Requesting Documents from a Borrower or Business Partner
In Encompass, use the Request button on the eFolder Documents tab or the Request Docs button on the eFolder condition tabs to request documents from borrowers
and settlement services from business partners.
A message will display if your administrator has not given you permission to request documents or services, and the Request Docs button is enabled on the condition tabs, only if your administrator has given you permission to request documents.
When you request a borrower document, the Status is changed to Expected and the Date is set to
the expected date. When you request a settlement service, the Status is changed to Ordered and the Date is set to
the ordered date. The details of the request are also reflected in the
Loan Log.
Borrower Documents
You can request two types of borrower documents, which borrowers can eSign or return by fax or email:
-
Sign and Return -
These documents
are sent to the borrower and contain loan data (such as a 1003). The borrower eSigns the documents or prints, signs, and returns them by fax or email.
-
Needed Documents - These documents are provided by the borrower
(such as a pay stub).
 Request Borrower Documents
- On the eFolder, click the Documents tab, select one or more documents not associated with a settlement service, and then click Request.
- Or click the Preliminary Conditions or Underwriting Conditions tab, select one or more documents not associated with a settlement service, and then click Request Docs.
- Or click the Preliminary Conditions, Underwriting Conditions, or Post-Closing Conditions tab, select one or more documents not associated with a settlement service, and then click Request Docs.
- On the Request window, click Send.
You can also preview and print the documents before sending as needed.
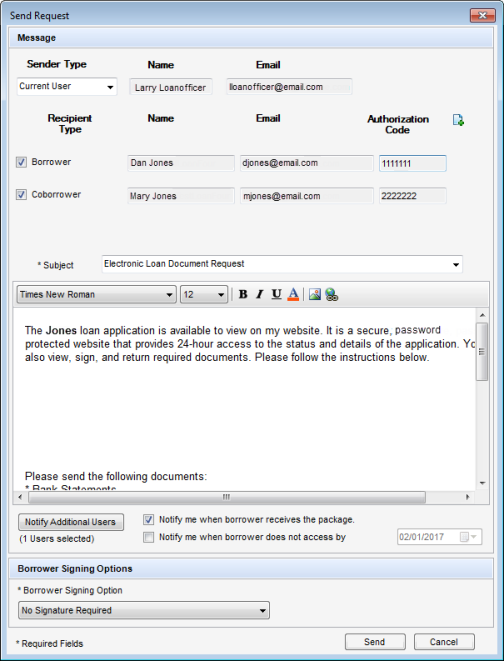
The Send Request window appears.
-
Select the Sender type. You can choose from the following:
- Current User
- File Starter
- Loan Officer
The Name and Email fields are populated based on your selection. If no name or email is listed in the File Contacts tool for the Encompass user associated with the option selected, the fields are blank and editable. Data entered in a blank field is then saved back to the File Contacts tool.
- Select or clear the check boxes to send the emails to the Borrower and/or Co-Borrower. Add Additional Recipients as needed.
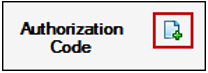
- In the Authorization Code fields, enter a 4-to-10-digit authorization code for each of the selected recipients.
After the request is sent, the authorization code fields become read-only on the Send Consent window and on any subsequent Send windows where the fields display (for example, the Send Request, Send eDisclosure, Send files, and Send Notification Email windows). A recipient enters the authorization code only once when accessing the loan on the Consumer Connect website for the first time. The recipient does not need to enter the code again after accessing the loan for the first time. The authorization codes are not automatically sent to borrowers. The Encompass user must contact borrowers to provide them with the codes.
- On the Send Request window, modify the subject and message as needed.
-
Select the Notify me when borrower receives the package check box to receive an email notification when the borrower receives the request.
-
Select the Notify me when borrower does not accept by check box, and select a date to receive an email notification when the borrower does not accept the package by the selected date.
-
Click the Notify Additional Users button to add users to the list of user who will receive email notification when the request is sent and when notifications or alerts related to the request are generated for the sender.
-
Select a Borrower Signing Option and a Borrower Authentication Method, if applicable.
If you select the Borrower Authentication Method, make sure you send the authentication code to the borrower. The authentication code is different from the password the borrower uses to access the website (see below).
-
Click Send.
A standard email containing a link to the
Consumer Connect Borrower Portal is sent. The email recipients log in to the website and then view the documents.
Add Additional Recipients
Use the Add icon on the Send Request window to add additional recipients from the Encompass File Contacts tool or to create new recipients who will be added to the File Contacts tool.
Add Recipients from the File Contacts Tool
- Click the Add icon on the Send Request window.
- Select one or more recipients from the File Contacts list, and then click Select.
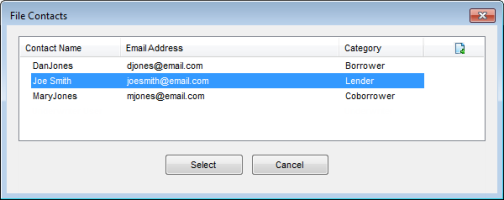
The Selected contacts are added to the recipients on the Send Request window. The Encompass user can now add an authorization code for the new recipient.
To Create New Recipients and Add Them to the File Contacts Tool
- Click the Add icon on the Send Request window.
- Select one or more recipients from the File Contacts list, and then click Select.
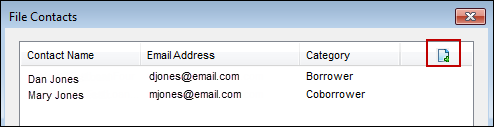
- Select a Category from the list.
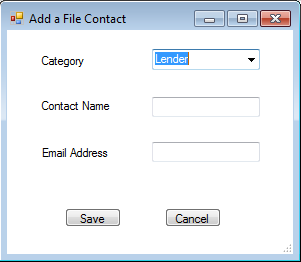
-
Enter a Contact Name and Email Address, and then click Save.
The new contact is added to the recipients on the Send Files window, where the Encompass user can now add an authorization code for the new recipient. The new contact is also added to the File Contacts tool in Encompass when the files are sent.
Settlement Services
Settlement services are ordered electronically from your electronic service providers.
Order Settlement Services
-
On the eFolder, click the Documents tab, select a document associated with a settlement service, and then click Request.
-
Or, click the Preliminary Conditions or Underwriting Conditions tab, select a condition associated with a settlement services document, and then click RequestDocs.
-
Or, click the Preliminary Conditions, Underwriting Conditions, or Post-Closing Conditions tab, select a condition associated with a settlement services document, and then click RequestDocs.
A settlement services document must be assigned to a condition before you can request a document from a service provider from one of the condition tabs. Use the Document Manager to assign the document to a condition.
-
For a compliance review, skip Steps 3 and 4. The review is processed when you click the Request button. The completed review displays in Encompass, and the file is imported into the eFolder.
-
If you are ordering a settlement service other than compliance, on the My
Providers tab (the name of the My Providers tab will vary for different services) select the name of a provider, and then click Submit or Order.
-
Complete the required information on the provider's
request form and submit the request.
If you select both borrower documents and settlement services, and then click Request, a window provides the option of either requesting borrower documents or ordering settlement services. After you make your selection and place the request, the window closes. You must return to the Documents tab to select and request the remaining documents.