Add Custom Images, Videos, Text and More
Website builder page templates support widgets, which let you easily edit and arrange images, text, videos, buttons and more. Widgets in the website builder allow you to quickly and easily add buttons, text boxes, video, maps and other elements to your site pages. When you add a widget it's like adding To view all the widgets available, click Widgets on the left menu of Website Builder.
Insert a page element simply by clicking the widget and dragging it to the desired location on the page.
What would you like to do?
To Insert a Title or Text Box:
- In the website builder, open the page you want to editYou can select the page from the Pagespanel or use the links in the menu bar of the currently loaded page.
- In the website builder main menu, click Widgets.
- Select the Title or Text widget, then drag it to the desired location on the page.
When you release the widget, a text box appears.
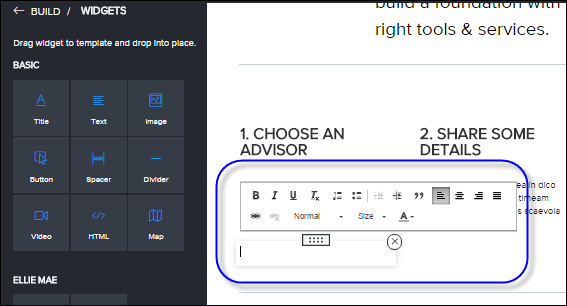
- Enter a title or text. Use the text editor to format the text.
- Click Preview to see how the page will look to visitors on your site, then click Publish if you are ready to publish your changes.
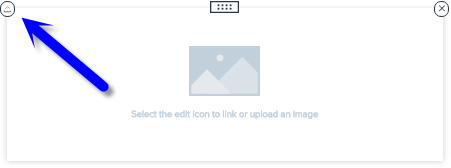
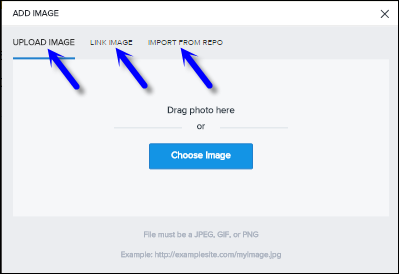
This section describes how to insert an image into a page. To learn how to replace a Header image, see ...
To Insert a Button:
- In the website builder, open the page you want to edit
 You can select the page from the Pagespanel or use the links in the menu bar of the currently loaded page.
- In the website builder main menu, click Widgets.
- Select the Button widget, then drag it to the desired location on the page.
When you release the widget, an image box appears.
- Click the Edit icon.

- On the Edit Button panel, specify how you want the button to appear and what action to take when clicked.
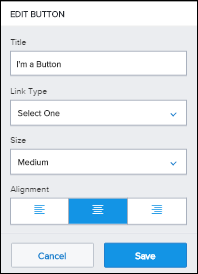
Button settings are:
- Title - The title that appears on the button.
- Link Type - This is the action that occurs when the button is clicked. You can choose Email, Page, Phone Number or URL.
- Size - Choose the size of the button. You can choose Small, Medium, or Large.
- Alignment - Specify how you want to align the button in the editing box.
- Click Save.
- Click Preview to see how the page will look to visitors on your site, then click Publish if you are ready to publish your changes.
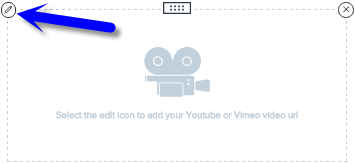
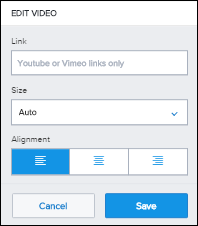
You can insert a video into a page on your site. Website Builder supports links to videos on Youtube and Vimeo.
To add a video to your site, you'll need to provide the URL to the video.
Get a Link to Your Video
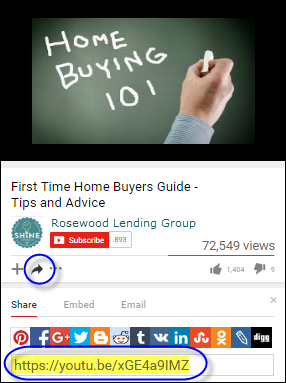
How to get a Youtube link
- Find the video on YouTube.
-
Click the Share icon to expand the share options.
- Copy the link.
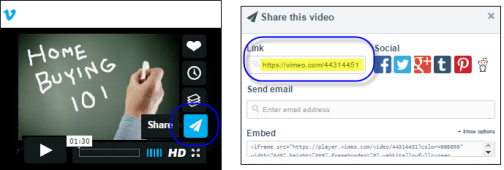
How to get a Vimeo link
- Find the video on Vimeo.
-
Click the Share icon to open the share options.
- Copy the URL in the Link field.
Upload a video to Youtube or Vimeo
If the video isn't on Youtube or Vimeo yet, it's easy to add them. Click the links below for instructions:
The loan application process begins when a site visitor clicks the
Apply Now button on your site. When you add an
Apply Now button, you’ll specify the Encompass user ID of the loan application recipient (the person who will receive the loan once it is submitted).
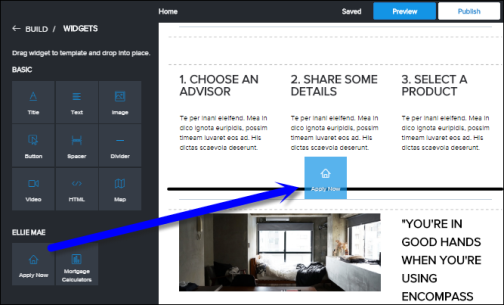
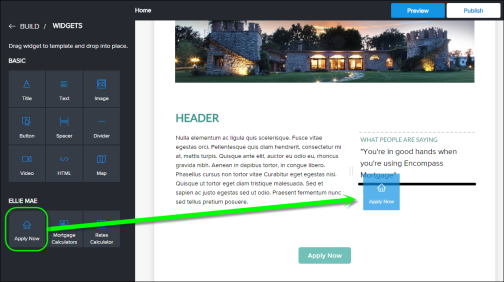
To Add an Apply Now Button to Your Site
- In the website builder, open the page where you want to add the Apply Now button. You can select the page from the Pages panel or use the links in the menu bar of the currently loaded page.
- In the website builder main menu, click Widgets.
Select the Apply Now widget, then drag it to the desired location on the page.
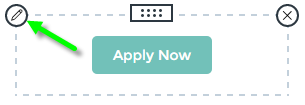
When you mouse over the widget, an image box appears.
- Click the Edit icon.
On the Edit panel, enter the loan application recipient (LAR, or Encompass user ID) of the user who will receive loan applications from this site. You can enter part or all of the recipient's Encompass User ID, then select it from the drop-down list.
For each Apply Now button you add, make sure the loan application recipient you specify is connected to a loan application folder. This will ensure any loans that are submitted from that Apply Now button go to correct user and folder. Learn more about connecting loan application recipients and folders
Optionally, change the button text, adjust the button size and alignment.
Click Save.