Welcome to the Consumer Connect Administration Portal
The Encompass Consumer Connect administration portal is where you create, manage, and administer your Consumer Connect websites, borrowers and loan application settings.
If your site is already up and running, use the navigation tabs on the left of Encompass Consumer Connect administration portal to view incomplete applications, find borrowers and to further manage your site's settings. Otherwise, continue with our Get Started section.
Get Started
If you are new to Encompass Consumer Connect and you want to build and launch a new website, here are the main steps to get started:
To get started, go to the Encompass Settings and set up the personas for the Encompass Consumer Connect administrators and contributors, such as loan officers or other authorized users who will be receiving and managing loans.
Anyone who is assigned the default Loan Officer persona and has login credentials can access the Incomplete Apps page in the Encompass Consumer Connect Administration portal.
Encompass Consumer Connect administrators and contributors must have the required access permissions to use Encompass Consumer Connect. Access permissions for Encompass Consumer Connect are controlled by Encompass persona settings. Your Encompass administrator can grant this access in Encompass.
To Grant Access to Encompass Consumer Connect:
- In Encompass, click Encompass, and then Settings.
- On the left panel, click Company/User Setup, then click Personas.
- Click the Consumer Connect tab.
- Select the Persona in the navigation tree, then select from the following:
- CMS Admin - Grants administrator access to the persona. Permissions include full access to the administration portal and website builder features and functions.
- CMS Contributor - Grants partial access to the persona. Permissions include access to the website builder and access to the Manage Sites page of the administration portal. Users cannot create or delete websites and cannot access other pages in the administration portal.

- When finished, click the Save icon to save the persona.
Use the Encompass Consumer Connect website builder to design the look and feel of the website, customize pages, links, add an Apply Now button. When you are finished designing your website, publishing is easy with a click of a button.
Follow these steps to create a new website.
- Log in to Encompass Consumer Connect administration portal.
In a browser, go to admin.elliemae.com/encompassconsumerconnect.
Or
In Encompass, click the Home tab.
Locate the Encompass Consumer Connect Administration module on the right, and then click Manage Your Consumer Connect Portal.
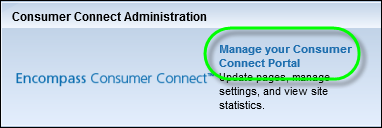
This link displays only to Encompass users with Encompass Consumer Connect Administration access via their persona, that is CC Admin, CC Contributor, and Loan Officer. On the login screen, enter your Instance ID, Encompass ID and Password, then click Login.
When the Encompass Consumer Connect administration portal opens, bookmark the page in your browser or add it to your Favorites list so you can access it directly from your browser.
- Once you are logged in, click
 on the Home page.
When the website builder opens, you are asked to enter a domain name for your site.
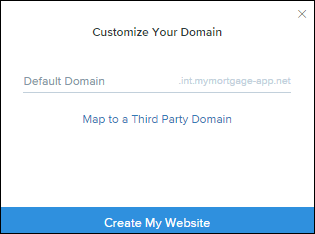
Your domain name is the actual name of your site (for example, http://www.A1loans.com). When you create a Consumer Connect site, the website builder assigns a domain to your site using the following format: YourDomainName.mymortgage-app.net. You can use this URL if you want or, if you have an existing domain for your organization, you can map it to your Consumer Connect URL. Map Your Consumer Connect Site to Your Custom Domain
Enter your domain name and click Create My Website.
Select a template for your site. You can click each of the template thumbnails to see a preview the various options. When you've made your decision, click Install Selected Template.
These templates are simply a starting point. Although you cannot select a different template, once one has been installed, any of the elements can be changed.
Once your site is created, you can use the features and tools in the Encompass Consumer Connect website builder to customize your site. These features and tools are available on the left navigation menu of the website builder. Website Builder Overview
The loan application process begins when a site visitor clicks the
Apply Now button on your site. When you add an
Apply Now button, you’ll specify the Encompass user ID of the loan application recipient (the person who will receive the loan once it is submitted).
To Add an Apply Now Button to Your Site
- In the website builder, open the page where you want to add the Apply Now button. You can select the page from the Pages panel or use the links in the menu bar of the currently loaded page.
- In the website builder main menu, click Widgets.
Select the Apply Now widget, then drag it to the desired location on the page.
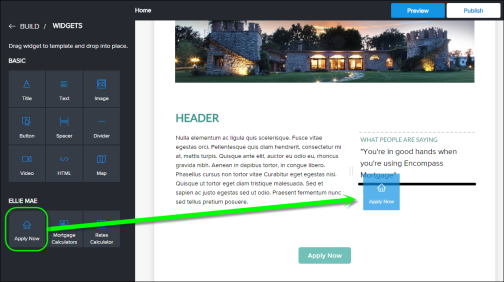
When you mouse over the widget, an image box appears.
- Click the Edit icon.
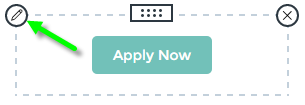
On the Edit panel, enter the loan application recipient (LAR, or Encompass user ID) of the user who will receive loan applications from this site. You can enter part or all of the recipient's Encompass User ID, then select it from the drop-down list.
For each Apply Now button you add, make sure the loan application recipient you specify is connected to a loan application folder. This will ensure any loans that are submitted from that Apply Now button go to correct user and folder. Learn more about connecting loan application recipients and folders
Optionally, change the button text, adjust the button size and alignment.
Click Save.
Connect New Loan Applications with the Right Person
The default
Loan App Recipient is the Encompass user who is notified when the borrower submits an application without specifying a preferred loan officer. This person is assigned as the File Starter for all web applications. The
Loan App Folder is where the loans submitted via Encompass Consumer Connect are saved in Encompass.
The default Loan App Recipient and Loan App Folder must be set before you launch your site. If the default Loan App Recipient is not set and a loan is submitted by a borrower, an error is returned to the borrower and the loan will not be submitted.
To Set the Default Loan App Recipient and Folder:
- In the Encompass Consumer Connect administration portal, click Website Builder.
- Make sure the site you want to edit is selected from the drop-down list at the top of the page.
- Go to the Default Loan App Connection section.

- Enter part or all of the recipient's Encompass User ID, then select it from the drop-down list.
If you do not see the Encompass User ID in the drop-down list, make sure the user has logged in to Encompass at least once, and then try again. The autofill feature populates these fields based on the user's matching information in Encompass. If the user's information is not entered in Encompass, the corresponding fields will not be auto-populated.
- Under Loan App Folder, select the corresponding folder from the drop-down list.
The autofill feature populates the drop-down list based on the user's matching information in Encompass. If the user's folder does not exist in Encompass, it will not appear in the drop-down list.
- Click Save.
In the Encompass Consumer Connect administration portal click each of the menu options on the left navigation panel to customize and configure loan settings, enable services, and to further customize Encompass Consumer Connect. Administrator Settings Overview
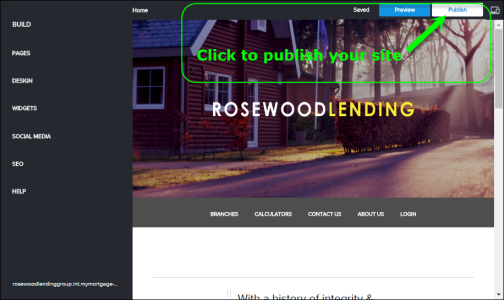
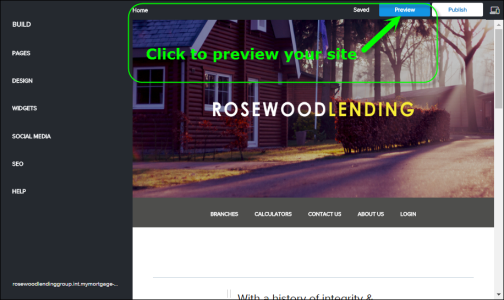
When you are ready to publish, you can preview your work by clicking
Preview at the top right corner of any page in the website builder. This allows you to see the changes you have made before publishing.
When you are satisfied with your changes, click Publish. If your site has not been published before, the website builder publishes the entire site. If your site is already live and you made some updates, only the modified pages are published.