Personas represent job functions in your company. Each persona defines
access to functions, forms, and tools. One or more personas
are assigned to each user.
 Home Tab
Defines the default Home Page view and the persona's ability to configure Home Page modules. Up to 12 modules can display on the user's Home Page at one time.
-
In the Must Have column, select modules that must always display on the users Home Page.
-
In the Show by Default column, select modules that display by default unless users reconfigure their Home Page layouts.
Modules that are selected as Must Have are automatically set to Show by Default.
-
In the Accessible column, select the modules that the persona is permitted to add or remove from the Home Page.
Modules that are selected to Show by Default are automatically Accessible for personas who can add or remove modules.
- Select Allow access to the Company's My Account module and pages to enable the persona to view company license information and company transactions from the My Account module.
Access Tab
Defines if the persona can access export options from the Pipeline, access the Dashboard, Campaigns (on the Contacts tab), and Reports tabs, as well as what the persona can see and do on the Pipeline, Loan, Contacts, and the Settings screen.
Pipeline View
Create the default Pipeline view for the persona by configuring the columns that display on the Pipeline, the order in which they appear, the sorting order for the loan entries, and by applying search filters to the Pipeline data.
-
In the Pipeline Views section, click the New icon.
-
Select Create a new, empty Pipeline view, and then click OK.
Select Create using an existing Pipeline View to copy the settings from an existing view and then follow the steps below to customize and save it as a new view. Select a Persona and then select the View to copy. Only existing views for the selected persona are available to copy.
-
Type a name for the custom Pipeline view.
Select All Loans or My Loans
-
Select a loan folder, and then select a View option.
-
If you do not select an option from the Loan Folder dropdown list, the custom view will be available to select when the persona is viewing files within any of their loan folders.
-
Select My Loans to display only loans where you are a loan team member.
-
Select All Loans to display all loans that you have permission to view.
Add or remove columns
-
To select one or more fields that will display as columns in the Pipeline view, click the Edit icon.
-
To add a field, select the corresponding checkbox.
-
To remove a field, clear the checkbox.
-
Repeat steps 1 and 2 until you have added all the columns required for the default view, and then click OK.
- Use the Up and Down arrows to reposition the columns. After you click OK, you can also reposition the columns by clicking and then dragging a column to the desired location.
- Columns arranged from top to bottom on the list will display from left to right on the Pipeline.
Change the column order
Click and then drag a column to the desired location.
-OR-
-
Click the Edit icon, and then select a column name in the list.
-
Click the up arrow or down arrow in the upper-right corner to move the column up or down in the list.
-
Click OK.
Sorting the data
-
To sort the data in a column, click a column header to display data in ascending order based on the information in the column.
-
Alternately click the header to sort the data in descending or ascending order.
You can sort loans based on two levels of loan data. For example, you can sort loans based on the loan amount and the last finished milestone. First, click the Loan Amount column header to sort by ascending loan amount. Then, click the Last Finished Milestone column header. The loans are sorted by last finished milestone, and the loans within each milestone group are sorted in ascending order by loan amount.
Apply search filters
-
To apply a search filter to the Pipeline data, click Advanced Search.
-
On the Advanced Search window, click the New icon.
-
On the Add/Edit Search Filter window, click the Find icon.
-
On the Select Field window, double-click to select a field from the list.
-
Select an Operator, enter (or select) a Value, and then click OK.
-
Repeat steps 2 through 5 to add more filters.
You can use parentheses to control the order in which multiple filters are evaluated. Click Parentheses, select the filters to group, click the New icon, and then click OK.
-
Click Apply.
-
When finished, click OK.
-
The view at the top of the Pipeline Views list is the persona’s default view. Use the up and down arrows to reposition the views.
Pipeline Tasks
Here administrators can control persona access to the following loan tasks:
- Export ULAD
- Export iLAD
- Export Fannie Mae Formatted File (3.2)
When these options are selected here, users assigned with this persona will have access to the options from the Pipeline menu and when they right-click a loan in their Pipeline and navigate to the GSE Services option in the menu.
Loans
Select the checkboxes for each loan task the persona is allowed to perform and each area or feature in Encompass the persona is allowed to access.
Contacts
Defines access to features and tasks on the Contacts tab. All other features on the Contacts tab (Calendar, Tasks, and Lead Center) are available to all personas. Access to Public Custom Letters and Campaign Templates is defined on the Access tab on the User Groups settings screen.
Dashboard/Reports
Defines access to features and tasks on the Reports and Dashboard tabs.
- Select the Allow loan files to be opened for data (slower performance) checkbox to enable the option to use fields from the Reporting Database or to use fields that are not included in the Reporting Database when running a report. If you do select this checkbox and then the Use fields from the Reporting Database for better performance option is not selected when running the report, reports will rely on field data in individual loan files instead. Since the loan files need to be opened in order to acquire the field data, the time it takes to run reports may increase.
Settings
Defines access to the tasks and options on the Encompass Settings screen. Only those options available to non-Administration
personas are displayed.
-
The Manage Personal Custom Print Forms and Form Groups checkbox grants rights to add, edit, and delete personal custom print forms using the Custom Print Forms option (in the Loan Setup folder). Access to public Custom Print Forms is configured in the User Groups settings.
-
The Loan Custom Fields checkbox grants access to the Loan Custom Fields option (in the Loan Setup folder).
-
The eFolder Setup checkbox grants access to the Documents, Document Groups, and Document Stacking Orders options.
-
The Manage Personal Loan Templates checkbox grants access to the Personal folders that contain the various types of personal loan templates.
-
The Tables and Fees checkbox grants access to the Tables and Fees options.
-
The Compliance Review Setup checkbox grants access to the Compliance Review Setup Wizard, which is used to configure the Encompass Compliance Service.
-
The Lock Comparison Tool Fields checkbox grants access to the Lock Comparison Tool Fields setting which is used to configure the fields displayed on the Lock Comparison Tool.
Web Version
For use primarily with the web version of Encompass, this tab is intended to control if the persona can access the desktop version of Encompass only or if they can access both the desktop and web versions of Encompass. (Note that you must be using Encompass Banker Edition in order to access the web version of Encompass.) Options available in the Access tab are:
- Desktop version of Encompass
- Both desktop and web versions of Encompass
When you select Both desktop and web versions of Encompass, a confirmation message displays. Select the I understand and accept these terms checkbox, and then click OK.
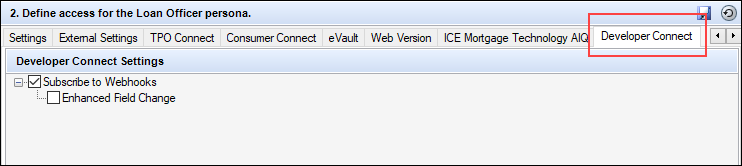
Developer Connect
Use the options provided on this tab to manage user permissions for subscribing to webhooks and the Enhanced Field Change webhook.
-
Subscribe to Webhooks enables users to create, update, and delete any webhook subscription.
-
Enhanced Field Change enables users to create, update, and delete Enhanced Field Change webhook; Personas with access to Enhanced Field Change are automatically enabled to Subscribe to Webhooks as well.
About the Field Change Webhook
There are many use cases for needing a detailed audit trail of data changes on the loan, including but not limited to audit of intentional (and unintentional) data changes by users that may have led to saleability or other issues on the loan. Additionally, the audit of data changes provides the ability for loan team members to react specifically to changed data to trigger automation in near real time. For example, changes in the loan amount from Conforming to Jumbo or any other material change that may impact loan manufacturing and the sale are candidates for this type of automation. The Enhanced Field Change webhook provides the details of all changed data (from and to) in the loan, however, because webhooks are delivered to platforms outside of Encompass, the actual data delivered in the subscription cannot be filtered.
Use the Enhanced Field Change option to limit access to the data to only select users and partners who have a true business need to access the detailed change data. Since the Enhanced Field Change webhook may include Personally Identifiable Information (PII) if it changes during the course of processing a loan, this Personas option also enables administrators to control which of their users and partners should have access to the data available in the webhook.
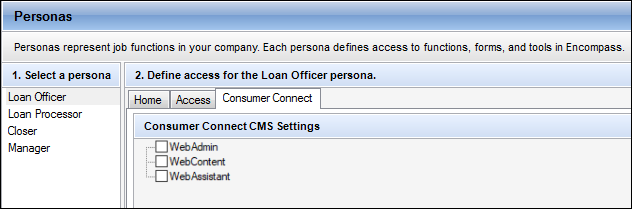
Consumer Connect
Defines user access to Encompass Consumer Connect administration tools and website content.
- WebAdmin - Grants administrator access to the persona. Permissions include full access to the administration portal and website builder features and functions.
- WebContent - Grants partial access to the persona. Permissions include access to the website builder and access to the Manage Sites page of the administration portal. Users cannot create or delete websites and cannot access other pages in the administration portal.
- WebAssistant - Grants the persona access to log into the Consumer Connect Admin Portal with their Encompass instance ID and user credentials to assist loan officers with incomplete applications and borrower lookups while loan officers focus on generating new business and other tasks.
Personas Provided with Encompass
The following Personas are provided when you install Encompass.
| Persona |
Description |
| Loan Officer (LO) |
Develops business and initiates loans. Develops new client relationships and manages relationships over time. Initiates the loan process. Gathers basic client information. Orders services for prequalification and pre-approval. Communicates wit processor. Monitors loans in the Pipeline by tracking milestones and items requiring attention. |
| Loan Processor (LP) |
Coordinates people and information to construct and finalize loans. Uses tolls such as forms documents, and communication logs. Monitors own Pipeline by tracking milestones ad items requiring action. |
| Closer (CL) |
Manages the closing process. Completes and audits the closing information. Orders closing documents. Reviews, prints, and reorders returned closing documents. |
| Manager (MG) |
Manages the business. Monitors the Pipelines of loan team members. Manages the bottom line, such as resource assessment and management, and financial forecasting. |
| Super Administrator (admin) |
Administers the system. Maintains company, organization, and user settings. Maintains default system settings. Has access to all system features and functions. |
| Administrator |
Based on position in company, has access to various company settings. |
Access Tab
Defines whether a persona can access the desktop version of Encompass only or both the desktop and web versions of Encompass. Also defines access to Analysis Tools.
Encompass Access
For use primarily with the web version of Encompass, use this tab to indicate the persona can access the desktop version of Encompass only or if they can access both the desktop and web versions of Encompass. Options available in the Access tab are:
- Desktop version of Encompass
- Both desktop and web versions of Encompass
When you select Both desktop and web versions of Encompass, a confirmation message displays. Select the I understand and accept these terms checkbox, and then click OK.
Mobile App Access
Use this option to manage access to the Encompass Consumer Connect mobile app.
Note that the Both desktop and web versions of Encompass... option and the Mobile App option must both be selected to grant access to the app for the persona. If the Desktop version of Encompass option and the Mobile App option are selected, the user with this persona will not be able to access the mobile app.
Web View Access
Settings in this section define the persona's access to Analysis Tools. Select the Enable Analysis Tool checkbox to enable the persona to access Analysis Tools.
Home Tab
Defines the default Home Page view and the persona's ability to configure Home Page modules. Up to 12 modules can display on the user's Home Page at one time.
-
In the Must Have column, select modules that must always display on the users Home Page.
-
In the Show by Default column, select modules that display by default unless users reconfigure their Home Page layouts.
Modules that are selected as Must Have are automatically set to Show by Default.
-
In the Accessible column, select the modules that the persona is permitted to add or remove from the Home Page.
Modules that are selected to Show by Default are automatically Accessible for personas who can add or remove modules.
-
Select Allow access to the Company's My Account module and pages to enable the persona to view company license information and company transactions from the My Account module.
Pipeline Tab
Defines whether a persona can view the Pipeline and Loan tabs, and what the persona can see and do on the Pipeline tab.
-
Select the checkbox at the top of the tab to give the persona access to the Pipeline and Loan tabs. If you give the persona access, complete the Pipeline View, Not Accessible Columns, and Pipeline Tasks sections.
Pipeline View
Create the default Pipeline view for the persona by configuring the columns that display on the Pipeline, the order in which they appear, the sorting order for the loan entries, and by applying search filters to the Pipeline data.
-
In the Pipeline Views section, click the New icon.
-
Select Create a new, empty Pipeline view.
Select Create using an existing Pipeline View to copy the settings from an existing view and then follow the steps below to customize and save it as a new view. Select a Persona and then select the View to copy. Only existing views for the selected persona are available to copy.
-
Type a name for the custom Pipeline view.
Select All Loans or My Loans
-
Select a loan folder, and then select a View option.
-
If you do not select an option from the Loan Folder dropdown list, the custom view will be available to select when the persona is viewing files within any of their loan folders.
-
Select My Loans to display only loans where you are a loan team member.
-
Select All Loans to display all loans that you have permission to view.
Add or remove columns
-
To select one or more fields that will display as columns in the Pipeline view, click the Edit icon.
-
To add a field, select the corresponding checkbox.
-
To remove a field, clear the checkbox.
-
Repeat steps 1 and 2 until you have added all the columns required for the default view, and then click OK.
-
Use the up and down arrows to reposition the columns. After you click OK, you can also reposition the columns by clicking and then dragging a column to the desired location.
-
Columns arranged from top to bottom on the list will display from left to right on the Pipeline.
Change the column order
Click and then drag a column to the desired location.
-OR-
-
Click the Edit icon, and then select a column name in the list.
-
Click the up arrow or down arrow in the upper-right corner to move the column up or down in the list.
-
Click OK.
Sorting the data
-
To sort the data in a column, click a column header to display data in ascending order based on the information in the column.
-
Alternately click the header to sort the data in descending or ascending order.
-
Example: Click the Loan Amount column to display loans with the lowest amounts at the top of the Pipeline and loans with the highest amounts at the bottom. Click the header again to display the highest amounts at the top.
-
By default, loans are sorted in ascending order based on the information in the selected column.
You can sort loans based on two levels of loan data. For example, you can sort loans based on the loan amount and the last finished milestone. First, click the Loan Amount column header to sort by ascending loan amount. Then, click the Last Finished Milestone column header. The loans are sorted by last finished milestone, and the loans within each milestone group are sorted in ascending order by loan amount.
Apply search filters
-
To apply a search filter to the Pipeline data, click Advanced Search.
-
On the Advanced Search window, click the New icon.
-
On the Add/Edit Search Filter window, click the Find icon.
-
On the Select Field window, double-click to select a field from the list.
-
Select an Operator, enter (or select) a Value, and then click OK.
-
Repeat steps 2 through 5 to add more filters.
You can use parentheses to control the order in which multiple filters are evaluated. Click Parentheses, select the filters to group, click the New icon, and then click OK.
-
Click Apply.
-
When finished, click OK.
-
The view at the top of the Pipeline Views list is the persona’s default view. Use the up and down arrows to reposition the views.
Not Accessible Columns
Select the columns that the persona cannot add to the Pipeline.
-
To make a column inaccessible to the persona, click the New icon.
-
On the Select Field window, select a field from the list, and click OK.
-
To search for a field, type one or more characters in the Find field, and then click Find. The first occurrence of the characters in any column is found. Continue clicking Find to view additional occurrences.
-
Continue selecting fields until you have added all the inaccessible fields.
-
To add more than one field at a time, select a field and then click Add. Repeat this process for any additional fields. When finished, click OK.
-
The selected fields display in the Not Accessible Columns list.
The same field cannot be located in both the Pipeline View and Not Accessible Columns at the same time.
-
To make a field accessible again, select the field on the list, and then click the Delete icon.
The selections for the Pipeline columns also apply to the columns accessible on the Trades, Contacts, Dashboard, and Reports tabs.
Pipeline Tasks
Select the checkboxes for each Pipeline task the persona is allowed to perform.
-
Select the Create Pipeline Views option to enable users to create and manage custom Pipeline views. For users granted access with this option, the Save icon for Pipeline views will be enabled after they make a change to the current Pipeline view they are using. They will then have the option to save their changes by clicking this icon and then saving the new custom Pipeline view. In addition, they can click the Manage Pipeline Views icon and then click the Duplicate, Delete and Rename buttons to manage their custom Pipeline views. For users who do not have persona access, the Save icon will be disabled and these buttons in the Manage Views pop-up window will be disabled.
-
For the Duplicate Loans option, a Loan Duplication Templates window lets you select the templates the persona can access, and select a checkbox to require the Persona to use one of the selected templates when creating duplicate loans.
-
For the Move Loans option, a Select Loan Folders window lets you select the loan folders to and from which the persona can move loans.
-
For the Import Loans option, a Select Options window lets you select the sources from which the persona can import.
-
For the Manage Pipeline Services option, a Pipeline Services Category window lets you select the export options available to the persona.
-
To grant access to modify (select or clear) the Include Archived Loans checkbox on the Pipeline, select the Access to Archive Loans option. To grant access to archived folders, select the Access to Archive Folders option.
-
If the administrator grants access to archived loans (Access to Archive Loans) but not to archived folders (Access to Archive Folders), the user will be able to select (or clear) the Include Archive Loans checkbox in a Pipeline view, but archived folders will not be included in the Loan Folders dropdown list and archived loans will be included in the Pipeline only if they are in an active (non-archived) loan folder.
Loan Tab
Defines access to Milestone/Workflow Management features, Itemization Fee management, Print tasks, eFolder tabs and tasks, and miscellaneous tasks.
-
Milestone/Workflow
Management - Select tasks that can be carried out as loans are processed.
For each task you select, a window opens and allows you to select the milestones
at which the persona can carry out the task.
-
Itemization Fee Management
- Select the checkboxes in this section to grant access to specific fee attributes on the 2015 Itemization input form, such as fee descriptions and amounts, along with the Borrower can shop for and Borrower did shop for indicators. Personas must be provided with the required access rights via these settings in order to edit these fee attributes. For example, to enable a persona to enter a fee in the Borrower column on the 2015 Itemization, the administrator must select the Borrower amount only checkbox for the persona. By selecting this checkbox, you authorize users assigned to the selected persona to enter and edit fees in the Borrower column.
-
The Fee Management Persona Overwrite options will continue to be provided in the separate Itemization Fee Management setting. By default, when users are entering fee descriptions on the 2015 Itemization they must select fees (i.e., fee descriptions) from the predefined dropdown list. However, administrators can use the Persona Overwrite tab to give permission (based on persona) to users to manually enter their own fee descriptions or overwrite existing fee descriptions in these fields. You can grant this permission for specific sections of the forms or for 2015 Itemization sections 800 through 1300.
-
The Itemization Fee Management settings do impact these Persona Overwrite settings:
-
If persona access has not been granted via the Persona Overwrite settings nor the Itemization Fee Management settings in the Personas setting, the persona will not be able to edit the fee description.
-
If persona access has only been granted via the Persona Overwrite settings, the persona cannot edit the description at all since they have not been granted persona access to the field in the Itemization Fee Management settings in the Personas setting.
-
If the persona has only been granted access to the Fee Description option via the Itemization Fee Management settings in the Personas setting, the persona can select a value for the fee description from the dropdown list.
-
If the persona has been granted access to the Fee Description via the Itemization Fee Management settings in the Personas setting and been granted access via the Persona Overwrite settings, the persona can choose a value from the dropdown or enter their own description (if the Apply to Itemization checkbox in the Itemization Fee Management setting has been selected).
-
Note that when the Templates Ignore Fee Mgmt Persona/Biz Rules setting in the Encompass Admin Tools is enabled, applicable fee data in public Loan Program, Closing Cost, and Data templates will overwrite existing Itemization fee attributes entered by these authorized personas when the template is applied to the loan file. For more information, refer to the Settings Manager topic in the Encompass Admin Tools online help.
-
Print
- Select the Print Button checkbox to grant access to the Print icon from within a loan file. Below this checkbox you can set access
to the Standard Forms tab, Custom Forms tab, the Preview button, and the Print to File option. These
settings also apply to the Secure Form Transfer feature.
-
Other - Establish the persona's ability to manage the borrower, apply loan and milestone templates and manage the service providers list. There are also additional options to manage the persona's ability to change the RESPA/TILA and URLA form versions used for loans and to access the AllRegs tool to search for compliance information.
Manage Service Providers List
Use the Manage Service Providers List setting to control the persona's ability to search for a service provider or add and select a service provider of their choice when ordering a service in Encompass.
-
Click the Manage Service Providers List link.
-
Select All to select all the service providers listed in Categories list. By default, all service providers are selected. Authorized personas will be able to search for, add and select a service provider of their choice when ordering services.
For the Appraisal service, you can also use the Appraisal Order Management setting to control the persona's ability to search for a service provider and manage the providers that are available for the persona to order from. Note that the Appraisal Order Management settings override the settings you configure in the Manage Service Providers List. For example, if the Appraisal checkbox in the Manage Service Providers list is not selected, a user with the selected persona will still be able to add or select an appraiser if the administrator has granted them permission to do so using the Appraisal Order Management setting.
-
Select Custom, and then clear a checkbox to prevent the persona from adding and selecting their own service provider when ordering a service. For example, to configure Encompass so that only company-approved Title and Closing service providers are available to select when the user is ordering title and closing, clear Title & Closing. The user will not be able to add and select their own Title and Closing service providers. The user will still be permitted to search for providers.
For the Appraisal service, you can also use the Appraisal Order Management setting to control the persona's ability to search for a service provider and manage the providers that are available for the persona to order from. Note that the Appraisal Order Management settings override the settings you configure in the Manage Service Providers List. For example, if the Appraisal checkbox in the Manage Service Providers list is not selected, a user with the selected persona will still be able to add or select an appraiser if the administrator has granted them permission to do so using the Appraisal Order Management setting.
- Select None to clear all the checkboxes in the Categories list. Personas will not be permitted to search for a service provider nor add and select a service provider of their choice when ordering a service.
For the Appraisal service, you can also use the Appraisal Order Management setting to control the persona's ability to search for a service provider and manage the providers that are available for the persona to order from. Note that the Appraisal Order Management settings override the settings you configure in the Manage Service Providers List. For example, even though the Appraisal checkbox in the Manage Service Providers list is not selected, a user with the selected persona will still be able to add or select an appraiser if the administrator has granted them permission to do so using the Appraisal Order Management setting.
-
Click OK.
-
Closing Docs - Select tasks that can be carried out during the loan's pre-Closing and Closing process, including permission to order closing documents, order pre-closing documents even if the Audit Review includes Fail alerts, add or remove documents within the document package, rearranging closing documents stacking orders, and the option to select Closing Doc Plan Codes and Closing Doc Stacking Templates when ordering closing documents. Additionally, enable the Encompass eClose features for the persona, and then select tasks that can be carried out during the loan’s eClosing process, such as Encompass eClose, activating and deactivating eNotes, Order Closing Docs, Closing Package Management, etc.
The options provided in the Closing Docs section are determined by your company's Encompass Docs Solution license. The View Closing Document Data, Manage Closing Plan Codes, and Manage Closing Stacking Templates options are provided only for customers licensed to order closing documents using the Encompass Docs Solution. The eClose options are provided only for customers who have worked with their relationship manager to enable eClose for their Encompass instance. For more information, refer to the Encompass eClose User Guide .
Forms/Tools Tab
Defines access to the options on the Forms and Tools tabs from within a loan file.
-
File Contacts
- To allow the persona to grant write access to loan team members, select
the Grant Write Access to Loan Team Members checkbox. On the Grant Write Access window, select the roles that the
persona can grant access to.
-
Fee Variance Worksheet- Select the Fee Variance Worksheet checkbox to grant the persona write access to the Fee Variance Worksheet. To prevent a persona from accessing specific fields on this worksheet, set up a Persona Access to Fields business rule or rules.
-
The Cure Variance checkbox controls access to the following features. When the checkbox is cleared, these features will be inactive (grayed out) for the persona.
-
The Cure Variance button on the Good Faith Fee Variance Violated alert only. When the Good Faith Fee Variance Violated alert is triggered and a user views the alert details, authorized users can click the Cure Variance button and correct the fees to address the violation. Select this checkbox to grant the persona access to the alert's Cure Variance button.
-
TQL Services - To allow the persona to use the TQL Services tool, select investors, publish documents on the TQL Portal, add comments in the tool, add comments to fraud reports and alerts, and comments to compliance reports.
-
Funding Worksheet - Select the Funding Worksheet option to provide persona access to the Funding Worksheet in the desktop and web versions of Encompass. Note that in order for the Funding Worksheet link to be accessible in the left navigation menu in the web version of Encompass, the Funding Worksheet and the Funding Balancing Worksheet options must both be selected.
-
Lock Comparison Tool - To allow the persona to use the Lock Comparison Tool to monitor the fields configured in the Lock Comparison Tool Fields setting for loan data changes made after a loan is locked.
-
Validate Pricing - To allow the persona to validate pricing.
-
Collateral Tracking - To allow the persona to use the Collateral Tracking tool to track and captures date and information for the Final Docs (Recorded Deed of Trust (DOT)/Mortgage and the original/paper copy of the Final Title Policy).
-
LO Comp Tool - To allow the persona to use the LO Compensation tool to view and modify the loan originator compensation being documented in the loan file, select the LO Comp Tool checkbox.
The Base Plan fields in the tool are editable by default. You may create a field access business rule to prevent users from editing these fields.
-
When the LO Comp Tool checkbox is selected, the Broker Comp and Loan Officer Comp checkboxes are selected by default. When selected, the persona can view and edit compensation details for lenders or third party originators/brokers (Broker Comp) and loan officers (Loan Officer Comp). To hide a section in the tool, clear the appropriate checkbox.
eFolder Tab
Defines each persona's access to the features in the Encompass eFolder.
-
Select the checkbox at the top of the tab to give the persona access to the eFolder's Documents tab. If you give the persona access, complete the General, Unassigned Files (File Manager), Unprotected Documents, Protected Documents, and Conditions sections.
-
General - Select the checkboxes to allow a persona to add, delete, duplicate, request, or manage access to documents; send borrowers eDisclosure Agreements that must be accepted before borrowers can receive documents electronically; enter custom names for documents; request or retrieve ICE Mortgage Technology Network services, generate, send, and retrieve eDisclosure packages; send files to borrowers and partners; archive documents; and print fax cover sheets.
-
Unassigned Files (File Manager) - Select the checkboxes to allow users to attach, edit, merge, split, delete, add notes to, and enable the auto assign function for files in the File Manager, as well as to allow users to suggest or approve files to be automatically assigned to specified eFolder documents. Selecting the Edit File checkbox also enables the Convert button in the File Manager, which allows a user to convert an unassigned native-format file to an image file if the image conversion option is selected in the eFolder Setup setting.
-
Unprotected Documents - Select the checkboxes to allow users to edit or delete unprotected documents. If you select the Edit checkbox, select or clear the additional selections as needed. Selecting the Edit checkbox also enables the Convert button on the Document Details and File Manager windows, which allows a user to convert an unprotected native-format file to an image file if the image conversion option is selected in the eFolder Setup setting.
-
Protected Documents - Select the checkboxes to allow users to edit or delete protected documents. If you select the Edit checkbox, select or clear the additional selections as needed. Selecting the Edit checkbox also enables the Convert button on the Document Details and File Manager windows, which allows a user to convert a protected native-format file to an image file if the image conversion option is selected in the eFolder Setup setting.
-
Conditions - Select the conditions tabs in the eFolder that are accessible by the persona and the tasks the persona can perform on each tab; and provide access to the eFolder's History tab.
Enhanced Conditions Tab
Administrators can use the Enhanced Conditions tab in the Personas settings to control persona access to the various types of enhanced conditions in Encompass, the web version of Encompass, and Encompass TPO Connect. Persona rights have been broken down to give administrators the ability to grant users with only the options they should have access to:
- Add/Edit/Delete persona rights are separated into individual options.
- The Create Blank Conditions option enables administrators to require users to use only the condition templates they have created or to allow certain users to access ad hoc conditions.
- Add or Remove Comments persona rights are separated into individual options
- The Mark Comments Internal/External option enables users to switch between internal or external comment type.
- Assign and unassign documents persona rights are separated into individual options.
Users will be able to view all of the defined tracking statuses for a condition type or condition template if their user role has been customized to enable the role to access them (via the Tracking Owners options in the Customize Custom Type Settings pop-up window).
Settings configured for condition templates in the Customize Custom Type Settings pop-up window will override the settings configured for condition types.
To Grant Persona Access to Enhanced Conditions in Loans:
- On the Enhanced Conditions tab, in the left panel, select a persona.
- In the Condition Types list, select the condition type which you are assigning persona access.
- To grant access to the selected condition type in the loan, select the Access Conditions checkbox.
- Select the options under the Access Conditions options to grant access to those options and actions in the loan file.
- To save your settings, click the Save icon.
Review Chapter 2: Configuring Encompass Settings for Enhanced Conditions in the Working with Enhanced Conditions Setup & User Guide for additional details about persona and role access to enhanced conditions in loans.
Trades/Contacts/Dashboard/Reports Tab
Defines access to features and tasks on the Trades, Contacts, Dashboard, and Reports tabs. All
other features on the Contacts tab (Calendar, Tasks, Campaigns, and Lead
Center) are available to all personas. Access to Public Campaign Templates is defined on the Resources tab on the User Groups setting screen.
The Trades tabs must also be set to display in the Trade Management Tabs section of the Trade Management Setup setting for users to have access to them, by Persona.
- If the Access to Trades Tabs is selected, all the other options are selected, If the Access to Trades Tabs is cleared, all the other options are cleared.
- If a tab option (e.g., Security Trades tab, Loan Search Tab, Loan Trades Tab) is selected, the corresponding edit option (e.g., Edit Security Trades, Edit Loan Search, Edit Loan Trades) is selected. If the tab option is cleared, the corresponding edit option is cleared.
- If an edit option is selected, the corresponding tab option is selected. If the edit option is cleared, the tab option is not cleared (remains selected).
- If a tab option is selected, users with the corresponding Persona can access the tab. If a tab option is not selected, those users cannot access the tab.
- If an edit option is selected, users with the corresponding Persona have edit access the tab. If an edit option is not selected, those users have read-only access to the tab.
- Encompass instances upgrading to the 20.2 December Service Pack with the old Edit Trades option selected will have all the options selected except for Bid Tape Management Tab and Edit Bid Tape Management.
- In the Contacts section, click the Originate Loan/Order Credit/Product and Pricing link, clear the Order Credit checkbox, and click OK to prevent users from ordering credit from the Borrower Contacts screen and ensure compliance with ECOA (Equal Credit Opportunity Act) and credit regulations.
-
In the Reports section, select the Allow loan files to be opened for data (slower performance) checkbox to enable the option to use fields from the Reporting Database or to use fields that are not included in the Reporting Database when running a report. If you do select this checkbox and then the Use fields from the Reporting Database for better performance option is not selected when running the report, reports will rely on field data in individual loan files instead. Since the loan files need to be opened in order to acquire the field data, the time it takes to run reports may increase.
Settings Tab
Defines access to the tasks and options in the Settings tool.
Company Settings
Authorized users can grant all personas access to their company’s administrative settings at a granular level to enable Encompass users to have more control over who can access the company settings in Encompass Settings. Options that correspond to each setting provided in the left panel of the Encompass Settings screen are listed on the Settings tab provided for each persona. Authorized users may use this tab to grant the selected persona access to the desired company settings.
When persona access is granted, complete add/edit/delete rights are granted for the setting. For the Personas setting only, the authorized user can choose to provide view-only access or full add/edit/delete access.
Non-Administrator personas are not granted access to all company settings by default. Encompass administrators must configure the desired access settings for each persona. If upgrading from an earlier version of Encompass, all existing access settings configured for the persona will be migrated accordingly. The main administrator of the Encompass environment assigned with the admin user ID will continue to be the only user with complete access to all Encompass settings.
Personal Settings
-
The My Profile option allows you to select which profile fields the persona can change.
-
The Default File Contacts checkbox grants access to the Default File Contacts tool where you can enter your most commonly used service providers. When you originate a loan, the default providers are copied to the appropriate loan forms and to the File Contacts tool for the loan.
-
The Grant File Access checkbox grants access to the Grant File Access tool where you can grant or revoke loan file access rights. By default, the ability to access loans is based on settings in your user profile, your position in the organization hierarchy, and the access granted when you are a member of a loan team. For more information, refer to the Organization and User Setup topic.
Other
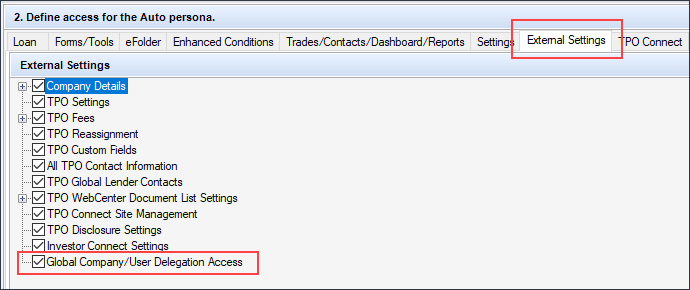
External Settings Tab
Defines access to the External Company Setup settings in Encompass Settings. When you select the Company Details checkbox, all checkboxes in this tab are selected, enabling the persona to access all the settings within the External Company Setup setting. Clear each checkbox to limit persona access to the corresponding external company setup setting.
-
Create Organizations - enables the persona to create TPO companies and branches
-
Delete Organizations - enables the persona to delete TPO companies and branches
-
Export Organizations - enables the persona to export TPO companies and branches
- Create/Edit Banks - enables the persona to create and edit banks
- Delete Banks - enables the persona to delete banks.
- TPO Organization Settings - enables access to the Company Details window in the Encompass Settings> External Company Setup> Company Details section.
Use the options within this section to enable/disable access to individual tabs within the Company Details window. You can enable access to selected tabs within the Company Details window and restrict access to others, if needed. You can also define the persona's editing and viewing rights by selecting the Edit checkboxes for each tab.
- TPO Contacts - enables access to the Third Party Originator Contacts section of the Encompass Settings> External Company Setup> Company Details setting.
- Use the options within this section to define the level of access for the persona within the Third Party Originator Contacts setting, such as the ability to create/edit, export , and delete TPO contacts. Select the Sales Rep checkbox to assign Sales Rep privileges to the persona. Users indicated as the Sales Rep are displayed for selection in the Add Sales Rep window available in:
Encompass Settings> External Company Setup> Company Details> Company Details window> Basic Info tab
Encompass Settings> External Company Setup> Company Details> Company Details window> Sales Reps / AE tab
Encompass Settings> External Company Setup> Company Details> Third Party Originator Contacts> TPO Contact Details window> TPO Sales Rep Information section
-
TPO Settings - enables and defines access to the TPO Settings in Encompass Settings> External Company Setup
-
TPO Fees - enables and defines access to the TPO Fees setting in Encompass Settings> External Company Setup
-
TPO Reassignment - enables and defines access to the TPO Reassignment settings in Encompass Settings> External Company Setup
-
TPO Custom Fields - enables and defines access to the TPO Custom Fields settings in Encompass Settings> External Company Setup
-
All TPO Contact Information - enables and defines access to the All TPO Contact Information settings in Encompass Settings> External Company Setup
-
TPO Global Lender Contacts - enables and defines access to the TPO Global Lender Contacts setting in Encompass Settings>External Company Setup
This setting was added in the Encompass 18.4 release.
- TPO WebCenter Document List Settings - enables and defines access to the TPO WebCenter Docs setting in Encompass Settings> External Company Setup
-
TPO Connect Site Management - enables and defines access to the TPO Connect Site Management setting in Encompass Settings>External Company Setup
- TPO Disclosure Settings - enables persona to access the TPO Disclosure Settings tool in Encompass Settings > External Company Setup. Here authorized users can select the Creditor Override on Statement of Denial checkbox to enable Encompass to automatically populate their company's contact information (as entered in the Company Information setting) to the Creditor Contact Information section of the Statement of Denial input form only for loan files in the Correspondent loan channel with non-delegated underwriting.
- Select the Global Company/User Delegation Access option to give users assigned with that persona access (view/edit) to the settings in External Company Setup > Company Details screen. This enables administrators to delegate tasks to other users so they can manage TPO company settings without having to assign a new Super Administrator persona to the user or classifying the user as a Sales Rep or Account Executive for every TPO company that is managed in the External Company Setup settings.
-
Company/User Account Management - Administrators and authorized users with this persona option enabled will be able to perform account management activities in Encompass TPO Connect for TPO Connect users. For example, the Encompass user could log into Encompass TPO Connect, and then select the account for a user with the Manager role. They would then be able to view the Pipeline in Encompass TPO Connect and perform the same loan level activities that the Manager can (which is existing functionality that users can use today) and now also click the Manage Account link under the user's name (in the top-right corner) and perform all those activities as well (for example, manage users, state licensing, etc.).
TPO Connect
Defines user access to the TPO Connect Administration settings for TPO Connect. Use the TPO Connect Site Settings options to select the features and actions to provide to TPOs accessing and using your company's TPO Connect website.
Consumer Connect
Defines user access to Encompass Consumer Connect administration tools and website content.
- WebAdmin - Grants administrator access to the persona. Permissions include full access to the admin portal and website builder features and functions.
- WebContent - Grants partial access to the persona. Permissions include access to the website builder and access to the Manage Sites page of the admin portal. Users cannot create or delete websites and cannot access other pages in the administration portal.
- WebAssistant - Select this option to enable the persona to log into the Consumer Connect Admin Portal with their Encompass instance ID and user credentials and assist loan officers with incomplete applications and borrower lookups. WebAssistants have limited access to the admin portal compared to personas with WebAdmin or WebContent permissions. WebAssistants can only manage (delete, archive, submit) incomplete applications, view application statistics, access the Borrower Lookup page, unlock borrower accounts, and view document package links. WebAssistant tasks can be further managed/limited by administrators using additional settings in the Consumer Connect admin portal.
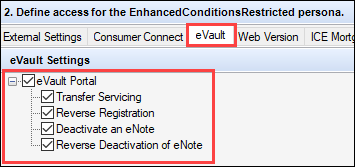
eVault
These access options are used to provide Encompass eClose/eNote users who are servicing their loans a way to execute life of loan servicing functions. Using the options below, the administrator can configure persona rights for these users, so they can access the Encompass eVault portal and perform specific responsibilities. All actions taken will be logged in the Transaction History of the eNote.
-
Select the eVault Portal checkbox to give the persona access to the portal.
-
Select or clear the checkboxes to enable or disable the personas' ability to transfer an eNote, reverse an eNote registration, deactivate an eNote, or reverse the deactivation of an eNote.
The persona settings on the Loan tab and on the new eVault tab are independent. The settings on the Loan tab provide access to the eNotes tab in the Encompass eFolder. The settings on the eVault tab provide access to the new Encompass eVault portal.
Web Version
Use the Web Version settings to configure user access to standard and custom forms, custom tools, standard input forms, Global Custom Tools, and additional service options and task-based workflow features in Encompass and the web version of Encompass. Use the Custom Input Forms, Custom Tools, and Global Custom Tools sections of this tab to control the custom forms, custom tools and global custom tools that users can access in the web version of Encompass. Use the Standard Web Forms and Standard Features section to control the standard forms and features users can access in the web version of Encompass.
Important Note: By default, no personas (with the exception of the Super Administrator) will have access to the custom forms, tools, and global custom tools. In order for web version of Encompass users to have access to these items, the administrator must update their persona settings to grant them access to these items.
- The Custom Input Forms section lists each custom input form in the web version of Encompass that has been built using the Encompass Web Input Form Builder. Select each form that the persona can access in the web version of Encompass.
- In the Custom Tools section, the custom tools in the web version of Encompass that have been built using the Encompass Web Input Form Builder are listed. Select each tool that the persona can access.
- In the Standard Web Forms section, select the correspondent input forms, Home Counseling Providers Information input form, Disclosure Summary ,and RegZ input forms to display for the selected persona. The forms selected here will display under the Standard Forms menu in the left navigation of the web version of Encompass for the selected persona.
- In the Global Custom Tools section, the global custom tools in the web version of Encompass that have been set up in the Encompass Web Input Form Builder are listed. Select each global custom tool that the persona can access.
Based on these persona settings in Encompass, the custom forms, custom tools, and standard forms that the administrator has granted access to will display in the left navigation menu in the web version of Encompass. Any forms or tools that the persona does not have access to will not display in the left navigation menu. If the persona has access to Global Custom Tools, they will be able to access the tool from the Apps menu in the web version of Encompass.
- In the Standard Features section, select the workflow tasks options to determine how the persona can access workflow tasks in the web version of Encompass. Based on these persona settings, the users assigned with the persona will be able to access these task-based workflow items in the left navigation menu in the web version of Encompass. Please note that in order for users to view the Workflow Tasks tool and view tasks in the tool in the desktop version of Encompass, their assigned persona must be configured with access to the Workflow Tasks Tool and Manage Tasks > View All Task Groups/Tasks options. For more information, refer to the Working with Task-Based Workflows setup guide.
- In addition, options are provided in the Services dropdown to provide personas with access to order from third-party service providers. By default, the Services and All Services checkbox options are selected for all personas. To prevent a persona from accessing all services, clear the All Services checkbox. When the All Services option is not selected, you can still select individual underwriting service options to enable access to the Underwriting Center and specific underwriting screens and tasks in the web version of Encompass. Use the Make Primary option to control user access to the Make Primary button in the Underwriting Center in the web version of Encompass. Users can utilize this button to identify their primary order so they can continue placing subsequent orders (with the same or different Automated Underwriting Service) without interrupting their workflow. Identifying the primary order can also be leveraged for business rules.
- For users who have access to the All Services or Underwriting Center screens, the All Services and Underwriting Center options will display under the Services category in the left-navigation menu in the web version of Encompass.
- In addition, select the Scheduler Event Tool option to provide access for the persona to the Upcoming Events option in the left navigation tool in the web version of Encompass. This persona option also determines access to the Scheduler Timeline icon (bell) provided in the loan-level top menu bar in the web version of Encompass. Selecting either of these options in the web version of Encompass enables users to view the status of scheduler events that have been configured through the Scheduler Templates administrator settings. This provides users with an improved method for identifying scheduler items and their current status.
-
In the Pipeline Default section, manage the version of the Pipeline- Loan Pipeline or Task Pipeline- that will display when the user logs into the web version of Encompass. By default, this option is set to Loan Pipeline.
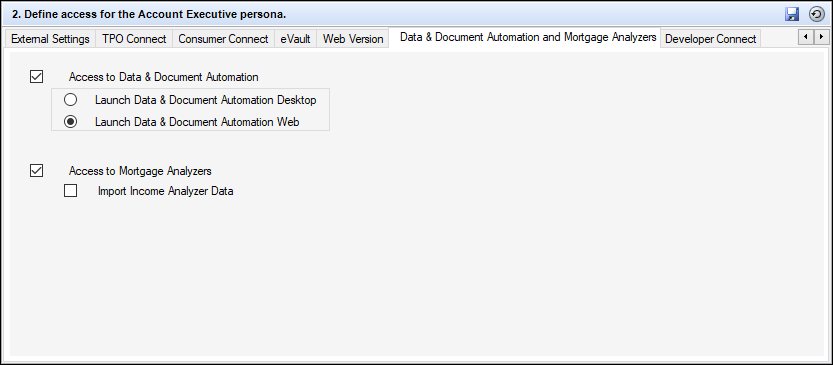
Data & Document Automation and Mortgage Analyzers
Use this setting to determine users’ access to ICE Data & Document Automation Desktop or ICE Data & Document Automation Web, ICE Mortgage Analyzers, or both. Select the checkbox and desktop and web options here to grant access to these services and features.
Developer Connect
Use the options provided on this tab to manage user permissions for subscribing to webhooks and the Enhanced Field Change webhook.
-
Subscribe to Webhooks enables users to create, update, and delete any webhook subscription.
-
Enhanced Field Change enables users to create, update, and delete Enhanced Field Change webhook; Personas with access to Enhanced Field Change are automatically enabled to Subscribe to Webhooks as well.
About the Field Change Webhook
There are many use cases for needing a detailed audit trail of data changes on the loan, including but not limited to audit of intentional (and unintentional) data changes by users that may have led to saleability or other issues on the loan. Additionally, the audit of data changes provides the ability for loan team members to react specifically to changed data to trigger automation in near real time. For example, changes in the loan amount from Conforming to Jumbo or any other material change that may impact loan manufacturing and the sale are candidates for this type of automation. The Enhanced Field Change webhook provides the details of all changed data (from and to) in the loan, however, because webhooks are delivered to platforms outside of Encompass, the actual data delivered in the subscription cannot be filtered.
Use the Enhanced Field Change option to limit access to the data to only select users and partners who have a true business need to access the detailed change data. Since the Enhanced Field Change webhook may include Personally Identifiable Information (PII) if it changes during the course of processing a loan, this Personas option also enables administrators to control which of their users and partners should have access to the data available in the webhook.
Personas Provided with Encompass
The following Personas are provided when you install Encompass.
Personas Provided with Encompass
The following Personas are provided when you install Encompass.
| Persona |
Description |
| Loan Officer (LO) |
Develops business and initiates loans. Develops new client relationships and manages relationships over time. Initiates the loan process. Gathers basic client information. Orders services for prequalification and pre-approval. Communicates with processor. Monitors loans in the Pipeline by tracking milestones and items requiring attention. |
| Loan Opener (OP) |
Receives loans from the loan officer and then reviews and further prepares them for the loan processor. |
| Loan Processor (LP) |
Coordinates people and information to construct and finalize loans. Uses tools such as forms documents, and communication logs. Monitors own Pipeline by tracking milestones and items requiring action. |
| Underwriter (UW) |
Verifies loan accuracy, provides conditions to be met, and then verifies that conditions are met. |
| Closer (CL) |
Manages the closing process. Completes and audits the closing information. Orders closing documents. Reviews, prints, and reorders returned closing documents. |
| Funder (FN) |
Manages the funding process. |
| Secondary Marketing (SM) |
Determines pricing strategies and develops/implements loan programs. |
| Lock Desk (LD) |
Receives and processes lock requests. |
| Shipper (SH) |
Assists with inventory control and provides input to secondary marketing functions. Ships loans to document custodians and the investor. |
| Manager (MG) |
Manages the business. Monitors the Pipelines of loan team members. Manages the bottom line, such as resource assessment and management, and financial forecasting. |
| Marketing (MK) |
Markets to contacts to generate leads. |
| Post Closer (PC) |
Confirms all documents are completed and generated. |
| Servicer (SV) |
Services the loan. |
| Quality Control (QC) |
Inspects loans for quality. |
| Accounting (AC) |
Manages financial documents. |
| Archiver (AR) |
Archives loan documents for the future retrieval. |
| Super Administrator (admin) |
Administers the system. Maintains company, organization, and user settings. Maintains default system settings. Has access to all system features and functions. |
| Administrator |
Based on position in company, has access to various company settings. |
Create New Personas for Use With Third Party Originators (TPOs)
To start managing the information and permissions for the third party originators (TPOs) that your company does business with, the Encompass administrator must create a TPO Administrator persona and an Account Executive persona. Based on the access rights configured for each persona, assign the applicable persona to the appropriate users.
-
TPO Administrator - Using the instructions provided above, create a new persona called TPO Administrator. This persona should have access to all External Company Setup settings. Using these settings, the TPO Administrator will manage all existing TPO companies, create new companies, branches, and contacts, and manage the amount of access TPO managers and Account Executives have to the External Company Setup settings. Additional setup responsibilities include (but are not limited to) configuring criteria for accepting loans from the TPO, assigning TPO Connect websites and LO comp plans to a TPO company, and creating custom fields to provide to the TPOs. They will also have access to all of the loan files submitted to Encompass from a TPO. Note that this persona is not intended to have the same permissions and access rights as the admin user ID or the Super Administrator or Administrator personas.
When configuring this persona, do not select the TPO Contacts > Sales Rep checkbox. This checkbox is intended only for the Account Executive persona.
-
Account Executive - Using the instructions provided above, create a new persona called Account Executive. This persona is intended to be the sales rep assigned to TPO companies. When configuring the settings for this persona, be sure to select the TPO Contacts > Sales Rep checkbox. With this setting enabled, users with the Account Executive persona are eligible to be the sales rep assigned to TPO contacts. They will have access only to the TPOs and loan files that they have been assigned to. If this Sales Rep setting is not selected, Encompass assumes the user with this persona is the TPO Administrator.