Company Details
This feature is not available in Encompass Broker Edition.
Use the Company Details setting to create and manage lenders, brokers, and third party originators (TPO) with whom your company does business.
Use the Banks setting to manage (create, edit, and delete) banks used by TPO companies. After a bank is created in this setting, authorized users can add the bank to the TPO company that uses this warehouse bank to indicate which bank to pay, when loans are submitted by the TPO company.
- On the menu bar, click Encompass, and then click Settings.
- In the left panel, click External Company Setup, and then click Company Details.
- In the Company/Branches panel, click to select the Banks folder, and then click the New icon.
- In the Bank Details window:
- Type the bank name, the bank address, contact person for the bank and their details.
- In the ABA Number field, type the nine digit routing transit number for the bank.
- In the TimeZone field, select the time zone where the warehouse bank is located. This time zone helps determine when the bank’s purchasing wire cut off time is if it has elected to not receive wires after hours.
- Click OK.
- In the Company/Branches panel, select the bank, and then click the Edit icon.
- In the Bank Details window, update the information, and then click OK.
You cannot delete a bank if a TPO company is associated with it. You need to first remove the bank from the TPO company (Company Details page> Warehouse tab) and then delete the bank here.
- In the Company/Branches panel, select the bank, and then click the Delete icon.
Before you can assign an LO Compensation plan to lenders to which your company brokers loans, you must first add these companies or branches to the External Company Setup setting. After adding to this setting, you can then assign an LO Compensation plan to these companies or branches. After assignment, authorized users can use the LO Compensation tool to track the amount of compensation to be paid.
- On the menu bar, click Encompass, and then click Settings.
- In the left panel, click External Company Setup, and then click Company Details.
- In the Company/Branches panel, click to select the Lenders folder, and then click the New icon.
- In the Company Details window, select Broker and/or Correspondent to indicate that your company can originate loans through a Brokered and/or Correspondent channel for the lender.
- Type the Company Legal Name, Company DBA Name, and street address in the appropriate fields. Additionally, type the billing address, billing city, and billing state in the fields provided (especially if the billing address is different than the company’s physical address, city, state, and ZIP code information.)
If you select only Correspondent, you will not be able to assign a compensation plan to this company, as Correspondent loans are exempt from LO compensation plans.
- Click OK.
![]() Assign an LO Compensation Plan to a Lender
Assign an LO Compensation Plan to a Lender
Here you can assign an active compensation plan to a lender (the compensation your company is being paid by the lender for brokering a loan).
- In the Lender folder hierarchy, double-click the company or branch to which you are assigning the compensation plan.
- In the Company Details window, click the New icon.
- In the LO Compensation Plans window, click the compensation plan to apply to the company or branch.
- In the Details section, you can change the Start Date of the plan if necessary. By default, Encompass sets the Start Date to one day after the compensation plan was assigned to the company or branch (i.e., the next day).
If another plan is already in effect, the new plan must start the next day to ensure that two plans are not being applied to the originator on the same day.
The Earliest Change Date is calculated based on the Start Date and Minimum Term # Days fields. After the plan is activated (i.e., when the plan is started), if an administrator tries to assign a new compensation plan before the minimum term of days is reached, a warning message is displayed that informs the administrator that the start date for the new plan occurs prior to the "earliest change date" (i.e., prior to the minimum term of days being reached). The administrator can then continue to add a plan or cancel the operation. After the Earliest Change Date is reached, the warning message will no longer be triggered.
- Click Select.
- The compensation plan is now listed in the Assigned Compensation Plans section.
- Click the plan to view its details in the LO Comp Plan section. You can change the Start Date of the plan if necessary, however you cannot change the start date here once the plan has started.
- Click OK.
To Create a New Company:
- On the menu bar, click Encompass, and then click Settings.
- On the left panel, click External Company Setup, and then click Company Details.
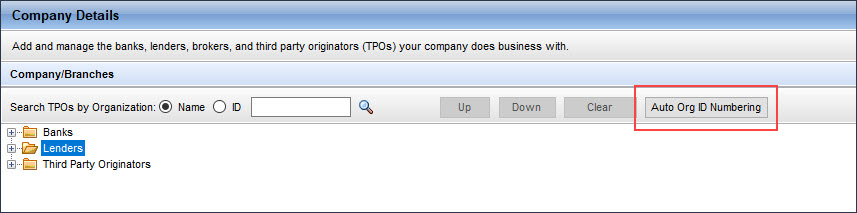
- In the Company/Branches panel, click Third Party Originator, and then click the New icon.
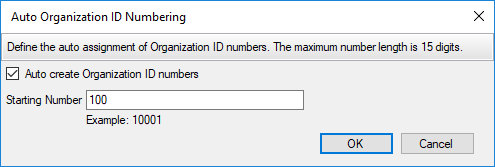
- Click the Auto Org ID Numbering button to access the Auto Organization ID Numbering pop-up window and configure the number to start the auto-generation of Organization IDs. When the Auto create Organization ID numbers option is being used, the Organization ID field on the Basic Info tab will be populated with the organization ID when the Save icon is clicked. If the Auto create Organization IDnumbers option is later cleared, the Organization ID field will be enabled and become editable. If you make changes to the field, you can click the Save icon to save the new Organization ID.
- Follow the instructions in the next section to complete each tab in the Company Details window. Enter information in the required fields. For non-required fields, enter information depending on your business requirements.
All of the fields provided on these tabs are included in the Reporting Database. The data entered in these fields is available via the Encompass SDK.
- In Organization Name field, enter the name of the TPO company. This is the unique identifier for the company.
- If you enter a name that has already been assigned to another company, an alert displays indicating that an organization with the same name already exists.
- Select the Disable Login checkbox to deactivate the TPO company if you are no longer doing business with or need to prevent the company from uploading loan files. Typically, you will not need to use this option during creation of a TPO company.
- Select the Multi-Factor Authentication checkbox to require multi-factor authentication for your Encompass TPO Connect sites.
- Select whether you want to "Disable Fee Management" for your brokers (default), enable them to "Request LE & Disclosures" or enable them to "Generate LE & Disclosures". Only one option can be selected.
- In the Company Details panel, enter basic and corporate information related to the TPO.
- In the Channel Type field, select the Broker or Correspondent (or both) checkboxes to identify the type of TPO company.
- Select the Delegated checkbox if the TPO client has delegated authority and/or select the Non-Delegated checkbox if the TPO client has non-delegated authority. (This setting is currently used by TPO Connect.)
The behavior between the Correspondent Channel Type and the Underwriting Type settings was modified in the Encompass 18.1 February Service Pack.
- If the Correspondent checkbox is selected as the Channel Type, then the Non-Delegated checkbox is automatically selected as the Underwriting Type.
- If the Correspondent checkbox is blank, then the Delegated and Non-Delegated checkboxes are blank.
- If the Delegated and Non-Delegated checkboxes are blank, then the Correspondent checkbox is blank.
- If the Correspondent checkbox is blank and either the Delegated or Non-Delegated checkbox is selected, then the Correspondent checkbox is selected.
- In the Timezone field, indicate the time zone of the TPO organization to help determine when the purchasing wire cut off time is.
- Select the No After Hour Wires checkbox to indicate that this organization does not accept wire transfers sent outside of normal business operating hours. This enables lenders to indicate that they prefer to receive wire transfers only during funding hours and simplify the reconciliation process.
- In the Organization ID field, enter a maximum of six characters for the organization code of the TPO company. You can enter any value that suits your company’s business needs.
- In the Owner’s Name field, enter the name of the owner of the company.
- In the Company Legal Name field, enter the name of the TPO company. This may be the same as the Organization Name above.
- In the Address, City, State, Zip, Phone Number, Fax Number, Email, and Website fields, enter the TPO company’s corporate contact information. Additionally, type the billing address, billing city, and billing state in the fields provided (especially if the billing address is different than the company’s physical address, city, state, and Zip information.) If the billing address is the same as the main company address, select the Same as Main Address checkbox to auto-populate the billing address fields with the main company address information.
- In the TPO Manager dropdown field, select the TPO contact who creates and manages the TPO contacts on your TPO Connect website and to whom the Welcome emails will be sent.
This dropdown field will be empty when you are creating a TPO company or branch record for the first time. This dropdown list will be populated with eligible contacts once you have created one or more TPO contacts for the TPO company or branch and have assigned the Manager role to them. For more information, refer to the Third Party Originator Contacts section.
- If a selection is entered in this field, you cannot delete this company.
- To delete this company, you must select the “Blank” option for this field, save the record, delete any associated contacts to this company, return to the Company Details screen, select this company, and then click on the Delete icon.
This feature was introduced in the Encompass 19.1 release.
- The Last Loan Submitted Date field is a read-only field and automatically populates when loans are submitted from this TPO company.
- Use the Company can accept first payments checkbox to indicate the Seller is approved to accept first payments.
- In the Rate Sheet and Lock Information panel, enter the TPO’s email address(es) and fax number(s) to which the system will send the Rate Sheet and Lock information.
- In the Product and Pricing panel, enter the TPO’s Product and Pricing account information:
- For Encompass Product and Pricing Service (EPPS) customers:
- Select their Price Group information from the dropdown lists by channel. This enables multiple price groups to be applied to a TPO company.
This feature was introduced in the Encompass 19.1 release.
- These price groups can only be applied if the corresponding channels have been enabled.
- The available price groups are managed in the TPO Settings.
- Type the EPPS username, and select the EPPS Comp. Model from the dropdown list.
- For Optimal Blue customers, select their Price Group information from the dropdown list.
- For Price My Loan customers, select their Price Group information from the dropdown list, and type their user name, password, and customer code.
For information on selecting your product and pricing provider, see Product and Pricing.
- In the Approval Status panel, enter the details related to the TPO’s approval status with your company. The Current Status and Company Rating dropdown fields in this panel have customizable values and can be configured by your Encompass administrator using TPO Settings.
- From the Current Status dropdown list, select the status of the TPO.
- Select the Add to Watchlist checkbox if you need to track and monitor this company.
- The Current Status Date field automatically populates the current date when you enter the Current Status of the TPO company. If you want to enter a different date, click the down arrow at the end of the field, and then in the calendar, click to select a date.
- In the Approved Date field, click the down arrow at the end of the field, and then in the calendar, select a date indicating when the TPO was approved by your company. You can also manually enter information in this field.
- In the Application Date field, click the down arrow at the end of the field, and then in the calendar, select a date indicating when the TPO was approved by your company. You can also manually enter information in this field.
- From the Company Rating dropdown list, select the rating assigned to this TPO.
Ratings are based on your company’s own scale and requirements. A rating of 1 may be considered the top rating or it can be the lowest rating depending on your company’s scale. This dropdown is configurable in the TPO Settings tool.
- In the Primary Sales Rep panel, indicate your company’s Account Executive assigned to this TPO. Click the New icon, select your Primary Sales Rep (PSR), and then click OK.
The Add Sales Rep window displays a list of Encompass users with Sales Rep personas. For more information on Sales Rep personas, refer to the External Settings Tab section of this topic. If you do not find the Encompass user you want to assign as the PSR for this TPO, go to Encompass Settings > Company/User Setup> Organization/Users, select the organization to which the user belongs, and then in the Enabled Users section, click New. Enter the user details, assign a Sales Rep persona to the user, and then click Save. Repeat step 6 to select the user.
- In the new Assigned Date field, indicate the date in which the Account Executive (AE) was assigned to their client. Providing the date that the AE/Sales Rep was activated for a specific client enables ICE Mortgage Technology customers to document the individual responsible for the Seller's business during a specific time period for reporting and compensation purposes.
- In the Business Information panel, enter the TPO’s general business information such as if the company is incorporated, state in which it is incorporated, LEI, NMLS ID, whether the company is DU Sponsored, and whether the company is LPA Sponsored.
-
The Yrs in Business field calculates the TPO’s years in business based on the current date and the date entered in the Date of Incorporation field. The number of months is calculated and indicated in this field along with the number of years. If the Date of Incorporation is set with a future date, this field will display as 0 Year 0 Months. Otherwise, the number of years and months in business will display here, based on the date entered in the Date of Incorporation field.
- Click the Save icon.
- In the alert window that displays after clicking the Save icon, click Yes if you want to assign this PSR to all branches and extensions under this TPO organization. Click No to assign the PSR at the Company level only.
Use the DBA tab to manage multiple DBA (Doing Business As) names associated with the TPO company. Authorized users have the ability to add, edit, delete, and arrange the sequence of DBA names displayed in the DBA list. You can also identify the default DBA using options in this tab. DBAs selected for the TPO organization in this tab are also displayed in the TPO Information tool.
- Click the DBA tab.
- To add a DBA name, click the New icon, enter information, and then click OK.
- To identify this DBA as the default DBA for this TPO company, select Set as default.
- To edit a DBA name, select the name, click the Edit icon, update the information, and then click OK.
- To change the sequence of DBA names in the DBA list (TPO Information tool), select the name, and then click the up and/or down arrows.
- To delete a DBA name, select it, and then click the Delete icon.
Use this tab to manage a TPO’s license information to help ensure compliance for the loans received from the TPO. When a TPO tries to submit a loan for a property in a state where they are not licensed, a warning message is displayed to them. A standard warning message is available out-of-the-box, however you can create your own custom message here. You can also indicate how your company will manage loans submitted for properties in unlicensed states (allow TPOs to submit loans without any restrictions, don’t allow lock requests or submission, don’t allow loan creation).
- Click the License tab.
- Select a Lender Type from the dropdown list.
For more information on lender types, see the Encompass Compliance Service Lender Type and License Setup Guide.
- If your company is a depository institution, from the Home State dropdown list, select the TPO’s home state.
- The applicable laws of the home state will be applied to the loan.
- If your company acts as a depository institution, you can indicate that no exportation of interest rate-related rules should be applied. This enables you to always apply the rules for the loan’s subject property state rather than relying on ICE Mortgage Technology to create a custom lender profile for this purpose. To make this indication, select the My Company wishes to not apply interest rate exportation checkbox.
- If the TPO company does business in more than one state, in the License Type in dropdown list, select All States.
- Or, if the TPO company does business in just one state, select the state to display only the licenses for that state.
- In the Select column, select each license type that applies to the TPO company.
- When you select a license, the Exempt checkbox displays. Select the checkbox if you do not want the Encompass Compliance Service to apply any license or compliance rules associated with that license in the property state.
For information on how licenses are applied by channel, see the Encompass Compliance Service Lender Type and License Setup Guide.
- Enter the License # (number), Issue Date, Start Date, and End Date license information. To enter data, click the row in the column and enter data in the text box provided.
- The Issue Date is the date the license is issued to the loan officer.
- The Start Date is the date that the loan officer’s license becomes associated with the company and they can start taking loan applications on behalf of the company. In most states this is referred to as the Sponsorship Date (not required in all states). Note that even if a loan officer has been issued a valid license, in many cases they can’t legally represent a new company until their license sponsorship transfers to their new employer.
- To specify an expiration date, type the expiration date (MM/DD/YYYY) or click the dropdown arrow and click a date on the calendar in the End Date column.
- When a state license expires, loan team members will not be able to assign loans in that state to the loan officer. If a loan has already been assigned to the loan officer and their license subsequently expires (or if the loan officer tries to originate a new loan after their license expires) they will not be able to enter the Subject Property State in the loan file. If the End Date field is left blank, Encompass assumes the license never expires.
- To enter the license status, click the row in the Status column, and then select an option from the dropdown list provided.
- To specify the Status Date (date that the status is in effect) and the Last Checked date (date that the status was last reviewed), type the status and/or last checked date (MM/DD/YYYY) or click the dropdown arrow and click a date on the calendar in the End Date and/or Last Checked column.
- In the Statutory Election panel, select the appropriate option for Statutory Election for first lien, subordinate lien, junior, closed-end, and open-end loans for subject properties in Maryland or Kansas, if the TPO company does business in Maryland or Kansas.
- If you have selected a single state from the License Type in dropdown list and only the licenses available for that state are displayed in the list, you can move licenses up or down in this list. Select a license and then click the up or down arrows accordingly to move a license.
The order in which these licenses are listed is important. When a loan is received from your TPO Connect website, the TPO’s company information, including state license information, is populated to the TPO Information tool in the loan file. The license information populated to the tool is based on the licenses you configure on this License tab. The first applicable state license that is listed on the License tab with its Select checkbox selected is used to populate the TPO Information tool. When an Encompass Compliance Service (ECS) review is run for this loan, the ECS will use this license to determine which license-related compliance reviews to run.
- In the ATR/QM panel, indicate if the TPO company qualifies as a small creditor, rural small creditor, or an exempt creditor.
- To indicate if the TPO company qualifies as a small creditor or rural small creditor, select Small Creditor or Rural Small Creditor from the dropdown list.
A Small Creditor is usually a community bank or credit union that has less than $2 billion in assets and in the previous 12 months made 500 or fewer first-lien mortgages. A Rural Small Creditor is usually a community bank or credit union that has less than $2 billion in assets, in the previous 12 months made 500 or fewer first-lien mortgages, and made more than 50% of its residential mortgage loans in counties designated as “rural” or “underserved”.
One of these options must be selected for the ATR/QM Eligibility checklist (in the ATR/QM Management tool) to render eligibility results in its Small Creditor Qualified Mortgage column for a loan submitted by this TPO.
- To indicate if the TPO company qualifies as an exempt creditor, select the option that best describes the business from the Exempt Creditor dropdown list: Community Development Financial Institution, Community Housing Development Organization, Downpayment Assistance Provider, or Nonprofit organization.
- From the Policy for Loans in Unlicensed States dropdown list, select the appropriate option to indicate how your company manages loans that do match the licensing requirements, based on the definitions below:
- No Restrictions: All loans will be created and submitted
- Don’t allow lock or submission: Loans can be created but lock requests cannot be made and loans cannot be submitted
- Don't allow loan creation: Loans cannot be created or submitted
- Don’t allow all – loan creation/lock/submission: Loans cannot be created, lock requests cannot be sent, and loans cannot be submitted
- In the Warning Message text box, you can update the out-of-the-box warning message to display when a TPO submits a loan for a property located in a state where they are not licensed (i.e., you have not entered any license information for the state on the License tab).
- Click the Save icon.
Use the Loan Criteria tab to specify the type of loans, and from which loan origination channel, the TPO can submit to your company. The settings for the Broker channel display by default. Click the Correspondent tab to set up the acceptance criteria for TPO loans submitted through the Correspondent channel. When a TPO tries to submit a loan that does not meet the criteria you have configured here, a warning message is displayed. A standard warning message is available out-of-the-box, however you can create your own custom message here. You can also indicate how your company will manage these types of loans (allow TPOs to submit loans without any restrictions, don’t allow lock requests or submission, don’t allow loan creation).
- Click the Loan Criteria tab.
- The tab for the Broker loan origination channel displays by default.
- Clear the checkboxes corresponding to the loan types that your organization will not accept from the TPO.
- In the Purpose of Loan panel, clear the checkboxes corresponding to the loan purposes for which your organization will not accept loan submissions from the TPO.
- From the Policy for Unapproved Loans dropdown list, select the appropriate option to indicate how your company manages loans that do match the loan type and purpose requirements, based on the definitions below:
- No Restrictions: All loans can be submitted
- Don’t allow lock or submission: Loans can be created but lock requests cannot be sent and loans cannot be submitted
- Don't allow loan creation: Loans cannot be created
- Don't allow all - loan creation/lock/submission: Loans cannot be created, lock requests cannot be sent, and loans cannot be submitted
- In the Warning Message text box, you can update the out-of-the-box warning message that will be displayed when loans submitted by the TPO do not match your company’s loan type and purpose criteria.
- In the FHA / VA Information panel, set the loan acceptance criteria for FHA and VA loans.
- Click the Correspondent tab.
- From the Underwriting dropdown field, select Delegated (loan is underwritten by Correspondent seller) , Non-Delegated (loan is underwritten by the Correspondent buyer), or Delegated Conditionally ) to configure underwriting assignments for TPOs.
- Selected Delegated if the loan is underwritten by the Correspondent seller, and then repeat steps 2 - 6 to indicate your company’s loan acceptance criteria for delegated correspondent loans.
- Select Non-Delegatedif the loan is underwritten by the Correspondent buyer, click the Correspondent Non-Delegated tab, and then repeat steps 2 - 6 to indicate your company’s loan acceptance criteria for non-delegated correspondent loans.
- Select Delegated Conditionally if the loan is underwritten by the correspondent seller but only if they meet the conditions defined in this setting.
- Click the Lookup icon (magnifying glass).
- In the Advanced Condition Editor window, click the New icon.
- In the Add/Edit Search Filter window:
- Type a Field to add as a filter.
- Or, click the Lookup (magnifying glass) icon, select a field from the list, and click OK.
- Or, click the Lookup (magnifying glass) icon, type one or more characters in the Lookup field and then click Lookup.
- The first occurrence of the characters in any column is found. Continue clicking Lookup to view additional occurrences. Select a field from the list, and click OK.
- Select an Operator, select an option, and then click OK.
- The Operator and Option define how the filter will be used. For example: Field ID= 1172 (Loan Type), Operator = Is any of, Options = VA.
- In the Advanced Condition Editor window, click OK.
- In the Correspondent Delegated tab, repeat steps 2-6 to indicate your company’s loan acceptance criteria for conditionally delegated correspondent loans.
- Click the Save icon.
Use the TPO Contacts tab to view and manage information related to the most prominent TPO contacts, such as the owner, managers, and executives employed with the TPO company. Here you can manually add new contacts, import existing contacts associated with this TPO from within Encompass, export contacts into an Excel spreadsheet, and edit and delete contacts as required.
The tab was renamed from "Key Contacts" to "TPO Contacts" in Encompass 18.4.
- Click the TPO Contacts tab.
- To manually add a new key contact, click the New icon, enter information in the Add Key TPO Contact window, and then click OK.
- To import one or more key contacts from your list of Third Party Originator Contacts, click the Import icon. In the Import Third Party Originator Contacts window, select the contacts you want to import, and then click Select. To import more than one contact, press the Ctrl key, select multiple contacts, and then click the Select button.
If you are creating a company but have not yet created Third Party Originator Contacts, this list is empty. You can use the import function after you have created Third Party Originator Contacts employed with this TPO. For more information on creating Third Party Originator Contacts, see Third Party Originator Contacts.
- To edit key contacts that were manually created in this tab, select the contact, click the Edit icon, update information, and then click OK.
You can delete key contacts that were created in this tab, as well as the key contacts imported from the Third Party Originator Contacts panel. Contacts created in this tab will be deleted permanently; contacts imported from Third Party Originator Contacts will be deleted from the Contacts tab, but their records will remain in the Third Party Originator Contacts panel.
Use this tab to add your company's sales reps or account executives who manage this TPO company account. After adding your sales reps, authorized users can view their company employees while managing this account. Assigning the sales rep in this tab enables them to access and manage all loans submitted by the TPO company.
Use the View dropdown list to view sales reps assigned to the current TPO company only or sales reps assigned to the current TPO company at any level in the company/branch hierarchy. For more information on TPO company hierarchies, see To Create Branches and Extensions in the External Company Hierarchy.
![]() To Assign a Sales Rep to the TPO Company
To Assign a Sales Rep to the TPO Company
- Click the Sales Reps / AE tab.
- Click the New icon.
- In the Add Sales Rep window, select a user, and then click OK.
- Only users with Sales Rep personas (i.e. TPO Contacts > Sales Rep option is selected in the persona setting) are displayed in the Add Sales Rep window. If you want to add a user who is not displayed on this list, contact your administrator to update the user’s persona. For more information, see Personas.
- Select from the channel indicators (Wholesale, Non-Delegated, and Delegated) to indicate which channel/channels a Sales Rep/AE is assigned to. These channel indicators are only available for the Current Org TPO Sales Reps View.
The channel indicators were introduced in Encompass 18.4.
![]() To Assign a Primary Sales Rep (PSR)
To Assign a Primary Sales Rep (PSR)
- Select a sales rep and then click Set As Primary.
- The PSR is automatically assigned as the sales rep all new TPO contacts created for the organization.
- The Sales Rep column for the PSR is updated with Primary.
- Select a sales rep and then click the Delete icon.
You cannot delete a primary sales rep. You need to first assign another sales rep as the primary sales rep for this company, and then delete the previous primary sales rep.
![]() To View Sales Reps Based on TPO Company Assignment
To View Sales Reps Based on TPO Company Assignment
- From the View dropdown list, select Company TPO Sales Reps to view sales reps assigned to the current TPO company at any level in the company/branch hierarchy.
- From the View dropdown list, select Current Org. TPO Sales Reps to view sales reps assigned to the current TPO company only.
Use the Lender Contacts tab to display the contacts that will be listed in the Lender Key Contacts widget for Encompass TPO Connect. In addition, you can manage contacts that are not in the TPO Global Lender Contacts setting or the Sales Reps/AE tab.
The feature to manage contacts directly on this tab was introduced in the Encompass 19.1 release.
- The contacts displayed on this tab are populated from the new TPO Global Lender Contacts setting, the Sales Reps/AE tab, and any contacts directly entered on the tab.
- A Primary checkbox is displayed (and selected) if the contact was populated from the Sales Reps/AE tab and that contact was Set As Primary on that tab.
For information on how to set a primary contact, refer to the Sales Reps/AE tab section of the Company Details setting in the Encompass online help.
- To hide a contact from the Lender Key Contacts widget for Encompass TPO Connect, select the Hide checkbox on that contact’s row.
- Click the Lender Contacts tab.
- Click the Add icon.
- Select a Channel (Channels) if you want the contact to be displayed under that channel/channels contact grouping in the Encompass TPO Connect Lender Key Contacts widget. For example, if you select Wholesale, the contact will be grouped and displayed in a “Wholesale” section.
If you do not select a Channel, the contact will be displayed in an “All Channels” section.
- In the Name field, click on the arrow to select a user from the dropdown list or manually enter a name, up to 30 characters.
- While the options in the dropdown list display the user’s first name, last name, and email, only the first and last name are populated into the Name field.
-
If you select a Name, the Title/Department, Phone, and Email fields are populated and cannot be edited.
-
If the Title/Department is blank in the user’s Encompass User record, an error message, “The selected User Contact record must first be updated before it can be used in this Key Lender Contacts feature. ‘Job Title’ must be entered in the Job Title field of the selected User Contact record", is displayed.
-
If you clear the Name, the Title/Department, Phone, and Email fields are cleared.
-
In the required Title/Department field, enter a title or department for the user, up to 30 characters.
-
In the Phone field, enter the user’s phone number, up to 30 characters, if you manually entered a Name. There is no special formatting or validation of this field.
-
If you selected a Name, this field cannot be edited.
-
If you clear or enter the Name, this field is cleared and you can edit it.
-
You must enter a Phone, Email, or both.
-
In the Email field, enter the user’s email address, up to 40 characters, if you manually entered a Name.
-
If you selected a Name, this field cannot be edited.
-
If you clear or enter the Name, this field is cleared and you can edit it.
-
You must enter a Phone, Email, or both.
-
Select the Hide checkbox if you want to hide this contact from the Encompass TPO Connect Lender Key Contacts widget.
-
Click OK.
-
If the Title/Department field is blank, the OK button is grayed out until all validation requirements are satisfied.
-
If both the Phone and Email fields are blank, the OK button is grayed out until all validation requirements are satisfied.
-
If the Email address format is not valid, the OK button is grayed out until all validation requirements are satisfied.
-
Your new contact is added to the bottom of the Lender/Investor Contact grid.
- Click the Lender Contacts tab.
- Select the contact you want to edit, and then click on the Edit icon.
You can only edit contacts you have added directly in this tab. All other contacts will be disabled and cannot be edited.
- Make your changes.
-
If you select a Name, the Phone and Email fields are automatically populated and cannot be edited.
- If you clear the Name, the Title/Department, Phone, and Email fields are cleared.
- You must have a Title/Department.
- You must have a Phone, Email, or both.
-
When you edit an existing contact, the Title / Department, Phone and Email can be manually edited and saved.
This manual update will save into the Lender Contacts table, however, will not be updated in the Existing Encompass User profile.
- Click OK.
-
If the Title/Department field is blank, the OK button is grayed out until all validation requirements are satisfied.
-
If both the Phone and Email fields are blank, the OK button is grayed out until all validation requirements are satisfied.
-
If the Email address format is not valid, the OK button is grayed out until all validation requirements are satisfied.
- Click the Lender Contacts tab.
-
Select the contact you want to delete, and then click on the Delete icon.
You can only delete contacts you have added directly in this tab. All other contacts must be deleted from where they were added (i.e., TPO Global Lender Contacts setting or the Company Details Sales Reps/AE tab).
-
A warning message is displayed: “Deleting this contact will permanently remove the entry from the settings. Do you wish to continue?”.
-
Click Yes.
![]() To Sequence Contacts in the Grid
To Sequence Contacts in the Grid
-
In the Company/Branches panel, click Third Party Originator, select the TPO company where you want to sequence contacts.
-
Select the entry you want to move, and then click the Up and Down arrows.
Use the Warehouse tab to manage the warehouse banks associated with this TPO. Authorized users have the ability to select from a list of banks set up by the Encompass administrator in the Banks setting. You can also update business information related to the bank, include notes, and update contact information associated with the bank.
Each bank can be added to the same TPO company multiple times since a TPO may have multiple account numbers with the same bank for handling different types of loans.
- Click the Warehouse tab.
- To add a bank, click the New icon, select a bank from the External Bank List window, and then click OK.
- Select the Approved checkbox in order for it to be listed in the Warehouse Bank Selector pop-up window. When this checkbox is selected, the current date will be populated to the Status Date field. You can then use the dropdown option in this field to select a different date as needed. (Note that when the Approved checkbox is cleared, the Status Date field will be cleared as well.)
- To view bank details, select the bank, and view the information in the Warehouse Bank Details panel.
- To update bank information, select the bank, enter the information in the Warehouse Bank Details panel, and then click the Save icon in the Warehouse Bank Details panel.
- To update contact information, select the bank, clear the Use Default Contact checkbox, enter the information in the Contact Information panel, and then click the Save icon in the Warehouse Bank Details panel.
- To include additional information about a bank, select the bank, type the information in the Notes panel, and then click the Save icon in the Warehouse Bank Details panel.
- To delete a bank, select it, and then click the Delete icon.
- Select the time zone where the warehouse bank is located from the Timezone dropdown list. This time zone will be help determine when the bank’s purchasing wire cut off time is if they have elected to not receive wires after hours.
Use the Fees tab to assign fees (such as Property Inspection Waiver fees, Flood Certificate fees, and Finding Fees) to the TPO so that fees charged for each loan are automatically calculated and applied to the loan. Authorized users have the ability to create a new fee manually or select from the list of TPO fees with active and pending statuses in External Company Setup settings. TPO Fees can also be filtered by loan channel type and/or the status of the fee (active, pending, or expired).
You can apply TPO Fees to the Correspondent channel only.
You can manually add TPO fees or select from the set of fees configured by your Encompass administrator.
- Click the Fees tab.
- Click the New icon.
- In the Add New TPO Fee window, click Create new fee manually and then click OK.
- In the second Add New TPO Fee window:
- In the Name field, enter the TPO fee name. This will be displayed as the title on the Correspondent Purchase Advice tool when the fee is itemized.
- In the Description field, enter a brief explanation of the fee.
- From the Channel dropdown list, select Correspondent.
Currently, TPO fees can only be applied to Correspondent loans.
- In the Fee Amount field:
- Select Total or Base Loan Amount, depending on how the fee is calculated (as a percentage of the total or base loan).
- Type the fee percentage.
- In the +$ field, type any additional amount, if applicable.
- In the Code field, type the general account for the fee.
This need not be a unique value since a fee code may be listed multiple times with different effective dates or channels.
- In the Start Date field, select the date from which the fee will be applied to loans based on the loan lock date.
If the current date is prior to the start date, the fee will not be applied to loans. Start date does not have to be entered. This means the fee will be effective immediately and be active up to the end date.
In the TPO Fees list, a fee is displayed as Pending if Start Date is in the future; Active if the current date is in between the start and end date or if the start and end dates are unspecified; Expired if the End date has occurred in the past.
- In the End Date field, select the last date for the fee period based on the loan lock date.
- In the Fee is Triggered field:
- Select Always to always apply the fee.
- Or, select Conditional to create a condition for when the fee is applied.
- Click the Lookup icon (magnifying glass).
- In the Advanced Condition Editor window, click the New icon.
- In the Add/Edit Search Filter window:
- Type a Field to add as a filter.
- Or, click the Lookup icon (magnifying glass), select a field from the list, and click OK.
- Or, click the Lookup icon (magnifying glass), type one or more characters in the Lookup field and then click Lookup. The first occurrence of the characters in any column is found. Continue clicking Lookup to view additional occurrences. Select a field from the list, and click OK.
- Select an Operator, select an option, and then click OK.
The Operator and Option define how the filter will be used. For example: Field ID= 1172 (Loan Type), Operator = Is any of, Options = VA.
- In the Advanced Condition Editor window, click OK.
- In the Add New TPO Fee window, click OK.
![]() To Add a Fee from Pre-Defined TPO Fees
To Add a Fee from Pre-Defined TPO Fees
- Click the Fees tab.
- Click the New icon.
- In the Add New TPO Fee window, click Add fee from existing TPO Fees, and then click OK.
- In the Add fees from Global TPO Fees list window, select the checkboxes corresponding to the fees you want to add, and then click OK.
Filter the fee list based on their channel type and/or status by using the dropdown options in this window. Type the complete name of the TPO fee and then click the Lookup icon to search for a fee by name.
You can create late fees to apply to this TPO company or select the Late Fee set up by your Encompass administrator.
- Click the Fees tab.
- Click Late Fee Settings.
- In the Edit Late Fee Settings window:
- Click TPO Specific Settings.
- In the Late Fee Grace Period (days) field, type the number of days past the deadline for which the late fee will be waived.
- In the Grace Period uses field, select:
- Week Days if only week days are included
- Calendar Days if weekdays and weekends are included
- Company Calendar if the Company Calendar dates are used
- In the Grace Period Starts field, select:
- On - if the grace period is calculated starting from the day selected below
- Day After - if the grace period is calculated from the day after the selected below
- In the Later of section, select one or more of the following options:
- Purchase Suspense Date - the date on which the purchase was suspended
- Purchase Approval Date - the date when the purchase was approved
- Delivery Expiration Date - the date on which the trade expires
- Latest Cond’s Issued Date - date when the latest stipulations were issued
This field label was updated in Encompass 17.3 from Latest Stips Issued Date to Latest Cond’s Issued Date.
- Other Date - Click the Search icon and then in the Select Loan Field window, select the date and then click Select
- In the Day Cleared field, select:
- Purchase Approval Date - the date when the purchase was approved
- Cleared for Purchase Date - the date when the buyer approved the loan for purchase
- Other Date - Click the Search icon and then in the Select Loan Field window, select the date and then click Select
- In the Late Fee Can Start on a weekend field, select:
- Yes - if the late fee will be calculated starting from the weekend
- No - if the late fee is calculated from Monday
- In the Include Day Cleared as Late Day field, select:
- Yes - if the late fee calculation adds one day for the day cleared
- No – if the late fee calculation does not include the clearance day
- In the Fee Handled As field, select:
- Fee - if the fee will be copied to a fee line item
- Price Adjustment - if the fee is deducted from the loan price as an adjustment
- In the Late Fee Percent field, enter the fee percentage.
- In the Late Fee Dollars +$ field, type any additional amount, if applicable.
- In the Calculate As field, select:
- Flat - if it is a one time fee
- Daily Fee - if the fee is calculated daily
- In the Maximum Late Days field, type the number of late days after which the TPO loan will be repriced.
- Click OK.
![]() To Add the Pre-Defined TPO Late Fee
To Add the Pre-Defined TPO Late Fee
- Click the Fees tab.
- Click Late Fee Settings.
- In the Edit Late Fee Settings window, select Global TPO Settings, and then click OK.
Use the options on the TPO Fees panel to filter and search for fees, and then edit or delete them. If you are dissatisfied with your updates to the TPO fees, you can reset them to the out-of-the-box list.
- Click the Reset to Default button.
- To filter fees by channel, select the appropriate channel from the Channel Type dropdown list.
- To filter fees by status (Active, Pending, Expired), select the value from the Status dropdown list.
You can use both filters to refine your search.
- To search a fee by name, type the complete name of the fee, and then click the Lookup (magnifying glass) icon.
Click the fee to select it and then click the Edit icon.
Use the search and filter options explained above to find the TPO fee.
Click the fee to select it and then click the Delete icon.
Use the search and filter options explained above to find the TPO fee.
Use the LO Comp tab to assign an active compensation plan to a TPO (the compensation your company is paying to the third party originator). After this assignment, authorized users can use the LO Compensation tool to track the amount of compensation to be paid.
Before assigning a plan, go to LO Compensation to create LO compensation plans.
- Click the LO Comp tab.
- To assign an LO Comp plan to the TPO, in the Assigned Compensation Plans panel, click the New icon, click an LO Comp plan, and then click Select.
In the Details section, you can change the Start Date of the plan if necessary. By default, Encompass sets the Start Date to one day after the compensation plan was assigned to the company or branch (i.e., the next day).
If another plan is already in effect, the new plan must start the next day to ensure that two plans are not being applied to the originator on the same day. The Earliest Change Date is calculated based on the Start Date and Minimum Term # Days fields. After the plan is activated (i.e., when the plan is started), if an administrator tries to assign a new compensation plan before the minimum term of days is reached, a warning message is displayed that informs the administrator that the start date for the new plan occurs prior to the “earliest change date” (i.e., prior to the minimum term of days being reached). The administrator can then continue to add a plan or cancel the operation. After the Earliest Change Date is reached, the warning message will no longer be triggered.
- To view an LO Comp plan’s details, in the Assigned Compensation Plans panel, select it, and then click the View icon. You can change the Start Date of the plan if necessary, in the LO Comp Plan section, but you cannot change the start date here after the plan has started.
- To delete an LO Comp plan, in the Assigned Compensation Plans panel, select it, and then click the Delete icon.
This only deletes the LO Comp assignment from the TPO. The LO Comp plan still exists in the system in Encompass Settings >Tables and Fees > LO Compensation.
- To export the LO Comp assignment history into an Excel spreadsheet and save it on your computer, in the Assigned Compensation Plans panel, click the Excel icon, select the location on your computer, enter a file name, and then click Save.
- On the LO Comp tab, click the Save icon.
Use the Commitments tab to track the TPO company's assigned commitment authority. This commitment authority can be managed in three (3) different ways:
- Restricting individual loan locks for Best Efforts and Mandatory based on available commitment authority.
- Restricting new correspondent trades based on available commitment authority.
- Restricting new correspondent master commitments based on available commitment authority.
The key to managing commitment authority is to track three (3) data points; Max (Maximum) Commitment Authority, Outstanding Commitments, and Available Amount. The Max Commitment Authority is the total dollar amount of loans available to be committed to the Investor that have not yet been “delivered” (Received Date (field ID 3917) is blank on the Correspondent Loan Status Tool).
- As loans are locked or correspondent trades are created, those amounts increase the Outstanding Commitments amount (by commitment type - Best Efforts or Mandatory).
- As loans are delivered (Received Date (field ID 3917) entered for the Investor), the loan amounts reduce the Outstanding Commitments amount.
- The Maximum Commitment Amount less the Outstanding Amount equals the Available Amount. If the Available Amount will become negative with a new individual loan lock or correspondent trade, Encompass may prevent the loan to be locked or the correspondent trade to be created.
Another important aspect of the Commitments tab is to restrict the types of lock commitments and loan delivery that a given TPO company has the authority to deliver.
- Commitment types may be enabled for Best Efforts, Mandatory, or both.
- The delivery type of Mandatory can be enabled for Individual, Bulk, AOT, Bulk AOT, Direct Trade, Co-Issue, and Forward.
The Bulk AOT and Co-Issue delivery types are available in Encompass 20.1 and later.
- Individual loan lock can only occur for the commitment types (Best Efforts or Mandatory) indicated.
- Correspondent trade delivery types are only available based on the delivery types enabled on this tab.
If none of the settings are enabled on this tab, the default will be “Best Efforts” and “Unlimited”.
Master commitments created for TPO companies are configured such that they are limited to only the types and amounts for which the TPOs are approved. The TPO's master commitments can include Best Effort and/or Mandatory and the amount of their limit for each. These values will be used by the Trade Management tool when master commitments are created for the TPO.
![]() To Create a Commitment Authority for Individual Best Efforts
To Create a Commitment Authority for Individual Best Efforts
- Click the Commitments tab.
- Select the Best Efforts checkbox to include the TPO's best efforts in their commitment authority.
- Unlimited is automatically selected and is for the TPO that does not have any limits in their best effort commitments.
- Or, select Limited, and then enter the Max Commitment Amount for the TPO.
The Outstanding Commitments field displays the total amount of outstanding commitments and includes all active best efforts and non-allocated best efforts loans for this TPO. The Available Amount field displays the calculated value for the Max Commitment Authority - Outstanding Commitments. This is also represented visually as a pie chart. When the Available Amount is a positive number, the pie chart will be green in an equivalent amount to the percentage available.
If the Outstanding Commitments exceeds the Max Commitment Authority, the Outstanding Commitments value displays in red, the Available Amount displays a negative value in red, and the pie chart displays 100% in red.
- Enter a Daily Volume Limit, Policy for Best Efforts Tolerance, and Policy for loans that exceed Daily Volume Limit to define the maximum number of locks allowed per day.
These fields are available in Encompass 20.1 and later.
- Daily Volume Limit
- The Daily Volume Limit cannot exceed the Max Commitment Authority.
- If the amount is exceeded, a warning message “The Daily Volume Limit cannot be more than the Max Commitment Authority.” is displayed.
- If an amount is not entered, the Policy for loans that exceed Daily Volume will have no effect.
- Policy for Best Efforts Tolerance
- If “Flat Tolerance” is selected as the Tolerance Control Option, a Flat Tolerance % field is displayed, populated with the Flat Tolerance percentage, and the field will not be editable.
- If “Conditional Tolerance” is selected as the Tolerance Control Option, a Lesser of % or $ fields are displayed. Once a Trade Amount is entered, the Tolerance field is populated with the Conditional Tolerance percentage, and the field will not be editable.
The following validations are performed when a Tolerance Control Option is selected to ensure it does not exceed 100% or contain a negative value.
-
Percentages greater than 100% cannot be entered.
-
Negative values cannot be entered.
-
Values cannot be copied into the policy.
- Policy for loans that exceed Daily Volume Limit
- Select No Restrictions to enable sellers to lock loans over the daily volume limit.
- Select Don’t allow lock (default) to restrict sellers from locking loans that are over the daily volume limit amount.
- If the policy is violated, a warning message “The loan amount exceeds the available amount of the daily volume limit.” is displayed and the seller cannot submit the lock request.
This is the default message but it can be customized.
- If a Daily Volume Limit is not entered, this policy will not be in effect.
- Select the Reset Limit with new Ratesheet ID checkbox to enable the Lock Desk to reset the daily lock limit when there is a price change to offer the full daily limit and allow a seller to take advantage of the new pricing.
This checkbox is available in Encompass 24.2 and later.
-
When the Reset Limit with New Ratesheet ID checkbox is selected:
- For a lock request, update, relock, or a lock request with an old lock or old request in the loan, the daily limit is validated but the Accrued Amount is not updated at the time of request, but will be updated upon lock confirmation.
- For updated buy side lock date or rate sheet ID with lock confirmed, updated, or relocked, the daily limit is validated before the lock is confirmed and the Accrued Amount is updated after the lock is confirmed using the buy side data.
- For updated loan amount or copy to snapshot and the loan is locked and confirmed, the daily limit is validated and the Accrued Amount is updated.
- For a confirmed new lock, the daily limit is validated and the Accrued Amount is updated using the buy side data.
- For a cancelled, denied, or voided lock, the loan amount is subtracted from the Accrued Amount.
- When a lock is denied or voided, the loan returns to its latest confirmed lock state.
- When a lock is voided, the daily limit is validated before the void is allowed. If the limit is exceeded, the configured message is displayed and the void is rejected.
- For Individual Best Effort delivery type, the best efforts daily limit is validated and the Accrued Amount is updated whether or not the Best Efforts checkbox on the Commitments tab is selected.
- Click the Save icon to save your settings.
![]() To Create a Commitment Authority for Individual Mandatory
To Create a Commitment Authority for Individual Mandatory
- Click the Commitments tab.
- Select the Mandatory checkbox and then enter the Max Commitment Amount for the TPO.
-
If you want to configure the tolerance for each TPO, select the appropriate Tolerance Control Option under the Policy for Mandatory Tolerance. When a trade is created, the tolerance will be mapped from this new policy.
This policy is available in Encompass 20.1 and later.
-
The policy is enabled when the Mandatory checkbox is selected.
-
The mapped tolerance can be overridden on the Correspondent Trades Details tab by clicking the Lock icon next to the Tolerance field.
-
By default, the policy is blank. If no option is selected, the Tolerance field on the Correspondent Trade Details tab can continue to be manually entered.
-
If “Flat Tolerance” is selected as the Tolerance Control Option, a Flat Tolerance % field is displayed.
-
If “Conditional Tolerance” is selected as the Tolerance Control Option, a Lesser of % or $ fields are displayed.
-
Enter a tolerance percentage for mandatory trades and a dollar amount for the delivery variance.
The following validations are performed when a Tolerance Control Option is selected to ensure it does not exceed 100% or contain a negative value.
-
Percentages greater than 100% cannot be entered.
-
Negative values cannot be entered.
-
Values cannot be copied into the policy.
- Select the Individual delivery type.
If there are other delivery types to be enabled, refer to the To Create a Commitment for Trade Delivery Types section.
- Click the Save icon to save your settings.
![]() To Create a Commitment Authority for Trade Delivery Types
To Create a Commitment Authority for Trade Delivery Types
- Click the Commitments tab.
- Select the Mandatory checkbox and then enter the Max Commitment Amount for the TPO (if not previously entered).
- Select all the delivery types that the TPO company is authorized to submit.
Every time a Mandatory loan is locked or a correspondent trade is created, the associated delivery type’s Outstanding Commitments amounts will increase along with the percentage of the Mandatory Max Commitment Amount. As long as the Mandatory Available Amount is positive, the pie chart and bar charts will display in green.
If the Outstanding Commitments exceed the Max Commitment Authority, the Outstanding Commitments value displays in red, the Available Amount displays a negative value in red, and the pie chart/bar graph displays 100% in red.
- Click the Save icon to save your settings.
![]() To Set Policy for Loans Exceeding Max Commitment Authority
To Set Policy for Loans Exceeding Max Commitment Authority
- Select No Restrictions if there are no limitations for the TPO when they exceed their Maximum Commitment Authority for either Individual Best Efforts or Individual Mandatory loans. In this scenario, the TPO can lock individual loans above any established limit without recourse.
-
Select Don't allow lock if you do not want to enable the TPO to submit lock requests when they exceed their Maximum Commitment Authority. In this scenario, when a lock request is submitted and it exceeds the Available Amount for that commitment type, the Lock Request is declined and a custom Warning message is returned to the requestor.
![]() To Set Policy for Trades Exceeding Max Commitment Authority
To Set Policy for Trades Exceeding Max Commitment Authority
- Select No Restrictions if there are no limitations for the TPO when they exceed their Maximum Commitment Authority. In this scenario, new correspondent trades (and any correspondent master commitments) can be created for the TPO with no limit to the Trade Amounts.
- Select Don’t allow Trade creation if you do not want to enable the TPO to create new correspondent trades or correspondent master commitments that when added to the current Outstanding Commitments, will exceed the Max Commitment Amount. In this scenario, when a new correspondent trade or a correspondent master commitment is created, and it exceeds the Available Amount for the Mandatory commitment type, the correspondent trade or correspondent master commitment cannot be saved and a custom Warning Message is returned to the requestor.
In the Encompass Settings > Secondary Setup > Trade Management Setup > Trade Management Tabs section, when Enable Auto – create of Correspondent Trades for Individual Delivery Type has been enabled, and you want to restrict trades, ICE Mortgage Technology strongly recommends that you also restrict loans to prevent loans from being locked but not assigned to an individual trade.
This setting was introduced in Encompass 17.4.
![]() To Set Restricted Loans – Warning Message
To Set Restricted Loans – Warning Message
In the Restricted Loans field, you must have a warning message that displays when the Don’t allow lock or Don’t allow Trade creation settings are selected and the associated Available Amount has been exceeded.
Use the Trade Mgmt tab to manage TPO Trade Management features by TPO client. The company-level settings for TPO Trade Management which can override these settings are located on the Trade Management Setup setting.
This tab was added in Encompass 17.3. In Encompass 17.4, the View Correspondent Master Commitment setting was enabled. The Request Pair Off and Receive Commitment Confirmation settings are disabled (will be available in a future release).
- If Enable TPO Trade Management is not selected on the Trade Management Setup setting, this tab will be disabled.
- If Use Company-level – TPO Trade Management Settings is selected, the settings selected on the Trade Management Setup setting will be used and the settings on this tab cannot be edited.
- If Customize Settings is selected, all settings that are enabled at the company level can be edited but all settings that are disabled at the company level cannot be edited.
If none of the checkboxes are selected, a warning that at least one Trade Management tab setting is required, is displayed.
-
If View Correspondent Trade is selected, TPO Connect users can view the correspondent trade pipeline, view correspondent trade details, and view assigned loans.
When Enable TPO Trade Management is selected, this setting is automatically selected.
- If View Correspondent Master Commitment is selected, TPO Connect users can view the correspondent trade pipeline, view correspondent trade details, and view assigned loans.
- If Loan Eligibility to Correspondent Trade is selected, TPO Connect users can find eligible loans (based on trade filters).
- If EPPS Loan Program Eligibility/Pricing is selected, TPO Connect users can select EPPS loan programs, determine loan eligibility using EPPS loan programs, and obtain LLPA and SRP pricing from EPPS.
If EPPS is not selected as the product and pricing provider on the Product and Pricing setting (under Secondary Setup), this setting is disabled.
- If Loan Assignment to Correspondent Trade is selected, TPO Connect users can assign loans to correspondent trades.
When Loan Eligibility to Correspondent Trade is selected, this setting is automatically selected.
- If Loan Deletion from Correspondent Trade is selected, TPO Connect users can remove one or more loans from correspondent trades.
Use the ONRP tab to specify time and dollar limits for ONRP by Third Party Originator (TPO) and channel.
- Click the ONRP tab.
- Select Enable ONRP for the appropriate channels to enable that channel’s settings.
- To edit a channel’s settings, you must also select:
- The related channel checkbox (Enable ONRP for Wholesale or Enable ONRP for Correspondent) on the Lock Desk Schedule/ONRP tab under Lock Desk Setup.
- The related Channel Type checkbox (Broker or Correspondent) on the Basic Info tab.
-
In the Correspondent Settings in ONRP section, you can select the Allow ONRP for Cancelled/Expired Locks checkbox to enable canceled or expired locks to be eligible for ONRP. If left blank, only initial lock requests are eligible for ONRP.
By default, this setting is disabled.
This setting was added in the Encompass 21.1 release.
- Select whether you want to Use Channel Defaults or Customize Settings.
- If Use Channel Defaults is selected, the settings are populated by the global channel settings and cannot be edited.
- If Customize Settings is selected, the settings can be edited.
- Select whether you want the ONRP coverage to be continuous or a specific time period.
- The ONRP Start Time is set to the Lock Desk End Time and cannot be edited.
- The ONRP End Time cannot be past the Lock Desk Start Time.
- If Weekend/Holiday Coverage is selected, the ONRP End Time must be set to A.M.
- If the Lock Desk is set for 24 hours, the ONRP Start Time is blank and the ONRP End Time is disabled for all ONRP settings (if central Lock Desk is set) or the corresponding ONRP settings (if Lock Desk is set by channel). For Saturday and Sunday, the Saturday/Sunday Hours checkbox is also disabled.
- If you select Continuous Coverage:
-
The ONRP End Time is set to the Lock Desk Start Time and cannot be edited.
- Saturday Hours , Sunday Hours, and Weekend/HolidayCoverage are disabled.
- If you select Specify Time:
- Enter the ONRP End Time. For Saturday and Sunday, you must select Saturday Hours and/or Sunday Hours first.
- The Saturday/Sunday Hours fields are available if enabled in Lock Desk Hours.
- Select whether you want Weekend/Holiday Coverage or not.
- If Saturday Hours and/or Sunday Hours is selected in Lock Desk Hours, the Weekend/Holiday Coverage checkbox is disabled.
- Select whether you want No Maximum Limit or not.
- If selected, the ONRP Dollar Limit $ and ONRP Tolerance % are blank and cannot be edited.
- If not selected, the ONRP Dollar Limit $ and ONRP Tolerance % can be edited.
- ONRP Dollar Limit $ is a required field and supports up to 8 digits.
- ONRP Tolerance % is an optional field and supports up to 2 digits.
- Click the Save icon.
Use the Notes tab to view and manage notes, comments, and additional information about the TPO company.
- Click the Notes tab.
- To create a note, click the New icon, enter information, and then click OK.
- To view note details, select the note, and then click the View icon.
- To export the Notes history into an Excel spreadsheet and save it on your computer, click the Excel icon, select the location on your computer, enter a file name, and then click Save.
- To delete a note, select it, and then click the Delete icon.
Use the TPO Connect Setup tab to specify the TPO Connect site that the TPO company will use to manage loan files. You can access the list of all TPO websites that have been set up for your Encompass account, select from the list, specify the loan originator channel, and add and remove TPO Connect sites.
- Click the TPO Connect Setup tab.
- Select the Test Account checkbox to test the features of the TPO Connect in a test environment instead of in a live production environment. When Test Account is selected, loans submitted from your TPO Connect site are sent to a loan folder you create in Encompass that is designated for test loans.
To create the folder in Encompass Settings, go to Loan Folders. Then, to designate this folder as the folder where test loans will be sent, use the Loan Setup section of the Loan Settings page in TPO Connect Administration. There you can designate a Test Pending Loans Folder and/or a Test Live Loans Folder
- In the Site URL field, manually enter or select the TPO Connect URL from the list of all TPO websites that have been set up for your Encompass account. If this is a test record, select or enter the test TPO Connect URL.
- From the Channel Type dropdown list, select the loan originator channel for the TPO company.
- Click the Add More button to include additional TPO Connect URLs associated with the TPO.
- Optionally, click the Delete icon in a Site URL row to remove the TPO Connect site from the TPO company.
- Click Save.
Use the TPO Docs tab to view and manage the documents this TPO can access on your Encompass TPO Connect website. Documents from the TPO Docs setting are automatically listed here. Authorized users can add TPO documents from their desktop or select from the document list created by the Encompass administrator.
You can manually add TPO documents or select from the list of documents provided by your administrator.
Only the following document types can be uploaded as TPO documents - pdf, xls, xlsx, CSV, XML, doc, docx, txt, tiff, JPEG, and JPG.
![]() To Add a TPO Document from Your Desktop
To Add a TPO Document from Your Desktop
- Click the TPO Docs tab.
- Click the New icon.
- In the Add Document window, click to select Add document from your desktop, and then click OK.
- In the Add New Document window:
- In the File Name field, click the Folder icon on the far right.
- In the Browse and Attach window, select a document from your computer, and then click Open.
- In the Document Display Name field, type the name of the document.
- In the Start Date and End Date fields, optionally, select the period for which the document is valid/active.
A document is listed as Active in the TPO Docs tab, Status column, if the current date is within the validity period defined in these fields, or if the validity period is not specified. A document is listed as Pending if the current date is before the Start Date; and Expired if the current date is past the End Date defined here.
- From the Category dropdown field, select the TPO document category.
- From the Channel dropdown field, select the TPO channel for which the document will be available.
- From the Place document dropdown list, select the positioning of the document within the document category selected in the Category field above.
- Click OK.
![]() To Add a TPO Document from the Documents Uploaded by Your Administrator
To Add a TPO Document from the Documents Uploaded by Your Administrator
- Click the TPO Docs tab.
- Click the New icon.
- In the Add Document window, click to select Add document from existing TPO Docs, and then click OK.
- In the Add Document from existing TPO Docs window:
- Click to the select the document.
Type the name of the document (full or partial), click the Lookup icon, and then select the document.
- From the Place document dropdown list, select an option to define the positioning of the document within the document category.
- Click OK.
- In the confirmation window, click OK.
You can edit, delete, archive and unarchive documents that you have added. These documents are listed in the TPO Docs tab with a display the value of Uploaded in the Source column.
Documents that were not uploaded by you can only be viewed and moved within their categories.
Use the Edit icon to modify TPO documents that you have uploaded. You can only update attributes such as the document display name, period of validity, and availability to loan channels. You cannot change the TPO document.
To replace an existing document, add a new document and then delete the existing document.
- Click the TPO Docs tab.
- Click to select a document, and then click the Edit icon.
- In the Edit Document window, update the information, and then click OK.
![]() Activate/Deactivate TPO Documents
Activate/Deactivate TPO Documents
Use the document activation feature to control access to active documents for your TPO Connect website users. You can deactivate documents to limit access to them temporarily.
This feature works on active documents (uploaded by you and the Encompass administrator) in toggle mode - selecting the Active checkbox for Inactive documents deactivates the documents, selecting the same checkbox for Inactive documents activates them.
To Deactivate TPO Documents:
- Click the checkbox in the Active column corresponding to the active document to deactivate a document.
- Click the checkbox in the Active column corresponding to the Category to deactivate all documents within the document category.
To Activate TPO Documents:
- Click the checkbox in the Active column corresponding to the Inactive document to activate a document.
- Click the checkbox in the Active column corresponding to the Category to activate all documents within the document category.
You can view all documents in the TPO Docs tab irrespective of their status and by whom they were uploaded.
To View a TPO Document:
- Click to select the document and then click the View icon.
You can delete documents that were uploaded by you only (Source of document displays Uploaded in the TPO Docs tab).
To Delete a TPO Document:
- Click to select the document and then click the Delete icon.
![]() Move a TPO Document Within Its Category
Move a TPO Document Within Its Category
You can move any document within its category. The sequence of the documents listed here is reflected in the document list in the TPO Connect website.
To Move a Document Within Its Category
- Click to select the document and then click the up or down arrows to change the document's position in the category.
![]() Archive/Unarchive TPO Documents
Archive/Unarchive TPO Documents
Use the archive feature to move documents, that are no longer being used, to the Archived Docs tab. Instead of deleting the documents that are no longer being used, you can archive them so that the document list in the TPO Docs tab is up-to-date and more manageable. Archived documents can be moved back to the TPO Docs tab if required.
You can only archive/unarchive documents that you uploaded.
To Archive a TPO Document:
- Click the TPO Docs tab, click to select the document, and then click Archive Selected to move the document to the Archived Docs tab.
To Unarchive a TPO Connect Document:
- Click the Archived Docs tab, click to select the document, and then click Unarchive to move the document to the TPO Docs tab.
Use the Attachments tab to include attachments such as financial documents and loan applications related to the TPO. You can add attachments from your computer (max file size is 25 MB), enter the filing date and the date on which the document will expire. Encompass calculates the countdown to the expiration date and enters the value in this tab. You can view and edit the attachment details and also view the attachment in its original format.
- Click the Attachments tab.
- Click the New icon to add an attachment to the TPO company.
- In the Attachment page, click the Folder icon, locate and select the attachment on your computer.
- In the Open window, click the Open button.
- In the Attachment window, update the Attachment Name.
- In the Description field, enter a brief explanation of the attachment.
- From the Category dropdown list, select the type of attachment.
- In the File Date field, enter the date of application from the calendar.
- In the Expiration Date field, enter the attachment’s expiration date, if applicable.
- The Days to Expire field automatically displays the countdown to the expiration date.
If the document has expired, a red alert is displayed in the Attachment window (next to the Days to Expire field) and on the Attachments tab.
- Click OK.
- To edit an attachment, select a document, click the Edit icon, and in the Attachment window, update the information, and then click OK.
- To view an attachment in its original format, select the document, and then click the View icon.
- To delete an attachment, select the document, and then click the Delete icon.
Use this tab to track the custom fields for the TPO company. Here, authorized users can enter custom data for these fields. The custom fields are configured in the TPO Custom Fields setting.
To Create Branches and Extensions in the External Company Hierarchy:
After you have created a TPO company, you can create branches and extensions nested under the company in hierarchical order. When you create the sub-organization, it is automatically listed as a Company Extension and inherits the TPO ID of the company above it in the hierarchy. When you change the Organization Type from Company Extension to Branch, the TPO ID updates automatically. If the parent company is on your company’s watchlist, the sub-organizations are automatically added to the watchlist and can be updated only when you remove the parent organization from the watchlist. Other information inherited from the parent company such as the channel type, address, approval status, assigned primary sales rep, business information, license, loan type, and TPO Connect website URL can be updated without changing the parent company information.
- On the menu bar, click Encompass, and then click Settings.
- On the left panel, click External Company Setup, and then click Company Details.
- In the Company/Branches panel, select the company under which you want to create the branch, and then click the New icon.
OR
Right-click the company under which you want to create the branch, and then select Add Organization.
- The Company Details page displays with the Use Parent Info checkboxes selected, and applicable information from the parent company inherited by the branch or extension.
- In the Organization Name field, enter the name of the company branch or extension.
- Select the Visible on TPOWC site checkbox if you want the details of this company extension or branch to be displayed to your Encompass TPO Connect administrators on your Encompass TPO Connect website.
-
When the Visible on TPOWC site checkbox is selected, the extension or branch will display on the Encompass TPO Connect site’s Manage Account page as a location into which the TPO company can place TPO contacts.
- To update the information, clear the Use Parent Info checkboxes and then enter information as needed.
- To identify the company as a branch, in the Company Details panel, clear the Use Parent Info checkbox, and from the Organization Type dropdown list, select Branch.
A Company Extension inherits the TPO ID of the organization folder above it in the Company/Branches hierarchy. When you create a sub-organization from a company, the system identifies it as a Company Extension and assigns it the same TPO ID as that of the company directly above it in the company hierarchical structure. When you update the Company Extension to Branch, the TPO ID updates automatically. When you create a Branch Extension under that Branch, the Branch Extension again inherits the TPO ID from the Branch.
- Click Save.
![]() Search for TPO Companies and Branches Based on Their Organization Name and/or Organization ID
Search for TPO Companies and Branches Based on Their Organization Name and/or Organization ID
Use the Search TPOs by Organization panel to search TPO companies and branches based on their Organization Name or Organization ID.
![]() To Search for TPO Companies Based on Their Organization Name
To Search for TPO Companies Based on Their Organization Name
- On the menu bar, click Encompass, and then click Settings.
- In the left panel, click External Company Setup, and then click Company Details.
- In the Company/Branches panel, select Name, type the full or partial name of the TPO Organization, and then click the Search icon.
- Click the Down button to see more results that match your search criteria. For example, if you type the search string "mont", results such as "Fremont Mortgage", "Mont Claire Holdings", and "Bank of Belmont" will be highlighted as your search results.
- Click the Clear button to remove the search string.
- Repeat steps 3 and 4 to start a new search.
![]() To Search for TPO Companies Based on Their Organization ID
To Search for TPO Companies Based on Their Organization ID
- On the menu bar, click Encompass, and then click Settings.
- In the left panel, click External Company Setup, and then click Company Details.
- In the Company/Branches panel, select ID, type the full or partial Organization ID of the TPO Organization, and then click the Search icon.
- Click the Down button to see more results that match your search criteria.
For example, if you type the search string "543", results such as "54321", "12543", "15430" will be highlighted as your search results.
- Click the Clear button to remove the search string.
- Repeat steps 3 and 4 to start a new search.
![]() Manage TPO Companies and Branches
Manage TPO Companies and Branches
Use the options in the Company/Branches panel to edit, delete, and import TPO companies from CSV files.
![]() To Edit an Existing TPO Company or Branch
To Edit an Existing TPO Company or Branch
- In the Company/Branches panel, select the organization, and then click the Edit icon.
- In the Company Details window, update the information, and then click Save.
![]() To Delete TPO Companies or Branches
To Delete TPO Companies or Branches
- Select the company or branch, and then click the Delete icon.
![]() To Export TPO Companies and Branches
To Export TPO Companies and Branches
Use the Export icon to save one or more TPO companies or branches to your computer in Excel or CSV format.
- In the Company/Branches panel, click the Third Party Originators folder, and then click the Export icon.
When you select a folder and click the Export icon, the selected organization and all folders below it are exported to an Excel file.
![]() To Import TPO Companies Using the Sample CSV File in Encompass
To Import TPO Companies Using the Sample CSV File in Encompass
You can import one or more companies using a CSV file instead of manually creating the records in Encompass. A sample CSV file is available for you to use as a template for your company information.
The following are mandatory fields for TPO Company imports, as designated by red stars in the Company Details window: Organization Name, Channel Type, Company Legal Name, Address, City, State, Zip, Phone Number, Primary Sales Rep. Name.
- In the Company/Branches panel, click the Third Party Originators folder, and then click the Import icon.
- In the File Selection section, click the or click here to open import template link.
- Enter information in the sample file, making sure that you have information for the mandatory fields, and save as a CSV file.
- In the TPO Organization Import Wizard window, click Browse.
- In the Select File to Import window, locate and select the file, and then click Open.
- In the TPO Organization Import Wizard window, click Next.
- In the Parsing Options window, select the First row contains header information checkbox, and then click Next.
- In the Data Mapping window, if required, click each column header to assign the data to a field, and then click Import.
- Click OK in response to the confirmation message.
![]() To Import TPO Companies Using Your Own CSV File
To Import TPO Companies Using Your Own CSV File
The following are mandatory fields for TPO Company imports, as designated by red stars in the Company Details window: Organization Name, Channel Type, Company Legal Name, Address, City, State, Zip, Phone Number, Primary Sales Rep. Name.
- In the Company/Branches panel, click the Third Party Originators folder, and then click the Import icon.
- In the TPO Organization Import Wizard window, click Browse.
- In the Select File to Import window, locate and select the file, and then click Open.
- In the TPO Organization Import Wizard window, click Next.
- In the Parsing Options window:
- If the first row in your data file contains column headers, select the First row contains header information checkbox to prevent the headers from being imported.
- Click Next.
- In the Data Mapping window, if required, click each column header to assign the data to a field, and then click Import.
- Click OK in response to the confirmation message.
![]() Third Party Originator Contacts
Third Party Originator Contacts
Third Party Originator Contacts for a TPO company are employees of the TPO company with whom your organization conducts business.
Use the Third Party Originator Contacts panel to add and manage contacts for the selected TPO and include information such as their last name, first name, roles, NMLS ID, and status of the ID. New contacts can be created by manually adding individual records or by importing multiple records using a CSV file. You can also export a subset of data for all TPO Contacts from Encompass onto your computer using the options in this panel. Authorized users have the ability to drag contacts between organization folders within the same company.
Contacts cannot be moved between different companies and cannot be deleted from a branch or a company if they are the primary manager for that branch or company. If you attempt to delete the primary manager of a company, a warning message displays, indicating that a new primary manager must be assigned before deleting the contact.
To enable an Encompass TPO Connect user to view their bid tape loans in their Encompass TPO Connect pipeline, a unique external user, First Name - 'BidTapeUser', Last Name - 'DoNotDelete', with an EA/Sales Rep role will be automatically added to the external TPO company used for the bid tape and assigned to the bid tape loans.
This user must not be deleted, otherwise non-admin users will not be able to view the loans in Encompass TPO Connect.
-
If a unique external user already exists for the external TPO company, a new user will not be added.
-
If no unique external user exists, a new TPO Contact Details record will be created.
-
If the bid tape row validation is successful, the unique external user will be assigned to the bid tape loan.
To Create a New Third Party Originator Contact:
- On the menu bar, click Encompass, and then click Settings.
- On the left panel, click External Company Setup, and then click Company Details.
- In the Company/Branches panel, select the TPO company.
- In the Third Party Originator Contacts panel, click the New icon.
The TPO Contact Details page opens with an auto-generated Contact ID assigned to this contact.
- Follow the instructions in the following sections to add or edit contact information. You must enter information in the required fields; for non-required fields, enter information depending on your business requirements.
- Click Save.
- Enter the first name, last name, and email address of your TPO contact.
The Use Company Address checkbox is selected by default and the TPO contact’s address fields are not editable and are automatically populated with the TPO company’s information. To enter a different address, clear the Use Company Address checkbox, and enter the information.
- Enter additional contact information as needed.
- The email address you enter in the Email field will automatically copy to the Login Email field in the TPO WebCenter Setup section.
- In the NMLS ID field, enter the contact’s NMLS license number.
- Select the NMLS Current checkbox if the contact’s NMLS credentials are valid and up-to-date.
![]() Rate Sheet and Lock Information
Rate Sheet and Lock Information
The Use Parent Info checkbox is selected by default, and if the rate sheet and lock information for the associated TPO company is already entered in the TPO Company Details page, the same information is automatically populated here.
- If the TPO contact’s email address and fax number to which the system will send the Rate Sheet and Lock information is different from the TPO company’s contact information, clear the Use Parent Info checkbox.
- Enter contact information as applicable.
Use this section to define the TPO Connect websites that the TPO contact can access and the TPO's login information (such as user ID and password). The Login Email field will already be populated with the contact’s email address if it was already entered in the TPO Contact Information section.
- If the TPO contact’s email address for logging in to the TPO Connect website is different from the email address entered in the TPO Contact Information section, enter the TPO Connect email address.
- If the TPO contact has forgotten their TPO Connect login credentials, in the Password field, click Reset.
- Typically, you will not need to use this during contact creation, but later, when the contact has already started using TPO Connect, and forgotten their password.
- In the message window confirming the temporary password creation, click OK.
- In the message window displaying the temporary password, click OK.
- After creating a contact, in the Welcome Email field, click Preview and Send.
- In the Welcome Email message window, click Send.
- The Sent Date field is automatically updated with the current date and time, and the Sent By field is updated with the first name and last name associated with your Encompass profile.
- From the Site URL 1 dropdown field, select the TPO Connect site that the contact will use to submit loans to your company.
- To add additional websites for this contact to use, click the Add More button and then select the website from the Site URL dropdown list. Repeat this step for each additional website you want to add.
Use the Approval Status panel to indicate the TPO contact’s approval condition with your company. The Current Status dropdown field in this panel has customizable values and can be configured by your Encompass administrator using TPO Settings.
![]() To Update a Contact’s Approval Status
To Update a Contact’s Approval Status
- From the Current Status dropdown list, select the TPO contact’s current status.
- Select the Add to Watchlist checkbox if loans submitted by the contact need to be monitored. This will result in this TPO’s loans having a watchlist warning in the loan header.
- The Current Status Date field automatically populates the current date when you enter the Current Status in step 1. If you want to enter a different date, click the downward arrow at the end of the field, and then in the calendar, click to select a date.
- In the Approval Date field, enter the date the contact was approved by your company.
By default, the primary sales rep assigned to the contact’s company is auto-populated in this section. However, you can assign a different sales rep to the contact as needed.
![]() Assign a Sales Rep to the Contact
Assign a Sales Rep to the Contact
- In the TPO Sales Rep Information panel, click the New icon.
- In the Add Sales Rep window, select a sales rep, and then click OK.
- The TPO Sales Rep Information panel is populated with the selected sales rep’s information.
You must assign a role to the contact to define the contact’s access rights to the TPO Connect site. If you do not assign a role, an alert message displays, indicating that the contact must have at least one role assigned to them.
![]() To Assign a Role to the Contact
To Assign a Role to the Contact
- In the Roles panel, click the New icon.
- In the Add roles for the contact window, select one or more roles, and then click Add.
The following types of roles can be assigned. Multiple contacts can have the same role within a TPO company and multiple roles can be assigned to one contact.
- Manager - This user is the primary contact for the company or branch and is often the broker/owner. Managers may create and manage the user accounts on your TPO Connect website and update the company or branch account information in Encompass. They also have access to all loan files originated under their branch and can set up a user as an Administrator.
- Contacts to whom you assign the Manager role here are displayed for selection in the Manager dropdown list located on the Company Details window's Basic Info tab. The Welcome email will be sent to the manager you select from that dropdown list.
If you intend for this contact to be eligible to be assigned to a loan file so they can perform loan officer or loan processor tasks, you must also assign the Loan Officer or Loan Processor role to the contact as applicable. Contacts with only the Manager role assigned to them will not be listed in the Loan Officer or Loan Processor dropdown lists located on the Loan Details page (Loan Summary tab) on your TPO Connect website and therefore will not be eligible to be assigned to the loan file by another loan team member.
- Administrator - An administrator can be assigned to maintain the day-to-day set up of the company's contacts.
- A company can have multiple administrator contacts.
- Administrators may view, edit and create contacts, originate and edit loans, and view or edit loans created by other contacts in their company.
If you intend for this contact to be eligible to be assigned to a loan file so they can perform loan officer or loan processor tasks, you must also assign the Loan Officer or Loan Processor role to the contact as applicable. Contacts with only the Administrator role assigned to them will not be listed in the Loan Officer or Loan Processor dropdown lists located on the Loan Details page (Loan Summary tab) on your TPO Connect website and therefore will not be eligible to be assigned to the loan file by another loan team member.
- Loan Officer - Loan officers can edit only their contact information. They may create loans and edit loans where they are the assigned loan officer.
- Loan Processor - Loan processors can edit only their contact information. They may edit loans where they are the assigned loan processor or they may edit loans created by other contacts in their company. (Loan access is determined by the Access to loans when the role is Loan Processor setting on the Loan Settings page in TPO Connect Administration.)
- To delete a role, select the role in the Roles panel, click the Delete icon, and in the confirmation window, click Yes.
When you create a TPO contact whose role includes loan officer responsibilities, you can specify the states in which the contact is licensed to originate loans.
![]() To Specify TPO Contact Licensing
To Specify TPO Contact Licensing
- In the Licenses panel, select the Active checkboxes for the states in which the loan officer is licensed to originate loans.
- Use the Deselect All or Select All buttons to clear or select all the checkboxes.
- To specify a license number, click to highlight a state, and then type the license number in the License Number field.
- To specify an expiration date for the license, click to highlight a state, and then in the End Date field, enter the expiration date (MM/DD/YYYY).
Use the Notes panel to enter additional information about the contact.