Updates and Enhancements for Encompass (Web Version) - 24.3 Major Release
This section discusses the updates and enhancements to existing forms, features, services, or settings that are provided in this release.
Encompass Pipeline
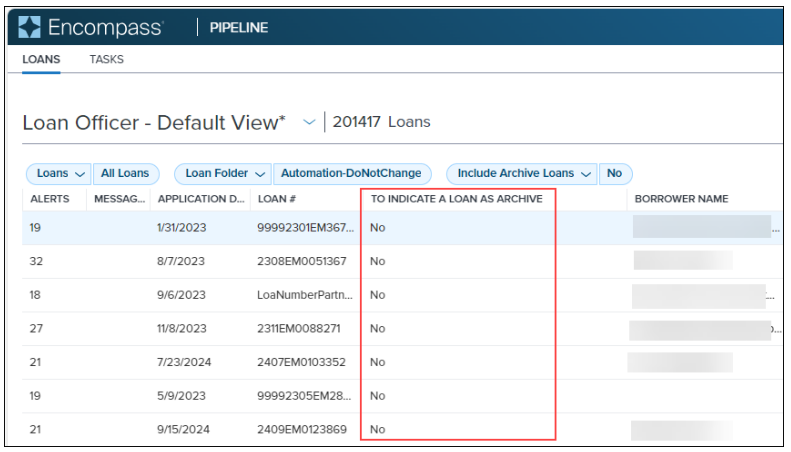
To enable users to view the current loan-level archival status in the Pipeline, Reports, and Dashboards, field 5016 (loan-level archival status) can now be added to these areas in Encompass. Users can then determine which loans are currently archived and which are not at a glance.
For example, to add a column to a Pipeline view to display the status of field 5016, right-click a column header, and then select To indicate a loan as Archive. The resulting column then indicates Yes for loans that are archived or No for loans that are not archived.
For users who already included the To indicate a loan as Archive column in their Pipeline, Reports, or Dashboard in previous versions of Encompass it is important to note the following:
-
Field 5016 was previously included in the Encompass Reporting Database. However, in Encompass 24.3, field 5016 is not available in the Encompass Reporting Database (unless you had added it to your list of Selected Fields in the database in a previous version of Encompass).
-
If you want to continue to include the To indicate a loan as Archive column in the Pipeline, Reports, or Dashboard after upgrading to Encompass 24.3, you must remove field 5016 from the database (i.e., remove it from the list of Selected Fields in the Reporting Database) after upgrading to Encompass 24.3. Only after removing field 5016 from the database should you then add the new To indicate a loan as Archive column to the Pipeline, Reports, or Dashboard.
-
When you remove field 5016 from the database, the historical loan-level data previously stored in the Audit Trail tool for this field will also be removed. If you do not want to lose this data stored in the Audit Trail tool, then do not remove field 5016 from the database. This ensures your historical data in field 5016 will continue to be retained and audited, but the To indicate a loan as Archive column in the Pipeline may contain inaccurate or stale archive status data.
-
DO NOT remove the previous To indicate a loan as Archive column from the Pipeline, Reports, or Dashboard directly, as this may result in Encompass application errors. Removing field 5016 from the database will automatically remove the previous To indicate a loan as Archive column from the Pipeline, Reports, or Dashboard.
-
DO NOT add the new To indicate a loan as Archive column to the Pipeline, Reports, or Dashboard before removing field 5016 from the database. If you add the column beforehand you will see two To indicate a loan as Archive columns with conflicting data.
Currently the sort option for this column does not sort the data as expected. This functionality will be updated in a future release.
Encompass Forms & Tools
New Fields in Encompass
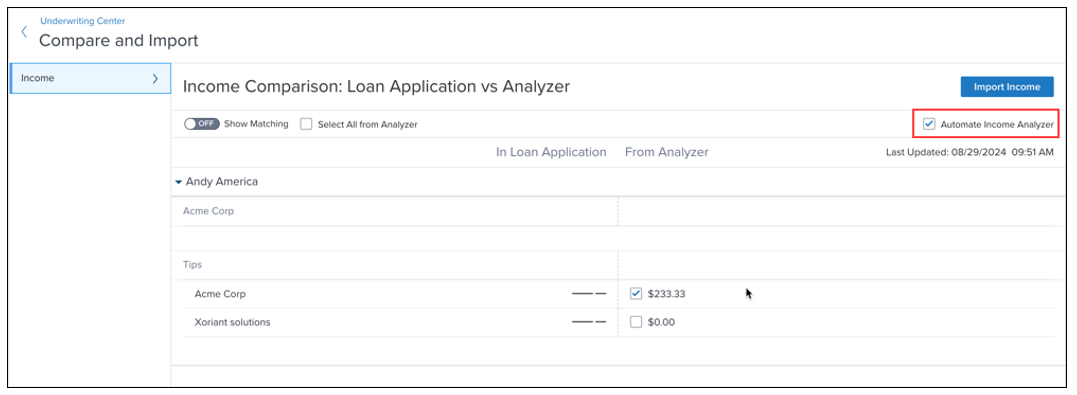
A new Automate Analyzer Income checkbox (ANALYZER.X18) is now provided on the Compare and Import tool which automates the Income Analyzer data write-back in Encompass and allows business rules to control activation and deactivation of automation. By clearing the field, you can opt out of the automation at the loan level. When selected, the income data from the Income Analyzer is automatically imported into the Verification of Employment input form in the loan file the next time the Income Analyzer runs moving forward.
The Automate Analyzer Income checkbox is not selected by default. When a user does select the checkbox, the automation does not immediately run the automated income import. The automation triggers the next time the user visits the page after saving their selection. To import the latest income analyzer right away, select the Import Income button.
This automation only triggers when there are changes to the loan data in the Income Analyzer or a new document is uploaded.
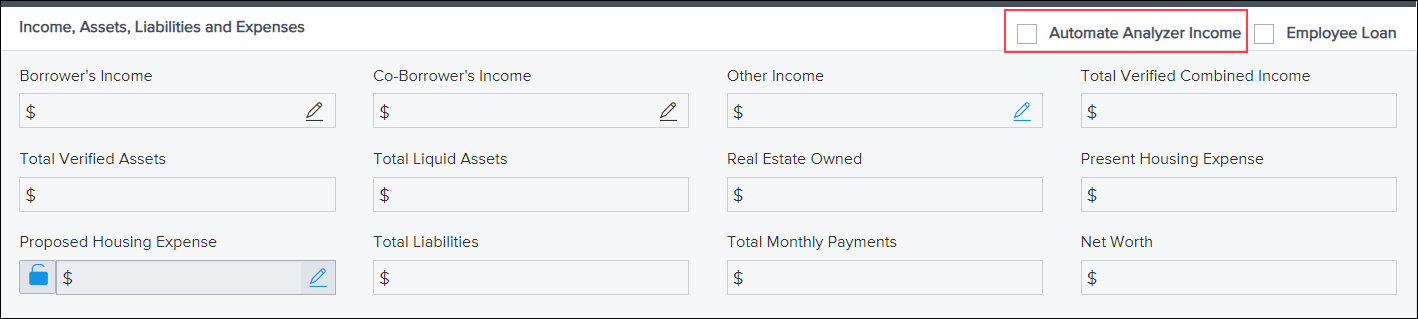
This checkbox is also provided in the Income, Assets, Liabilities and Expenses section of the Borrower Summary – Origination and Borrower Summary – Processing input forms.
In addition, a new Status of Document Validation for all Analyzers field (ANALYZER.X17) to capture the status of the data analysis is now provided. This field is needed for the system to determine when the Income Analyzer has completed analyzing the document and can then import the data into the loan if the Automate Analyzer Income option is selected. Users can utilize this new field to understand when the next income automation import has occurred. This status field is not visible on any forms or tools in Encompass. It is in the Encompass Reporting Database and may be added to custom input forms.
CBIZ-60951, ENCW-98172, ENCW-102994, ENCW-108466
In preparation for the integration of Audit Analyzers in Encompass (currently targeted to be available in Encompass in 2025), the following new fields have been added to store data for the analyzer that can then be added to the loan when the user is ready:
-
Correspondent Loan Purpose Type (CORRESPONDENT.X560) - Data for field 19.
-
Correspondent Loan Amortization Term Months (CORRESPONDENT.X561) - Data for field 4.
-
Correspondent Loan Amortization Type (CORRESPONDENT.X562) - Data for field 608.
-
Correspondent Loan Maturity Date (CORRESPONDENT.X563) - Data for field 78.
-
Correspondent GSE Refinance Purpose Type (CORRESPONDENT.X564) - Data for field 299.
These fields are not currently visible on any forms or tools in Encompass. They are in the Encompass Reporting Database and may be added to custom input forms.
In addition, the following new editable loan-level fields have been added to enable users to track Mortgage Analyzer data for Asset, Audit, AUS, Credit, Document Validation, and Income analyzers:
-
Income Analyzer Eligible (ANALYZER.X1)
-
Income Analyzer Exceptions (ANALYZER.X2)
-
Income Analyzer Status (ANALYZER.X3)
-
Credit Analyzer Eligible (ANALYZER.X4)
-
Credit Analyzer Exceptions (ANALYZER.X5)
-
Credit Analyzer Status (ANALYZER.X6)
-
Asset Analyzer Eligible (ANALYZER.X7)
-
Asset Analyzer Exceptions (ANALYZER.X8)
-
Asset Analyzer Status (ANALYZER.X9)
-
AUS Analyzer Eligible (ANALYZER.X10)
-
AUS Analyzer Exceptions (ANALYZER.X11)
-
AUS Analyzer Status (ANALYZER.X12)
-
Audit Analyzer Eligible (ANALYZER.X13)
-
Audit Analyzer Exceptions (ANALYZER.X14)
-
Audit Analyzer Status (ANALYZER.X15)
-
Doc Validation Analyzer Exceptions (ANALYZER.X16)
These fields are not currently visible on any forms or tools in Encompass. They are in the Encompass Reporting Database and may be added to custom input forms.
CBIZ-59513, CBIZ-60673
In preparation for enhanced functionality in Mortgage Analyzers in Encompass (targeted for 2025), the following new expiration date fields have been added to the Encompass Reporting Database. These fields will provide users with document expiration dates for loans based off the information provided to the Mortgage Analyzers. The analyzer will use extracted dates, compile those dates, and then send back the oldest document expiration date to set the document expiration date for a file.
Documents reviewed will include paystubs, bank statements, credit reports, and other documents used for the loan decision making process.
These date fields will be compiled by the Mortgage Analyzers and sent back to the Encompass database.
-
Credit Expiration Date (ANALYZER.X19)
-
Income Expiration Date (ANALYZER.X20)
-
Asset Expiration Date (ANALYZER.X21)
-
Collateral Expiration Date (ANALYZER.X22)
-
Overall Expiration Date (ANALYZER.X23)
-
Income Analyzer Document Processing Status (ANALYZER.X24)
-
Credit Analyzer Document Processing Status (ANALYZER.X25)
-
Asset Analyzer Document Processing Status (ANALYZER.X26)
-
Business Association Exception Count (ANALYZER.X27)
These fields are not currently visible on input forms, but they are in the Encompass Reporting Database and may be added to custom input forms.
CBIZ-59937, CBIZ-61015
Two new virtual fields are now available to facilitate passing the Last Completed Milestone name from Encompass to Mortgage Analyzers:
-
Log.MS.LastCompletedName
-
Log.MS.StageName
With the addition of these fields, the Last Completed Milestone value for loans is reflected in the loan data when using the Mortgage Analyzers integrated with Encompass to analyze the loan data. These fields are not visible on Encompass input forms, but they are available in the Encompass Reporting Database.
CBIZ-62600
Two new Exclude Unmarried Addendum checkboxes have been added to the Application View > Borrower Information input form to give users an option to suppress the URLA-Unmarried Addendum form from disclosure packages.
-
Exclude Unmarried Addendum [Borrower] (5036)
-
Exclude Unmarried Addendum [Co-Borrower] (5037)
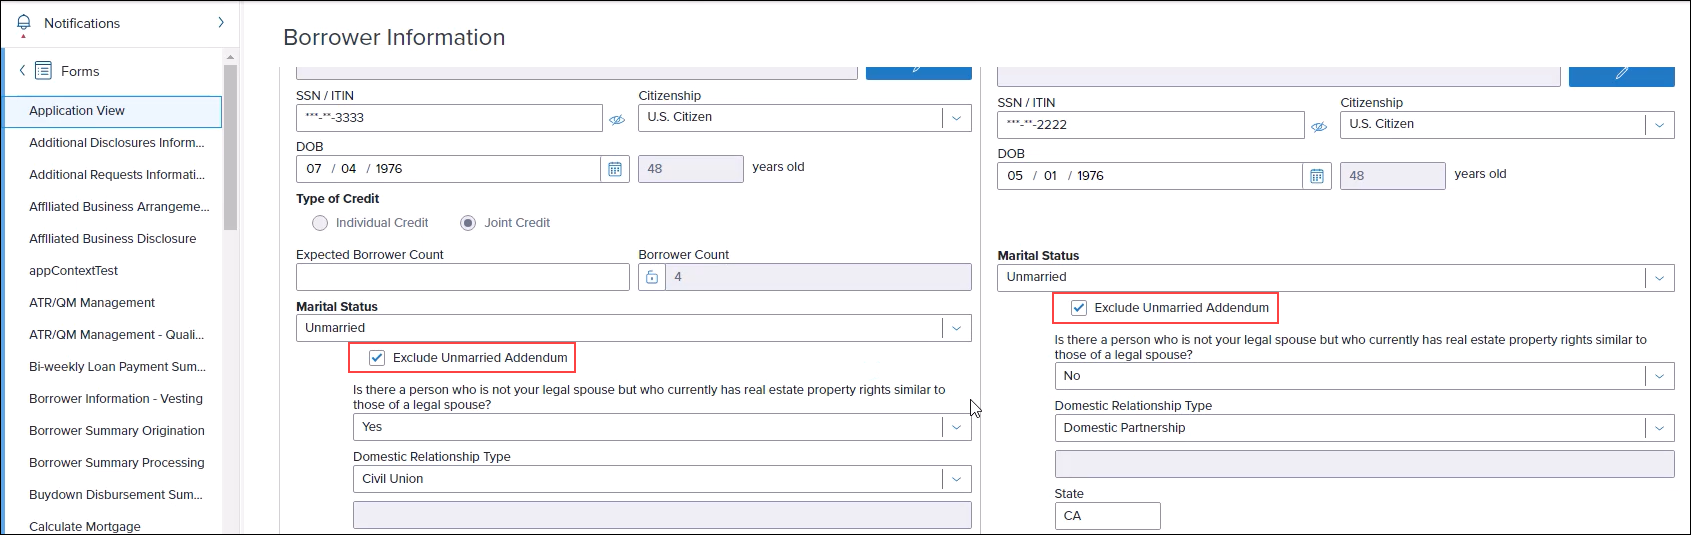
Note that the checkbox displays on the input form only when the Marital Status dropdown field for the borrower (52) and or co-borrower (84) is set to Unmarried.
A new standard borrower-pair level field, Credit Report First Issued Date (5040), has been added to the Encompass Reporting Database. The purpose of this field is to capture the credit report first issued date. Administrators can then write a business rule for this field that triggers when the report is expiring. Users can then re-order the credit report if necessary.
This field is not provided on any Encompass input forms or tools but can be added to custom input forms.
CBIZ-61692
To accommodate Fannie Mae's recent change in policy for the Affidavit of Affixture (GMANARDU/GMANARLU), a new checkbox field has been added to the Property Information screen: Subject Property was previously converted to Real Property (5039).
Select this checkbox to confirm if the subject property was previously converted to real property when the subject property is a manufactured home. Fannie Mae will no longer require the Affidavit of Affixture form if the manufactured home was previously converted to real property.
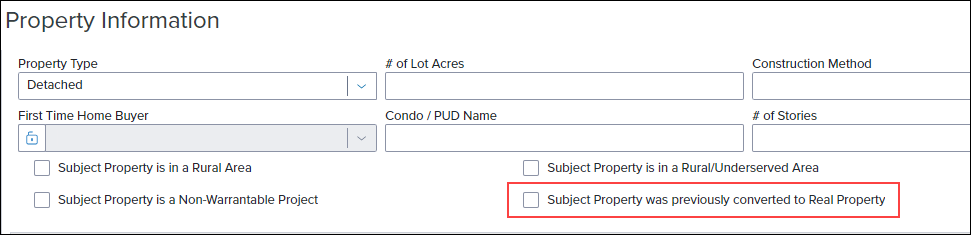
If this checkbox is not selected, the Affidavit of Affixture will be included in the package when the subject property is a manufactured home. If the checkbox is selected, the Affidavit of Affixture will not be included in the package when the subject property is a manufactured home.
ENCW-110902
When managing a first mortgage with a new HELOC loan on a property that is financed by another lender (not a piggyback or linked loan), the maximum qualifying monthly payment for DTI is now populated to the proposed estimated monthly mortgage payments in addition to the first mortgage (229) and the proposed monthly second mortgage payment (1725).
A new Monthly Qualifying Payment (URLARAL0034) field has been added to the VOAL (Verification of Additional Loans) input form to capture the qualifying payment to be used for qualifying purposes for the DTI (debt-to-income ratio).
-
For a HELOC linked loan, this field is deactivated (grayed-out). The payment amount from the HELOC Qualifying Payment field (5025) in the linked loan is automatically populated here.
-
For a linked loan that is not a HELOC loan, or any loan financed by another lender, this field is activated by default and users can add the qualifying payment manually.
-
The calculation logic for the first mortgage P&I (1724), second mortgage P&I (1725), negative cash flow (462), positive cash flow (1169), net monthly rental income (URLA.X81), and the borrower’s gross income from rental properties (106) have been updated to use the new Monthly Qualifying Payment (URLARAL0034) if it has a value greater than 0 for VOALs. If the value is blank or 0, Monthly Principal and Interest (URLARAL0118) is used for VOALs.
-
An additional new field has been added to facilitate the HELOC Qualifying Payment (5025) value populating to the web version of Encompass: LinkedHelocQualifyingPaymentAmount (LINK_5025). This field is not provided on any input forms or tools in the desktop version of Encompass but is available in the Encompass Reporting Database.
CBIZ-38484, CBIZ-47615
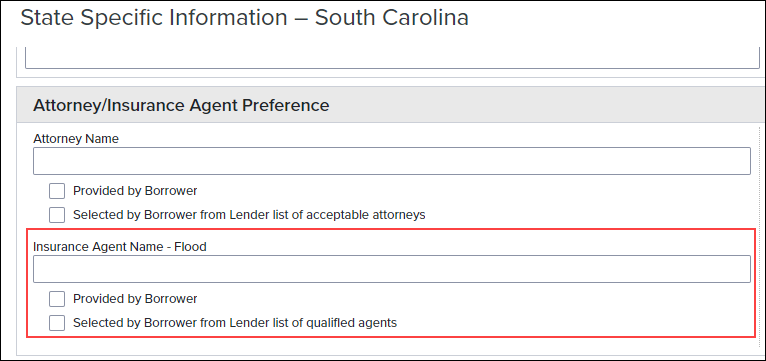
New fields are now provided on the South Carolina State Specific Information input form where the name of the Flood Insurance agent can be added, along with checkboxes to indicate if the agent was an existing agent provided by the borrower or if the agent was selected by the borrower from a list of agents. These fields are being added to enable lenders to add a flood insurance agent as an additional agent to the form so that the Attorney/Insurance Agent Preference Disclosure is compliant with Attorney-Insurance Preference Requirement SC SECTION 37-10-102(a).
-
Insurance Agent Name - Flood (DISCLOSURE.X1219)
-
Provided by Borrower/Selected by Borrower from Lender list of qualified agents (DISCLOSURE.X1220)
ENCW-108047
A new checkbox field (5026) for Minnesota (MN) Statutes 47.59.12 is now available on the Important Terms and Agreement Language tab on the HELOC Management input form. Use this field to indicate that the loan is not subject to these MN statutes. When this checkbox is selected, the following language will be omitted from the Home Equity Line of Credit Agreement printed output form:
If this box is checked, you have been assessed finance charges, or points, which are not included in the annual percentage rate. These charges may be refunded, in whole or in part, if you do not use your line of credit or if you repay your line of credit early. These charges increase the cost of your credit.
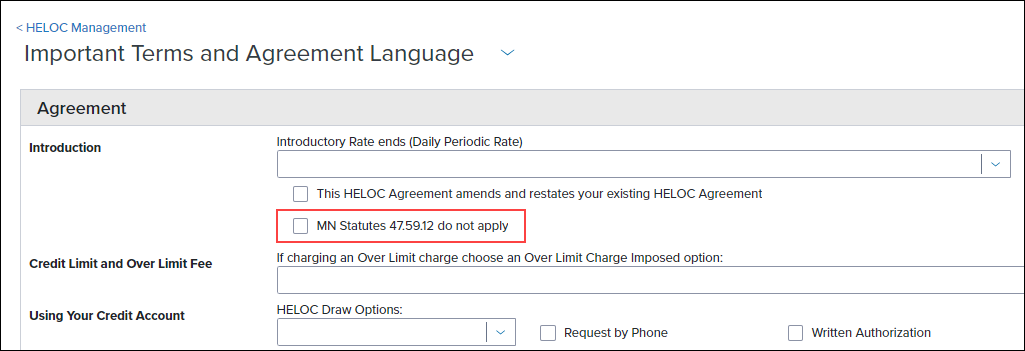
This field always displays on this input form. It is not dependent on the Subject Property State (14) being Minnesota.
Please note, by design this language will also be omitted from the Home Equity Line of Credit Agreement printed output form if the Mortgage Lien Type (420) = First Lien AND the Loan Amount (2) is greater than $100,000. Please refer to KA 000035999 for additional details.
CBIZ-53093, ENCW-105984
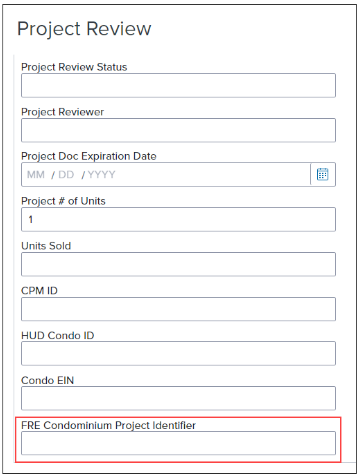
A new FRE Condominium Project Identifier field (CASASRN.X221) is now provided on the Project Review tool to enable users to enter the CPI (Condominium Project Identifier) number that can be submitted to Freddie Mac’s Loan Product Advisor (LPA) to assess the condominium’s liability.
A new (read only) Float Updated on field (5035) has been added to the Lock Request Form input tool to provide users with a way to view the float date and determine if a float rate lock has been requested.
-
This field will be updated by your selected product and pricing provider but is not required.
-
This field will not be cleared after the lock request is submitted or confirmed.
In addition, a new Lot Owned Free and Clear checkbox (5038) has been added to the Lock Request Form. By default, this field is deactivated (grayed-out). It is activated when the Refinance (Owned) checkbox (4255) on the Lock Request Form is selected.
Note that when the Lot Owned Free and Clear checkbox (5015) on the 1003 URLA Part 4 input form is selected, the new Lot Owned Free and Clear checkbox is automatically selected too.
The following updates have been made to the Loan Snapshot and the Lock Request Snapshot on the Secondary Lock Tool.
-
The Lot Owned Free and Clear checkbox has been added to the loan snapshot (field ID 5015) and lock request snapshot (field ID 5038). By default, the checkbox is deactivated.
![]()
-
When field ID 5015 is updated, field ID 5038 is updated. However, if field ID 5038 is updated, field ID 5015 is not updated.
-
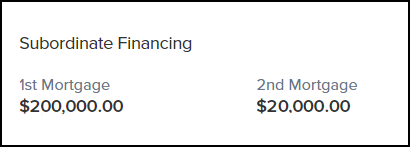
The Subordinate Financing section on the lock request snapshot has been updated to display two read-only 1st mortgage (field ID 3035) and 2nd mortgage (field ID 3036) fields (formerly a button).
-
A Loan Type field has been added to the Basic Loan Information section of the lock request snapshot.

-
An HCLTV field has been added to the section directly above the Lock Request Additional Fields section of the lock request snapshot.

SEC-28601, SEC-27707, SEC-27728
The following updates have been implemented on the Fee Itemization input form to clearly identify all transfer tax line items:
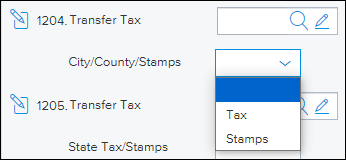
Line items 1204 and 1205
The labels for line items 1204 and 1205 have both been changed to Transfer Tax.
![]()
New lines with drop-down lists have been added below line items 1204 and 1205:
-
The drop-down list for line 1204 is labeled City/County/Stamps.
-
The drop-down list for line 1205 is labeled State Tax/Stamps.
-
Three options are available on each of the drop-down lists: Taxes, Stamps, and a blank value. The fields are populated with a blank value by default.
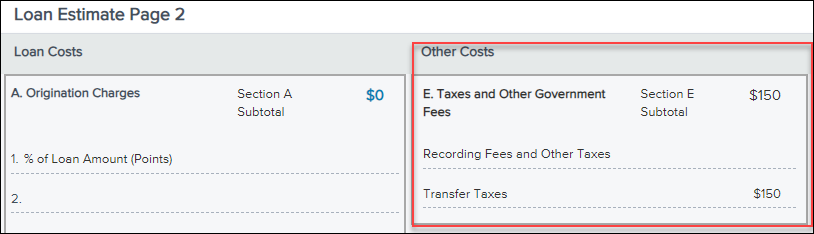
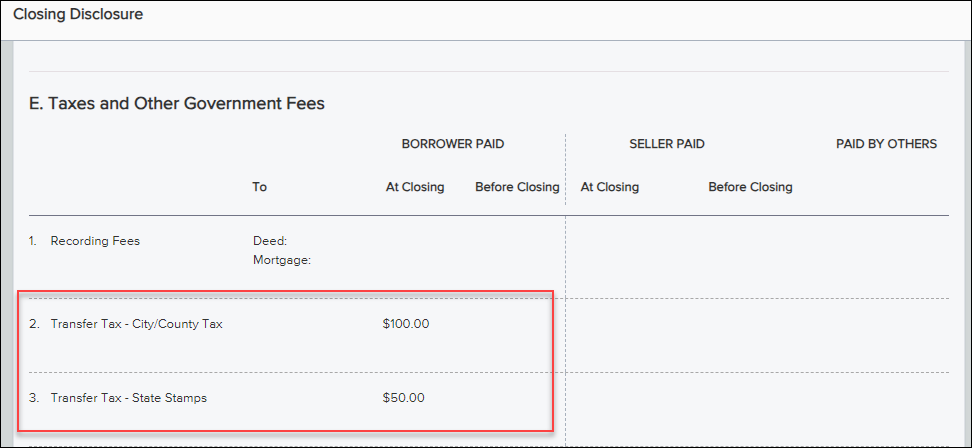
Loan Estimate Page 2 and Closing Disclosure Page 2
The Loan Estimate Page 2 and Closing Disclosure Page 2 reflect the selections made in the new drop-down lists.

Electronic Document Management (EDM)
Encompass now supports Partner Document Delivery for users requesting documents from or sending disclosures and documents to consumers via a partner point-of-sale application. For lenders who have integrated and enabled point-of-sale vendors with their Encompass instance, they can select that partner within the Request/Send, Disclosures, and Pre-Closing workflows available within the new eFolder in the web version of Encompass and the documents will be delivered to recipients through the vendor instead of the default Encompass point-of-sale portal- Encompass Consumer Connect.
Typical use cases:
-
User wants to generate a disclosure package to be sent to their clients by their point-of-sale partner.
-
User wants to send an additional document (i.e., copy of an appraisal or other attachment in eFolder) or disclosure for review or signature utilizing their point-of-sale partner.
-
User wants to send a preliminary Closing Disclosure through the Pre-Closing workflow to borrowers by their point-of-sale partner.
Prerequisites:
There are no changes required to the Docs Setup settings (eDisclosure Packages, eDisclosure Plan Codes, etc.) to send/request disclosures to partners. However, the point-of-sale vendor integration must be configured and enabled in Encompass Partner Connect. Partners will have the following request types set up with Encompass Partner Connect for the workflows they will support:
-
Disclosures Document Delivery
-
Pre-Closing Document Delivery
-
Generic Document Delivery (Request/Send workflow)
Refer to the Partner Documents Delivery topic in the Encompass Partner Connect Developer Hub for more information about completing this integration.
Example: Disclosures Document Delivery
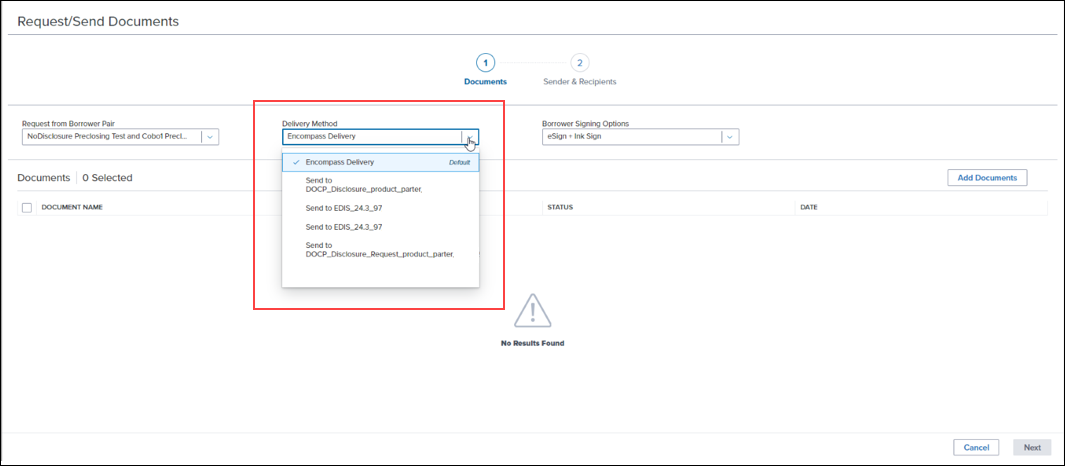
In the eFolder, select the Disclosures button.
.png)
On the Send Disclosures screen, select the integrated partner from the Delivery Method dropdown list, and then click Next.

Address any required issues returned from the loan audit, and then select Next.
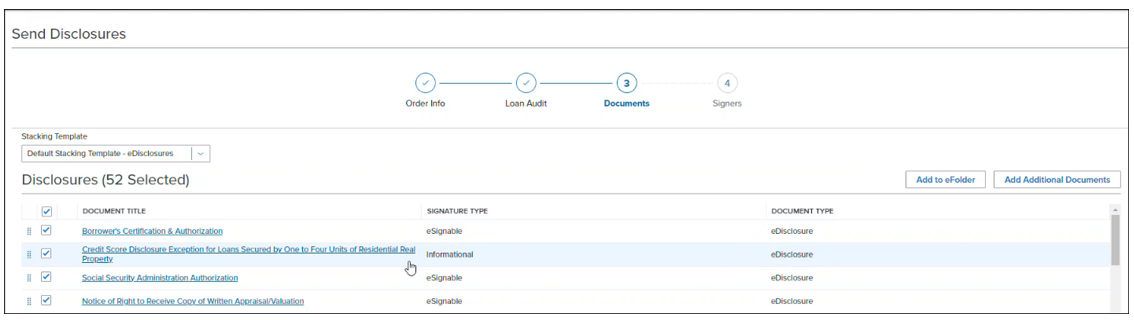
Then, select the disclosures to include in the package, and then select Next.
Finally, review the signers, and then click the Send to Partners button. Notice that since you are sending the disclosure package to a partner (and not to the borrower) the option to indicate the type of signing options that the borrower must use for the documents are not included in this workflow.
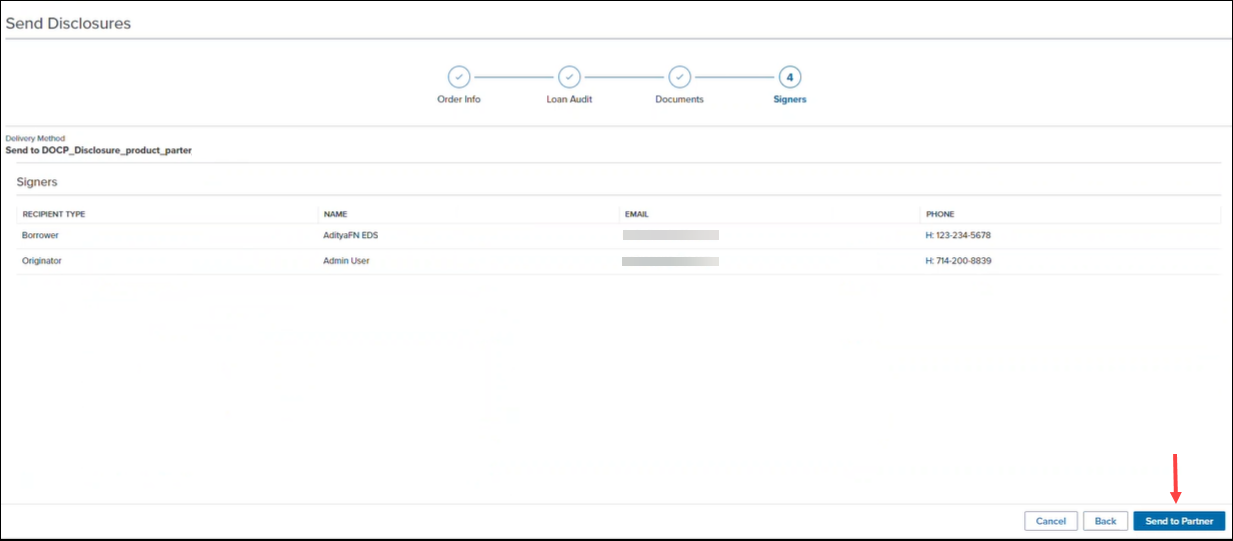
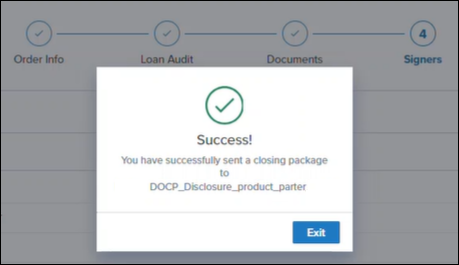
The disclosures package is then sent to the partner.
Similar workflows are provided when sending Pre-Closing documents and for generic document delivery using the Request/Send workflow. Refer to the eFolder online help for more information.
When sending documents through the Send to Third Party or Send to Partner workflows, the option to choose documents from a document stacking template and the option to select one or more documents to add to the eFolder are now available. These options are provided on the Closing Documents screen as you proceed through the Send to Third Party or Send to Partner workflows.
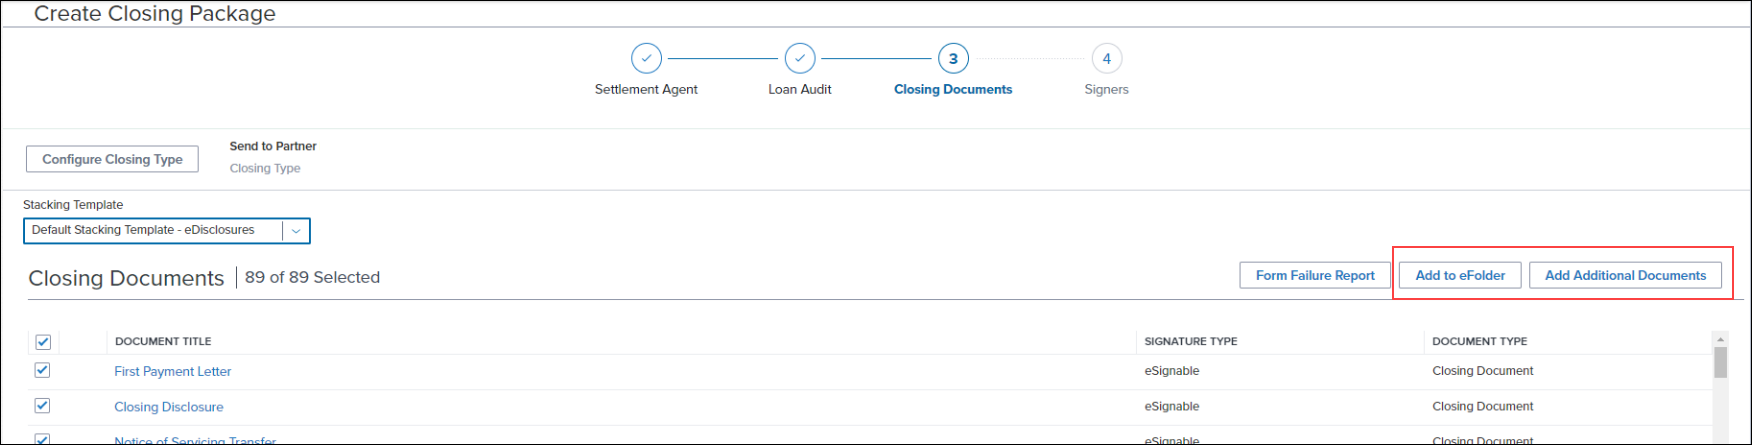
DOCP-64055
Updates to the eFolder
The following updates have been made to the eFolder user experience.
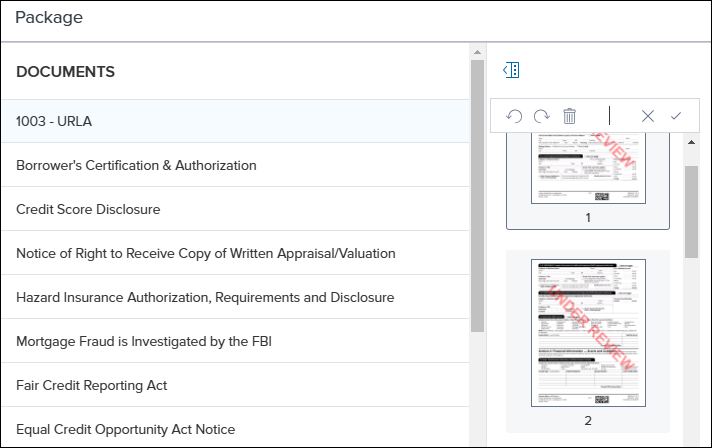
When using the eFolder side-by-side view, users can now select multiple files in different document folders. The first file selected is displayed in the document viewer panel. Files that are subsequently selected are then listed as thumbnails in the document viewer panel. Select a thumbnail to view the file in full view.
To select multiple files you can also use your keyboard to Shift+select a range of files and Ctrl+select to select specific files for Windows machines. You may also use Shift+select and Command+select on Mac computers.
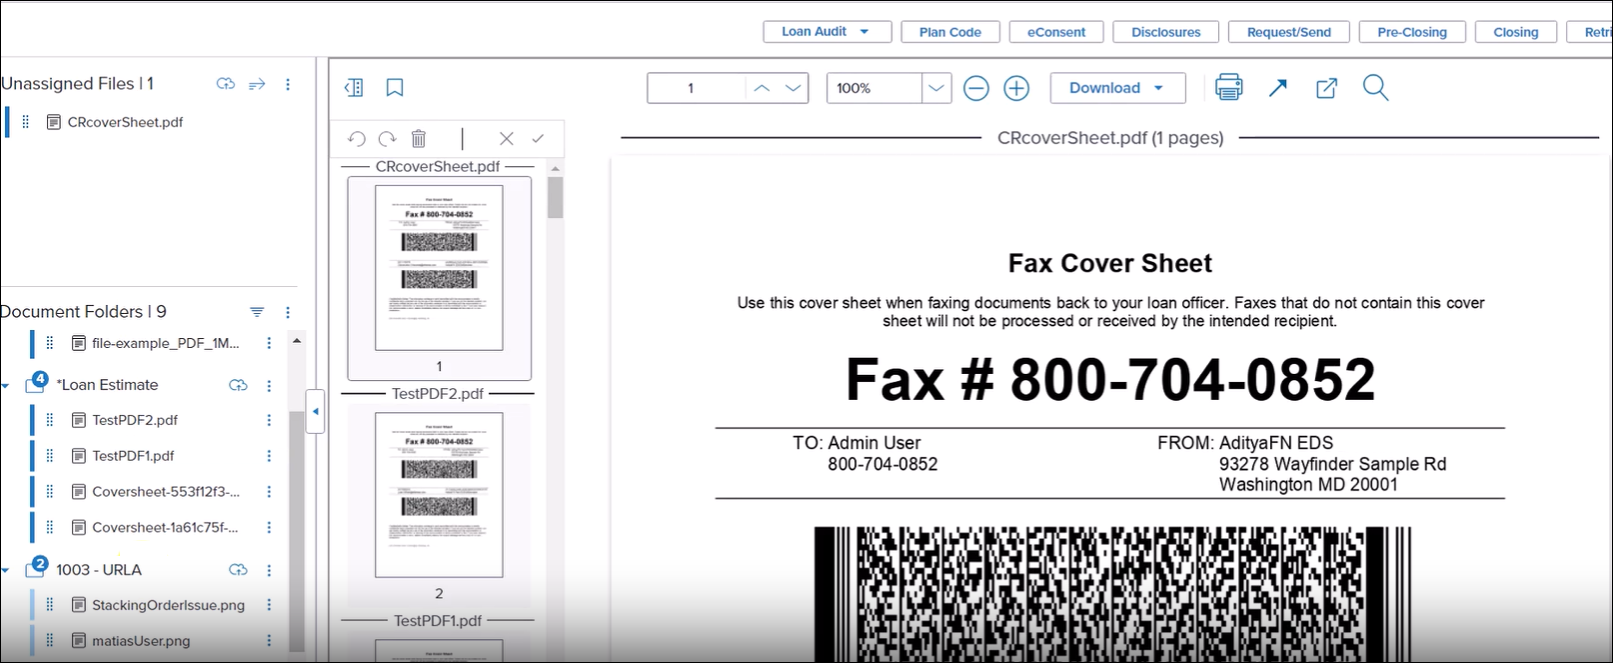
Remember, you can also use the Pop Out Window option to view the selected files in a separate tab or monitor.

After selecting the document folders or the attachment(s) within a folder, and then clicking the Request/Send button, the selected folders and attachments are automatically added to the Documents list on the Request/Send Documents screen. This enhancement saves users from having to click the Add Documents button to add these items. If additional documents need to be added, then click the Add Documents button to add those items.
Please note that selecting an attachment will add a copy of the attachment to the document package. Selecting the document folder generates and attaches a new Encompass Form or Needed document to the package. (In the desktop version of Encompass, these two actions are performed with two different workflows: by clicking the Request button and by clicking the Send Files button. In the web version of Encompass, the Request/Send workflow can perform both of these actions.) In addition, only attachments with the Current Version indicator turned On are added to the document package.
DOCP-65387
When managing the attachments (i.e., files) in a document folder, users can now select the individual attachment to view and it will display in the document view panel. For example, when you select a file and then press Shift on your keyboard and select a different file, all of the files in between are selected. Then, when you select just one file, only that file is selected. (Previously, all of the selected files would remain selected.) In addition, after using Shift+select to select a range of files, when you press Ctrl on your keyboard and then select a file in the range, that one file is no longer selected.
DOCP-66632
With multiple files selected in the left panel when using the eFolder side-by-side view, users can now select the Document Training option from the Document Folders panel. (Previously, this option was deactivated unless only one file was selected.) After clicking Ok at the prompt, the selected files are sent to document training.

DOCP-65058
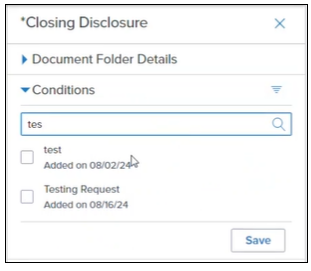
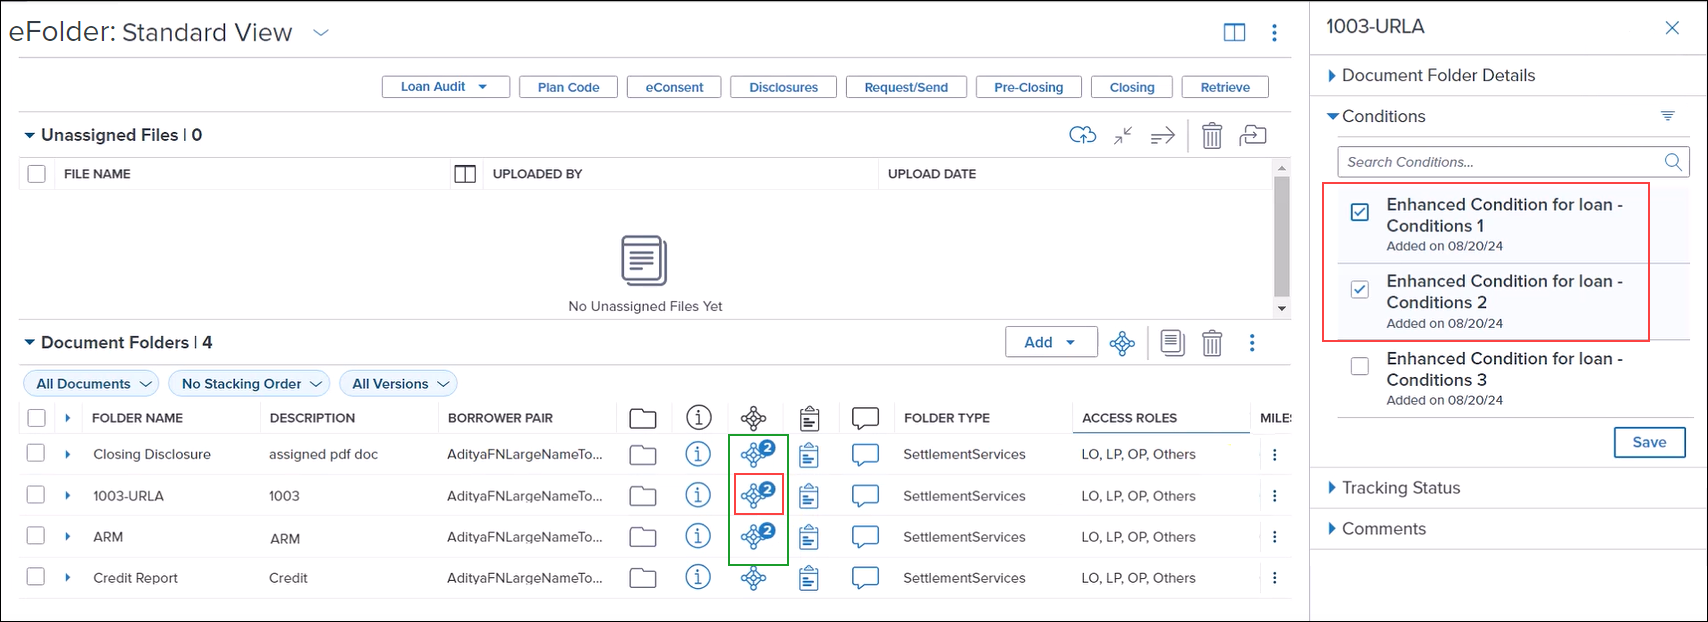
When viewing conditions in the eFolder for a loan, users can now sort the conditions based on filter status in the right slide-out panel. This new filter displays the statuses for all available conditions in the loan. Users can then select a status in the list and the conditions matching the selected status are then displayed on the Conditions panel. (Condition statuses are defined by the administrator using the Encompass Settings > eFolder Setup > Enhanced Conditions setting. In the Enhanced Conditions setting, custom statuses may be created for an enhanced condition when managing the Tracking Options.)
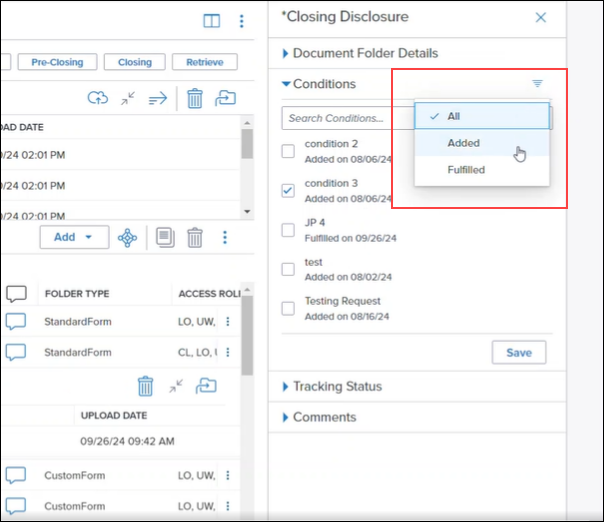
In addition, a new Search Conditions field is now provided to help users search for specific conditions.
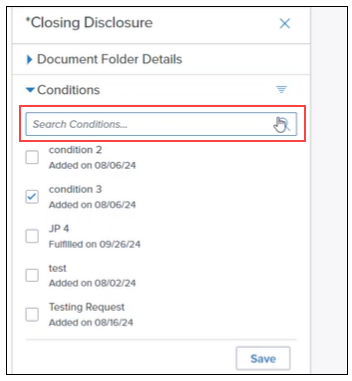
Type the name of the condition in the field. As you type, condition names that do not match the characters you are typing in the field are hidden in the list, thus narrowing the list down to only those that match the search term.
DOCP-67232, DOCP-66837
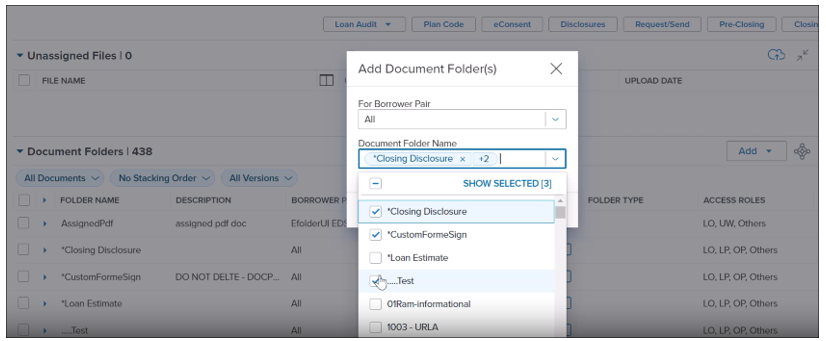
When using the Add > Blank Document Folder option in the Document Folders section of the eFolder, users can now select more than one folder to add. Using the checkboxes provided, select the folders to add from the Document Folder Name dropdown list. You may also manually type the name of a brand new document folder (or folders) to add in the Document Folder Name field.
DOCP-64271
When moving a file to a document folder, users can now create and add a new document folder. After clicking the Move to Folder icon, type the name of the new folder in the Move to Folder window’s search field. Then click the Add folder button at the top of the window.
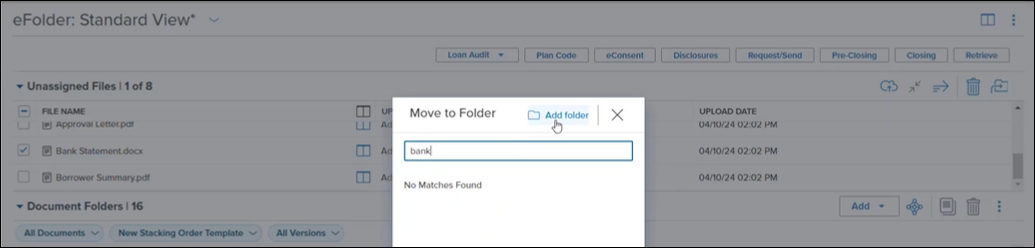
Once you add the folder, you can add the new folder to the Document Folder Name list. Type the name of the newly added folder in the Document Folder Name field, and then select it from the list.
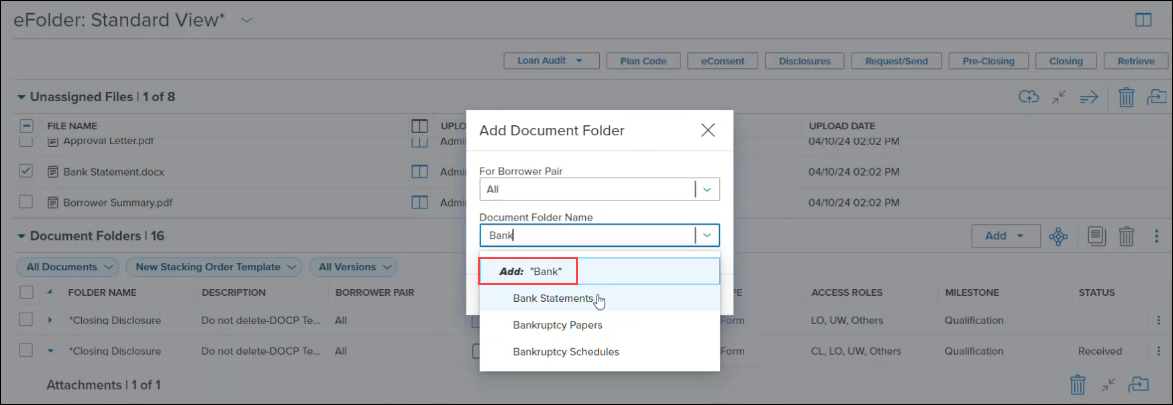
Once added, you can then select the new folder from the list and move the file to that new folder. Or you can elect to select an existing folder from the list and add the file to that document folder.

DOCP-64215
In the eFolder side-by-side view, users can now pin document folders. When a folder is pinned, it is moved to the top of the Document Folders panel in the new Pinned Folders section, where it can then be easily found accessed without having to search through the entire list of document folders. (The remaining unpinned folders are displayed based on the filter criteria (document group, stacking template, and current version.)
To pin a folder, select the menu icon next to the folder, and then select Pin Folder.
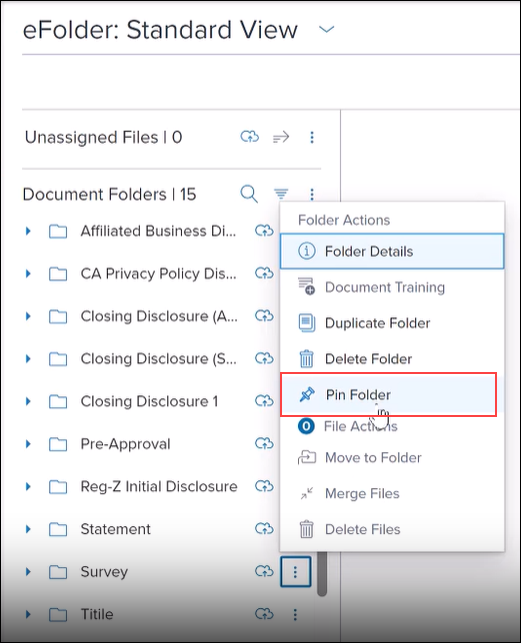
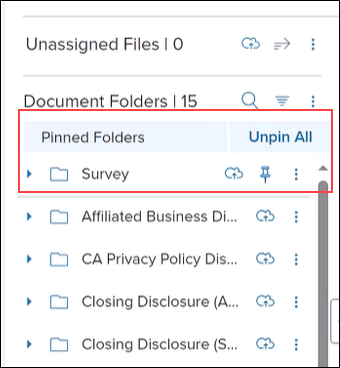
To un-pin the folder, select the Pin icon.
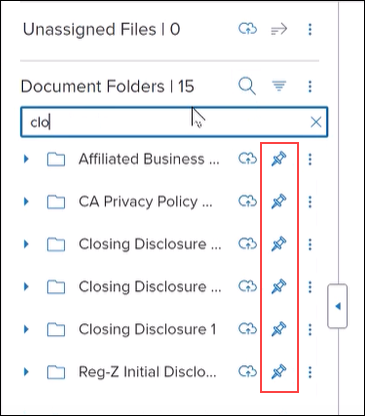
When searching for document folders, you can also pin the folders that match your search criteria. Click the Pin icon for the folder to pin.
DOCP-65994
In the eFolder you can elect to move files to a document folder. After clicking the Move to Folder icon, the Move to Folder panel displays. The document folders are listed in alphabetical order by default and the user can select the folder to move the file to. When a Document Stacking Order is applied to the document folders, the Move to Folder list now lists the folders in the order determined by the Document Stacking Order instead of alphabetically.
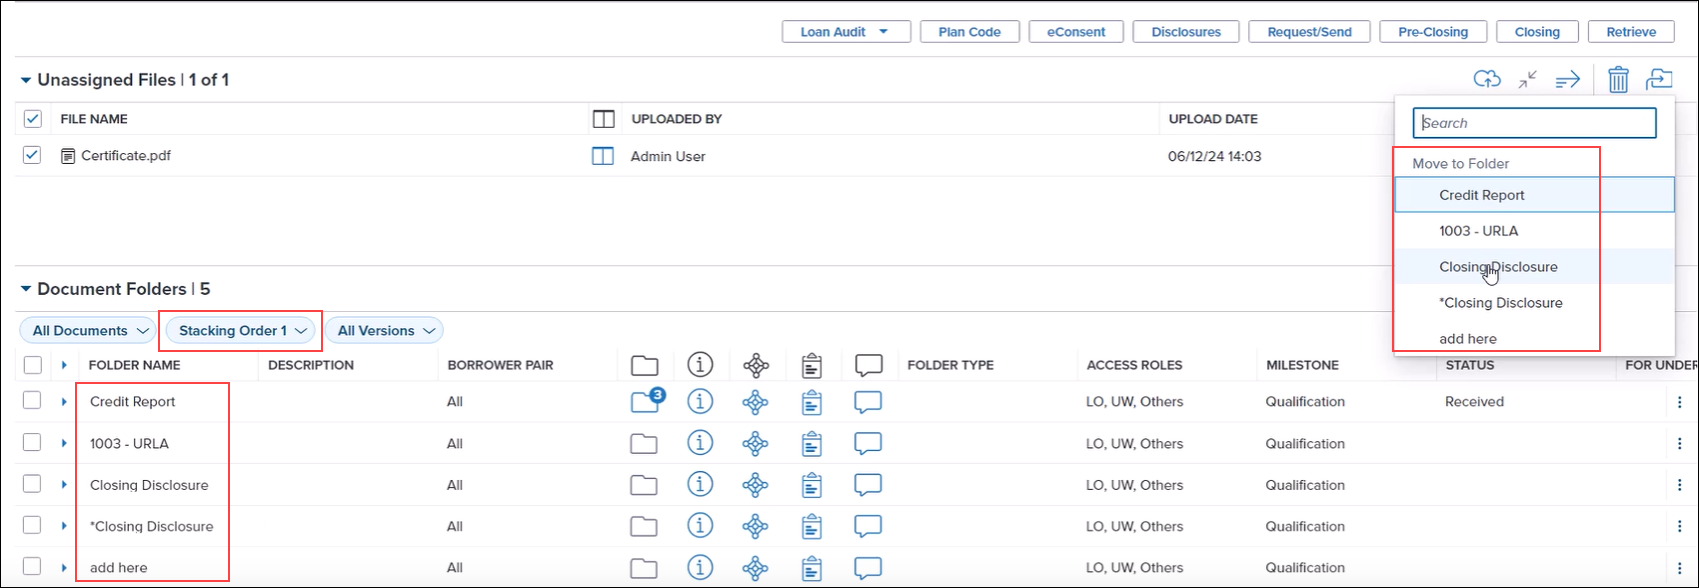
DOCP-64240
When viewing the History screen in the eFolder, the number of document folders, attachments in document folders, and conditions are now displayed with the associated folder in the left panel of the History screen. Here is an example of the number of attachments in document folders displayed in the blue bubbles:
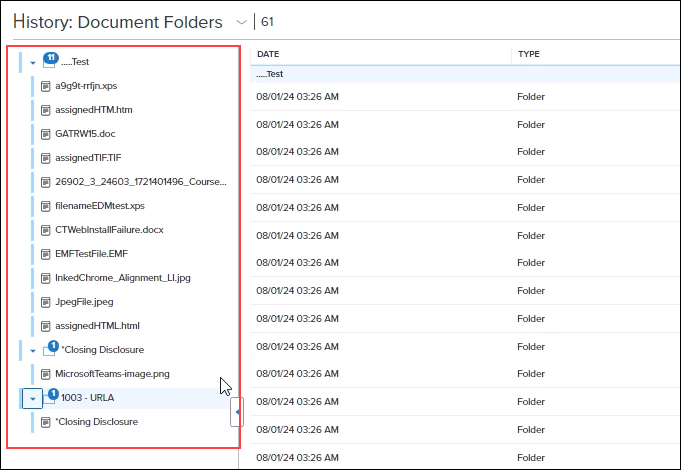
DOCP-65860
In the eFolder landing view, user can now search for document folders and then select multiple loan folders to display in the list based on the search criteria. Type the search data in the Folder Name column header search field, and then select the desired folders. Only the selected folders will then display in the Document Folders section in the eFolder.
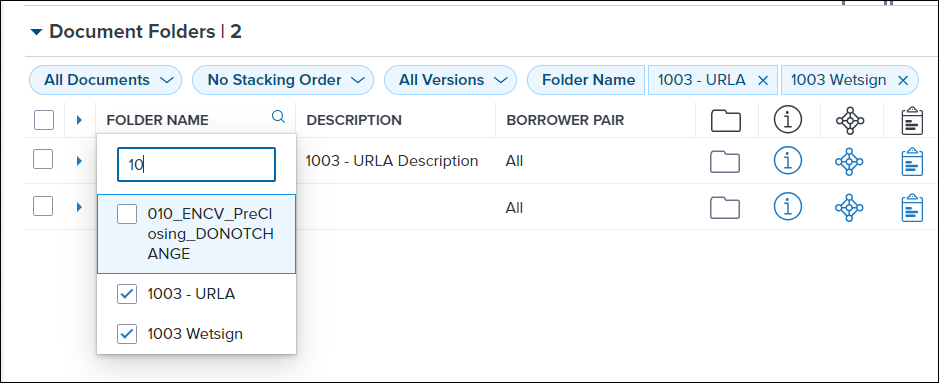
DOCP-65977
Users can now re-size the width of the columns on the eFolder History screen. Hover your mouse pointer over the right side of the column header, and when the curser turns to a vertical bar, move the pointer to the left or right to decrease or increase the width of the column.
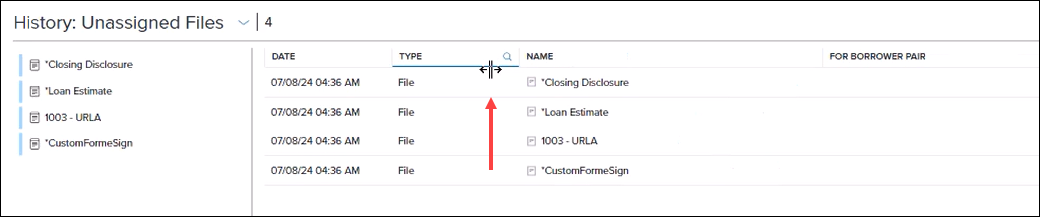
DOCP-65060
Certain columns in the Document Folders section were typically not returning data and were not providing value for eFolder users. These columns are no longer available to add to the Document Folders section when using the Customize Columns feature to add or remove columns:
-
Updated
-
External
-
Closing Doc
-
eDisclosure
-
Size
-
Underwriting Condition
Note that these columns were not displayed by default in the Document Folders section, but they were previously available to add.
DOCP-67231, DOCP-66844
In the eFolder side-by-side view, the Document Folders filters are now displayed in a slide-out panel that. In addition, users can now search in each column for specific data.
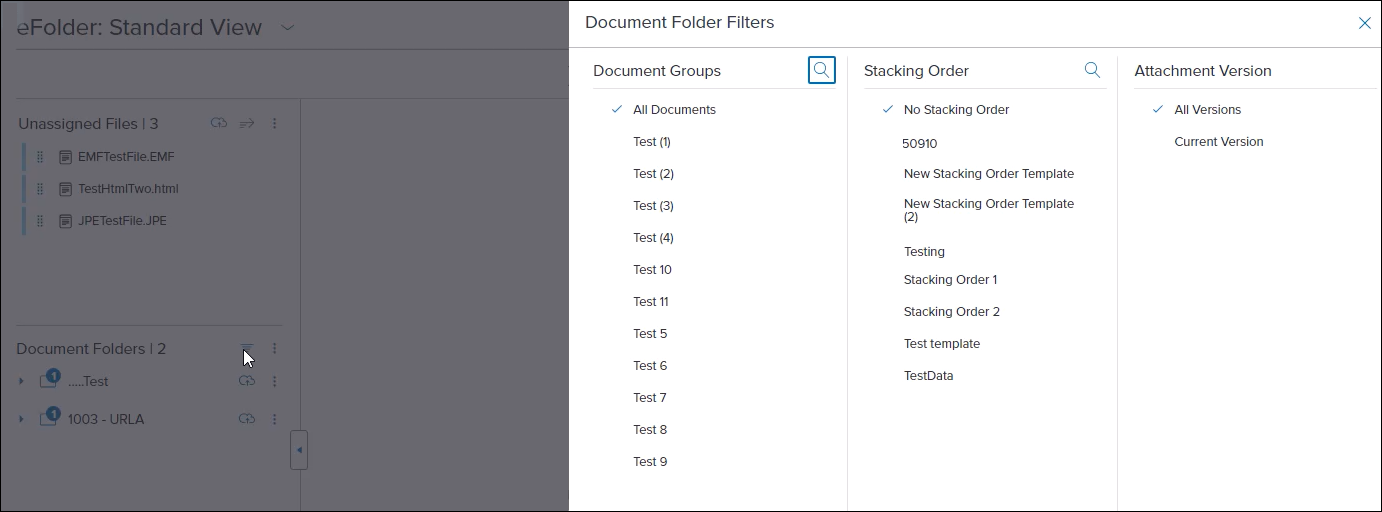
DOCP-66842
When switching between the landing and side-by-side views (or vice versa) the filters established in a view (document groups, document stacking orders, file attachments, selected files, and document folder filters and file selections) now persists in both views.
In addition, the number of documents attached to a condition now displays on the conditions icon in the eFolder landing view.
DOCP-66192, DOCP-66845
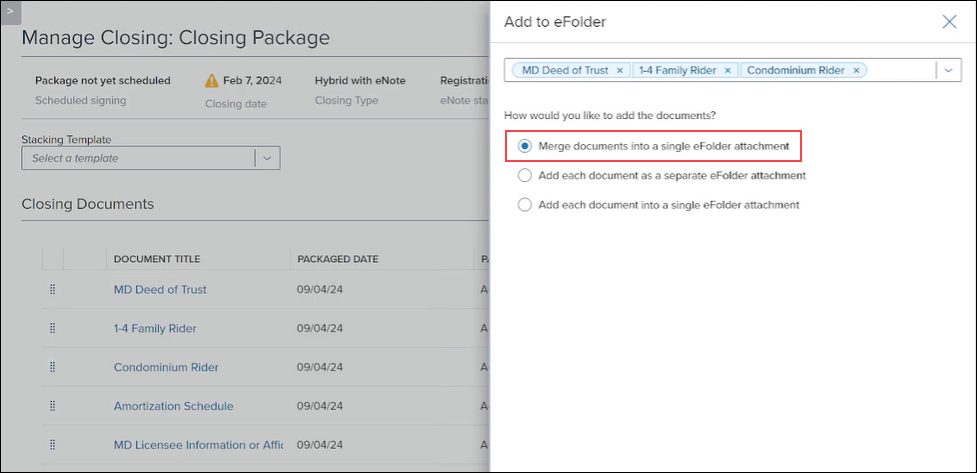
When clicking the Add to eFolder button on the Manage Closing Screen when using the Encompass eClose workflow, a new option- Merge documents into a single eFolder attachment - is now provided with the other two existing options (Add each document into a single eFolder attachment and Add each document as a separate eFolder attachment. These labels were modified slightly in Encompass 24.3, but the functionality of these options remains the same as in previous versions.)
After selecting the documents to add, and then selecting the new Merge documents into a single eFolder option, the selected documents are merged into a single PDF file that is then placed in one Document container.
DOCP-66525
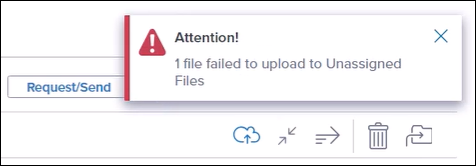
When users attempt to add an encrypted or password-protected file (PDF) to the eFolder, an error message is now triggered to alert the user that these types of files are not supported.
DOCP-65547
Administrators can now set up Persona Access to Fields and Persona Access to Loan Actions business rules in the desktop version of Encompass to manage access and permissions for the eDisclosures, Closing, and Audit buttons in the eFolder.
Using the field IDs provided below, administrators can elect to hide or deactivate the button based on the user’s persona.
-
eDisclosures button: BUTTON_EDISCLOSURES
-
Closing button: BUTTON_REGZ-TILECLOSE
-
Audit button: BUTTON_REGZ-TILAUDIT

DOCP-63527
Encompass Settings
The following updates have been made for Personas settings that are applied to the File Contacts tool.
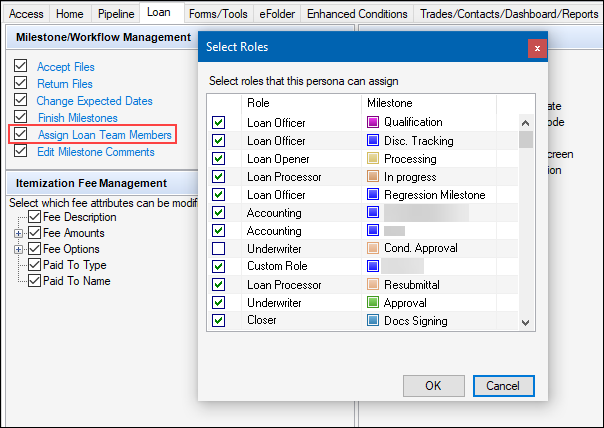
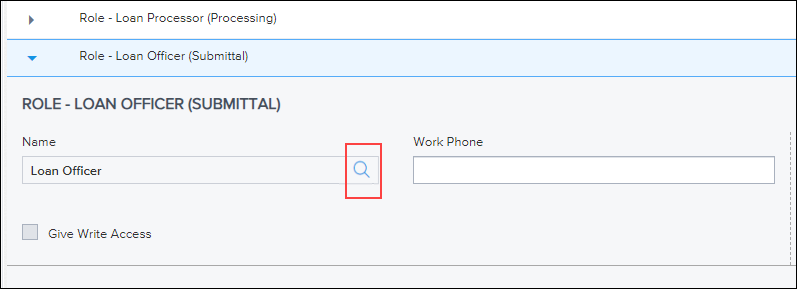
In the Encompass Settings > Company/User Setup > Personas setting in the desktop version of Encompass, administrators can use the Assign Loan Team Members option on the Loan tab to determine if the selected persona can assign a specific role (or roles) to a loan team member in the loan. The way this personas setting is enforced is now in parity with the desktop version of Encompass:
-
In the File Contacts tool, when viewing a milestone role (like a Loan Officer, Loan Processor, and Loan Opener), regardless of the permissions configured in the Personas settings for Assign Loan Team Members, the Name field is always read-only and there is no Lookup icon (magnifying glass) provided for a user to search for a loan team member to assign to a role. The name can only be populated through a Milestone Worksheet. Previously, a Lookup icon was provided in the Name field for milestone roles.
Encompass 24.3

Previous version of Encompass
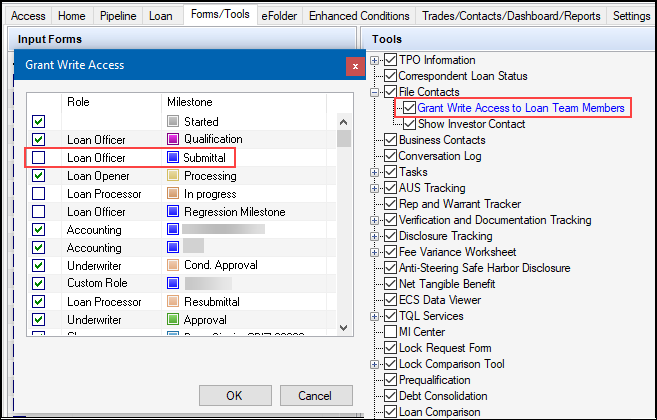
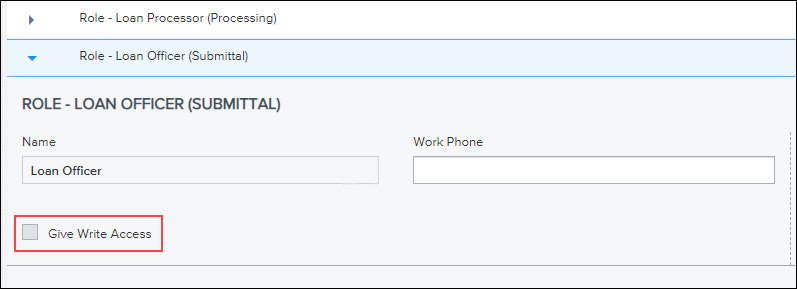
In the Encompass Settings > Company/User Setup > Personas setting in the desktop version of Encompass, administrators can use the Grant Write Access to Loan Team Members option on the Forms/Tools tab to determine if the persona has permission to select the Grant Write Access checkbox for a role on the File Contacts tool. However, there was an issue in the web version of Encompass where these permissions were not being applied correctly. If the persona did not have the required permission to grant write access to a role, the Grant Write Access checkbox was inactive (grayed-out) as expected when they viewed the contact in the tool, but after adding a loan team member to the contact in the tool, the Grant Write Access checkbox was then activated and the user could select this checkbox. This issue has been resolved and the persona settings for Grant Write Access to Loan Team Members are retained and enforced correctly.
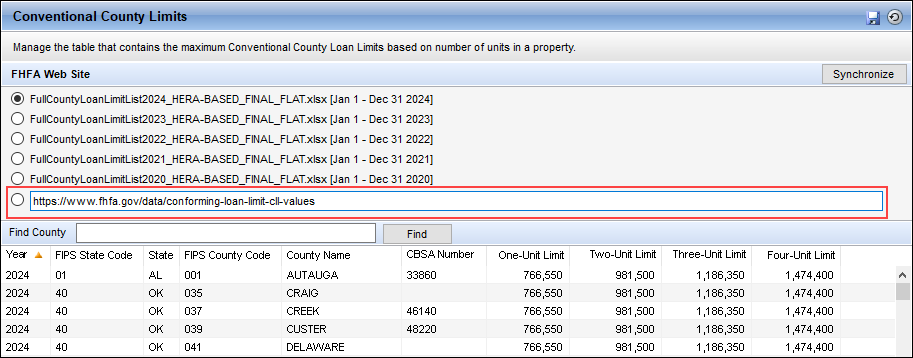
In the Conventional County Limits setting, a new URL field is now provided that defaults to the FHFA’s current Conforming Loan Limit Values download site: https://www.fhfa.gov/data/conforming-loan-limit-cll-values. Select this option to synchronize the Conventional County Limits table in Encompass with the most current FHFA data.
Administrators can manually override the default URL provided and enter a new URL as needed. For example, if the FHFA changes the URL for their download site, the updated URL could be manually entered in this field and enable you to continue to access the most recent FHFA data.
Encompass User Experience
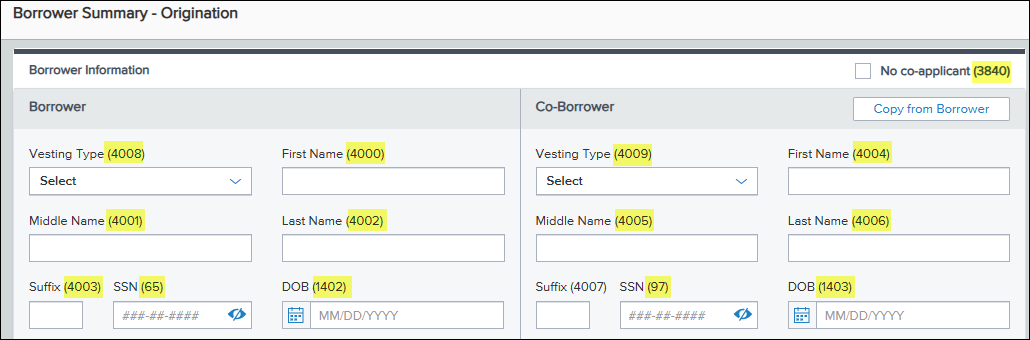
A new option has been added to enable users to view field IDs on loan forms and tools. Once the Show All Field IDs option is enabled, the field ID for a field is listed in parenthesis next to the field name. The field IDs continue to show as the user moves between forms or tools on the loan file.
To show the field IDs, open a loan file, select the  Menu, and then select Show All Field IDs. The field IDs for the current form are then displayed.
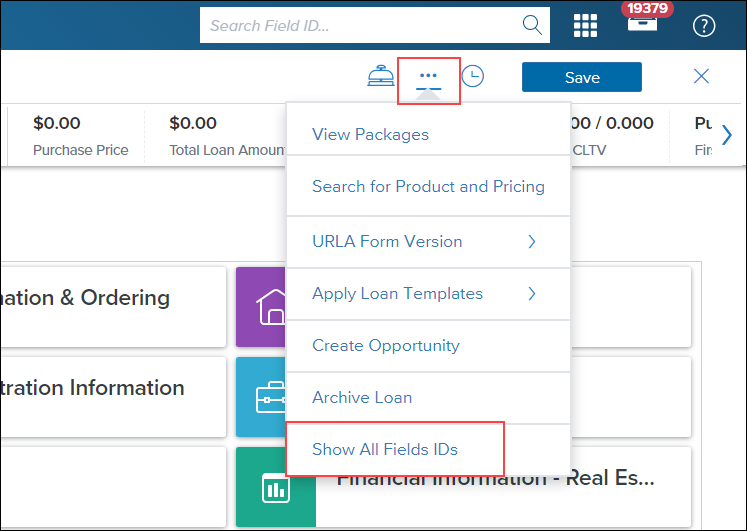
Example of Field IDs after Show All Field IDs is Selected
When the Show All Field IDs option is being used in a loan, and then you close the loan and open a different loan file, the field IDs will not be shown on the forms or tools. When you move to a different loan, you must select the Show All Field IDs option again to show the field IDs in that loan.
To hide the field IDs, open a loan file, select the Menu, and then select Hide All Field IDs. The field IDs are no longer shown on the form or tool.
ENCW-105684
Updates to ULDD/PDD Input Form
New fields have been added to the ULDD/PDD input form for Phase 5 updates:
Fannie Mae tab:
-
CPM Certification Identifier (ULDD.FNM.X1)
-
CPM Phase Identifier (ULDD.FNM.X2)
-
MERS Registration Status Type (ULDD.X215)
-
MI Premium Plan Type (ULDD.X216)
-
MI Interest Rate Adjustment Percent (ULDD.X217)
-
Deeds Restriction Term Months Count (ULDD.FNM.X3)
-
Lender Target Funding Date (ULDD.FNM.X4)
-
Wire Instruction Reference Identifier (ULDD.FNM.X5)
-
Government Bond Finance Indicator (ULDD.FNM.X6)
Freddie Mac tab:
-
MERS Registration Status Type (ULDD.X215)
-
CPA Project Assessment Request Identifier (ULDD.FRE.X1)
-
CPA Project Waiver Request Identifier (ULDD.FRE.X2)
-
MI Premium Plan Type (ULDD.X216)
-
MI Interest Rate Adjustment Percent (ULDD.X217)
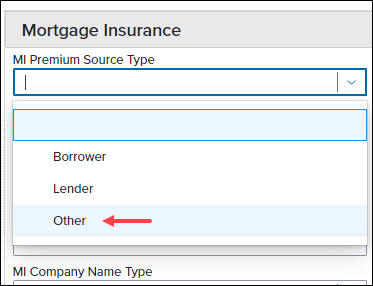
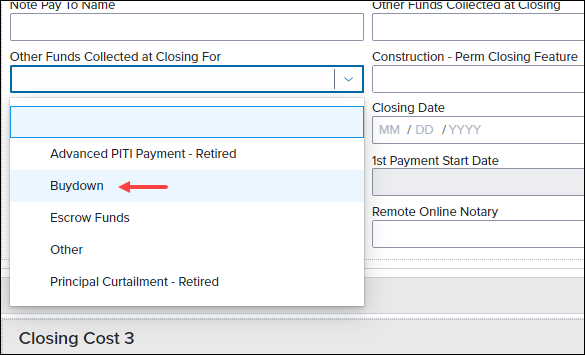
In addition, new enumerations that can be selected from the following dropdown fields have been added to the following fields. (These are not new fields.):
On the Fannie Mae tab, a new Other enumeration was added to the Mortgage Insurance Premium Source Type field (ULDD.X49).
On the Freddie Mac tab, a new Buydown enumeration was added to the Other Funds collected at Closing for field (ULDD.X111).
ENCW- 110299
New borrower-level fields for Counseling Format and Counsel Type have been added to the Fannie Mae and Freddie Mac tabs of the ULDD/PDD input form.
-
Borrower Counseling Format (ULDD.X207)
-
Borrower Counseling Format Other Description (ULDD.X209)
-
Co-Borrower Counseling Format (ULDD.X208)
-
Co-Borrower Counseling Format Other Description (ULDD.X210)
-
Borrower Counsel Type (ULDD.X211)
-
Borrower Counsel Type Other Description (ULDD.X213)
-
Co-Borrower Counsel Type (ULDD.X212)
-
Co-Borrower Counsel Type Other Description (ULDD.X214)
As part of this update, the loan-level Counseling Format fields (ULDD.X24, ULDD.X25) and Counsel Type fields (2847, ULDD.X152) previously provided on this form were removed.
ENCW-106118
The Validate button has been removed from the Fannie Mae, Freddie Mac, and Ginnie Mae tabs on the ULDD/PDD input form. The button provided outdated functionality that was no longer valid for these tabs.
ENCW-99812
The Self-Employed checkboxes for the borrower (FE0115) and co-borrower (FE0215) that were provided on the Fannie Mae and Freddie Mac tabs on the ULDD/PDD input form have been removed. These were removed to address an issue with the checkboxes not always reflecting the value that was exported to the GSEs. The checkboxes were only reflecting if the first VOE on the loan was for a self-employed record or not, while the GSE export reflects the self-employed records indicated in all of the VOEs on the loan. These checkboxes are still provided on the Employment & Income screen and Verification of Employment (VOE) where they have been provided in previous versions of Encompass.
Please note that since the 2020 URLA forms and features were introduced in Encompass in 2019, all employment verification information, including self-employment data, is captured on the VOE. (See sample screen below.) This data from the VOE is the employment data that Encompass uses when exporting loans to Fannie Mae or Freddie Mac in the required ULDD format. Therefore, the Self-Employed checkboxes on the ULDD/PDD input form were no longer needed.
ENCW-105982
GSE Integrations
For more GSE Integrations and Services 24.3 updates, see the GSE Release Notes.
Lenders can now configure Automated Service Ordering and Workflow Rules to send UCD information automatically to Freddie Mac’s Loan Closing Advisor or Fannie Mae’s UCD Collection Solution:
-
Order History: ASO UCD Order displayed on Order History UI for both Freddie Mac Loan Closing Advisor and Fannie Mae UCD Collection Solution
-
Disclosure Tracking Tool: Loan data snapshot record in Disclosure Tracking Tool now available for both Freddie Mac Loan Closing Advisor and Fannie Mae UCD Collection Solution
-
Rep and Warrant Tracker Tool: Updated with last UCD ordered
The following VA Loan Review Tool updates are included in this release:
-
Default Document Type: For subsequent submission in VA Loan Review; Default Document type is now LR Deficiency
-
Updated Verbiage in Submission Status Page:
-
VA Description update when Status = Success
-
Column name updated from LIN Number to LIN
-
The following Rep and Warrant Tracking Tool updates are included in this release:
-
Freddie Mac LPA:
-
Logic update for field IDs FEI0327 & FEI0328
-
Support for Mission Index
-
Verification of Employment logic update
-
Mapping update for Message Codes FEI0224 and FE10226 to only parse to the Income Verification Section
-
Collateral Offerings mapping update
-
LPA Choice: Upon each LPA response for a loan, if message codes are returned, they will be parsed and written back to (new) field ID TQL.X282
-
-
Fannie Mae UCD Collection Solution:
-
Field ID MORNET.X96 parsing logic update
-
Support for Child Support and Alimony Income Verifications
-
-
Fannie Mae DU and DO:
-
DU/DO Recommendation: The DU Recommendation field has been renamed to DU/DO Recommendation as the tool now also captures the Recommendation value returned from DO. Fannie Mae Rep and Warrant tracker logic is now applied to both DU and DO orders, and the existing Fannie Mae fields are now populated with values returned from DO responses when applicable
-
Support for "Conditional" Rep & Warrants
-
-
Fannie Mae DU: Support for Mission Score and Partial Rep & Warrants
Encompass has been updated to support the latest Freddie Mac LPA 5.4 Spec requirements:
-
Lender credits sent to LPA are now sent as closing adjustments instead of purchase credits.
-
The Preferred Language section of the SCIF Form is only required to be sent to the GSEs if the borrower provides a language preference or has selected "I do not wish to respond". Encompass has been updated for this requirement and default values are no longer sent if these areas in the form are left blank. This applies to Conventional, FHA, and VA loans.
-
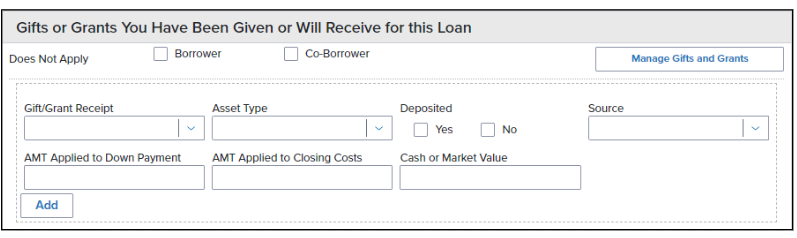
New fields have been added to help FHFA identify how much of a gift/grant is being used towards the down payment and/or closing costs. Freddie Mac created a new attribute to capture this information- lpa:GiftGrantClosingCostAmount- and the two fields- Amount Applied to Down Payment (URLARGG0023) and Amount Applied to Closing Costs (URLARGG0024) were added to capture this information.
-
Freddie Mac now supports a new enumeration, NonOriginatingLender, for the FundsSourceTypeOtherDescription. Encompass now provides the Non-Originating Lender (FRE) option to select from the Source field (URLARGG0119) on the Verification of Gifts and Grants form to capture this information.
-
Freddie Mac now supports a new data point: lpaCondominiumProjectIdentifier. Encompass has been updated to send the value in the FRE Condominium Project Identifier field (CASASRN.X221) to this attribute when submitted to LPA (when the Project type (URLA.X205) is Condominium and not a Cooperative (URLA.X205).
-
A new ClosingAgent (FRE) enumeration has been added in the Source fields (4667, 4668, 4669, 4670) on the 1003 URLA Lender and 2015 Itemization input forms to help ensure the Closing Agent is exported to LPA (and sent to the PurchaseCreditSourceTypeOtherDescription attribute).
-
The enumerations for AboutVersionIdentifier and DataVersionIdentifier have been updated to S5.4.00 and 5.4.00 respectively to reflect the most recent version of LPA.
ENCW-105822, ENCW-112064, ENCW-111938
Encompass has been updated to support the latest Fannie Mae DU 1.9 Spec requirements:
-
The Preferred Language section of the SCIF Form is only required to be sent to the GSEs if the borrower provides a language preference or has selected "I do not wish to respond". Encompass has been updated for this requirement and default values are no longer sent if these areas in the form are left blank. This applies to Conventional, FHA, and VA loans.
-
The enumeration for AboutVersionIdentifier has been updated to DU Spec 1.9 to reflect the most recent version of DU.
-
Encompass has been updated to send the value in the Equifax Income field (GSEVENDOR.X40) to DU to support Day 1 Certainty. The first value in this field is designated to the primary borrower. A comma separates the value between the borrower and co-borrower, with the second value designated to the co-borrower
The following field label was updated to more closely align the field label with the expected property ID users should enter in this field and include in the loan data submitted to Freddie Mac’s Loan Product Advisor (LPA):
-
The Inspection ID field (CASASRN.X220) is now labeled Property Data Identifier.
ENCW-107366
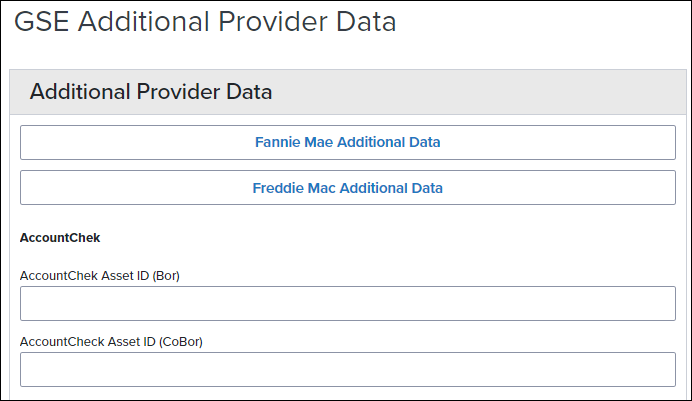
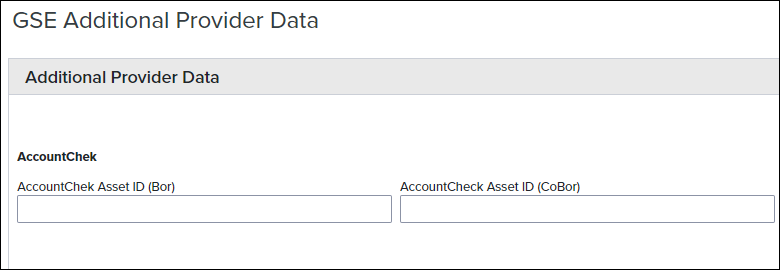
The following updates have been made to the GSE Additional Provider Data input form:
-
A new AccountChek section has been added to the top of the form. Two existing fields, AccountChek Asset ID (Borrower) (FANNIESERVICE.X3) and AccountChek Asset ID (Co-Borrower) (FANNIESERVICE.X4) from this form have been moved to this section.
-
The following fields have been removed from the form:
-
Early Warning Services (EWS) Report Id (Bor) (FANNIESERVICE.X5)
-
Early Warning Services (EWS) Report Id (CoBor) (FANNIESERVICE.X6)
-
Universal Credit 4506T (Bor) (GSEVENDOR.X12)
-
Universal Credit 4506T (CoBor) (GSEVENDOR.X13)
-
BankVOD (Bor,CoBor) (GSEVENDOR.X25)
-
BankVOD IRS (Bor,CoBor) (GSEVENDOR.X35)
-
ComplianceEase IRS Tax Transcript (Bor,CoBor) (GSEVENDOR.X33)
-
Corvious (Bor,CoBor) (GSEVENDOR.X14)
-
FirstAmerican (Bor,CoBor) (GSEVENDOR.X16)
-
Inco-Check (Bor,CoBor) (GSEVENDOR.X17)
-
QuestSoft (Bor,CoBor) (GSEVENDOR.X36)
-
Quovo (Bor,CoBor) (GSEVENDOR.X27)
-
Roostify (Bor,CoBor) (GSEVENDOR.X28)
-
Taxdoor 4506T Service (Chronos) (Bor,CoBor) (GSEVENDOR.X32)
-
Yodlee (Bor,CoBor) (GSEVENDOR.X24)
-
AccountChek Asset ID (Bor) (CASASRN.X31)
-
AccountCheck Asset ID (CoBor) (CASASRN.X32)
-
Note that these fields were removed from the input form but they are still available in the Encompass Reporting Database and may be added to custom input forms.
-
The Avantus(4506T, VOE/VOI) field (GSEVENDOR.X10) was renamed to Avantus (4506T).
-
The following new fields were added to the GSE Additional Provider Data input form to support Fannie Mae Day 1 Certainty and Freddie Mac AIM partners:
-
Blend Income (Bor,CoBor) (GSEVENDOR.X49)
-
Truework (Bor,CoBor) (GSEVENDOR.X48)
-
-
The following fields were renamed:
-
CoreLogic Factcheck) (GSEVENDOR.X47) renamed to CoreLogic Income Analysis (Bor, CoBor)
-
Day 1 Certainty provider Experian (Bor, CoBor) (GSEVENDOR.X59) renamed to Experian (Bor, CoBor)
-
Blend (Bor) (GSEVENDOR.X8) renamed to Blend Asset (Bor)
-
Blend (CoBor) (GSEVENDOR.X9) renamed to Blend Asset (CoBor)
-
ENCW-107364, ENCW-84371
Encompass Compliance Service (ECS)
In this release, a new Clear Alert button has been introduced to the Compliance Review Tool within the web version of Encompass. This enhancement is designed to give users the ability to remove specific alerts from the Alerts & Messages section.

Key Features:
-
Clear Alerts: Users with the appropriate access rights can now use the Clear Alert button to remove the "Compliance Review – Did Not Pass" and "Compliance Review – Had Warnings/Alerts" messages from the Alerts & Messages section.
-
Button Placement: The new Clear Alert button is located alongside the existing buttons, such as Fee Details, View Error List, Run Preview, and Order Report.
-
Access Control: The Clear Alert button is visible only to users with the necessary permissions. If a user does not have the required access rights, the button will not be displayed.
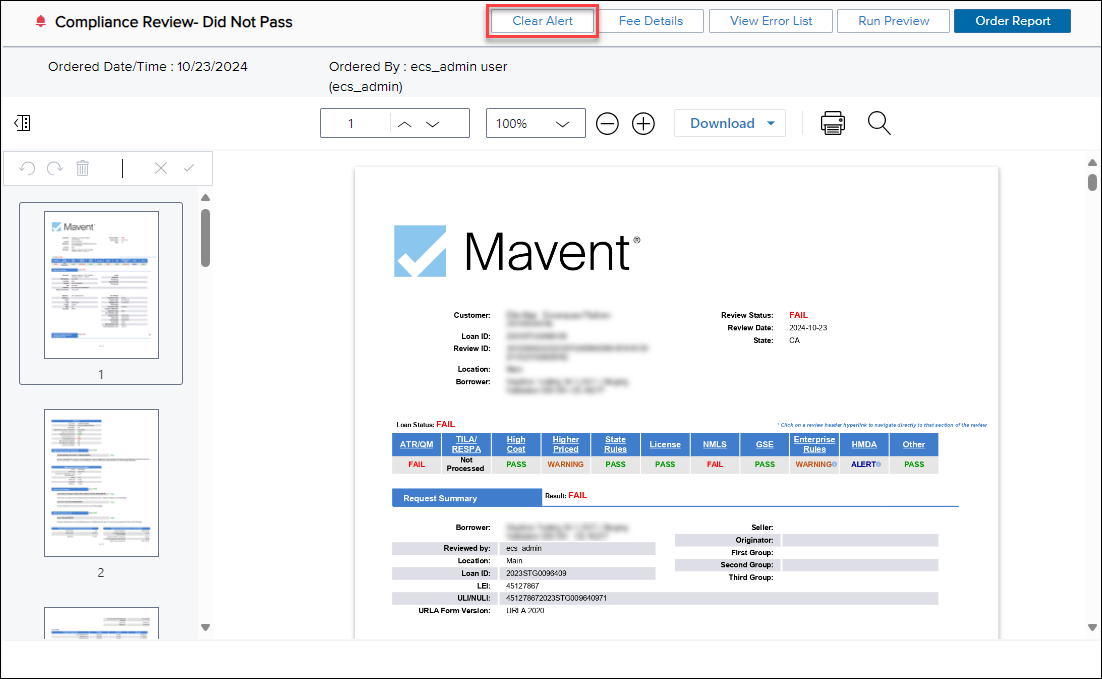
This update is aimed at enhancing workflow efficiency and providing users more control over managing alerts related to compliance reviews.
CE-51367, ENCW-104184
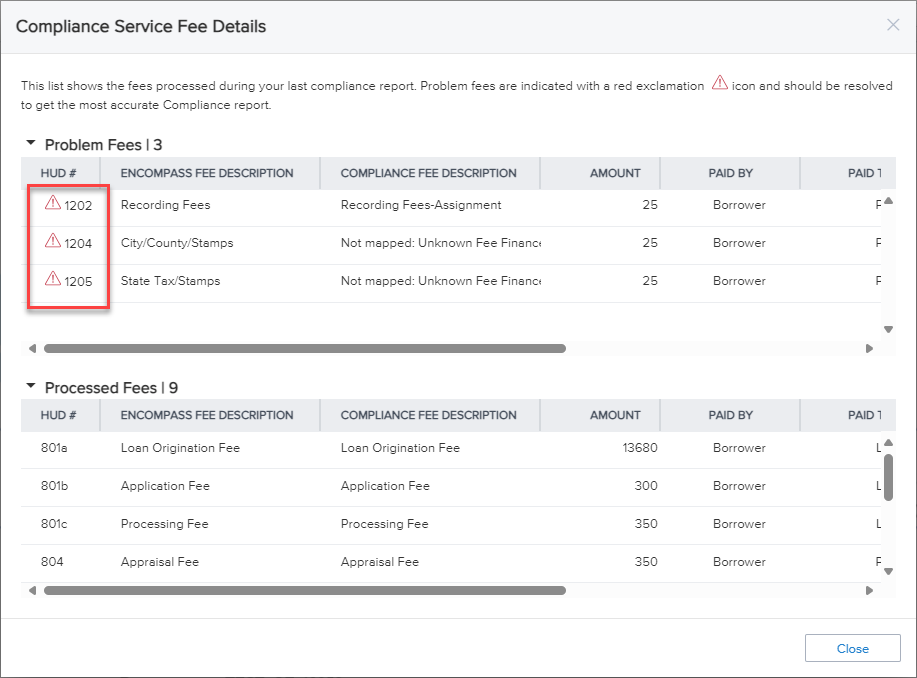
You can now view a distinct list of “problem fees” at the top of the Compliance Service Fee Details window, positioned above the already available "processed fees" list, whenever discrepancies occur between the Encompass APR and Compliance APR. These problem fees are marked with a red exclamation icon, helping you quickly identify any mismatched APR fees.
In this update:
-
Window Access: The Compliance Service Fee Details window can be accessed via the Fee Details button, located between the Clear Alert (if enabled) and the View Error List buttons on the tool panel in the top right of the Compliance Review tool.

For instructions on enabling user access to clear alerts in the Compliance Review, consult the section on managing user permissions within the Compliance Review Setup.
-
Details and Messaging: The message at the top of the window reads:
“This list shows the fees processed during your last compliance report. Problem fees are indicated with a red exclamation icon and should be resolved to get the most accurate Compliance report.”
-
Problem Fees Section: Fees that do not match between Encompass APR and Compliance APR now appear in a dedicated section at the top of the Fee Details window, positioned above the processed fees list, to facilitate locating and addressing discrepancies.
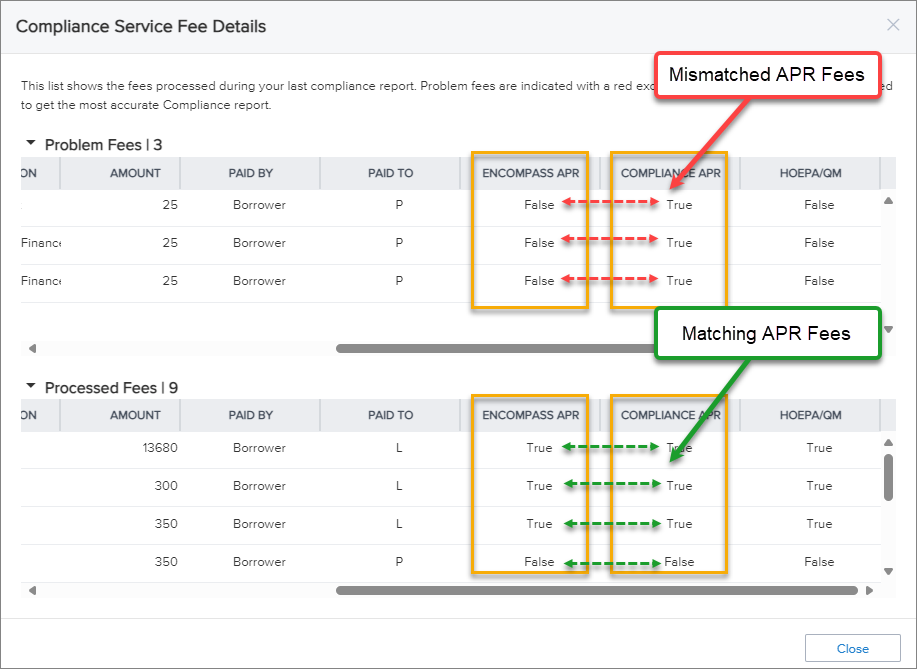
This enhancement is designed to assist users in efficiently identifying and correcting mismatched APR fees.
CE-52277
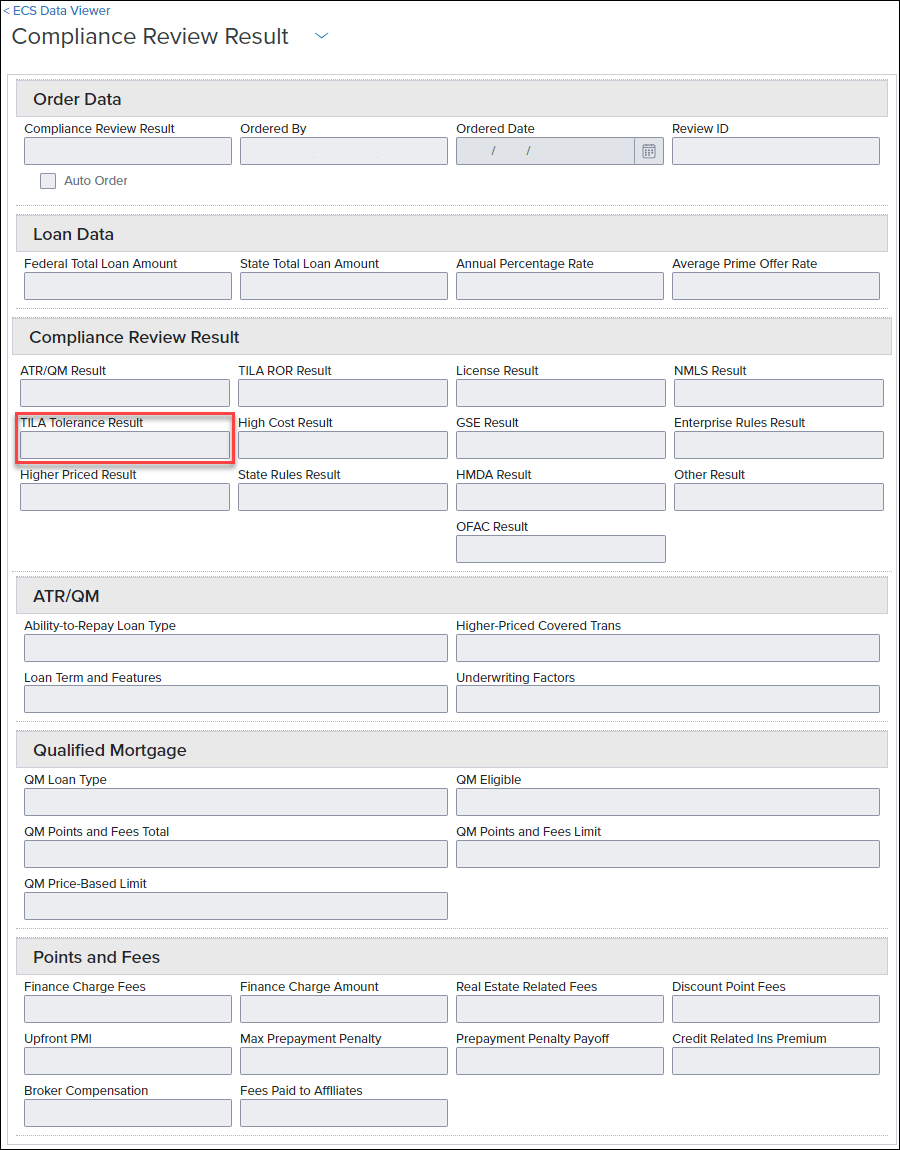
In this release, the Compliance Review Result tab in the Encompass Compliance Service (ECS) Data Viewer has been updated to enhance the clarity and accuracy of compliance result reporting.
Key Updates:
-
TILA ROR Result (field ID COMPLIANCEREVIEW.X13) has been removed from the UI, as this review is no longer supported by Mavent.
-
OFAC Result (field ID COMPLIANCEREVIEW.X10) has been removed from the UI, as this review is no longer supported by Mavent.
-
TILA Tolerance Result (field ID COMPLIANCEREVIEW.X14) has been relabeled to TILA/RESPA Result in the ECS Data Viewer to align with updated reporting standards.
These updates are designed to help enhance the clarity and accuracy of compliance review results based on user data input.
ENCW-107930
Additional Updates to Forms, Tools, Calculations
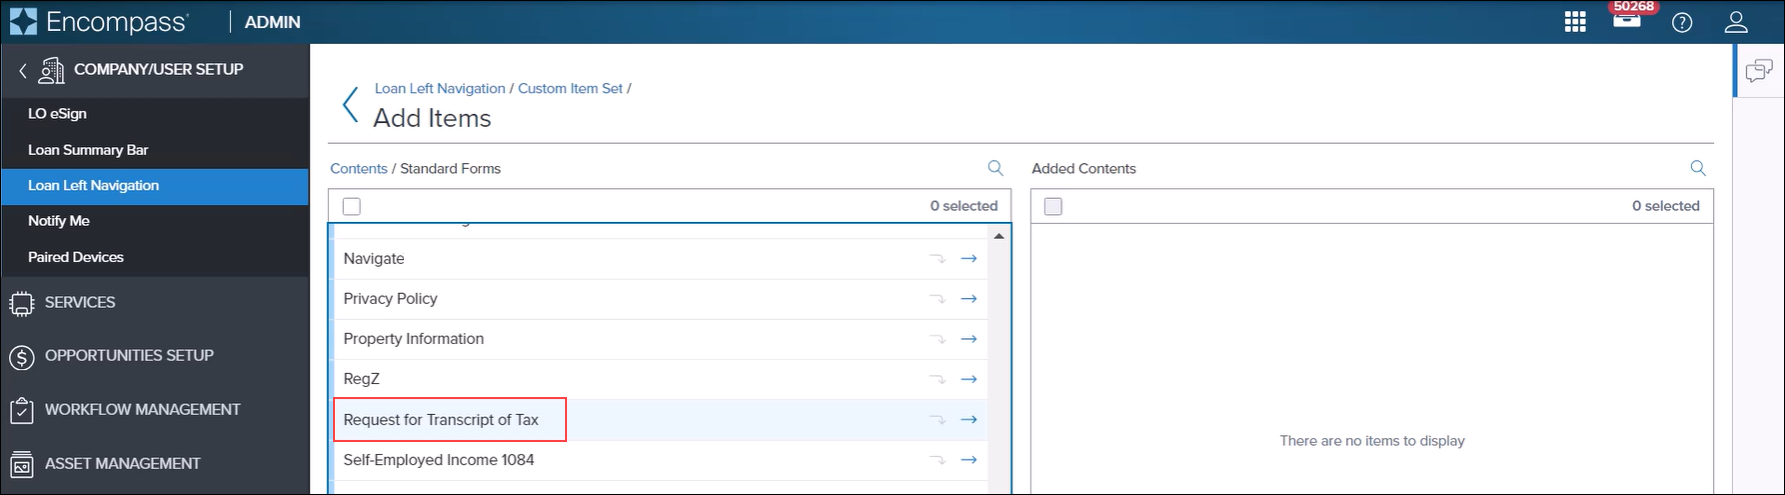
When creating a custom Loan Left Navigation menu, the Request for Transcript of Tax form is included in the list of standard forms that are available to add to the custom navigation menu.
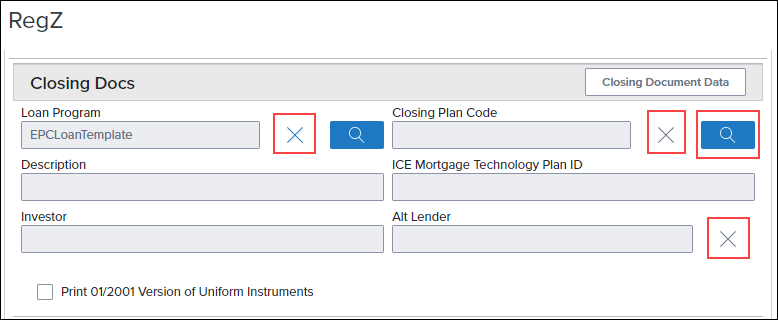
Users on the Initial Disclosure and the RegZ input form can now use the new Plan Code Lookup icon to apply a plan code to the loan. Select the Lookup (magnifying glass) icon to open the Plan Code page, and then select the desired plan code. Upon returning to the RegZ input form, the name of the selected plan code is displayed in the Closing Plan Code field (1881).
In addition, new Delete icons have been added to the Loan Program (1401), Plan Code (1881), and Alt Lender (1882) fields on the RegZ input form that gives users the option to delete the current selection in these fields. After selecting the icon the user is prompted to confirm the deletion. Once confirmed, the selected program, code or lender is removed from the applicable field.
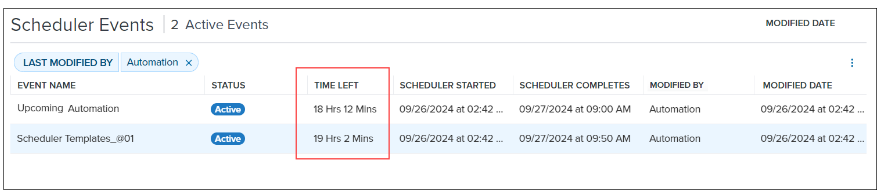
In Encompass 24.3, the list of scheduler events (on the Tools > Scheduler Events screen) is now sorted by default based on the event that is closest to expiring (i.e., the Time Left column data). The event closest to expiring is listed at the top of the list, followed by the event that is the next-closest to expiring, and so on. Users can also sort the data based on the remaining columns: Event Name, Status, Scheduler Started, Scheduler Completes, Modified By, and Modified Date. The first selection on a column header sorts the data in ascending order. The second selection on a column header switches the sort order to descending order.
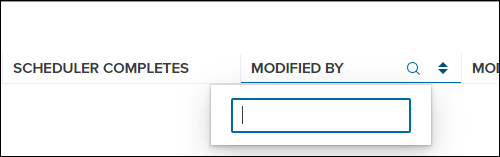
In addition, Search functionality is now provided for the column data on the Scheduler Events screen (except for the Time Left column). When hovering the mouse pointer over a column header, the Search icon (magnifying glass) displays. Select the icon to display the Search field, and then enter the search term. For the date fields (Scheduler Started, Scheduler Completes, Modified Date), the Search data is a calendar icon. Select the calendar icon, and then enter the date or the date range to use for your search.

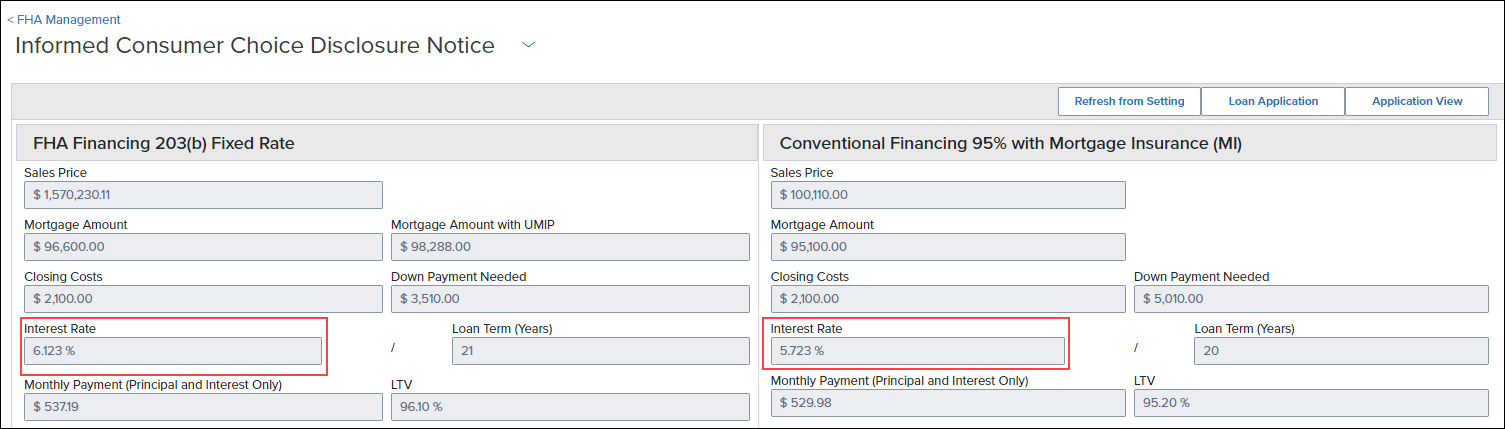
On the FHA Management > Informed Consumer Choice Disclosure Notice tab, the Interest Rate % fields (FICC.X6, FICC.X17) on the Interest Rate and Term of Loan in Years line have been updated to allow for up to three decimals. (Previously these fields allowed two decimals.) This update enables Encompass users to disclose the interest rate more accurately.
Please note the following:
-
These fields have also been updated to allow up to three decimals in the Encompass Settings > Loan Setup > FHA Informed Consumer Choice Disclosure where administrators can enter default data that is populated to the FHA Management > Informed Consumer Choice Disclosure Notice tab in the loan.
-
When a user opens an existing loan in Encompass 24.3, the value in these fields will display three decimals. For example, if the value was 5.00 in Encompass 24.2, the value will be 5.000 in Encompass 24.3.
-
If the value saved in an existing loan was 5.12%, the value will display as 5.120% in Encompass 24.3.
-
-
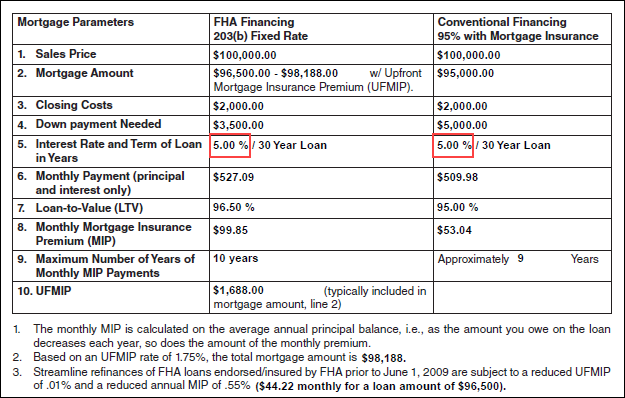
When the values in FICC.X6 or FICC.X17 have a final digit that is zero (0), the value will print with two decimals on the printed Model Notice Informed Consumer Choice Disclosure Notice output form. Otherwise, the value will print with three decimals. For example, 5.000 prints as 5.00 on the form, 3.500 prints as 3.50 on the form, 3.625 prints 3.625 on the form.
ENCW-110829
The Index (688) and Margin + Index fields (1827) have been updated to display up to five decimals based on the ARM Index Precision field (4912). This loan-level field is populated by default with the ARM Index Precision option selected in the Encompass Admin Tools > Settings Manager, but users can use the ARM Index Precision field to manually override the Admin Tools setting and apply three decimals or five decimals rounding logic to the Index % (field 688) and Margin + Index fields (1827) for the current loan only.
Previously the Index and Margin + Index fields were always displayed to three decimals.
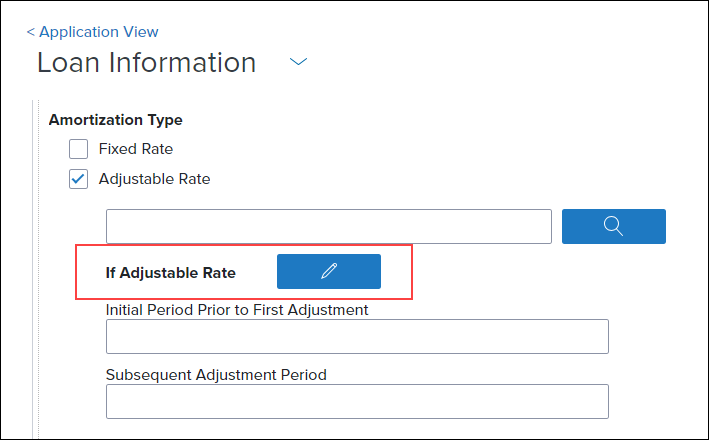
To make a selection in the ARM Index Precision field (4912), select the Adjustable Rate checkbox (608) on the Application View > Loan Information page, and then select the If Adjustable Rate Edit icon to open the Adjustable Rate Mortgage pop-up window. There, near the bottom of the window, you can make a selection from the ARM Index Precision dropdown list.
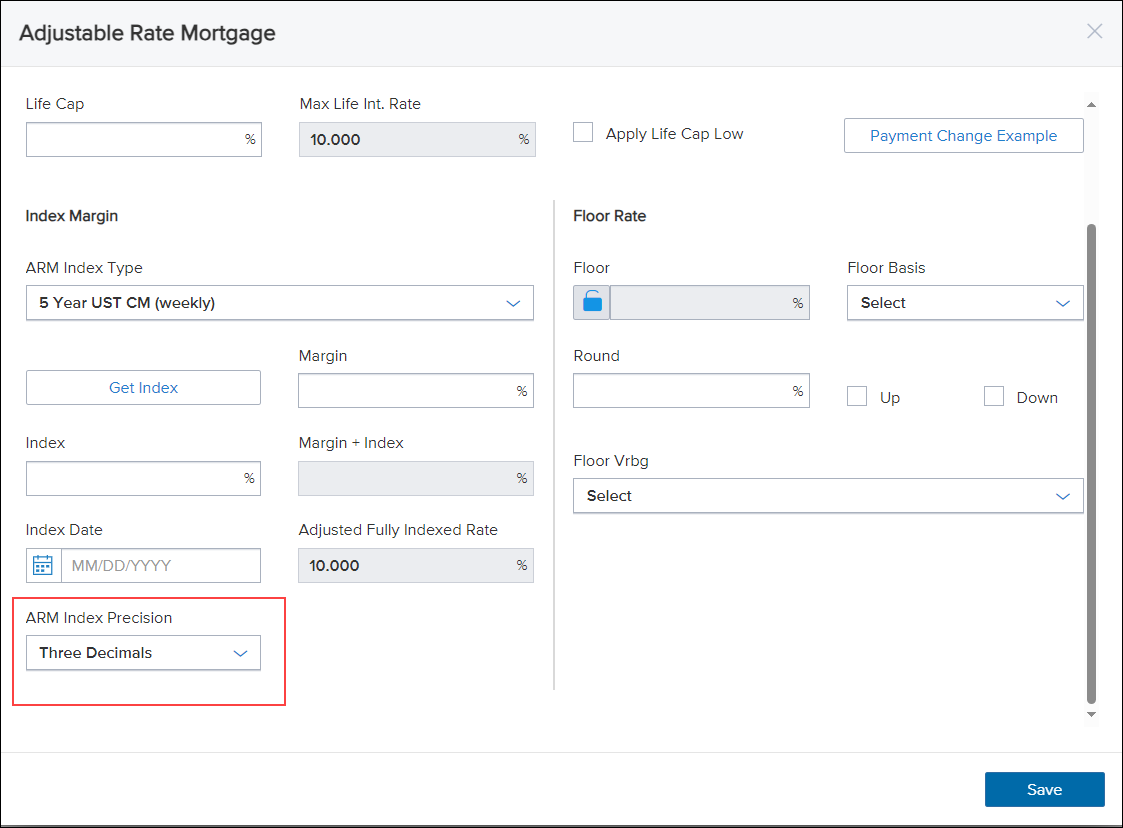
In cases where the original Index or Margin + Index field value was three digits and then the ARM Index Precision value is set to Five Decimals, then two zeros (00) are added to the end of the original value. For example, 3.521% would be updated to 3.52100%.
The calculation logic for the HMDA Prepayment Penalty Period (HMDA.X82) field has been updated. When the Business or Commercial Purpose field (HMDA.X58) is set to 1. Primarily for a business or commercial purpose, then NA [not applicable] is automatically populated to the HMDA Prepayment Penalty field. This update has been made based on HMDA prepayment penalty term requirements (Section 1003.4(a)(22).)
CBIZ-61585
Prior to Encompass 24.3, the Fannie Mae Refinance Cash Out Amount (ULDD.RefinanceCashOutAmount) was not calculating correctly for cash-out refinance loans because it was not taking all lender credits into account. This could result in an incorrect cash out amount being sent to Fannie Mae. Starting in Encompass 24.3, for cash-out refinance loans (19), Encompass now includes (adds) all credits (URLA.X152) and includes (adds) the Payoff Amount (FL0016) from the Verification of Liabilities when a second mortgage is being paid off when calculating the Refinance Cash Out Amount field.
For the Freddie Mac [Refinance] Cash Out Amount (CASASRN.X79), the calculation was not including (adding) the closing costs paid by the lender. When cash-out refis were submitted to Freddie Mac, the cash out amount would be short the amount of any lender-paid fees. Starting in Encompass 24.3, for cash-out refinance loans (19), Encompass now includes (adds) all credits (URLA.X152) and includes (adds) the Payoff Amount (FL0016) from the Verification of Liabilities when a second mortgage is being paid off when calculating the Refinance Cash Out Amount field.
ENCW-99194, ENCW-99195
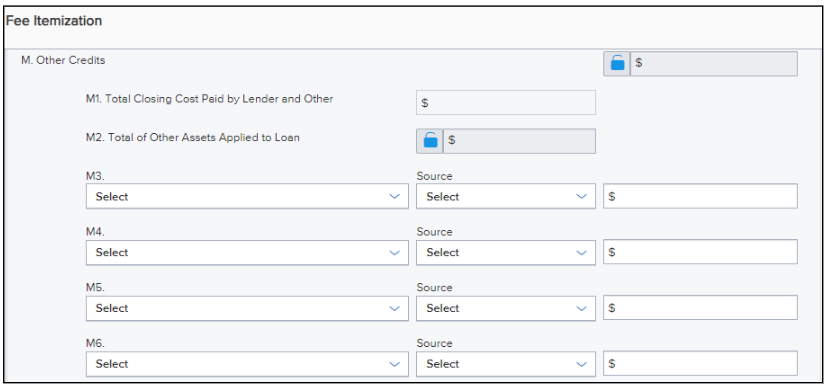
Users managing the data on the Fee Itemization input form can now select from a predefined list of fee descriptions for line 704 in field L217. This list is determined by the fees configured in the Encompass Settings > Tables and Fees > Itemization Fee Management settings in the desktop version of Encompass.
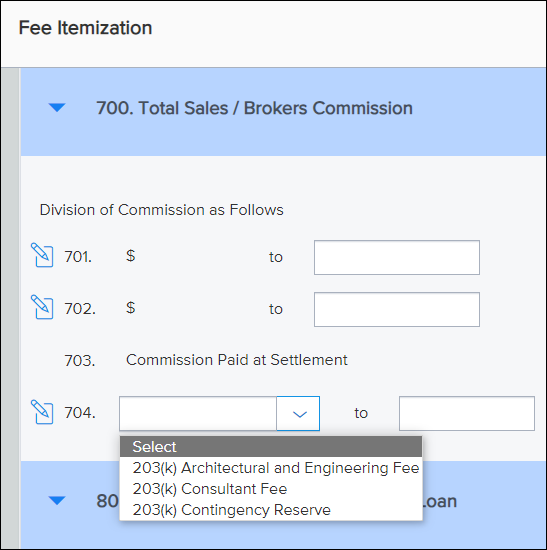
Administrators can use the Itemization Fee Management setting to create a list of predefined closing costs that users can select when completing the Fee Itemization form (when using the 2015 RESPA-TILA forms). These fields can then be mapped to the appropriate fee fields in the Encompass Compliance Service. Users can then order a compliance report without requiring an administrator to map manually entered closing fees as they are added to the system. In Encompass 24.2, a new Section 700 column was added to the Fee List tab. Use this column to map fees to the real estate fields on line 704 of the Fee Itemization. By default, none of the checkboxes in the Section 700 column are selected. Select the checkbox for the fees to provide on the line 704 dropdown list that users can then select from on the input form.
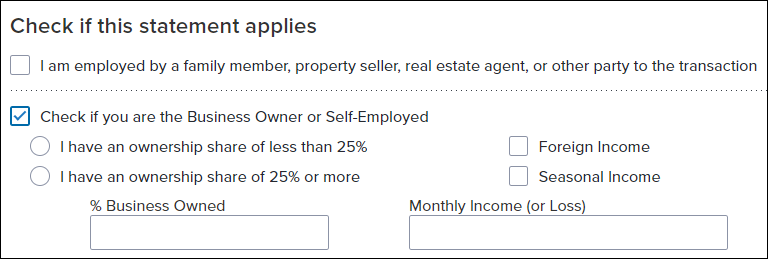
New AMI Manual Data checkbox (5027) is now provided in the Affordable Loan Eligibility section of the Borrower Summary - Origination input form that can be used to manually enter the year and values to use for the Area Median Income (AMI) limits in the AMI % fields on the form. This option is provided to give users a way to use the AMI dataset year that is compliant with the GSE investor’s AMI dataset when that year’s data is not accessible from the loan file or from the Affordable Lending tables in Encompass Settings.
Encompass provides the current year’s dataset in the Encompass Settings > Tables and Fees > Affordable Lending > AMI Limits setting. Users can click the Get AMI button to populate the AMI Year Used and AMI 100%, 80%, and 50% fields with this data. (Encompass stores the last three years’ AMI data. The option to select a different year from the table will be available in a future release.) In addition, administrators can enable the Automated Data Completion settings in Encompass Admin Tools to automatically populate these fields with the current year’s AMI limits without clicking the Get AMI button. These fields are set to read-only when they are populated.
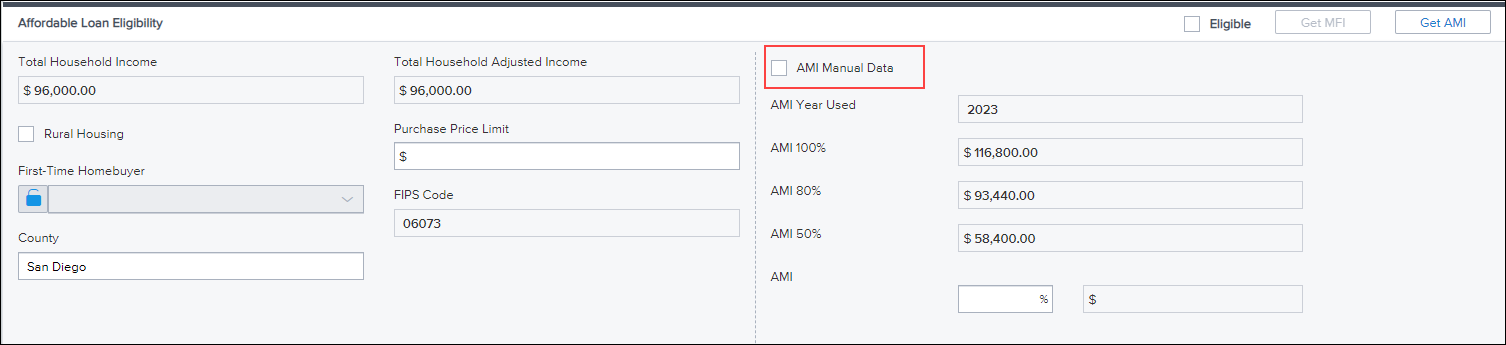
To manually change the AMI year to use, select the AMI Manual Data checkbox. This activates the read-only fields and deactivates the automated completion calculations and the Get AMI button. Users can then manually enter the year to use for AMI limits in the AMI Year Used field and then manually enter the AMI 100%, AMI 80%, and AMI 50% limits based on the AMI data provided by Fannie Mae and Freddie Mac.
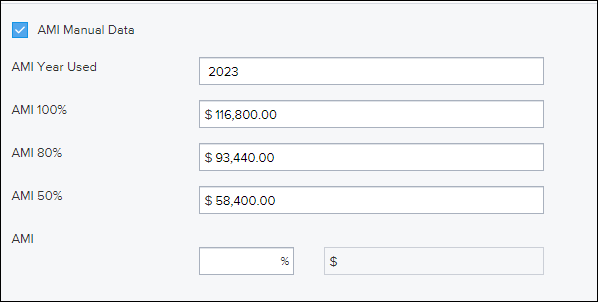
The checkbox is not selected by default.
ENCW-111844
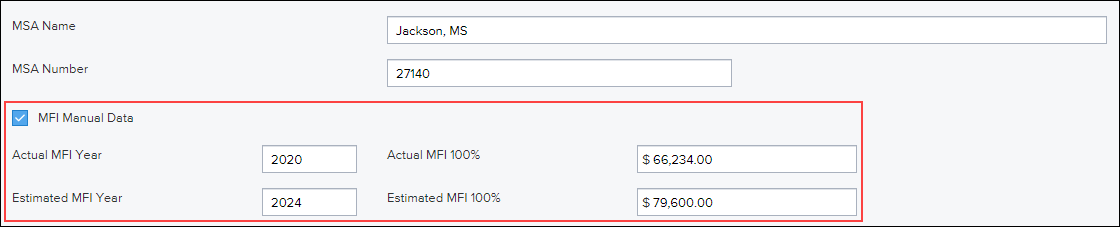
A new MFI Manual Data checkbox (5028) is now provided in the Affordable Loan Eligibility section of the Borrower Summary - Origination input form that can be used to manually enter the year and values to use for the Median Family Income (MFI) limits in the Actual and Estimated MFI % fields on the form. This option is provided to give users a way to use the MFI dataset year that is compliant with the GSE investor’s MFI dataset when that year’s data is not accessible from the loan file or from the Affordable Lending tables in Encompass Settings.
Encompass provides the most current dataset in the Encompass Settings > Tables and Fees > Affordable Lending > MFI Limits setting in the desktop version of Encompass. Users can click the Get MFI button to populate the Actual MFI Year, Estimated MFI Year, and the Actual and Estimated MFI 100% fields with this data. In addition, administrators can enable the Automated Data Completion settings in Encompass Admin Tools to automatically populate these fields with the current MFI limits without clicking the Get MFI button. These fields are set to read-only when they are populated.
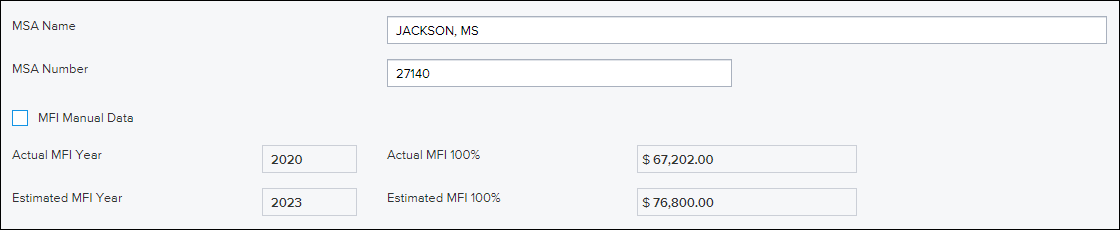
To manually change the MFI Estimated Year to use, select the MFI Manual Data checkbox. This activates the read-only fields and deactivates the automated completion calculations and the Get MFI button. Users can then manually enter the year to use for MFI limits in the Estimated MFI Year field, and then manually enter the Actual MFI Year, Actual MFI 100%, and Estimated MFI 100% limits based on the MFI data provided by the FFIEC (Federal Financial Institutions Examination Council).
ENCW-111853
New Explanation buttons are now provided on the Application View > Declarations page for the co-borrower in sections A through M. (Previously the Explanation button was available for the primary borrower only.) When you select Yes for a co-borrower declaration, the Explanation button is enabled as shown for section A below.
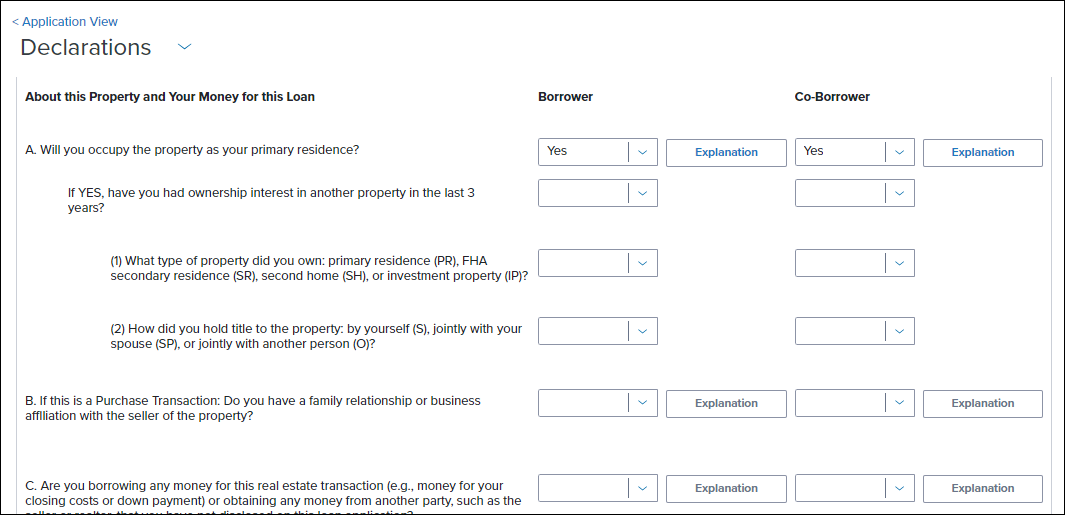
After selecting the Explanation button, the Explanation for Co-Borrower pop-up window displays where you can add an explanation for the declaration.
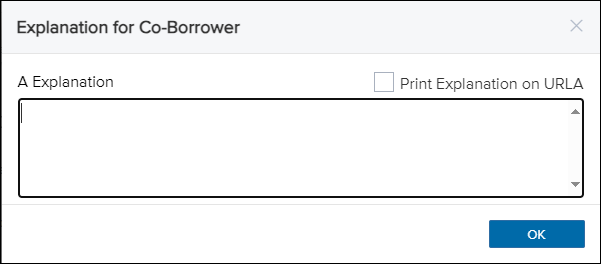
Select the Print Explanation on URLA checkbox to include this explanation information on the printed URLA form.
ENCW-107650, ENCW-107653, ENCW-105593
The following field label has been updated to more closely align the field label with the expected property ID that users should enter in this field and include in the loan data submitted to Freddie Mac’s Loan Product Advisor (LPA):
-
The Inspection ID field (CASASRN.X220) is now labeled Property Data Identifier.

ENCW-107366
The following updates have been made to the GSE Additional Provider Data form.
A new AccountChek section has been added to the top of the form. Two existing fields, AccountChek Assed ID (Borrower) (FANNIESERVICE.X3) and AccountChek Asset ID (Co-Borrower) (FANNIESERVICE.X4) from this form have been moved to this section.
The following fields have been removed from the form:
-
Early Warning Services (EWS) Report Id (Bor) (FANNIESERVICE.X5)
-
Early Warning Services (EWS) Report Id (CoBor) (FANNIESERVICE.X6)
-
Universal Credit 4506T (Bor) (GSEVENDOR.X12)
-
Universal Credit 4506T (CoBor) (GSEVENDOR.X13)
-
BankVOD (Bor,CoBor) (GSEVENDOR.X25)
-
BankVOD IRS (Bor,CoBor) (GSEVENDOR.X35)
-
ComplianceEase IRS Tax Transcript (Bor,CoBor) (GSEVENDOR.X33)
-
Corvious (Bor,CoBor) (GSEVENDOR.X14)
-
FirstAmerican (Bor,CoBor) (GSEVENDOR.X16)
-
Inco-Check (Bor,CoBor) (GSEVENDOR.X17)
-
QuestSoft (Bor,CoBor) (GSEVENDOR.X36)
-
Quovo (Bor,CoBor) (GSEVENDOR.X27)
-
Roostify (Bor,CoBor) (GSEVENDOR.X28)
-
Taxdoor 4506T Service (Chronos) (Bor,CoBor) (GSEVENDOR.X32)
-
Yodlee (Bor,CoBor) (GSEVENDOR.X24)
-
AccountChek Asset ID (Bor) (CASASRN.X31)
-
AccountCheck Asset ID (CoBor) (CASASRN.X32)
The Avantus ((4506T, VOE/VOI) field (GSEVENDOR.X10) was renamed to Avantus (4506T).
ENCW-107364
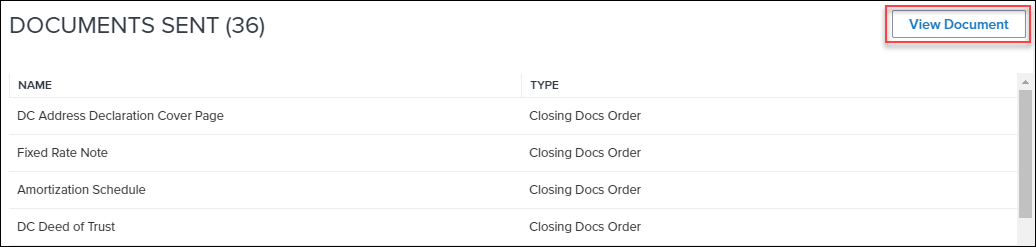
An update has been made to the Disclosure Tracking tool to enable users to view the documents that are associated with an eDisclosure or eClose disclosure tracking entry. A new View Document button is now available on the Disclosure Details page. When a user selects this button, a slide-out panel displays and the first document displays. Users can select a document from the list on left side of the slide-out panel to view the contents of the document.
Example of the Documents view:
To View Documents for a Disclosure Tracking Entry:
-
From a loan, select Tools from the left navigation menu and then select Disclosure Tracking.
-
Navigate to the Disclosure History section and select the Menu icon next to the entry you want to view.
-
Select Edit .
-
Navigate to the Document Sent section and select View Document.
ENCW-104288
A change has been to the information tracked on the Disclosure Tracking summary details page to provide additional clarity. With this update, the Document Viewed Date row is being removed as this row was being populated when either the eSign or wet sign documents were viewed. Now, two additional rows have been added to independently track when eSign and wet sign documents were viewed.
The following rows have been added or updated:
-
eSIGNED VIEWED DATE - Lists the date that the eSign documents were viewed.
-
WETSIGNED VIEWED DATE - Lists the date that the wet sign documents were viewed.
-
INFORAMTION VIEWED DATE - Lists the date that the informational documents were viewed for disclosure sent in the web version of Encompass or by API. Support will be added for disclosures sent from the desktop version of Encompass in a future release.
To View an eDisclosure Summary
-
From a loan, select Tools from the left navigation menu and then select Disclosure Tracking.
-
Navigate to the Disclosure History section and select the Menu
 icon next to the entry you want to view.
 -
Select Edit
 .
. -
On the Disclosure Details page, select View Summary.
ENCW-112890
Workflow Management
A new Receive / Send Documents resulting action has been added to enable administrators to write rules to request and or send documents to the defined borrower(s). Selected documents with a source of Custom, Standard, or eFolder Attachment sends the content to the borrowers. Selected documents with a source of Needed requests the documents from the borrowers. The automation relies on configuration of your Document settings in the desktop version of Encompass. The automation service honors this configuration to determine the signature type for documents and the borrower(s) are prompted to eSign if the document being sent is eSignable. For information on configuring documents, click here.

Note: An Encompass Consumer Connect Site ID must be associated with the instance, and One Time Password (OTP) must be enabled for this resulting action to work. For information on configuring OTP settings for your Consumer Connect site, click here.
Nested action support has been added to the Order Service resulting action. With this update, administrators can create a task, send a notification, or start a scheduler based off the success or failure of an attempted service order.
To Configure a Nested Action for the Order Service Resulting Action
-
From the Result tab on a workflow rule, select Order Service from the Resulting action field and then select Add.
-
Select the Menu
next to the resulting action in the Added Resulting Actions section. -
Select Add Nested.
-
A new entry is created under the resulting action labeled Select Nested Action. Select On Success to execute the action when the parent action is successful or select On Failure to execute the action when the parent action is unsuccessful.
-
Select Create Task, Start Scheduler, or Send Notification from the Resulting Nested Action field.
-
Enter a description for the nested action, if desired. This description displays under the specific nested action in the Added Resulting Actions section.
-
Based on the selected Resulting Nested Action in step three, select the task, scheduler or notification to use for the action.
Note: Up to three of each On Success or On Failure nested actions can be added to the Order Service resulting action.
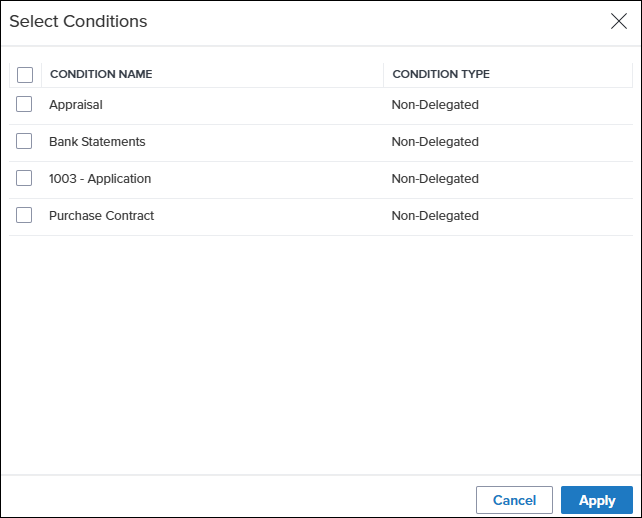
The Condition Status Updated triggering event has been updated to enable administrators to select multiple document folders for one rule. Previously, only one condition could be used to trigger each workflow rule.
To Select Multiple Conditions for the Condition Status Updated Triggering Event
-
From the Triggering Event tab on a workflow rule, select Condition Status Updated in the Triggering Event field.
-
Select the condition type that the workflow rule will apply to in the Condition Type field.
-
In the Select Status field, select the one or more statuses that the workflow rule should be listening for.
-
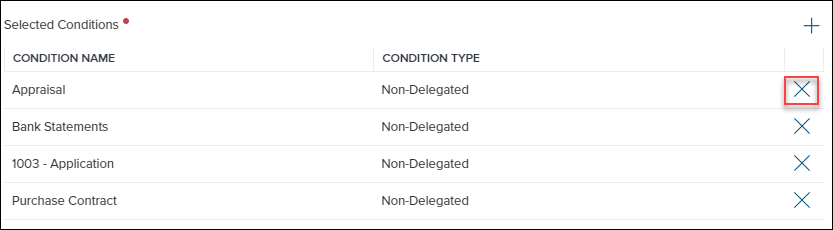
In the Selected Conditions section, select Add.
-
On the Select Conditions window, select the checkbox for each condition that the rule will apply to and then select Apply.
-
To remove a condition from the Selected Conditions list, select the Remove X icon.
New Missing Configuration Indicators have been added to the Workflow Rules page to enable administrators to easily identify workflow rules that will fail due to missing or inactive resulting action configuration. When a component for a resulting action is either missing or inactive, the indicator displays in front of the workflow rule entry on the workflow rules list. Existing rules with missing configuration are identified nightly. Imported rules are immediately indicated when they have a missing configuration. The following indicators are used:
-
 - Indicates that the inactive rule is missing a component for the resulting action.
 -
 - Indicates that the active rule is missing a component for a resulting action and the automation will fail if the rule is triggered.
When there is a missing configuration indicator on a specific rule, the active toggle can not be set to On from the workflow rules list. If the rule is currently active, administrators can quickly switch the toggle to Off from the workflow rules list.
The active toggle will no longer appear inside the details of a workflow rule and can only be managed from the workflow rules list.
For this initial release, the missing configuration indicator only indicates for the following resulting actions:
Missing Template
-
Create Tasks
-
Complete Task
-
Create Tasks by Group
-
Complete Tasks by Group
-
Create Sub-Task
-
Complete Sub-Task
-
Send Notification
-
Start Scheduler
-
Order Service
Missing Service Rule:
-
Order Service
Missing Provider
-
Update Service Order
Missing Condition Template
-
Update Enhanced Conditions Tracking Status
Tasks Management
The following forms and tools are now supported in Task Workspaces and can be included in Task Workspace Templates. This provides administrators with the option to include up to five additional Standard Forms and three additional Standard Tools to task workspaces to support greater efficiency in end user workflow.
Forms:
-
Home Counseling Provider
-
Settlement Service Provider List
-
Borrower Information - Vesting
-
Affiliated Business Arrangements
-
Request for Transcript of Tax
Tools:
-
Funding Worksheet
-
Disclosure Tracking
-
Appraisal Management
For information on configuring task workspace templates, click here.
Enhancements have been made to streamline and improve the usability of the Tasks Pipeline. A new Copy option has been added to enable users to quickly copy a loan number associated with a task. When the user selects the Copy option, the loan number is saved to the device’s clipboard and can then be pasted in another application.
Users can also now update the status of a task from the Tasks Pipeline without requiring them to open the task first. Users can select the Edit icon next to the column entry for the Status column to update the status of a task.
Both of these changes support lenders using the Task Pipeline as a task related dashboard, regardless of which application their end users are using to work on loans.
Note: If the task disposition requires a comment to complete the task, the user is prompted to open the task and leave a comment before completing the task. Additionally, if there are open subtasks and the user attempts to mark the task as completed, they are instructed to complete all required sub-tasks before task completion.
A change has been made to migrate the folder-based layout of the Task Templates page to an organized table view. This update brings the Task Templates in line with other configuration pages in the web version of Encompass and enhances the usability of this feature by enabling administrators to sort and find task templates based on the visible information.
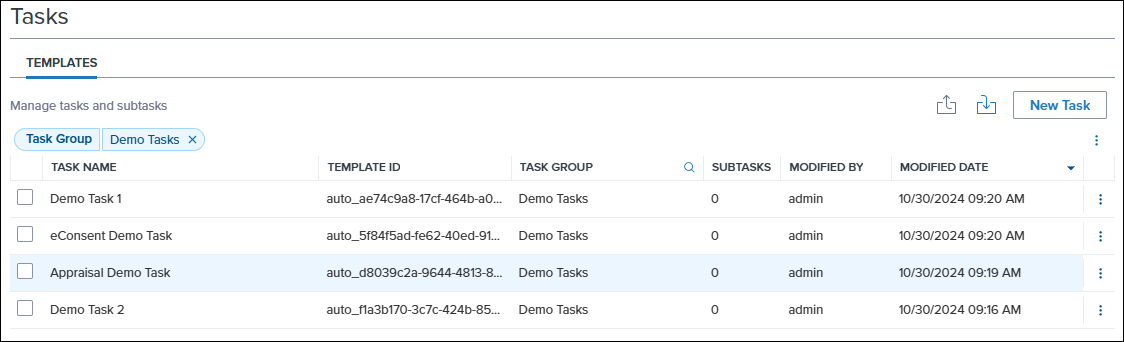
Key Updates Include:
Task Group Redefined
Redefined the relationship between Task Groups and individual Tasks to better facilitate task automation where groups of tasks should be managed together. Previously, Task Groups served as a container for related tasks, with each task belonging to and nested in its respective group or sub-group. This association has been decoupled, and Task Groups now acts as labels or tags that associate tasks for easier management in workflow automation.
Any current implementation of Task Groups automatically transitions over to this redefined relationship structure, except for nested Task Groups. Only the relationship with the parent task group that the task is inside of is retained. Other task groups that were parents to a task group or were empty are still available to associate to task templates.
Adding a task group or assigning a task to a task group has now been moved to the Add/Edit Task page.
To Select or Add a Task Group
-
From the Edit Task page, navigate to the Task Group field.
-
To select an existing task group for the task, select the Dropdown
 icon next to the Task Group field and then select the task group.
 -
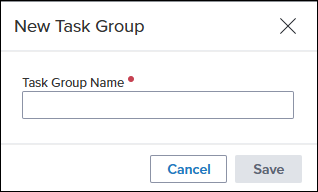
To add a new task group, select Add
 next to the Task Group field.
 -
On the New Task Group window, enter a task group name and then select Save.
Additional Changes:
-
The ability to export a Task Group has been removed.
-
The ability to delete or rename a Task Group has been temporarily removed and will be re-enabled in a future release.
-
Importing a Task template that has a Task Group attribute into a new instance won’t carry over the group attribute at this time. This will be addressed in a future update.
-
The ability to import an existing task over itself has been temporarily removed and will be reintroduced in a future update
Workflow Rule Updates
Administrators can still leverage task related triggering events and resulting actions. The Task Group Created and Task Group Completed triggering events are unchanged by these updates.
To accommodate and increase automation functionality around tasks, some changes have been made to the following resulting actions
-
Create Task Group has been renamed to Create Tasks by Group.
-
All tasks associated with a group will be listed in the Create Tasks by Group resulting action, there is no longer the concept of grouped tasks that be excluded from auto-creating when the group is used to add tasks to the loan
-
-
Complete Task Group has been renamed to Complete Tasks by Group.
-
Create Task has been renamed to Create Tasks
-
All tasks are listed in the Create Tasks resulting action, enabling administrators to select tasks with or without a task group label. Previously, only standalone tasks or grouped tasks that were not configured to auto create with their group were listed for this resulting action.
-
Services Updates
The credentials management page has been updated to support the ability to capture automation credentials for lenders who need support for multiple organization level automation credentials. This update changes the Credentials landing page to display Company, User, and Automation Credentials in separate categories. This change makes it easy for admins to add credentials in each category.
Additionally, new options have been added to make it easier for administrators to define organization specific credentials. This is particularly helpful for lenders who need to define different credentials for specific branches. Before you can add override credentials, ensure that the default credentials for the company and automation categories are set up. When a lender adds a subsequent company or automation credential configuration, a new Override Credentials page displays.
To Create Company Override Credentials
-
From the Credentials page for a service setup that has an existing credential configuration, select ADD in the Company Credentials section.
-
On the Add Company Override Credentials screen, enter a unique name for the credential setup in the Name field, and then enter a description in the Description field.
-
Enter the credentials for this provider in the Credentials section.
-
To designate which users will use these credentials, select Add in the Users section.
-
On theAdd Entities window, navigate through the Category options to select the Users who will use this setup. To move to a category, select the Down Arrow
 icon. To move an individual user to the Selected Users column, select the Move Arrow
 icon. To search for a specific user, select the Search
  icon.
icon.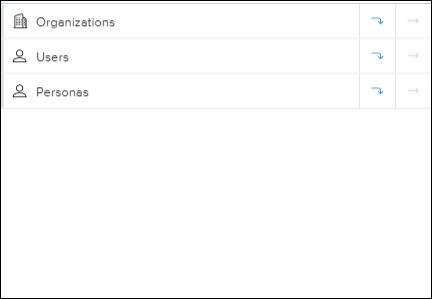
-
To remove users from the Users section, select the check box in front of the user and then select Delete. Alternatively, you can select the Delete
 icon in the Action column for the user.
 -
To export a list of all users assigned in the Users section, select the Export to .csv
 icon.
icon.-
Note: Administrators can select up to 200 users at a time on the Add Entities window before adding them to the Authorized Users list. Once added, the administrator can return to the Add Entities window if they need to add more users.
-
-
-
To save the new company override credentials, select Save.
To Add Automation Override Credentials
-
From the Credentials page for a service setup that has an existing credential configuration, select ADD in the Automation Credentials section.
-
On the Add Automation Override Credentials screen, enter a unique name for the credential setup in the Name field, and then enter a description in the Description field.
-
To use credentials other than the default company credentials, unselect the Use default Company Credentials checkbox.
-
If you unselect the Use default Company Credentials checkbox, enter the company credentials.
-
-
Enter the user credentials in the User Credentials section.
-
In the Entities section, select the organization(s) that this configuration applies to and then select the Move
arrow.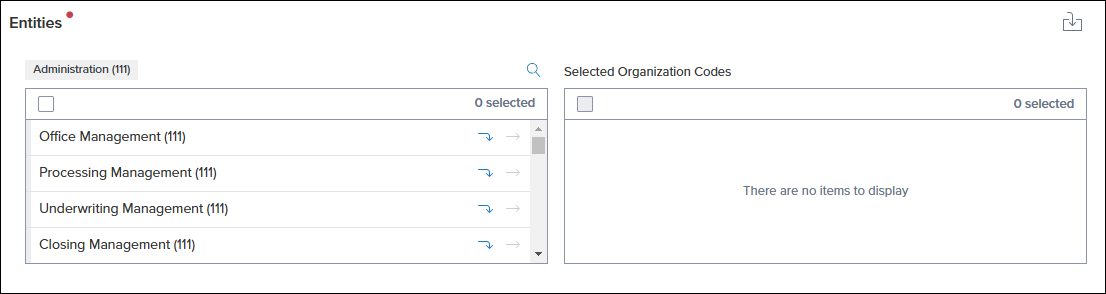
-
To remove an organization from the Selected Organization Codes section, select Remove
 .
. -
To save the Automation Override Credentials, select Save.
The new credentials are listed on the service setup Credentials page and the type indicates that the credentials are override credentials as displayed below
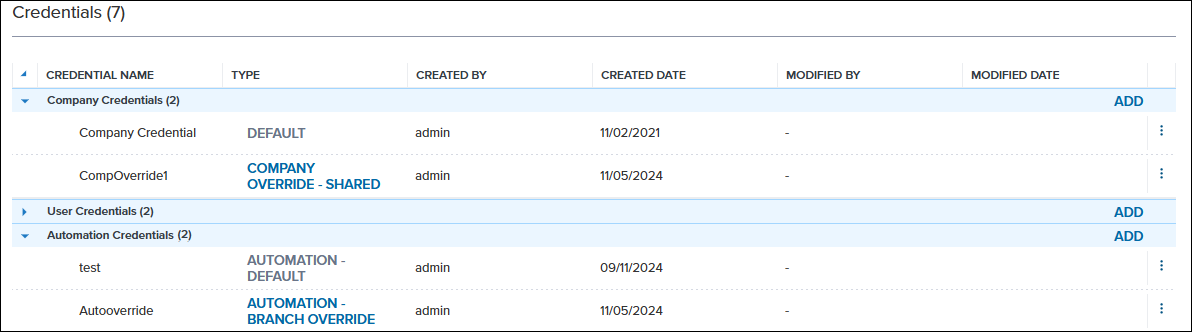
A change has been made to the message that displays when attempting to edit pre-configured services. As part of an initial integration for some partners, several manual service setups were configured automatically in the web version of Encompass. These service setups are not able to be edited and when an administrator tried to edit one of these services, the following message displayed:
Cannot read properties of undefined (reading ‘length’)
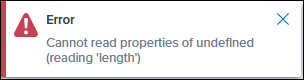
To provide a more helpful message, this notification has been updated to display the following:
This is a preconfigured service setup and does not have any authorized users. Please delete it and create a new service setup to add authorized users and readiness conditions.
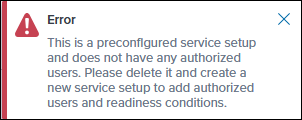
Prior to this release, MI Center orders in test environments (Encompass client IDs starting with TEBE) were submitted to the MI service provider’s production environments. Starting with this release, MI service providers’ test environments are available for testing purposes. The look and feel of the partner test environments are identical to their production environments.
To use this feature, Encompass admins need to create new products, that have “R2T” in their names, in Services Management settings. Each MI provider has two available 'R2T' products to support testing - one for Rate Quote Comparison (RQC) and one for standard ordering. Users who want to perform testing in their TEBE environments for both features will need their Encompass admins to configure both R2T products for the desired MI providers.
R2T products should be configured ONLY in TEBE (test) environments, and not in production environments. Any non-R2T products which may have already been configured in your TEBE (test) instance may safely be removed.
-
TEBE (test) instances: Configure only R2T standard and R2T RQC products
-
Production instances: Configure only standard and RQC products (never R2T)
MI orders in the Encompass test environment will fail if MI Center points to the partner’s production environment, instead of the R2T environment.
Notification Templates Updates
Sort and Filter support has been added to the Notification Type and User Type columns, enabling users to quickly group and find notification types by these columns.
To Sort by Column
-
Select the column header to sort notification templates by that column in ascending order.
-
Select the column header again to sort in descending order.
To Filter by Column
-
Select the Search
 icon on the column header.
 -
Enter the search criteria in the column header and press enter. The results are filtered by the search criteria.
An update has been made to the Notification Templates feature to ensure that Notification Template names remain unique. As a result, the template import process has been updated and now any templates in the existing environment are replaced and overwritten with the Template from the import file. The informational verbiage on the import windows has been updated to reflect this change.
Example of verbiage update:

Additionally, a new notification message displays when attempting to name a template with same name as an existing template on the Add/Edit Template page. The following message displays when attempting to save a template with the same name as an existing template:
Conditions Updates
A user interface update has been made to the conditions view when a condition is expanded on the Conditions page. Previously, the Assign Document, Duplicate Condition, and Delete Condition buttons were displayed at the bottom of the expanded condition view. Now, these features have been moved as follows:
-
Assign Document button is now Assign Document(s) to Condition located on the left side of the expanded condition view.

-
Duplicate Condition button is now a Duplicate
icon located in the Menu for the condition. -
Delete Condition button is now a Delete
icon located in the Menu for the condition. -
Export to Excel
 icon replaced with an Export
  icon.
icon. -
Expand All
 option has been replaced with an Arrow
  toggle located at the front of the column header.
 -
Menu
 icon has been replaced with the Menu used throughout the web version of Encompass. This menu has the following options:
-
Clear Filters option in the menu resets the filtering to the system default.
-
Reset View resets both the filtering option and any changes to the column layout.
-
Customize Columns enables users to select which columns are visible.
-
Some options have been updated to provide more control over what information is included on the closing instructions page when using the Add Conditions option. When the Add Conditions option is selected on the Closing Instructions page users can now either select to copy all open condition names and internal/external descriptions to the closing instructions, or they can expand the list to select individual conditions. To expand the list of conditions available to copy, select the new Expand![]() option. Once expanded, users can select the checkbox to include any individual open condition names and internal/external descriptions that they want to include in the closing instructions.
option. Once expanded, users can select the checkbox to include any individual open condition names and internal/external descriptions that they want to include in the closing instructions.
Note: Internal and External descriptions are optional and can be blank.
Expand Option
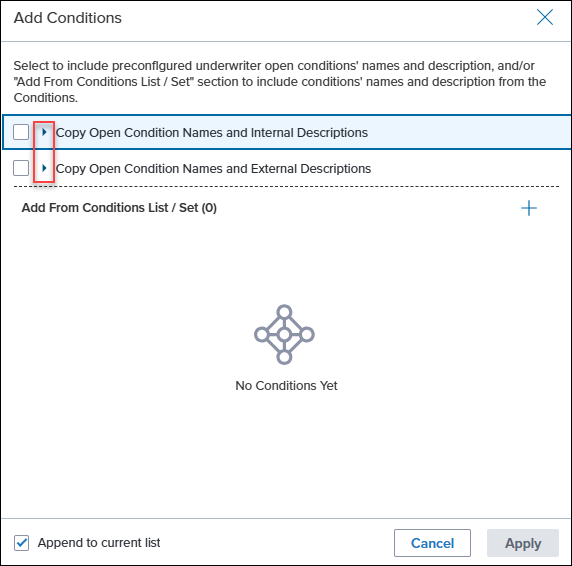
Example of Expanded Open Condition Names and External Descriptions List
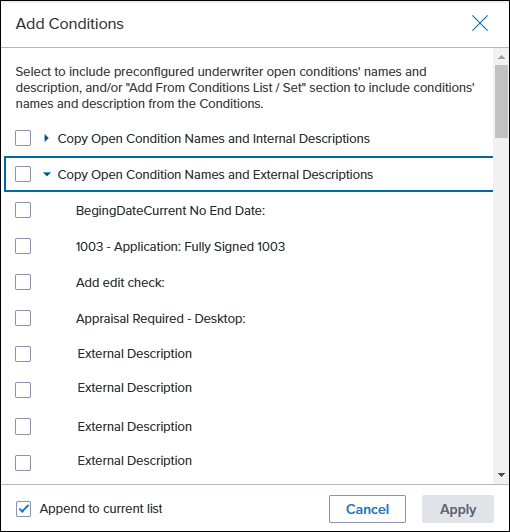
Users can now add the Condition Type column to their Conditions page view. Once added, users can sort and filter the Conditions view by the Condition Type column.
To Add the Condition Type Column to a Conditions View:
-
From a loan, select Conditions from the left navigation menu.
-
Select the Menu
icon on the left side of the page, and then select Customize Columns. -
Select Condition Type from the list of available columns.
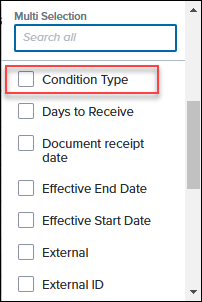
Once the column is added, users can sort or filter the conditions list. They can also save the updated view to retain these changes for the future. For more information on customizing the Conditions list, click here.
ICE Mortgage Analyzers
You can now view the following income types in the Compare and Import Tool:
-
Pension
-
Retirement
-
Tips
You can use the Compare and Import Tool to import this data for viewing and further processing in Encompass. These income types are also reported in the Income Worksheet.
Importing income retrieves all income items from the Income Analyzer:
-
When income is selected in the analyzer, the checkbox is also selected in the Encompass
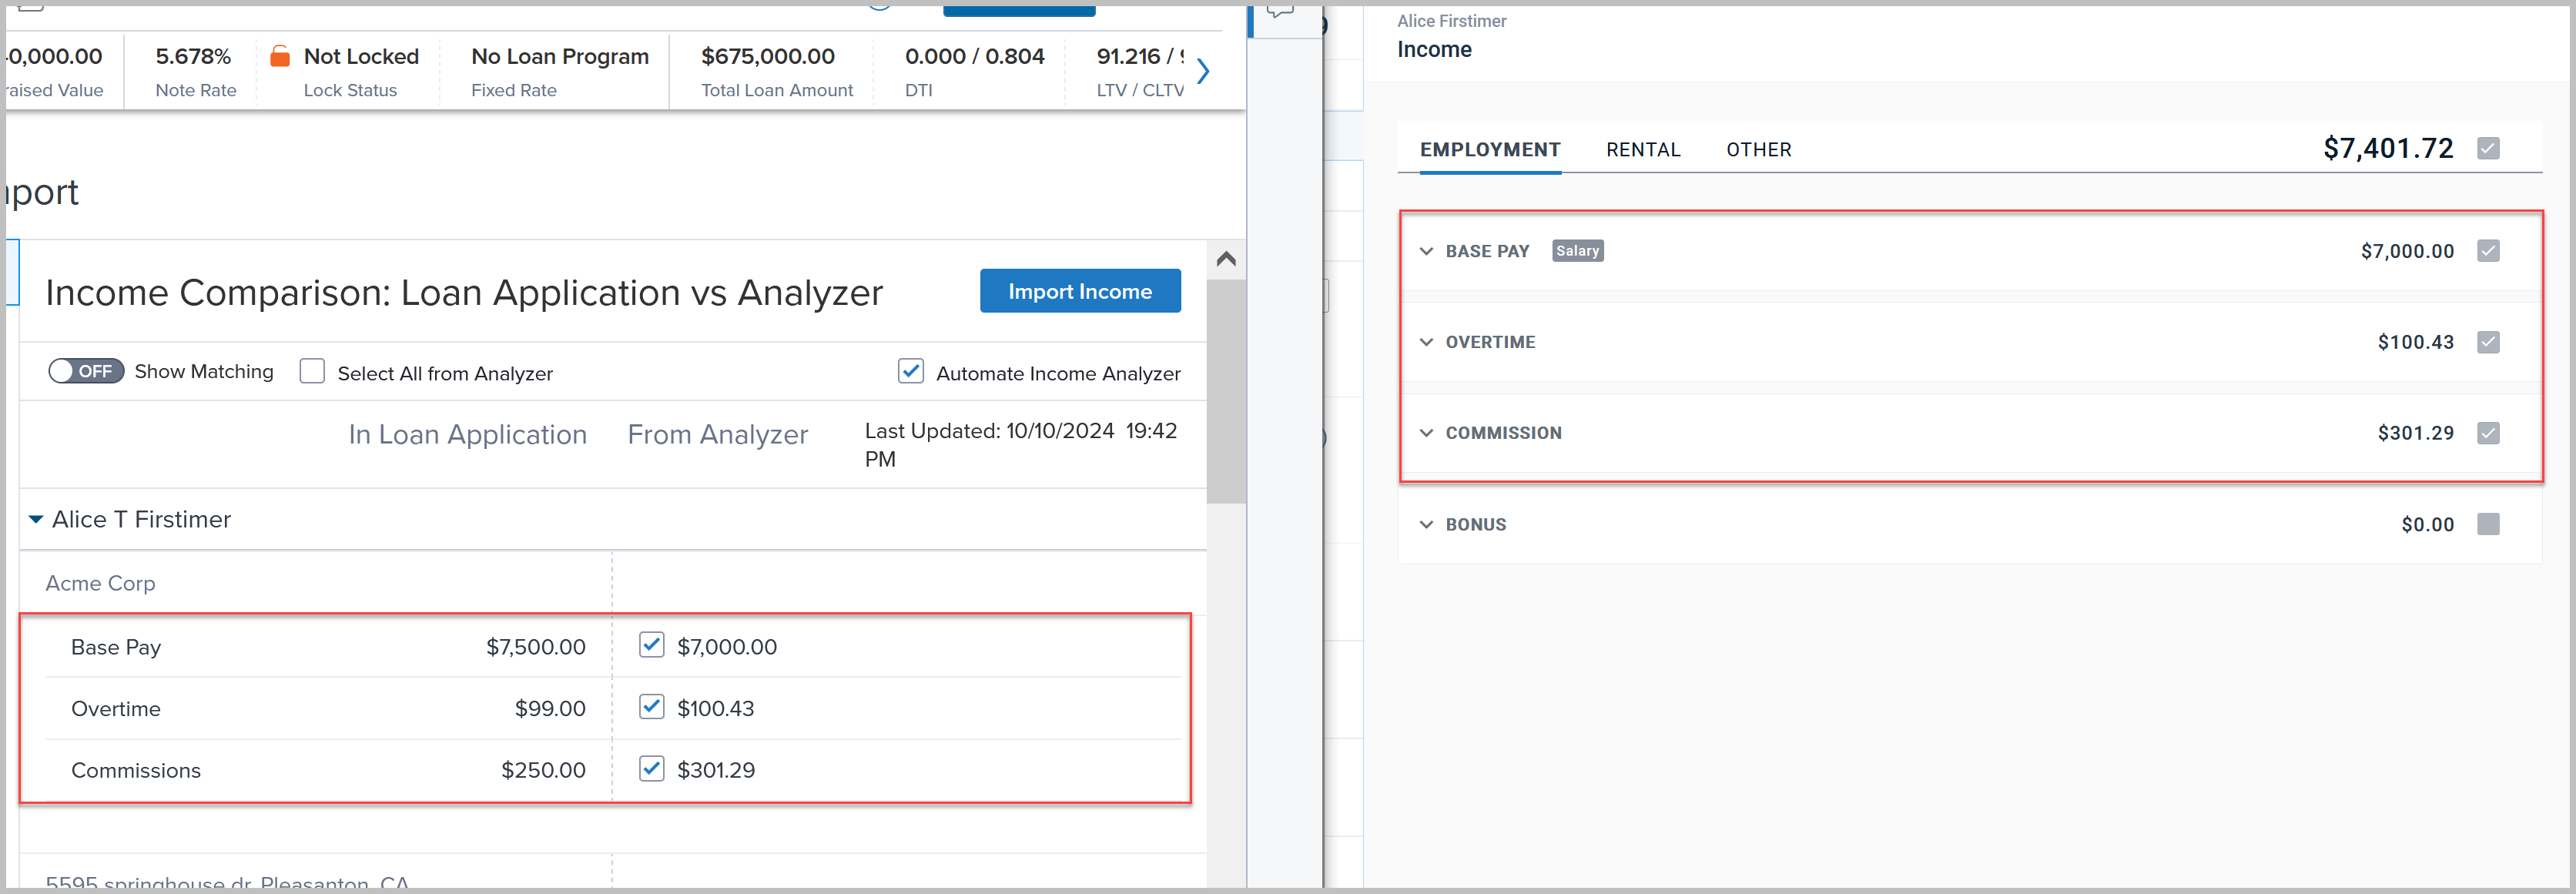
-
When income is not selected in the analyzer, the checkbox is cleared in the Encompass
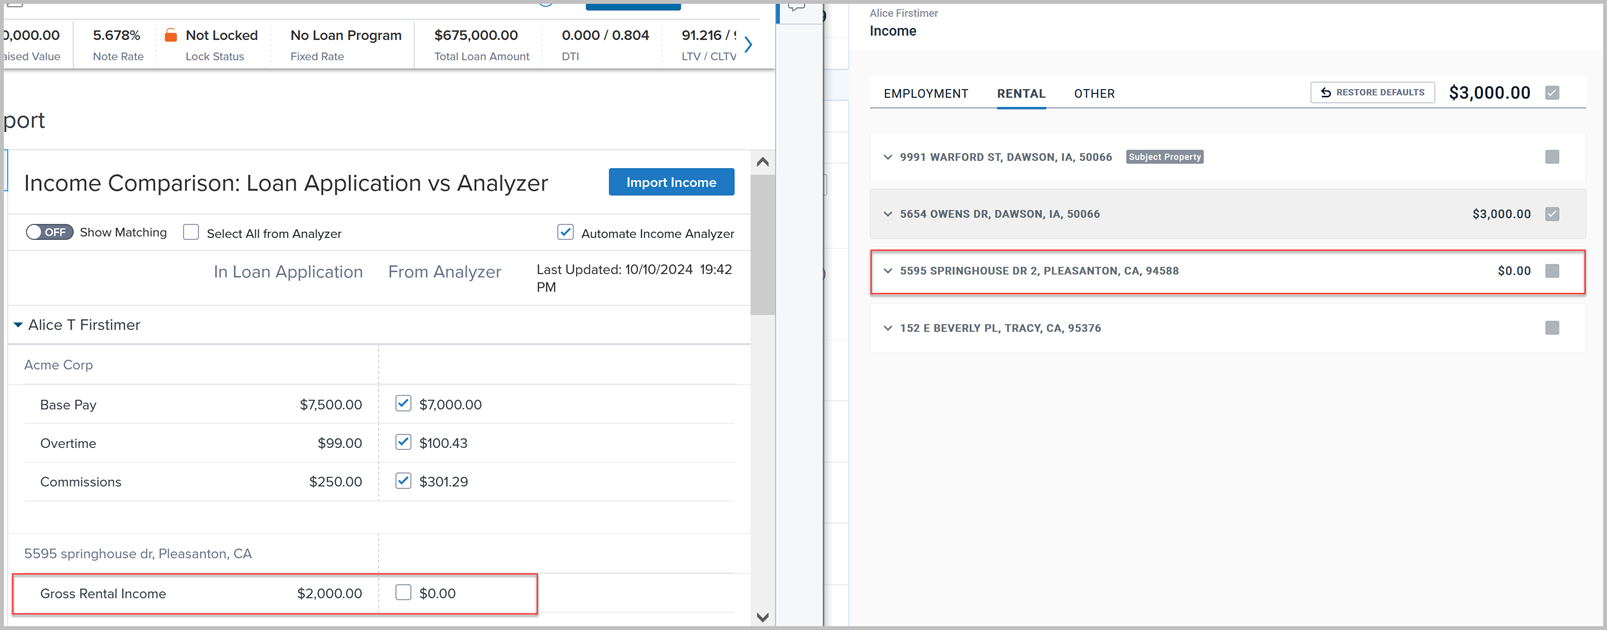
Reminder: When income values in the Income Analyzer match the values in Encompass, they are not displayed in the Compare and Import tool.
When the Mortgage Analyzer sends alerts and messages, these are displayed under the Notifications section in two categories: Alerts and Messages.
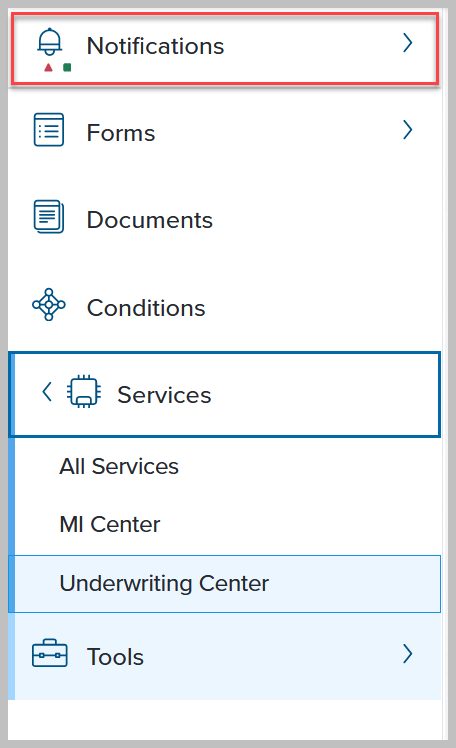
Previously, clicking an Income analyzer message was not opening to the message details correctly. Starting in Encompass 24.3, these message notifications are now informational only. Selecting the message will not open any message details. Users can than open the related Mortgage Analyzer in the Underwriting Center and review the message details there.
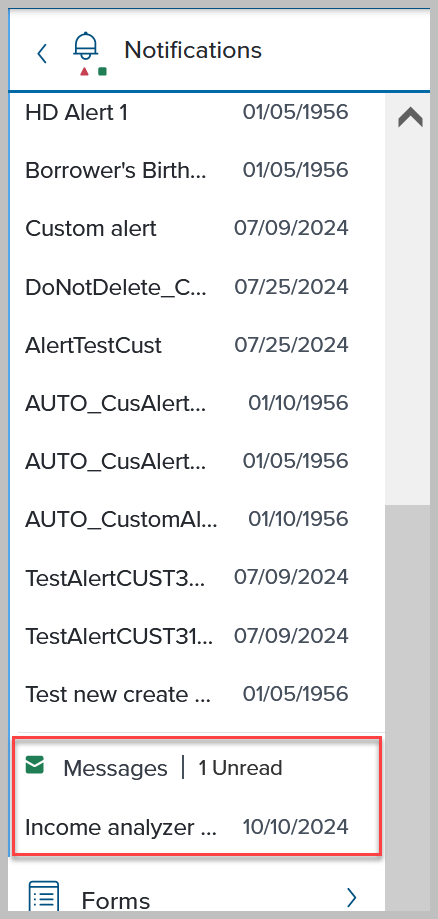
ENCW-109231
Previously, when income values were missing, the hyphens were displayed.
![]()
With the current update, the Empty label is displayed instead.
![]()
Secondary Marketing
A numeric value can be entered in the Days to Extend field on the Lock Request Form when extending a lock if the Lock Extension Price Adjustment section of the Product and Pricing setting in the desktop version of Encompass is configured as follows:
-
Control option is “Company controls extension days and price adjustment”,
-
Allow daily adjustment is selected
and
-
Price adjustment per day value is entered.
If a value is entered manually in the Days to Extend field and then that value is removed and Extend Lock is selected, an error message will be displayed.
SEC-26862
A new section, Additional Fields, has been added to the Current Loan Info snapshot in the Secondary Registration tool. The fields displayed in the section are managed in the desktop version of Encompass Lock Request Additional Fields setting under Secondary Setup.
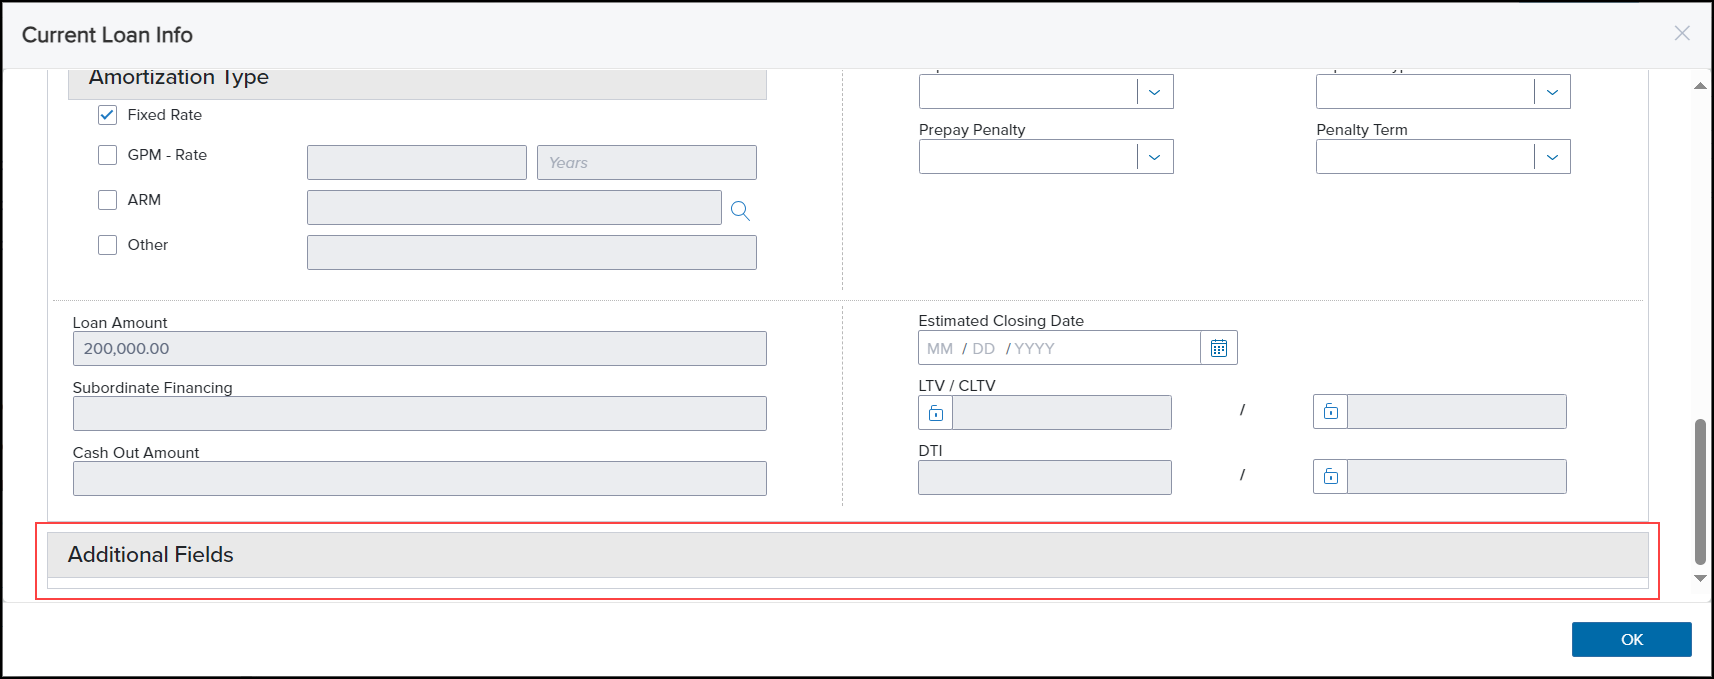
-
The field name and field value are displayed.
-
Up to 50 additional fields can be displayed.
-
The fields displayed are read-only.
SEC-27547
If ICE PPE is the provider saved in the new Pricing Provider (field ID 5029) virtual field, the following update has been made to the Secondary Lock Tool.
-
Currently in Encompass, when a lock extension is requested, the pricing provider configured in the desktop version of Encompass Product and Pricing setting is used for the extension. From this release forward, the Pricing Provider (field ID 5029) virtual field on the lock snapshot will be checked for the pricing provider and if ICE PPE is the provider, the ICE PPE portal will be launched.
SEC-27740
When there are differences between the current loan data and the lock request data, and the Lock and Confirm button is selected on the Secondary Lock Tool, the Compare with Current Data modal is displayed to provide an opportunity to copy the current loan data to the lock request before the loan is locked and confirmed.
If there are no differences between the current loan data and the lock request data, the Compare with Current Data modal will not be displayed.
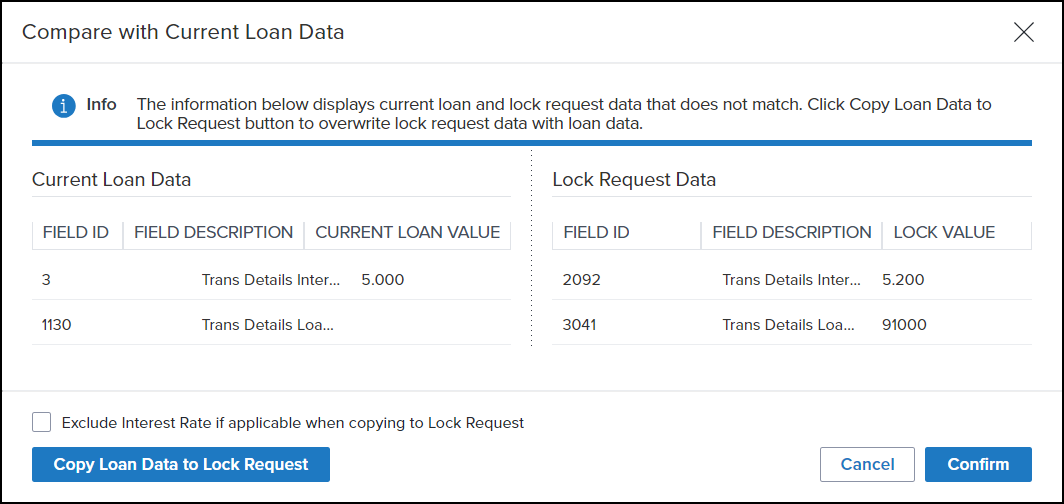
-
Select Copy Loan Data to Lock Request to copy the current loan data to the lock request.
-
Select Confirm to lock and confirm the loan without copying the current loan data to the lock request.
SEC-27657
ICE PPE
(Updated on 11/22/2024)
The ICE PPE integration with Surefire enables ICE PPE users to include real time Loan Program Comparisons driven from ICE PPE pricing and products in single property websites for listings that can be co-branded with partners, display photos, generate open house flyers, and be shared via social media.
For additional information and the steps to configure the new integration between ICE PPE and Surefire, refer to the ICE PPE 24.3 release notes.
This functionality will be available shortly after the release of ICE PPE 24.3.
SFIRE-77
| Next Section: Fixed Issues | ||
| Previous Section: New Forms & Features |