Enhanced Conditions
This feature is not available in Encompass Broker Edition.
Enhanced Conditions
Working with Enhanced Conditions Setup and User Guide
Using the Condition Types option within the Enhanced Conditions settings, administrators can:
-
Create and customize condition types based on your company workflow
-
Define an unlimited number of condition types (for example, preliminary, underwriting, post-closing, plus custom types)
-
Define the available options for some of the fields in the enhanced condition (category, prior to, recipient, and source fields)
-
Define the user role's status tracking options for the enhanced condition (for example, determine roles who can receive, clear, or waive the condition)
-
Define which status tracking options for the enhanced conditions should be addressed in order to satisfy a condition (for example, the administrator can configure the waived status as the status that closes/satisfies the condition)
-
Define the roles that can select and clear the status tracking options in the loan (for example, they can define that the Underwriter role can select and clear the Cleared checkbox for an enhanced condition)
To Set Up New Condition Types:
- On the Encompass menu bar, click Encompass, and then click Settings.
- On the left panel, click eFolder Setup, and then click Enhanced Conditions.
-
Click the Condition Types button.
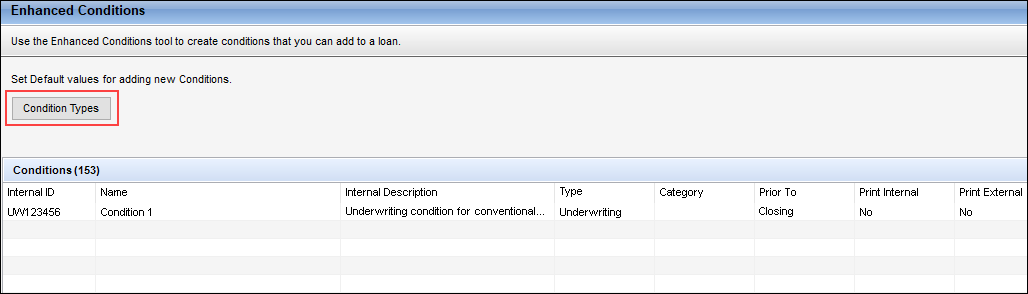
The Condition Type Settings screen displays.
The Preliminary, Underwriting, and Post-Closing types are provided in this Settings list by default. These types are set to Active by default, but they can be deactivated by the administrator. These enhanced condition types have been set up to mirror the options defined in these types of standard conditions. These Preliminary, Underwriting, and Post-Closing names are reserved for use for these types of enhanced conditions only. If the administrator tries to name a different type of condition with one of these, the system will not allow it and a message will be presented to the administrator explaining that the name is reserved for a particular condition type.

- Click the New icon to open the Add a Condition Type Setting screen.
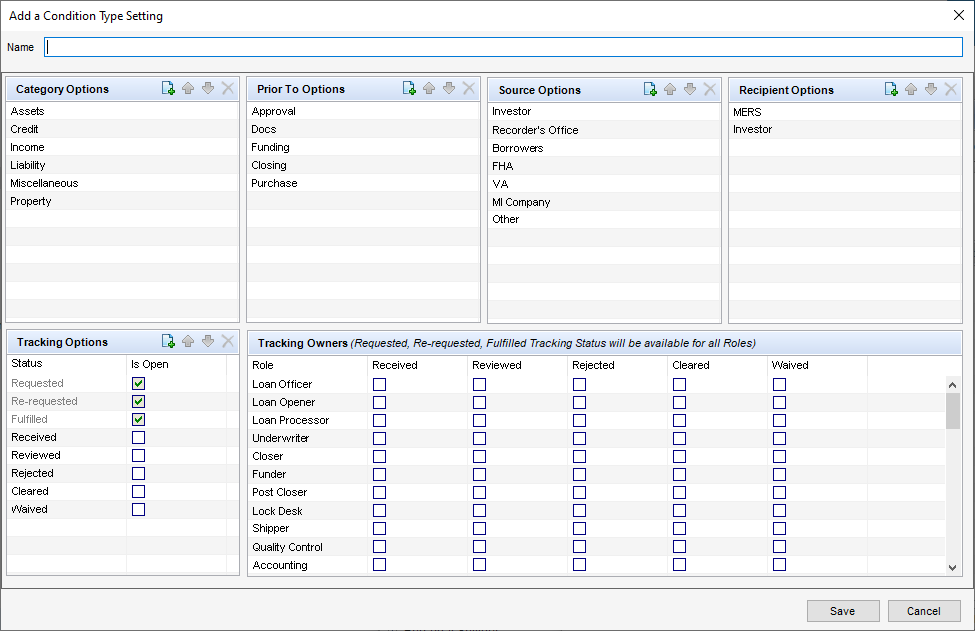
-
Type the name of the condition type. (Note that the Condition Type name cannot be duplicated or changed once the condition type is saved.)
-
In the Category Options, Prior To Options, Source Options, and Recipient Options sections, you can add and organize new options for the conditions:
-
Category Options: Add and manage the condition categories you want to use.
-
Prior To Options: Add and manage options that describe when the condition must be satisfied.
-
Source Options: Add and manage the options of whom (i.e., the source) the condition may come from.
-
Recipient Options: Add and manage whom may need to receive the condition during the loan cycle.
-
Tracking Options: Determine the different tracking options that will be provided with the condition. Select the Is Open checkbox to indicate that the condition is still open (and not considered closed) when the specific tracking option is selected in the loan file.
- “Requested”, “Re-Requested”, and “Fulfilled” tracking status options are available as static options and cannot be edited or moved to a different position in the dropdown list.
- For all of these sections:
- To add a new option, click the New icon, and then type the name of the category.
- To move an option up or down in the list, select an option, and then click the up or down arrow accordingly. This list determines the order in which these options are listed in the condition’s dropdown fields in the web version of Encompass and Encompass TPO Connect.
- To delete an option, select an option, and then click the Delete icon.
-
- In the Tracking Owners section, select a checkbox to indicate that the role is permitted to select or clear this checkbox for the condition in the web version of Encompass and Encompass TPO Connect.
- For example, to enable the Underwriter to review and reject a condition in a loan file, select the Reviewed and Rejected checkboxes on the Underwriter line.
- “Requested”, “Re-Requested”, and “Fulfilled” tracking status are available for all roles within a loan file. Therefore, these options are not available to modify here.
- When finished configuring these settings, click Save.
- The new condition type is now included in the Condition Type Settings list.
- To activate the condition type, select the condition type and then click the Activate button. (Conditions must be activated in order to be added to a condition template.)
- To modify the condition type, select the condition type, and then click the Edit icon.
Once you have created at least one condition type, then you can create a custom condition (i.e., a condition template).
To Create a Condition Template:
- In the Conditions section, click the New icon.
-
In the Enhanced Conditions screen, select the condition Type. This dropdown list is populated based on the condition types you have created. (This is a required field.)
- Among the various types that are available, the “Investor Delivery” type is intended for use with Encompass Investor Connect bi-directional conditions. Please note that this "Investor Delivery" type is available only to users who have enabled Encompass Investor Connect. For detailed information about configuring and using Enhanced Conditions with Encompass Investor Connect, refer to the Encompass Investor Connect 20.2 December Service Pack release notes.

- Type an Internal ID for the condition. This ID is a unique identifier that can be used by your organization to identify the condition.
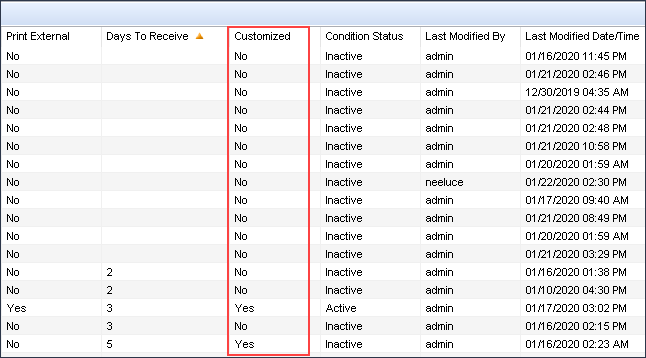
- The Condition Status field will be automatically populated with the Inactive status the first time the condition’s settings are saved. This status will be automatically updated to Active when the administrator clicks the Activate button for the condition.
- Type an External ID for this condition. This ID is a unique identifier that typically comes from an external third-party source, such as an investor, that they can use to identify the condition (for AUS conditions or Investor delivery, for example).
-
Select the Condition cannot be duplicated in loan file checkbox to prevent loan team members from duplicating the condition in a loan file. (When this option is selected, the option to duplicate the condition will not be available to the loan term members in the loan file.)
- This option enables administrators to determine which conditions a user can or cannot add multiple times to a loan file. For example: Let's say a condition is being set up for the Verification of Employment. You could elect not to select this option so that users can duplicate the condition for the Verification of Employment and then it could be added Prior to Docs, and then again for Prior to Closing. On the other hand, you could elect to select this option for a condition like Funds to Close, so that users can only add the Funds to Close to the loan file once.
- Next, type a name for the condition. (This is a required field.)
- In the Internal Description text box, type a description of the condition that will be displayed when a loan team member is viewing the condition details in the loan. Here you can provide additional details or specific instructions to the loan team member.
- In the External Description text box, type a description of the condition that will be provided to a consumer or to a loan team member in the loan when accessed in Encompass TPO Connect. When the condition is marked as an ‘External’ condition, this description will print on forms that contain conditions and/or what will be published to the lender/broker via Encompass TPO Connect.
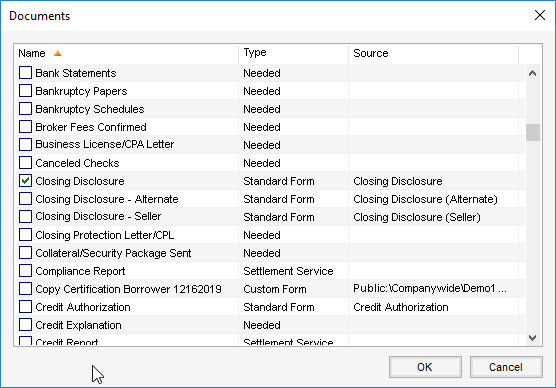
- Next, click the Documents button to select one or more documents that are required to satisfy the condition.
-
Use the Owner dropdown list to select an Owner for the condition from the roles defined in the Roles setting. The role is listed as the owner of the condition on the Condition Details page in the desktop and web versions of Encompass. Typically, the owner of the condition is responsible for satisfying the condition. However, this Owner field is purely informational, and a different loan team member may be assigned to satisfy the condition.
-
Select a Category, Source, Recipient, and Prior To option from the applicable dropdown lists. The options in these dropdown lists are populated based on the condition types you set up earlier using the Condition Type Settings.
-
In the Effective Dates section, click the Calendar icons to select a date for when the condition starts to be required for the loan and stops being required for the loan. These dates determine when loan team members will have access to this condition template in a loan. When the dates are no longer effective, the loan team members will not see this condition template in the list of conditions to add to the loan.
- In the Days to Receive field, type a number to automatically populate the Days to Receive field for a condition in the loan.
- A Days to Receive field is also provided on the main Enhanced Conditions settings screen. If you have already entered a value in this field on the main screen, the same value will be auto-populated to this field in the condition template. You can modify this value in the condition template as needed.
-
Select the Internal or External checkbox (or both) to indicate which type of condition form this condition will be printed on.
-
Internally and Externally checkboxes are also provided on the main Enhanced Conditions settings screen. If you have already selected one or both of these checkboxes on the main screen, the same checkbox selections will be auto-populated to these checkboxes in the condition template. You can modify these checkbox selections in the condition template as needed.
The two print options are used to determine the type of condition forms on which a condition will be printed. For example, if you do not want the condition to print on the Conditional Approval letter, select Internal. If neither option is selected, the condition will not be included on any condition forms.
-
- Use the Automatically upload TPO attachments to options to indicate the document that will be automatically linked with the condition. When a TPO user is working with the condition in their TPO Connect website, the document you indicate here will be associated with condition. The TPO user can then visit the Conditions section of the Docs & Conditions page in their TPO Connect site and select the document to attach to the condition.
- Document with same name as condition - With this option selected, a document with the same name as the condition name is linked with the condition.
- Default Document - With this option selected, click the Select Documents button, and then select the document to link with the condition.
- When finished, click Save.
![]() Customizing Condition Settings
Customizing Condition Settings


To Activate the Enhanced Condition:
After you have added the condition details and saved the new condition, the condition's status is set to Inactive by default.
- When Inactive, any condition templates added and activated under this condition will not be visible to the users at the loan level. Both the condition template and the condition type must be Active in order for the condition to be visible at the loan level.
-
When setting up new Condition types, this option is not provided to loan team members.
- Select the condition in the list activate.
-
Click the Activate button.
- The Condition Status is updated to Active.
- To deactivate the condition, select the condition in the list, and then click the Deactivate button. When prompted, click Yes to complete the deactivation. Loans where this condition has already been added will not be impacted when the condition is deactivated.
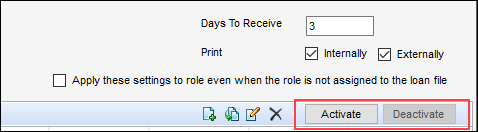
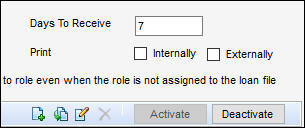
To Indicate Days to Receive and Print Properties:
- In the Days to Receive field, type a number to automatically populate the Days to Receive field for a condition in the loan.
- Select the Internally or Externally checkbox (or both) to indicate which type of condition form this condition will be printed on.
The two print options are used to determine the type of condition forms on which a condition will be printed. For example, if you do not want the condition to print on the Conditional Approval letter, select Internally. If neither option is selected, the condition will not be included on any condition forms.
See Also
Enhanced Conditions Sets Setting
Automated Enhanced Conditions (Business Rule)
Encompass Developer Connect Enhanced Conditions and Settings API Reference