Configuring Borrower Loan Portal Settings
Borrower loan portal settings affect the borrower's experience in the borrower portal. The settings control whether borrowers can upload files outside of a task, if contact information for the loan officer and loan processor is shown to the borrower, and control password requirements for borrower accounts.
To configure the borrower loan portal, click Borrower Loan Portal in the left navigation menu.
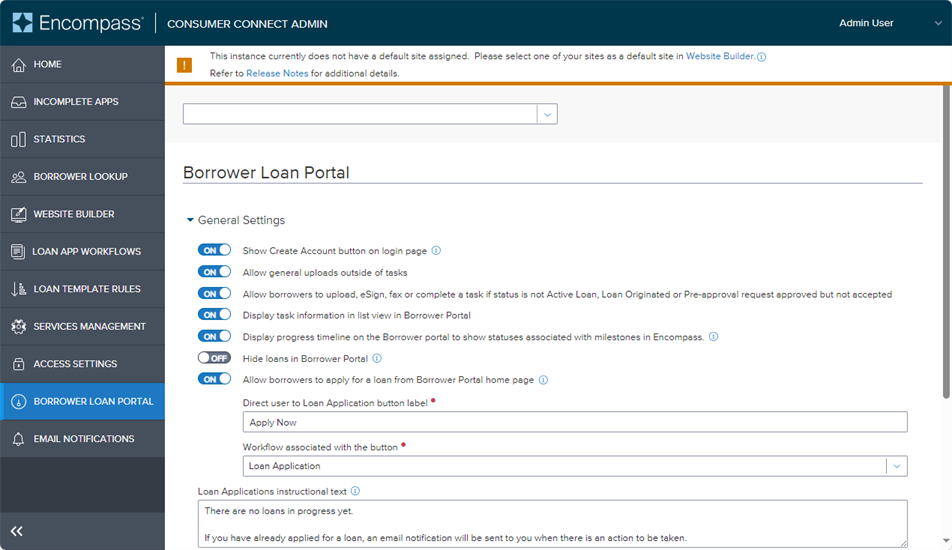
Use the General Settings to manage various aspects of the borrower experience on your borrower-facing website.
-
Show Create Account button on login page: Use this option to provide a Create Account button on the login page that borrowers will see after they click the Apply Now button on your site to start the loan application process.
-
Allow general uploads outside of tasks: By default, this option is On so borrowers are allowed to upload files outside of their loan tasks. Toggle this option to Off to prevent borrowers from uploading files that are not associated with document requests or other tasks.
-
Allow borrowers to upload, eSign, fax or complete a task if status is...: This option controls whether borrowers have the ability to upload, eSign, fax or complete a task if the loan has been withdrawn or canceled. When this option is set to On, borrowers are able to perform all tasks in the borrower portal regardless of whether the loan has been withdrawn or canceled. When this option is Off, Consumer Connect checks the status of the loan in Encompass to determine whether the loan has been withdrawn or canceled. If the loan status is NOT Active Loan, Loan Originated or Pre-approval request approved but not accepted, the borrower can view the loan but cannot upload, eSign, fax or complete a loan task. The status of the loan is indicated by the Current Status field in Encompass (field ID 1393). It is strongly recommended that this option is turned Off for lenders who want to limit edit access to withdrawn or canceled loans . When Off, the changes are reflected in both pre-existing and new loan applications.
-
Display task information in list view in Borrower Portal: Controls if the tasks that need to be completed by the borrower are displayed on task cards or in a list view. By default, this option is set to Off which results in tasks displayed as task cards. To display a list of tasks instead, set this option to On.
-
Display progress timeline on the Borrower portal...: Determine if borrowers will be able to view a timeline of milestone statuses for the loan. The progress timeline shows the borrower the status of their loan application along with the number of milestones remaining. By default, this option is set to Off. The timeline will not display with the borrower tasks. Toggle this option to On to display the timeline. (In order for milestones to display in the timeline, you must set up the milestones to apply to loan files in the Encompass > Settings > Company/Users > Milestones setting. Provide a Consumer Status for the milestones to display in the timeline. This value will display for the Current Status of the milestone in the timeline when the matching milestone is current.) Review the New Loan Progress Timeline entry in the 23.3 November Service Pack release notes for more details about the progress timeline.
-
Hide loans in Borrower Portal: This option can be used to hide loans that meet the criteria as defined by the administrator. Specifically, administrators can specify the number of days since the loan was created or specify a completed milestone. If a loan has existed within the number of days specified or the specified milestone has been completed, the loan card will not display for the borrower in the Borrower Portal. By default, the loan card for any loan started by the borrower displays in the portal for 720 days. When this option is turned On, the options for Days and Milestone to use for this option are provided here.
-
Administrators can use the Days option to specify the number of days a loan will display for the borrower and then hide older loans that are no longer relevant to the borrower. Or, they can use the Milestone option to specify, for example, the Canceled milestone. This results in all Canceled loans from being displayed for the borrower.
-
Select Days, then type the number of days from the loan creation date that the loan will display for the borrower OR select Milestone, and then select a milestone from the dropdown list. When this milestone is completed in a loan, the loan will no longer display in the borrower portal.
-
You can only specify one of these options, not both.
-
The Hide Loans feature applies to submitted loans only. It is not applicable to loans still in draft status that have not been submitted.
-
-
Allow borrowers to apply for a loan from Borrower Portal home page: Control whether borrowers can apply for a loan from the borrower portal home page. To display the Apply Now button on your site's home page, toggle this option to On. (This option is set to Off by default and the button is not displayed.)
-
Loan applications created using the Apply Now button on the borrower portal are assigned to the default Loan Application Recipient.
-
In the Workflow associated with the button drop-down, select the workflow to associate with the Apply Now button to customize the experience.
-
-
Loan Applications instructional text: Enter the description text informing the user that there are no loans in progress.
There are several settings on the Borrower Loan Portal page for configuring site navigation on your site. Some of these settings are especially useful for seamlessly blending the borrower portal into sites that use SSO-enabled widgets.
-
Show the Navigation Menu
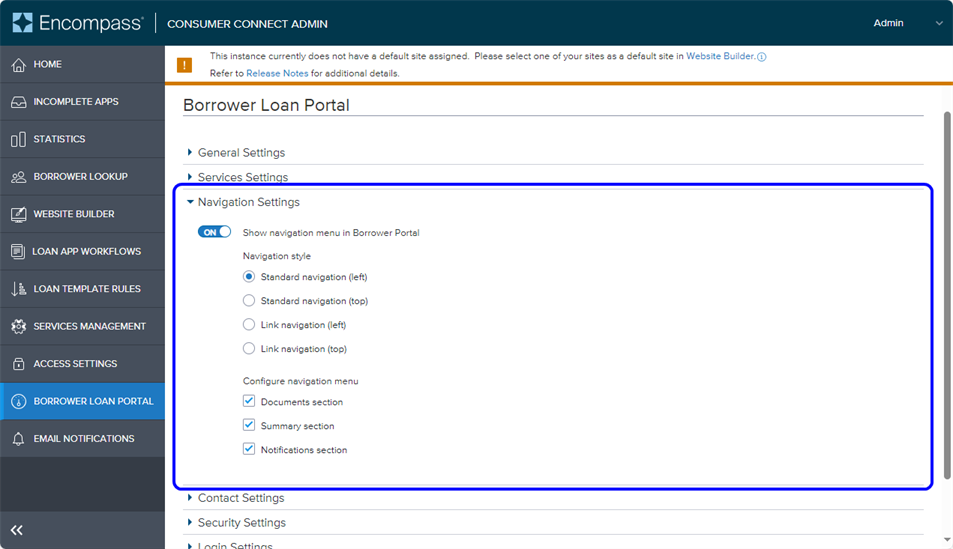
The Show navigation menu in the borrower portal option lets you show or hide the navigation menu in the borrower portal. This option provides more flexibility for lenders who want to embed the borrower portal into their existing site and who offer loan management outside of the borrower portal.
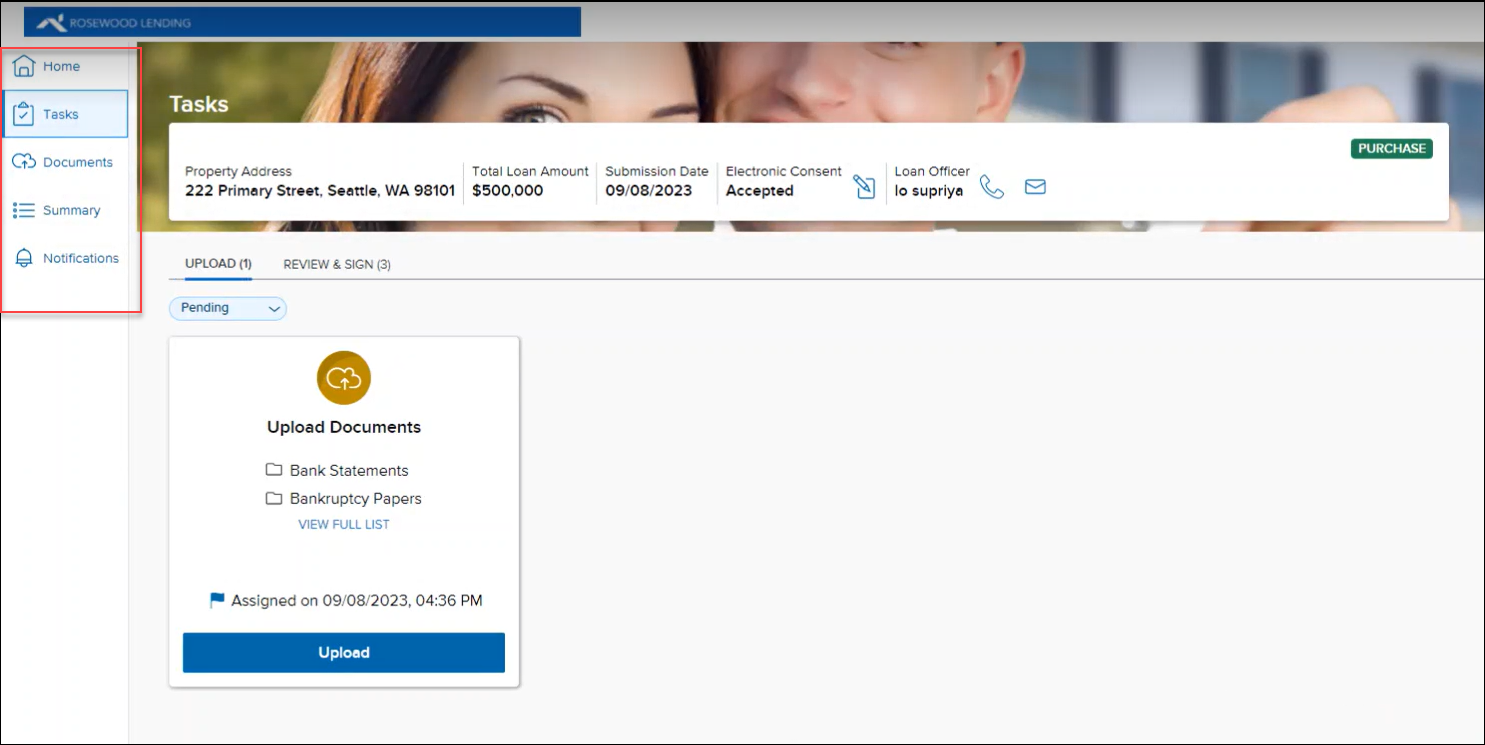
When this setting is enabled, the navigation menu is visible in the borrower portal. When it is not enabled, only the Tasks page is displayed (as shown in the example below) when a borrower logs into the borrower portal.
-
Choose a Navigation Style
Navigation styles control the orientation of the navigation menu in the borrower portal. There are three navigation styles to choose from:
-
Standard navigation. This is the default option. When selected, the borrower portal navigation menu is displayed as icons with text links on the left side of the page.
-
Link navigation (left). When this option is selected, desktop users will see the navigation menu displayed as text links on the left side of the page. Mobile users will see the navigation menu displayed as icons.
-
Link navigation (top). When this option is selected, desktop users will see the navigation menu displayed as text links on the top of the page. Mobile users will see the navigation menu displayed as icons.
-
-
Show or Hide Uploads, Summary, or Notifications in the Borrower Portal
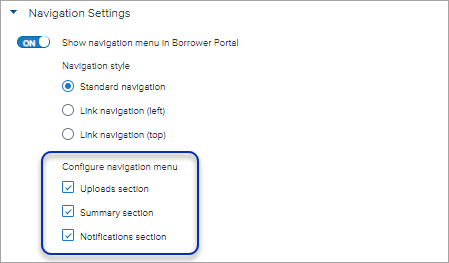
The Configure navigation menu settings provide the ability to show or hide certain borrower portal features such as Uploads, Summary, and Notifications. When a feature is hidden, it will not be listed in the borrower portal navigation menu. The entire section for that feature will not be visible or accessible to borrowers.
To Show or Hide Borrower Portal Features:
-
In the Encompass Consumer Connect Admin portal, go to Borrower Loan Portal.
-
If you have more than one site, select the site you want to edit from the drop-down list at the top of the page.
-
Click Navigation Settings to expand the configuration area.
-
Make sure Show navigation menu in Borrower Portal option is set to ON and a Navigation style is selected.
-
The Uploads, Summary, and Notifications options are displayed under the Configure navigation menu area. By default, all check boxes are selected. If you do not want a section to appear in the navigation menu, clear the check box for that option.
-
Click Save.
-
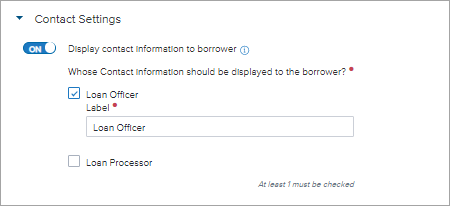
At certain points in the loan application process, Encompass Consumer Connect shows the loan officer's and loan processor's contact information to the borrower. You can choose whether to enable or disable this feature and whether to show contact information for the loan officer, loan processor or both.
To Manage Contact Settings:
-
In the Encompass Consumer Connect Admin portal, go to Borrower Loan Portal.
-
If you have more than one site, select the site you want to edit from the drop-down list at the top of the page.
-
Click Contact Settings to expand the section.
-
By default, the Display contact information to borrower option is enabled.
If you do not want to display contact information to the borrower, set the Display contact information to borrower option to OFF.
-
When set to ON, you can specify the contact information you want to display: Loan Officer, Loan Processor or both. At least one selection is required.
-
Click Save.
Security settings apply to borrower accounts and control how long a password is valid and password requirements.
To Manage Login Security:
-
In Encompass Consumer Connect Admin, go to Borrower Loan Portal.
-
If you have more than one site, select the site you want to edit from the drop-down list at the top of the page.
-
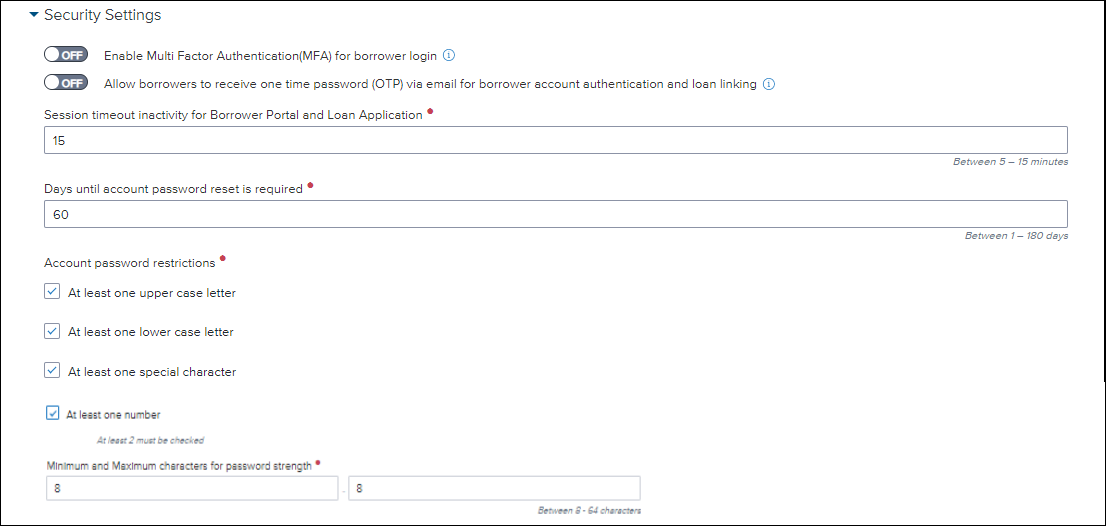
Click Security Settings to expand the section.
-
Update Security Settings as needed.
Security Setting Description Enable Multi Factor Authentication (MFA) for borrower login
Setting is turned to ON by default. When ON, users accessing the borrower portal are required to complete MFA to access the portal every time they log in. After entering log in credentials and then clicking Log In, the borrower is prompted for an authentication code. Once they receive the code via their smartphone, they add the code. The system authenticates the code and the borrower is logged into the borrower portal.
The option to receive the code via email can also be provided to borrowers for sites that opted-into borrower account authentication and loan linking and the one-time password (OTP) option is turned on.
Allow borrowers to receive one time password (OTP) via email for borrower account authentication and loan linking
Setting is turned to OFF by default. When ON, borrowers have option to send and receive one-time password requests. Borrowers accessing the borrower portal on one-time password (OTP)-enabled instances can use email as an alternate option to the phone-text/call options. They can then use the email option to complete authentication and access the borrower portal.
Session timeout inactivity for Borrower Portal and Loan Application
Required. Controls how long a borrower portal and loan application session can remain inactive before timing out.
Specify a time between 5 and 15 minutes a session can remain inactive before timing out. The default is 15 minutes. When a session times out, a Need more time? message is presented to the borrower displaying the number of seconds left before the session ends.
Days until account password reset is required
Required. The number of days a borrower's password is valid. Borrowers will be alerted when their password must be reset.
Account password restrictions
Required. Complexity requirements for a borrower password that you want to enforce. Options are:
- At least one upper case letter
- At least one lower case letter
- At least one special character
- At least one number
At least two requirements must be selected. All options are selected by default.
Minimum and Maximum characters for password strength
Required. The minimum and maximum number of characters allowed for the password. The minimum number of characters must be 8 or higher. The maximum number of characters cannot exceed 64.
-
When you are finished making changes, click Save.
Customize the text on the borrower portal login screen and cookies notification banner that appears on the log in page.

To Customize Text on Login Screen and/or Cookies Banner:
-
In Encompass Consumer Connect Admin, go to Borrower Loan Portal.
-
If you have more than one site, select the site you want to edit from the drop-down list at the top of the page.
-
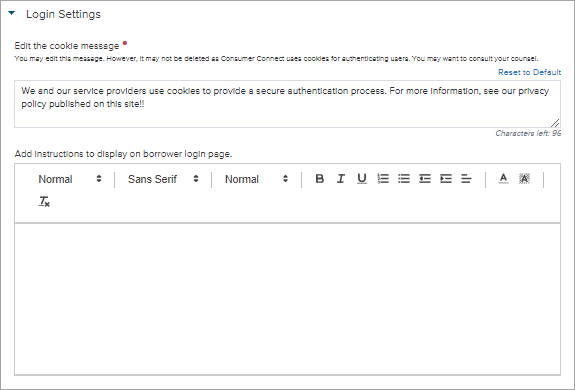
Click Login Settings to expand the section.
-
Update the Login Settings as needed.
Security Setting Description Edit the cookie message
Text is required. The cookie message is displayed in the cookies notification banner that appears on the borrower portal login page. Up to 250 characters can be entered into the text box. A Reset to Default option is provided so you can return to the default text if desired.
Add instructions to display on borrower login page
Optional. Instructional text to display on the borrower portal login screen. Up to 250 characters can be entered into the text box. If left blank, then no message will be displayed.
-
When you are finished making changes, click Save.