New Features & Forms in Version 24.3
This section discusses the new features being introduced in this ICE PPE release.
New Integration Between ICE PPE and ICE Surefire
We are excited to announce the upcoming integration between ICE PPE and ICE Surefire. This integration will enable ICE PPE users to include real time Loan Program Comparisons driven from ICE PPE pricing and products in single property websites for listings that can be co-branded with partners, display photos, generate open house flyers, and be shared via social media.
This functionality will be available shortly after the release of ICE PPE 24.3.
To enable the integration between ICE PPE and ICE Surefire, follow the steps below.
To Add ICE PPE as an Available Rate Source:
As an ICE PPE customer, you can set up ICE Surefire to employ ICE PPE pricing engine-generated pricing scenarios in your Single Property Site (SPS) media.
-
Log into ICE Surefire as a Primary admin.
-
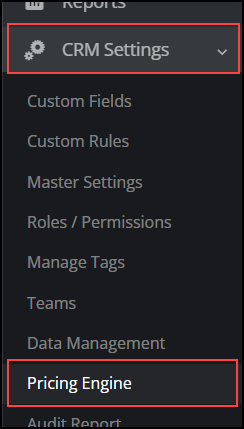
In the left navigation menu, select CRM Settings and then select Pricing Engine.
-
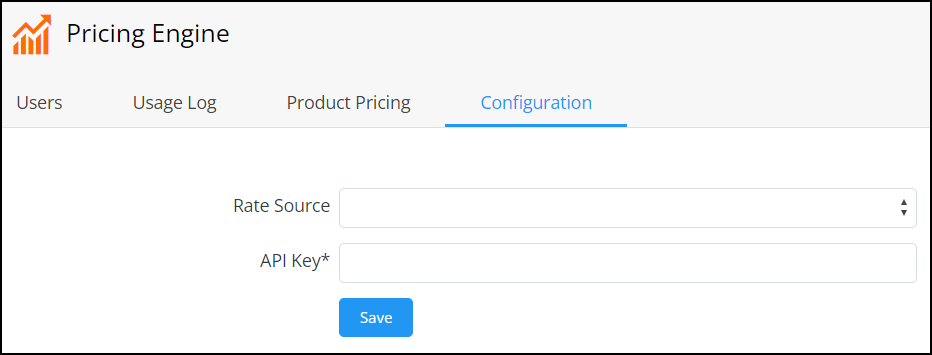
Select the Configuration tab.
-
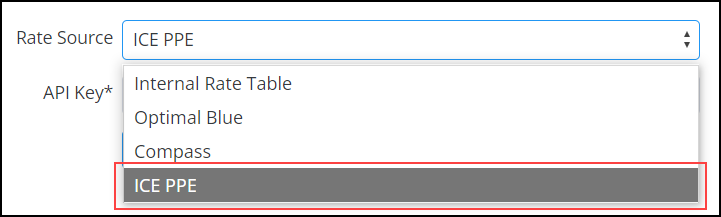
In the Rate Source dropdown field, select "ICE PPE".
-
In the required API Key field, enter your numeric API key (API Generated Token) provided by ICE PPE.

-
To receive your API key token, please submit an ICE Surefire Support ticket requesting a key be generated for you. Please allow 24 hours for a token to be provided.
-
Prior to requesting a token, make sure all users who will utilize the ICE PPE - ICE Surefire features are added to your ICE PPE account. Otherwise, if users are missing (or user information is incorrect), there can be another 24 hours delay to sync additional users.
If you have any user errors or experience syncing issues, please submit an ICE Surefire Support Ticket.
-
Select Save.
-
If your credentials are valid, a "Success" popup window is displayed.
-
If your credentials cannot be validated, you will need to contact a representative from ICE Surefire for assistance. Alternatively, you can contact a representative from ICE PPE for assistance.
To Activate ICE PPE Users:
When your organization enables ICE PPE as its pricing engine, only ICE PPE users activated in ICE Surefire will be able to access Single Property Sites.
To Enable Pricing Engine in Roles and Permissions:
For Surefire users to access ICE PPE as a Pricing Engine option, you must enable the Pricing Engine permission for a user's role in Surefire.
-
Log into ICE Surefire as an Admin.
-
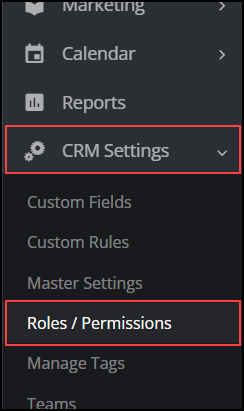
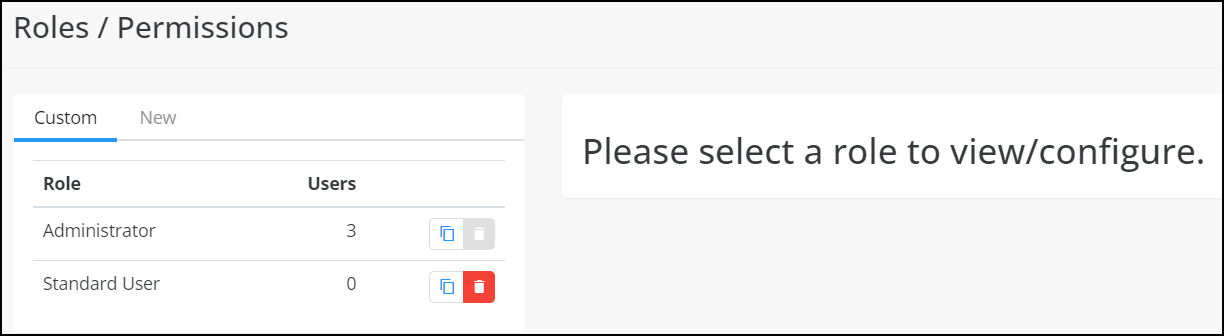
In the left navigation menu, select CRM Settings and then select Roles / Permissions.
-
Select the user role you want to provide ICE PPE use (e.g., Standard User, Administrator, etc.).
-
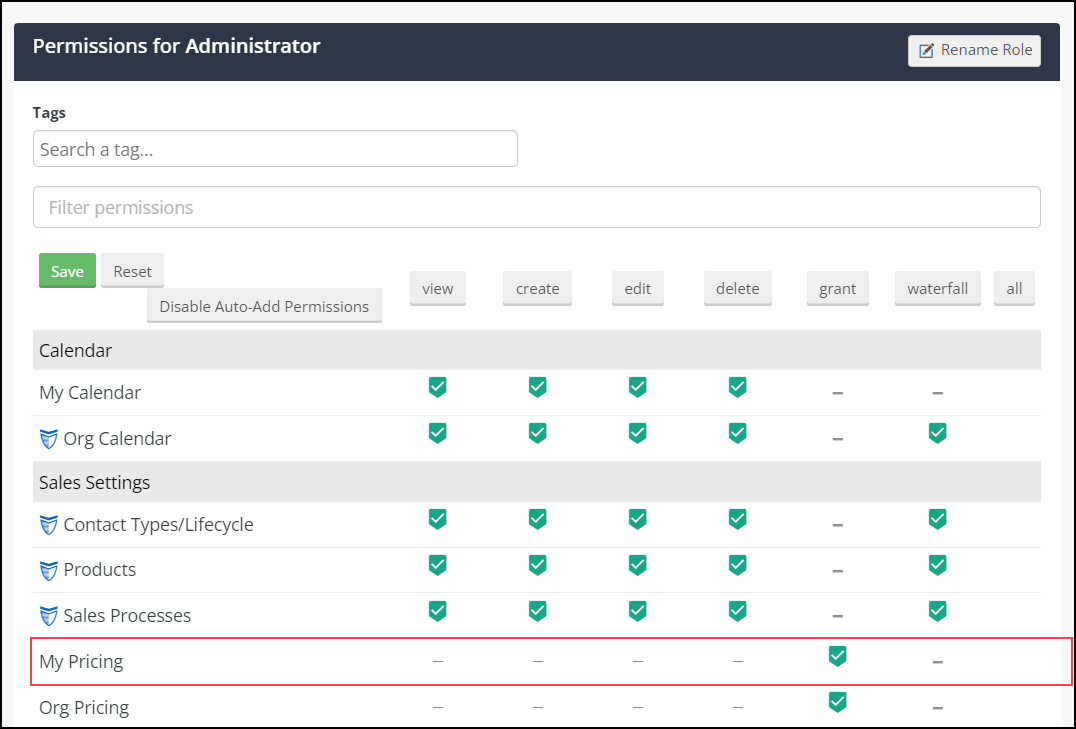
In the Permissions table, make sure that the "My Pricing" permission is selected under the Sales Settings section.
-
Select Save.
To Activate an ICE PPE User:
Each user that should be able use Surefire must have their account activated.
-
Log into ICE Surefire as an Admin.
-
As an Admin, you can impersonate a user to activate ICE PPE for them.
-
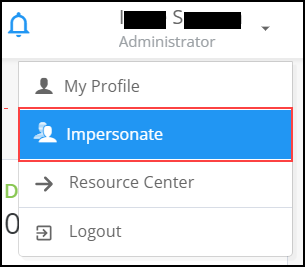
Select your name in the top right corner and then select "Impersonate" from the dropdown list.
-
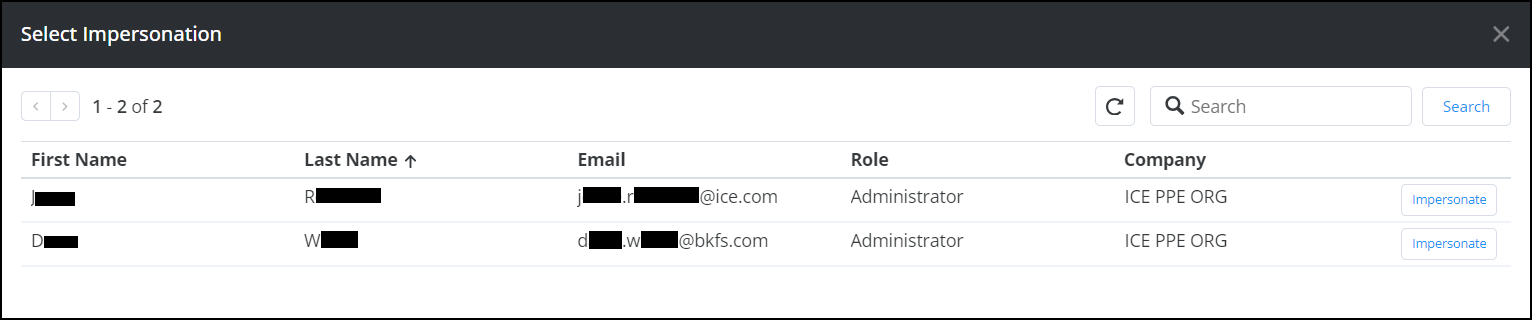
Select Impersonate on the far right of the row with the user you want to impersonate.
-
Make sure you know the user's last name and email address.
-
Select Yes, I'm sure!. You are now logged in as the user you selected to impersonate.
-
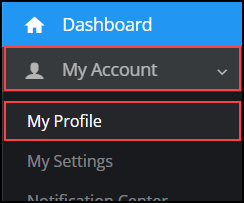
In the left navigation menu, select My Account and then My Profile.
-
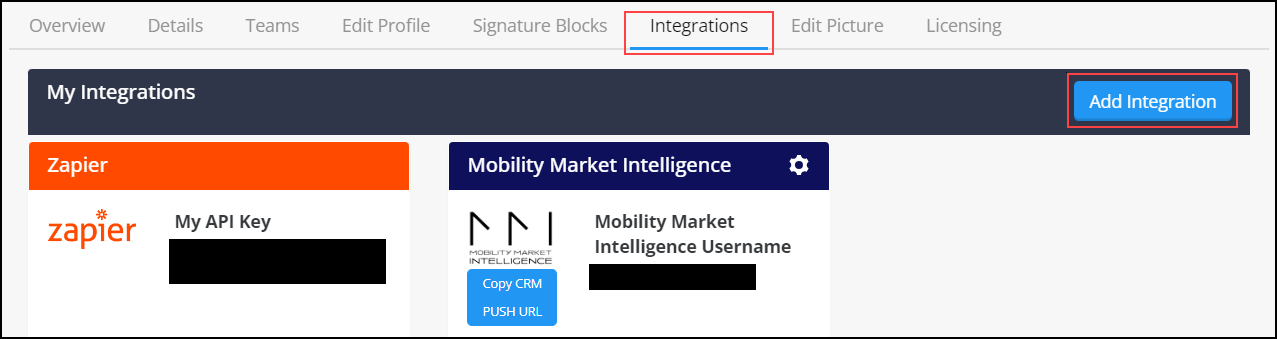
Select the Integrations tab and then select Add New Integration.
-
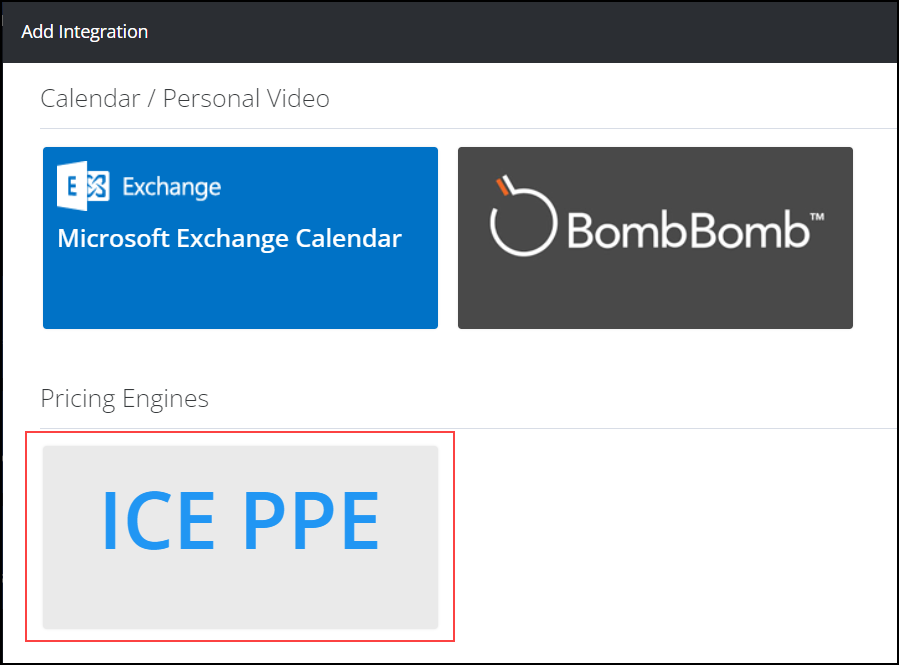
In the Add Integration popup window, select "ICE PPE".
-
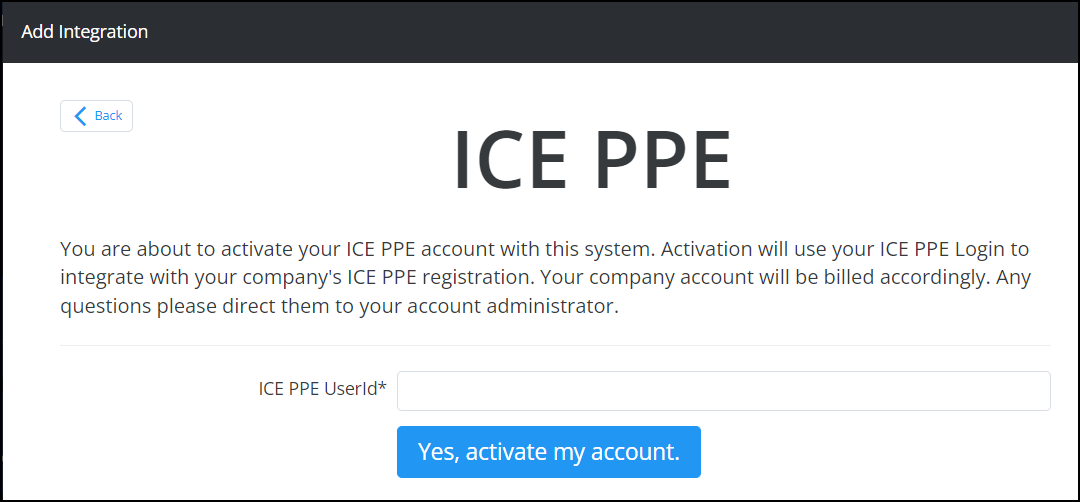
In the required ICE PPE UserId field, enter the ICE PPE UserId of the user you are impersonating.
-
Select Yes, activate my account.
-
Repeat steps 2-8 for every user you that should be able to use Surefire.
To Create ICE PPE Rate Scenarios within ICE Surefire:
A rate scenario can be created on a company level or individual user level.
To Create an ICE PPE Rate Scenario:
-
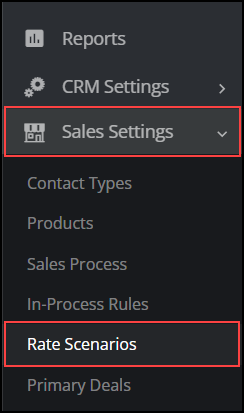
In the left navigation menu, select Sales Settings and then select Rate Scenarios.
-
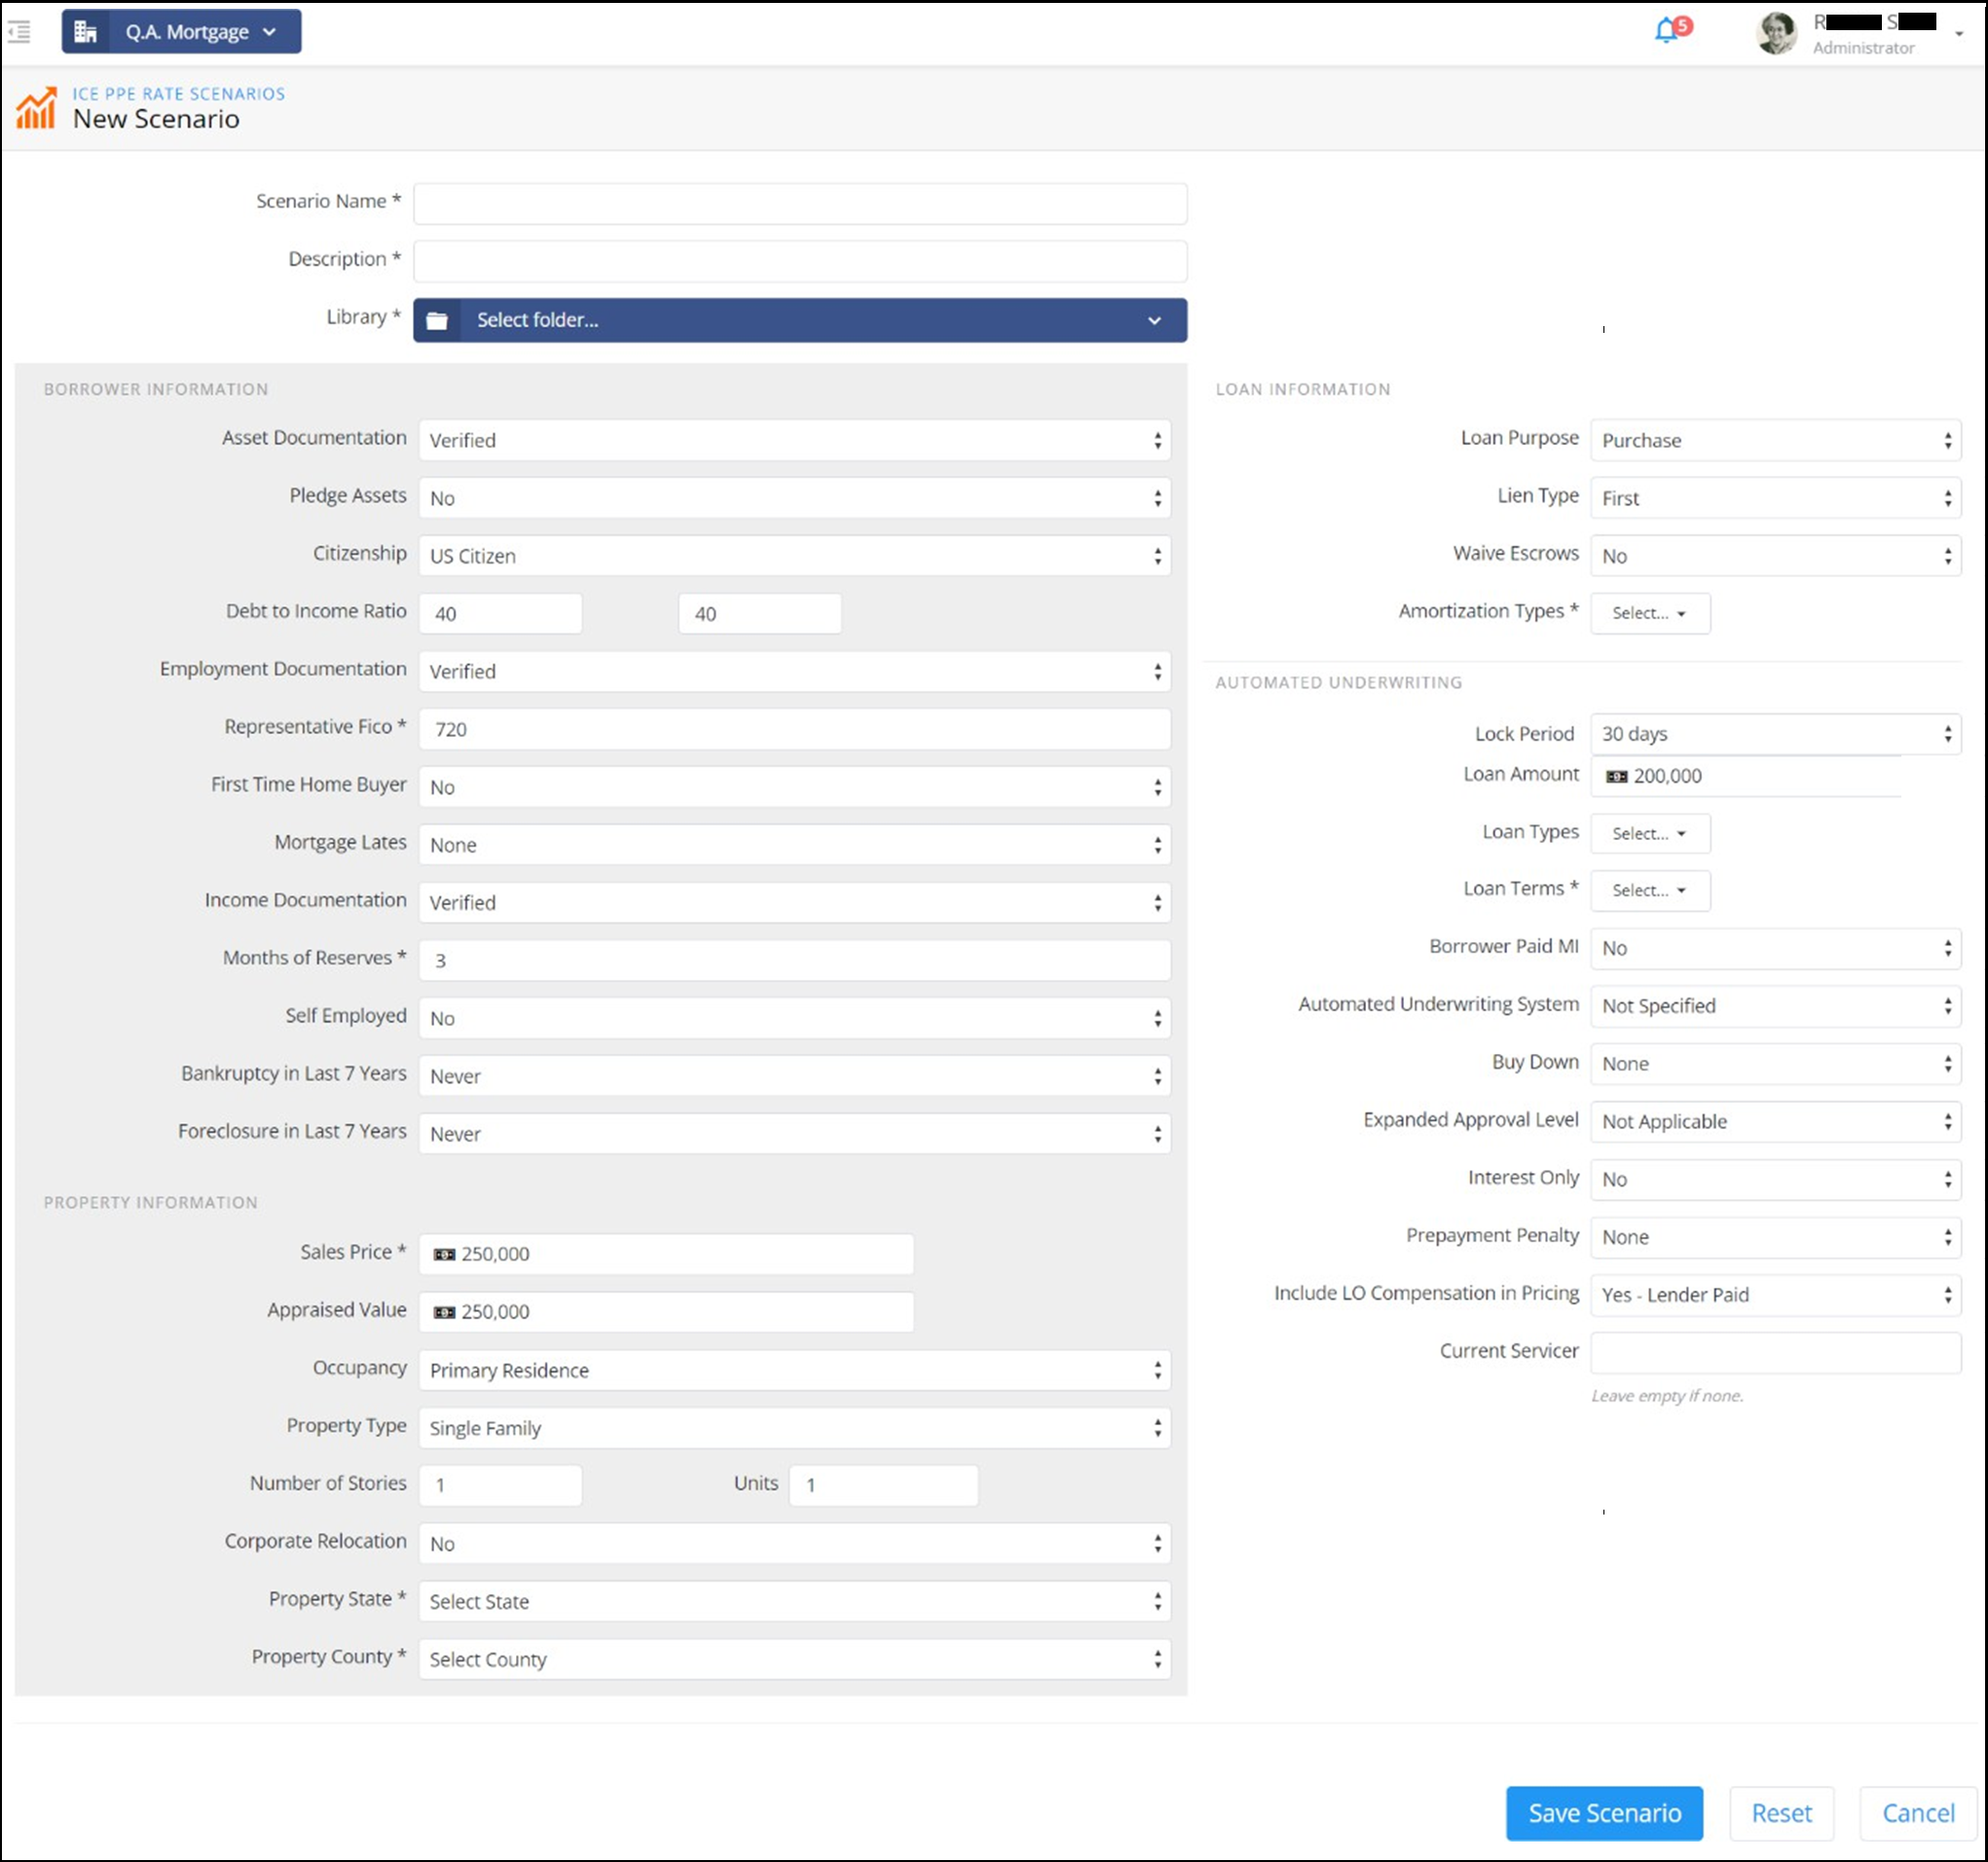
Select New Scenario.

-
On the New Scenario page, enter the data you have for a given borrower scenario (e.g. Loan Types, Loan Terms, etc.). Make sure all mandatory/required fields are completed.
Users will never get Pricing information for states they are not licensed in.
-
Select Save Scenario.
To Review Pricing Details for an ICE PPE Rate Scenario:
-
In the left navigation menu, select Sales Settings and then select Rate Scenarios.
-
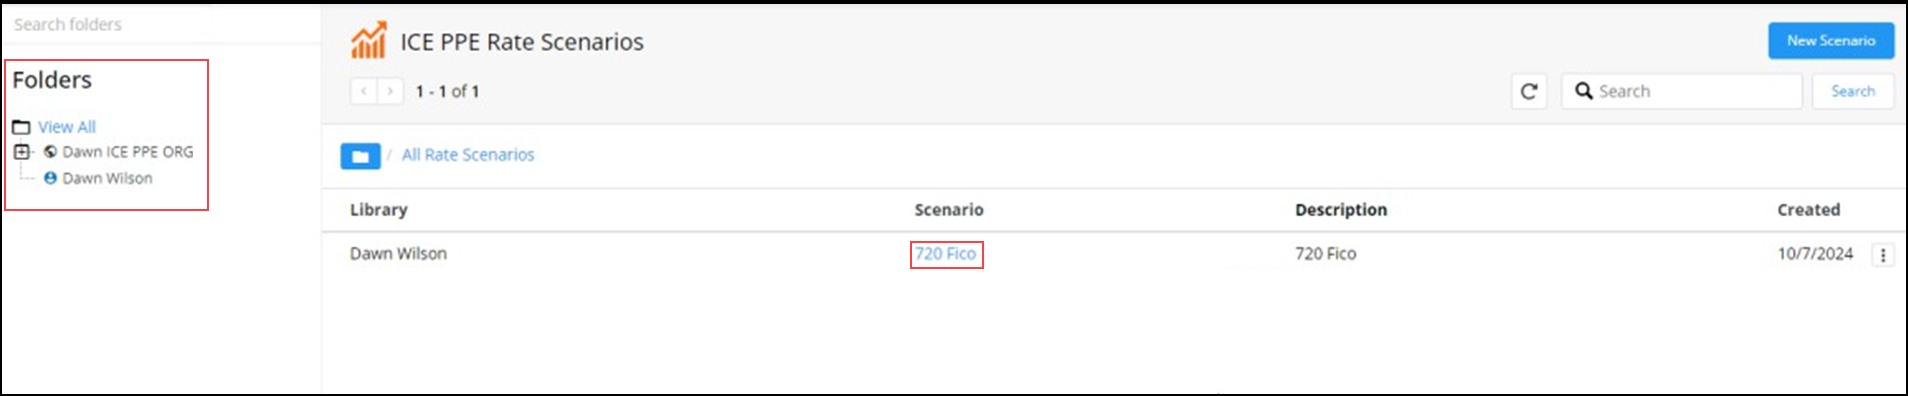
Select the folder with the Rate Scenario you want to review.
-
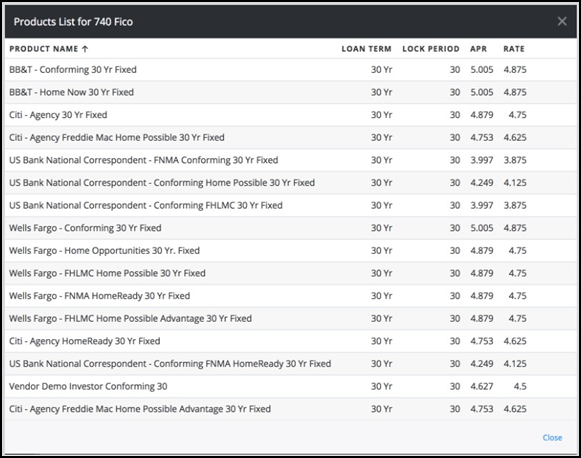
Select the Rate Scenario with the day's pricing details you want to review.
-
A list of products for the Rate Scenario you selected (Products List for [Rate Scenario]) is displayed.
Once the ICE PPE - Surefire integration is complete, you can create and manage Single Property Sites.
To Manage Single Property Site Loan Programs:
For additional help with Single Property Sites, select your Profile icon and then select "Resource Center" from the dropdown list. Use the Search to find "How to Manage Single Property Site Loan Programs".
-
In the left navigation menu, select Marketing and then select Single Property Sites.
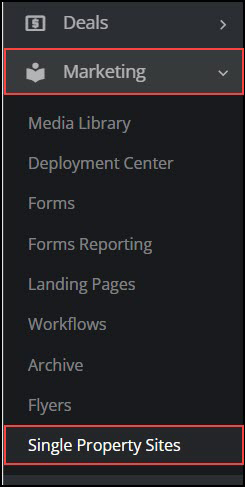
-
Select the Program Settings tab.
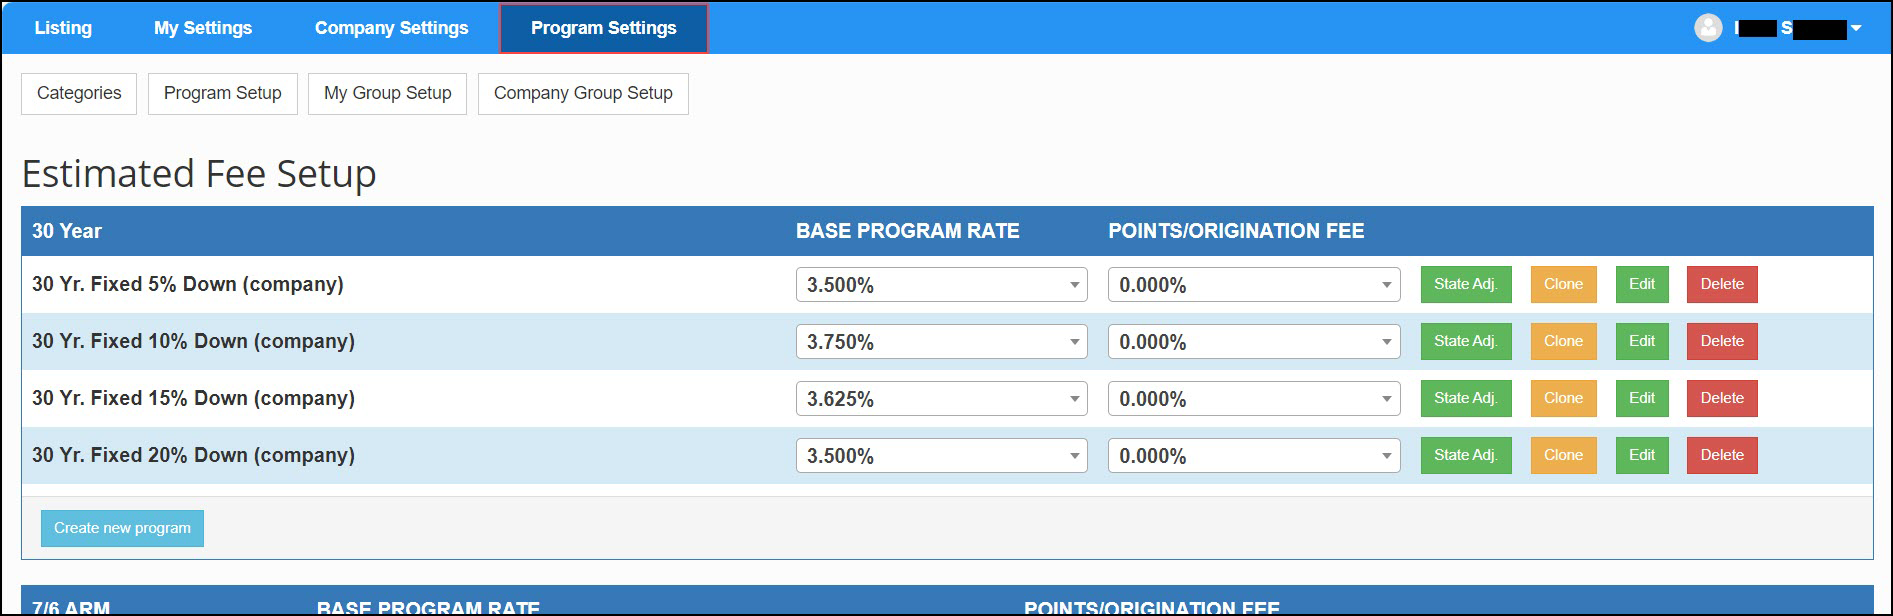
-
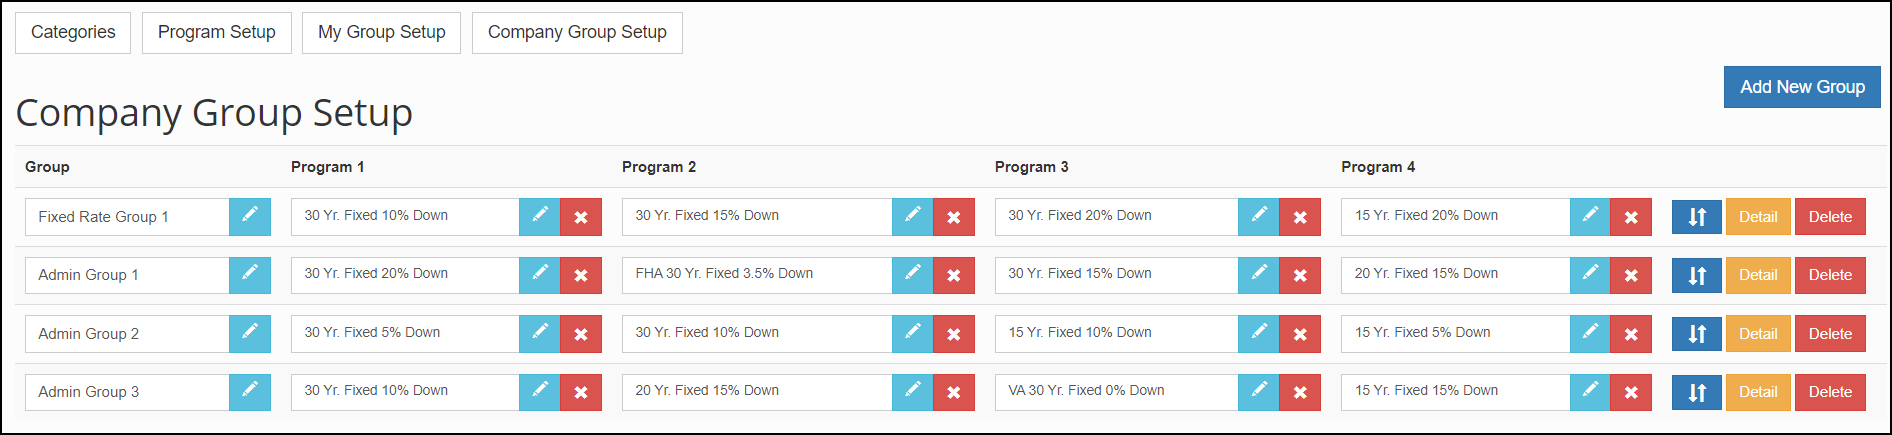
By default, you will begin on the Program Setup tab.
-
Program Settings are structured using a simple system composed of three elements:
-
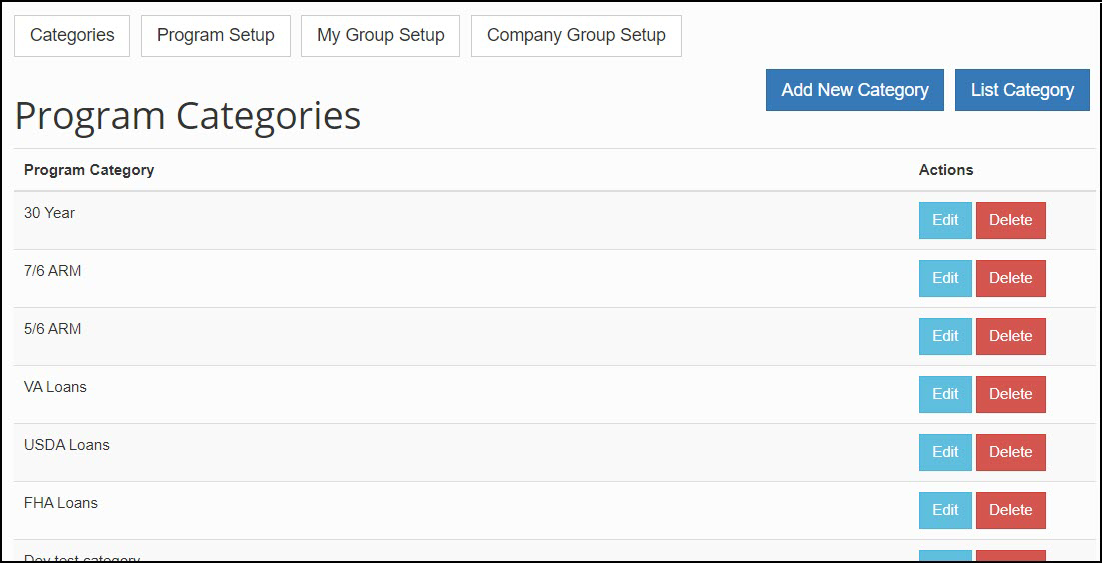
Program Categories - Individual Loan Programs must belong to a Program Category. For example, a company could have categories for 30-year, FHA, VA, and Jumbo. You can view these as broad categories of different loan types with underlying specific Loan Programs.
For additional help creating Program Categories, select your Profile icon and then select "Resource Center" from the dropdown list. Use the Search to find "Create a Loan Program Category".
-
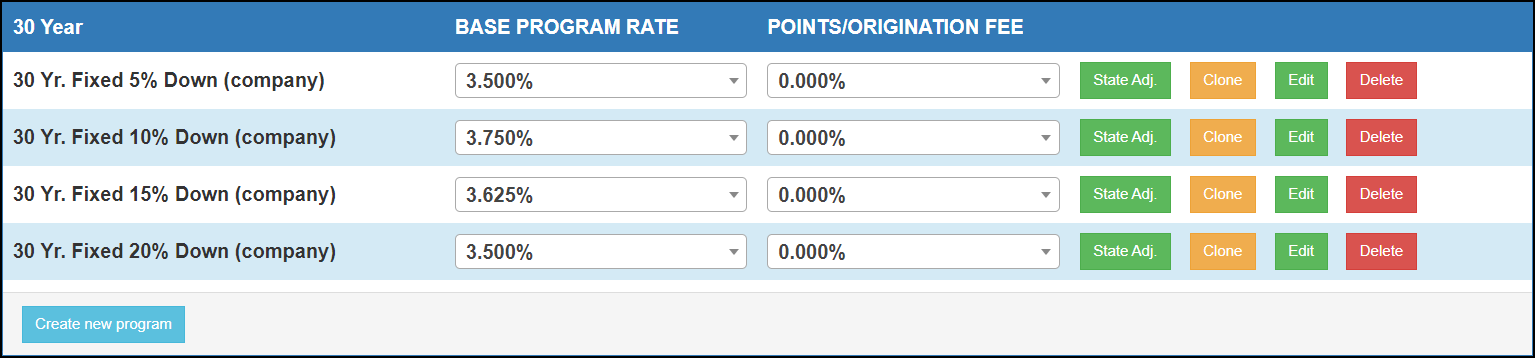
Loan Programs - Within a Program Category, an admin can create and edit individual Loan Programs. These are for more specific types of loans than the broader Program Category. For example, for a 30 Year category, you could include programs such as 30-Year Fixed 5% Down, 30-Year Fixed 10% Down, 30-Year Fixed 15% Down, and 30-Year Fixed 20% Down. Once you create the Loan Programs, you can edit the attributes of the program (e.g., Rate, Term, Taxes, etc.) and adjust the rate by state.
-
Program Groups (Personal and Company) - Once a set of Loan Programs are created, you have the option to create your own Program Groups (or containers), with up to four programs. You apply the Program Group to a SPS and the group of programs is displayed in the Rate Table of the listing's Single Property Site Flyer.
To Add Loan Programs to a group, select Add Program from the Company Group Setup page.
To Create a Single Property Site:
For additional help creating and managing Single Property Sites, select your Profile icon and then select "Resource Center" from the dropdown list. Use the Search to find "View and Manage Single Property Sites”. You will find information on how to configure settings, set up branch and licensing information , set default loan programs, set your sites' "theme colors", manage layouts, and much more.
-
In the left navigation menu, select Marketing and then select Single Property Sites.
-
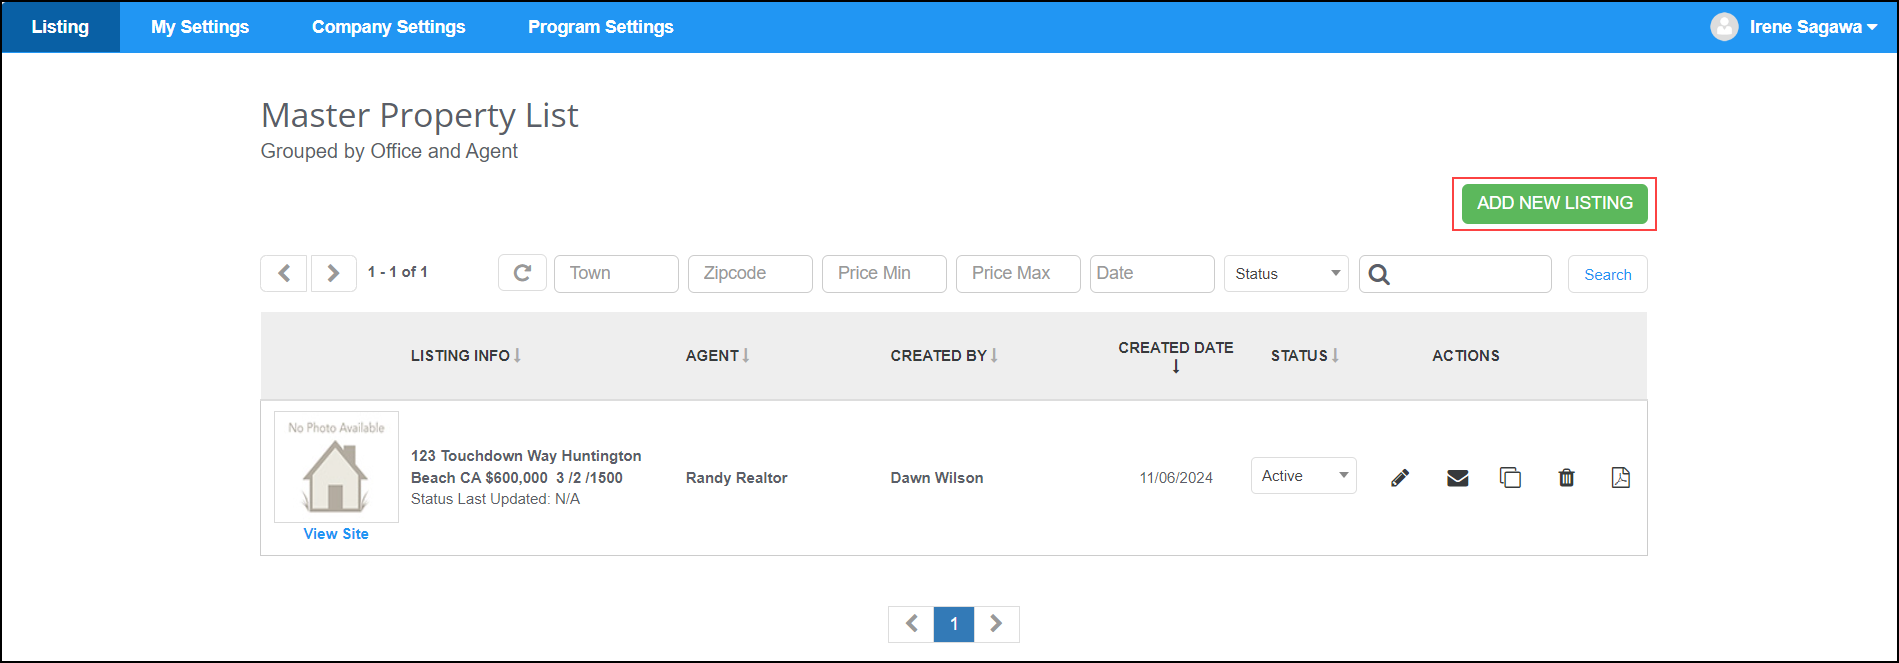
On Listing tab of the Master Property List page, select Add New Listing.
-
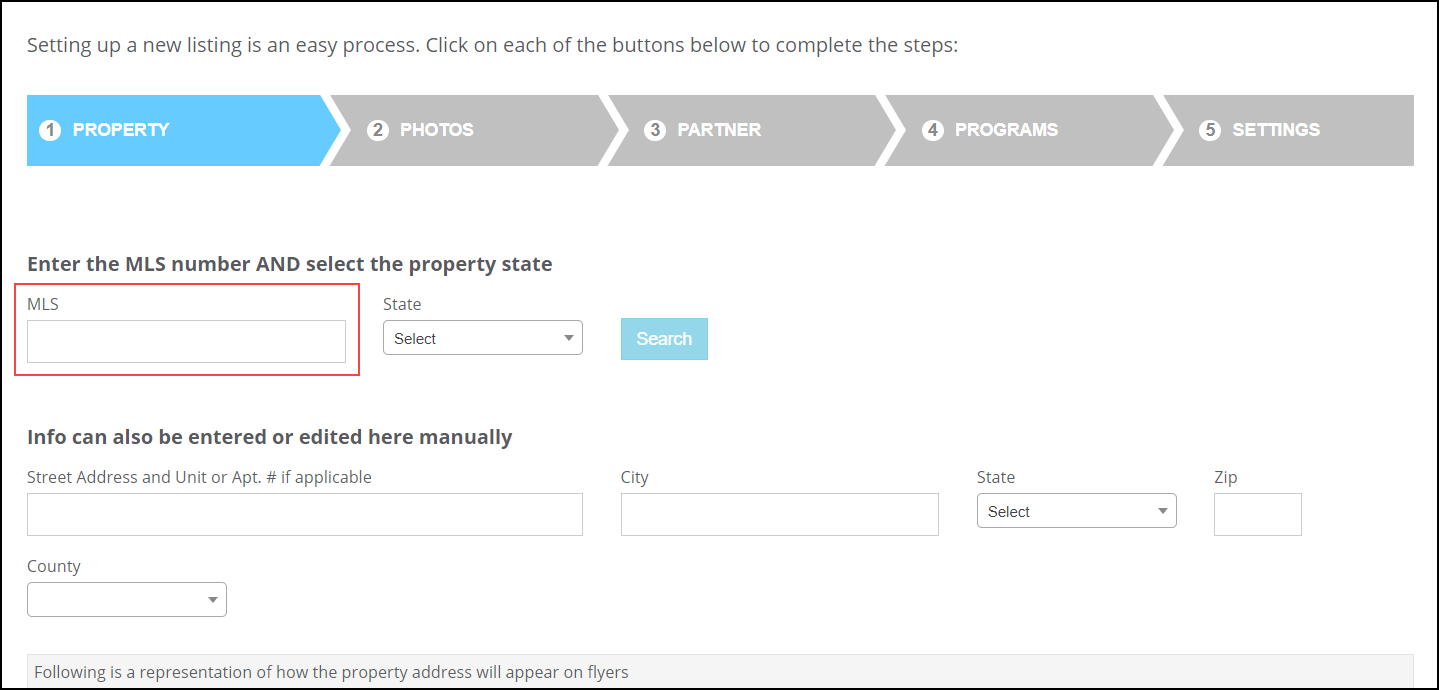
On the Property tab, enter the MLS number for the listing. When you add a valid MLS ID, you can automatically pull in all the information for the listing. If the MLS ID is not found, you can manually enter the property information.
-
Select Save & Continure.
-
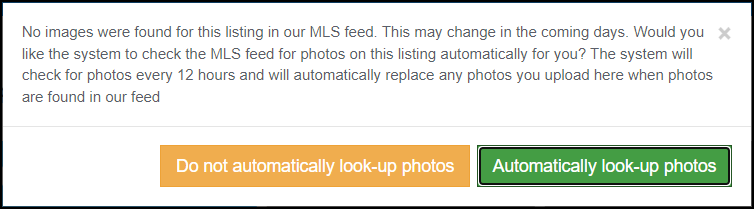
If no photos are found for your listing on the MLS feed, a popup window is displayed asking if you would like the MLS feed to be monitored and any photos found to be automatically uploaded to the listing. Select Do not automatically look-up photos to disable this service. Select Automatically look-up photos to enable this service.
If you enable this service and photos are found, those photos will automatically replace any photos you manually uploaded to the listing.
-
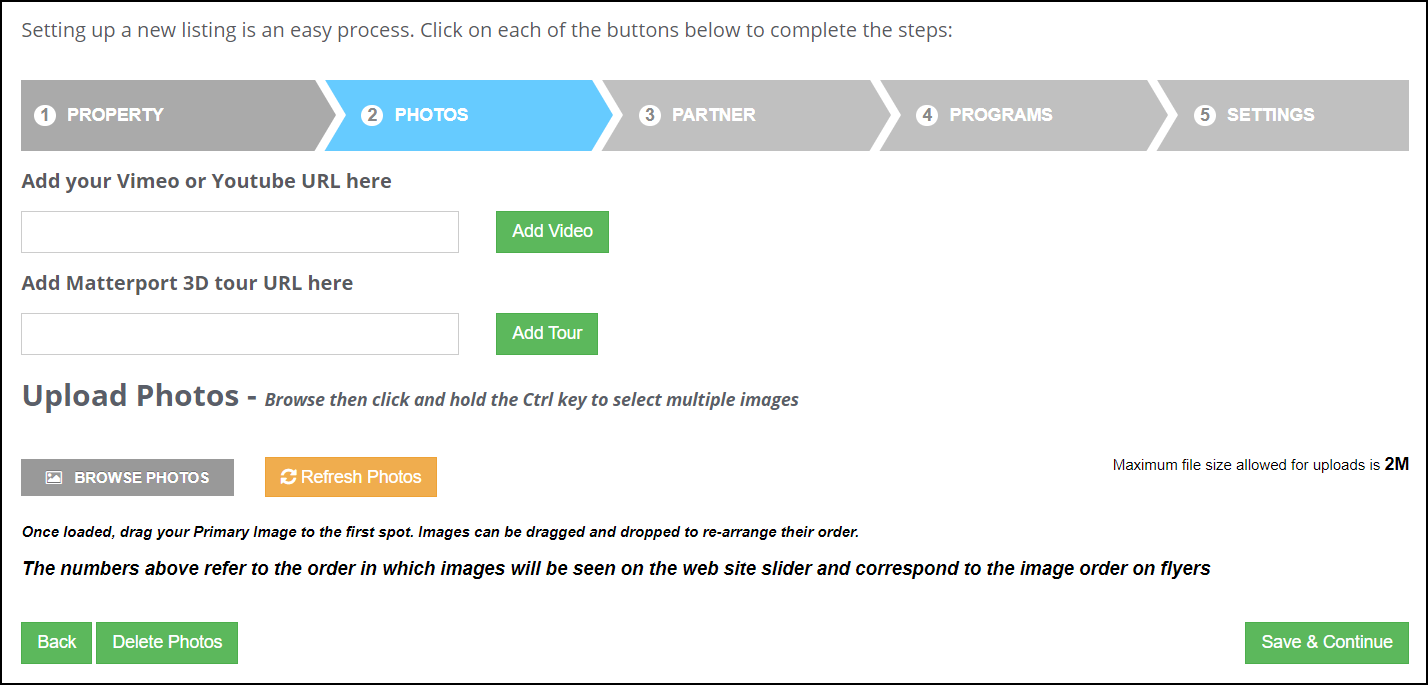
The system automatically pulls in the photos available from the MLS. However, you can remove any existing photos and upload your own photos on the Photos tab. In addition, you can upload videos and 3D tours of the property. You can also delete any digital media uploaded for your listing from this tab.
-
Select Save & Continue.
-
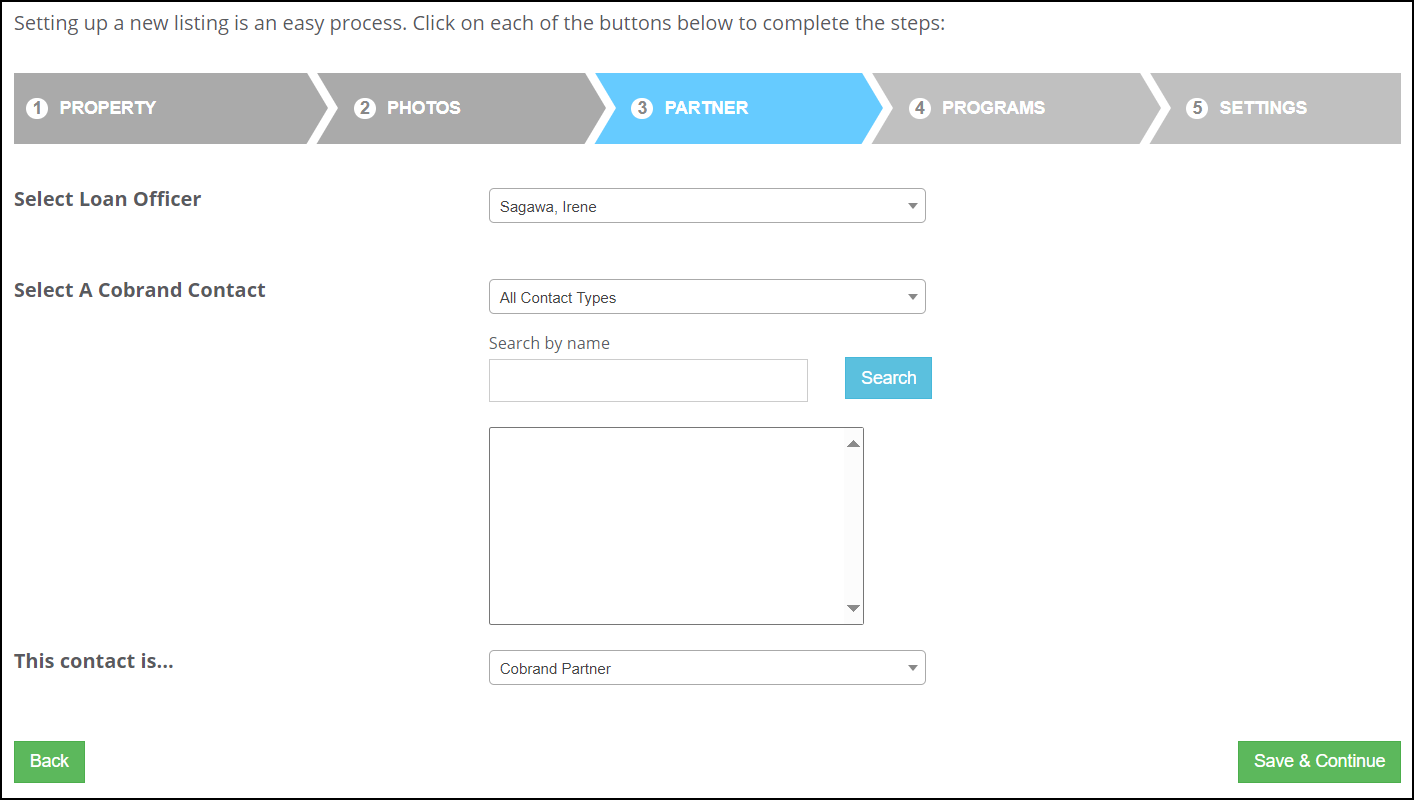
On the Partner tab, select the Surefire user who will be the Loan Officer for the listing (the currently logged on user is displayed as the default selection).
-
The selected user's contacts will be listed as the available users for the listing's Cobrand Contact.
-
Select and define the Cobrand Contact. If it is a FSBO property, select the contact.
-
-
Select Save & Continue.
-
On the Programs tab, select from the Your Group dropdown list and the Rate Scenario(s) that you created previously. This returns pricing results from ICE PPE and enables you to select which products are displayed on the Single Property Site (see the examples below).

-
Select Save & Continue.
-
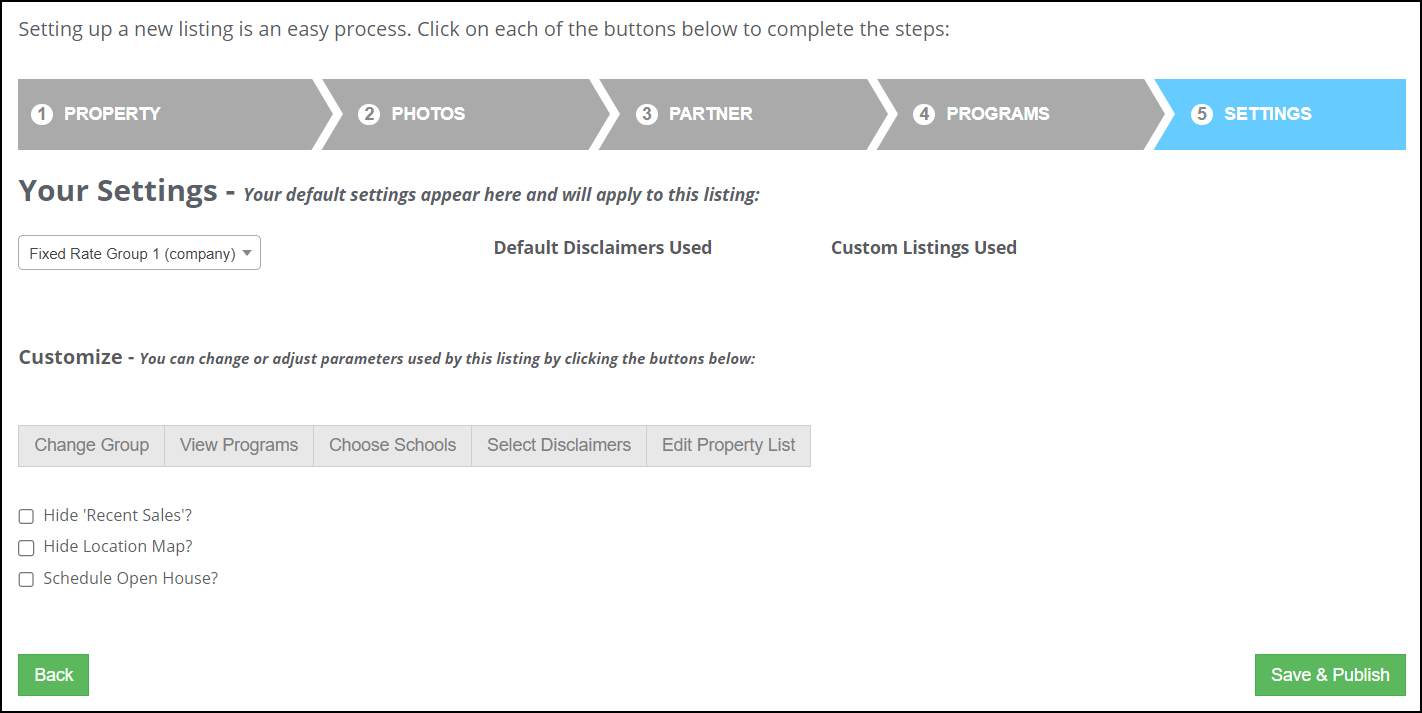
On the Settings tab, your default settings are displayed and will be applied to the listing. In the Customize section, you can modify any of the areas listed (Change Group, View Programs, etc.), as well as select any of the checkboxes (Hide 'Recent Sales'?, Hide Location Map?, etc.).
-
When done, select Save & Publish.
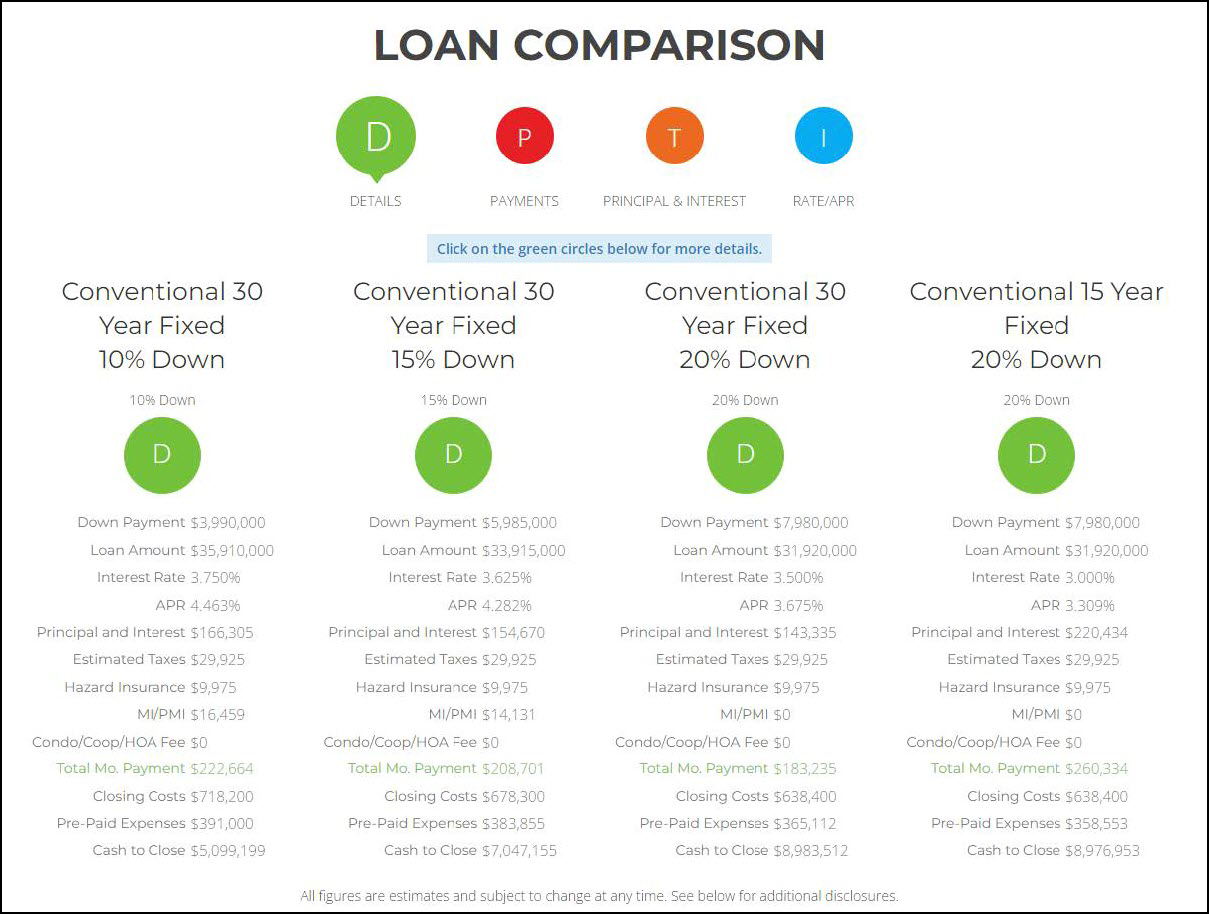
Example of a Single Property Site Pricing:
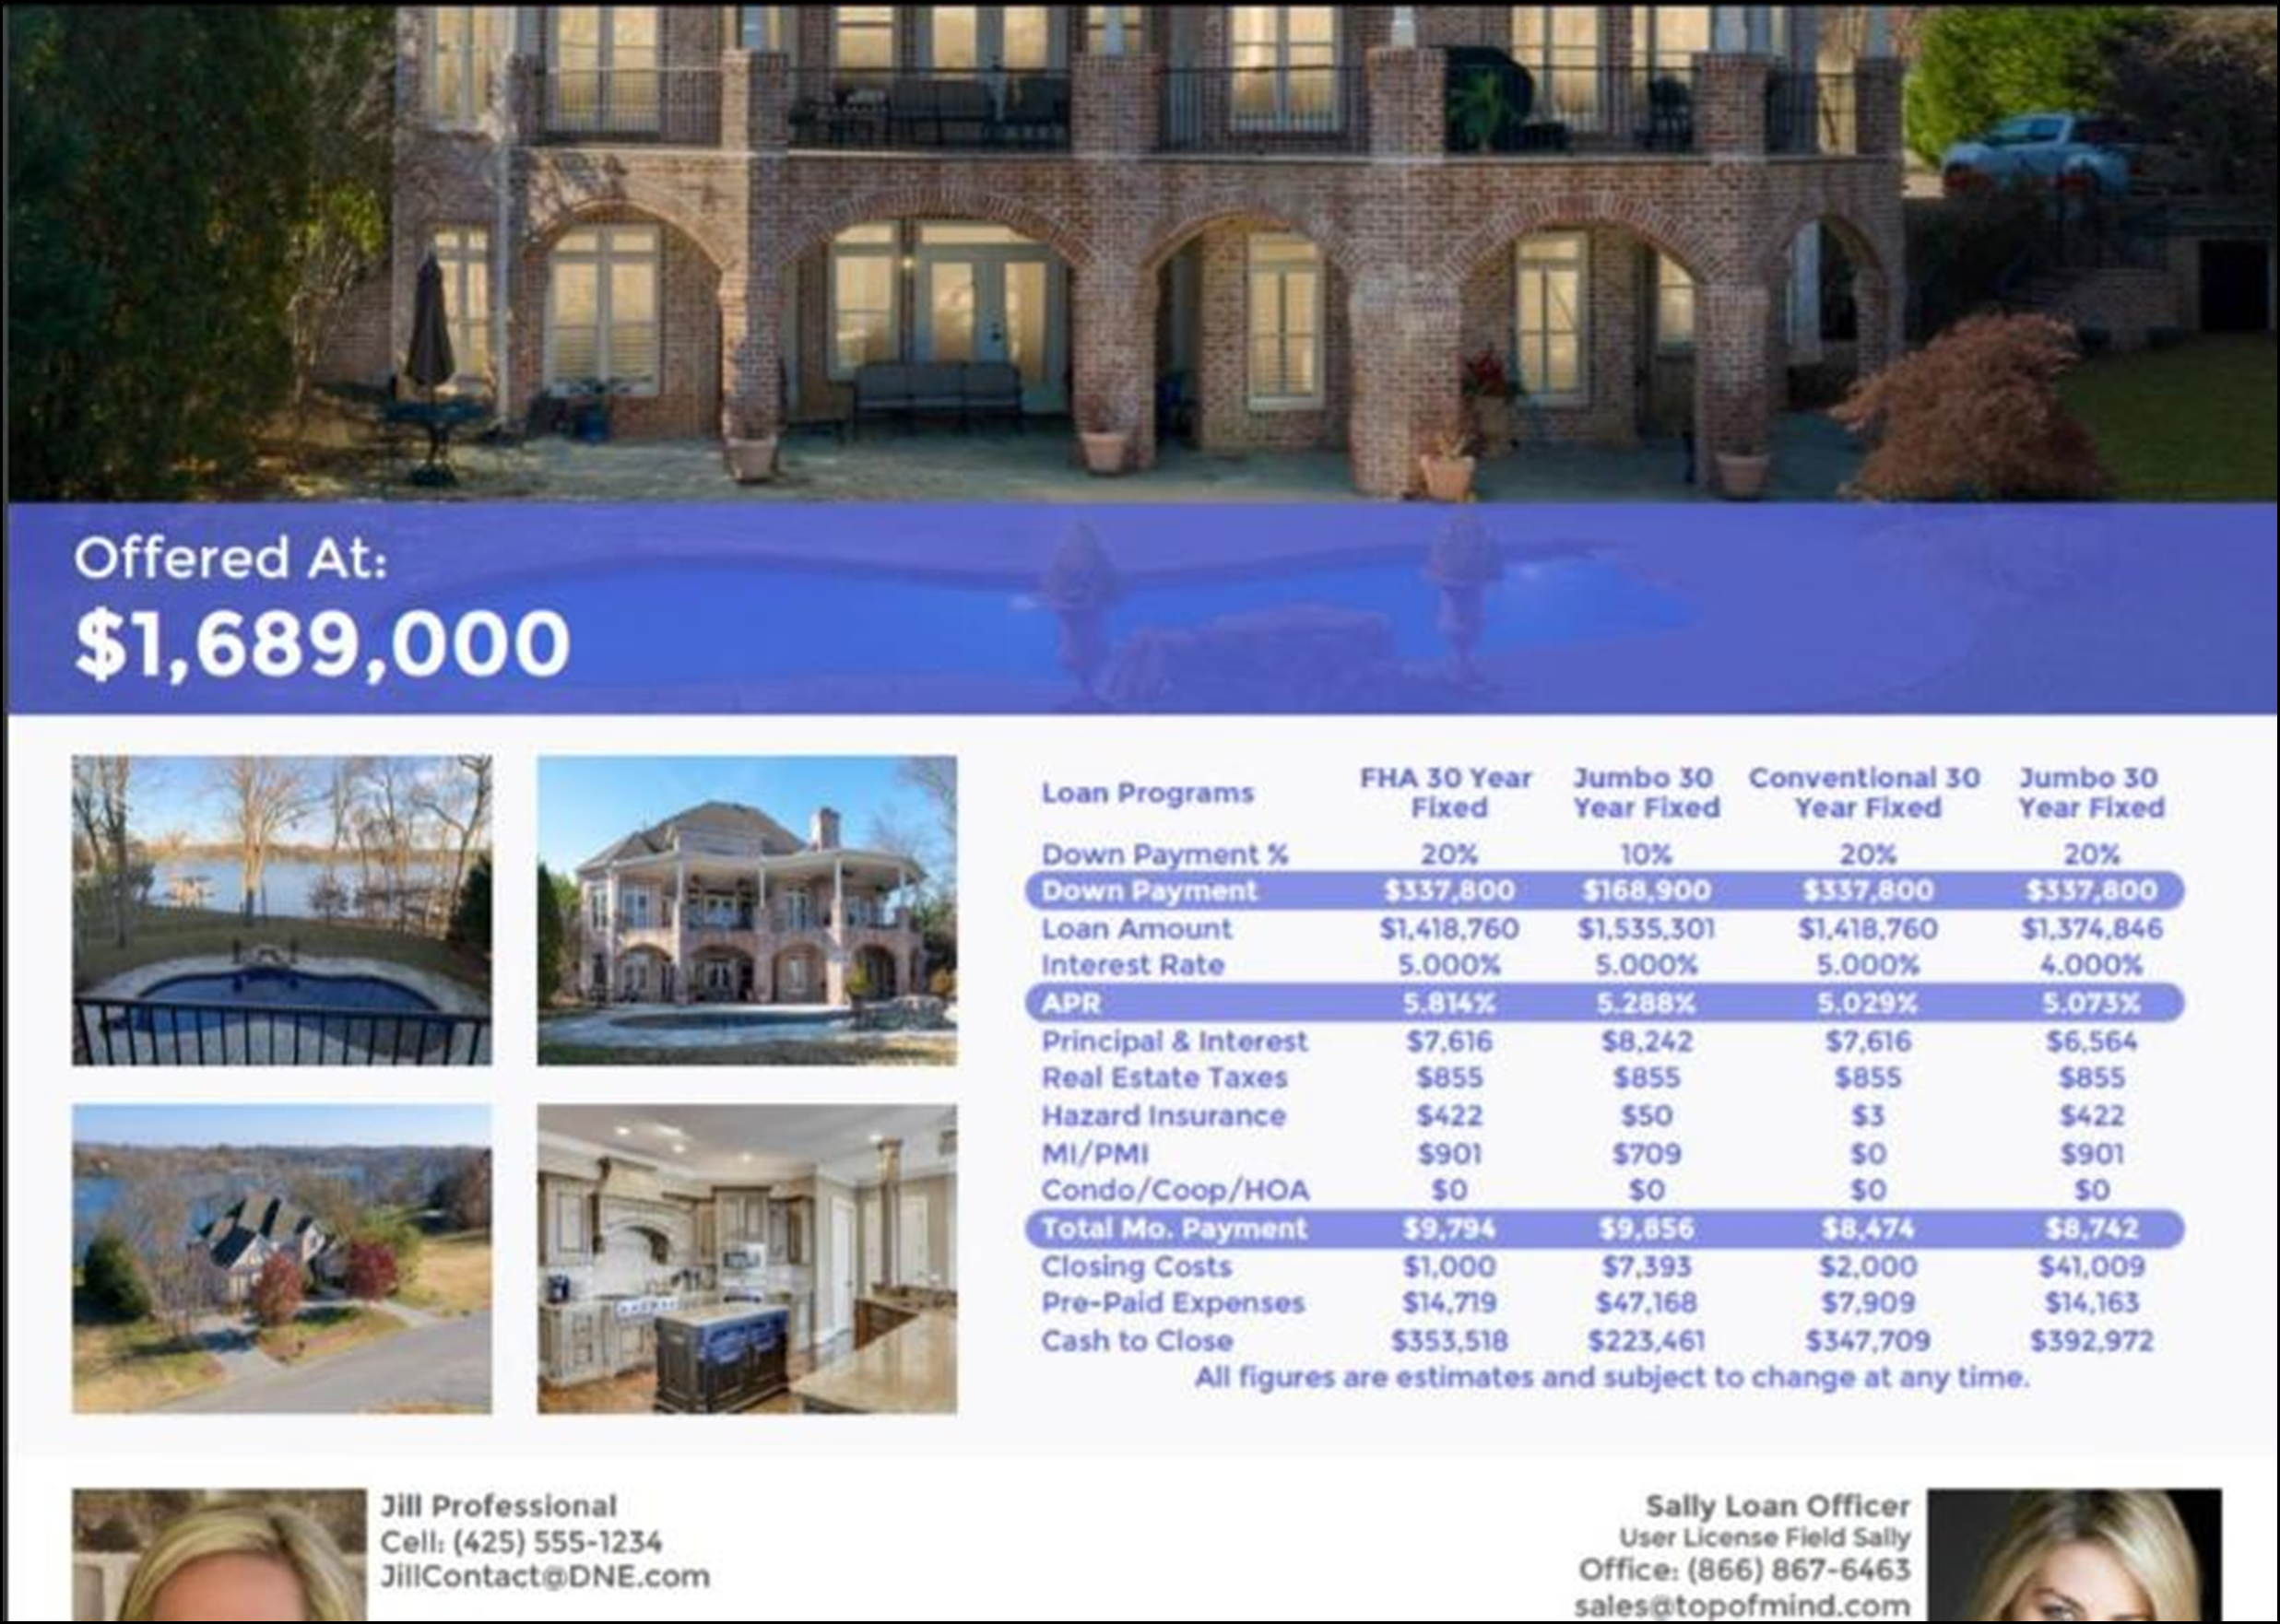
Example of a Single Property Site Flyer:
| Next Section: Feature Enhancements | ||
| Previous Section: Introduction |