Enhanced Conditions
Working with Enhanced Conditions
Encompass Innovation Journey Playbook - Automating Conditions and Task Workflows for Service Orders
When working in loan files, authorized loan team members can add, edit, view, and track enhanced conditions. Note that the Encompass administrator controls which users have access to enhanced conditions, and the actions they can perform, based on user personas. Administrators create conditions based on their company’s business needs using the settings provided in Encompass Settings > eFolder Setup > Enhanced Conditions.
It is also important to note that while this section provides information and instructions about all of the enhanced conditions features and functionality, loan team member access to these conditions and functionality is controlled by the Encompass administrator. Based on your persona, the administrator controls what level of access you have to enhanced conditions and the associated functionality provided for them.
Remember, the new document viewer must be enabled for the Encompass web interface in order for loan team members to access and manage enhanced conditions in loan files.
Refer to the Working with Enhanced Conditions setup and user guide for prerequisites for enabling and using enhanced conditions, instructions for setting up the conditions, and sample workflows and information about how loan team members can address and manage these conditions in their loan files.
Enhanced Conditions in the Encompass web interface are available with the Encompass Desktop view only.
To Access Conditions:
- From the Encompass web interface Pipeline, create a new loan or open an existing loan file that was created after enabling Enhanced Conditions.
- In the left navigation menu, click Conditions.
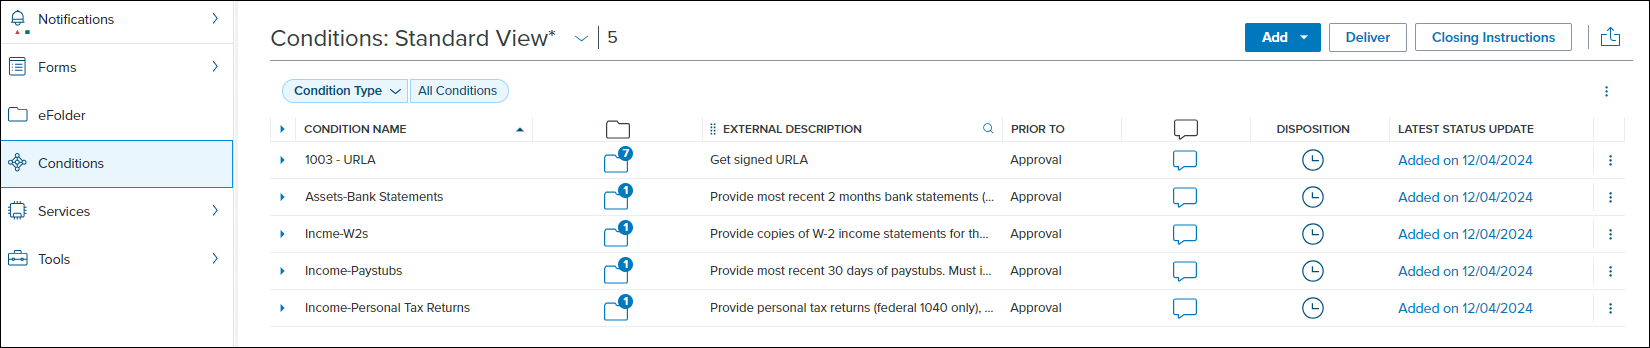
Enhanced conditions associated with the loan are listed on the Conditions landing page. (If you are creating a new loan and there are no conditions associated with it, a No Conditions Yet status is displayed on this screen.)
After opening the Conditions screen, the left navigation menu is minimized automatically to enable more of the conditions workspace to be displayed. To expand the left menu, click the Expand icon at the bottom of the menu.
To View or Update Condition Details:
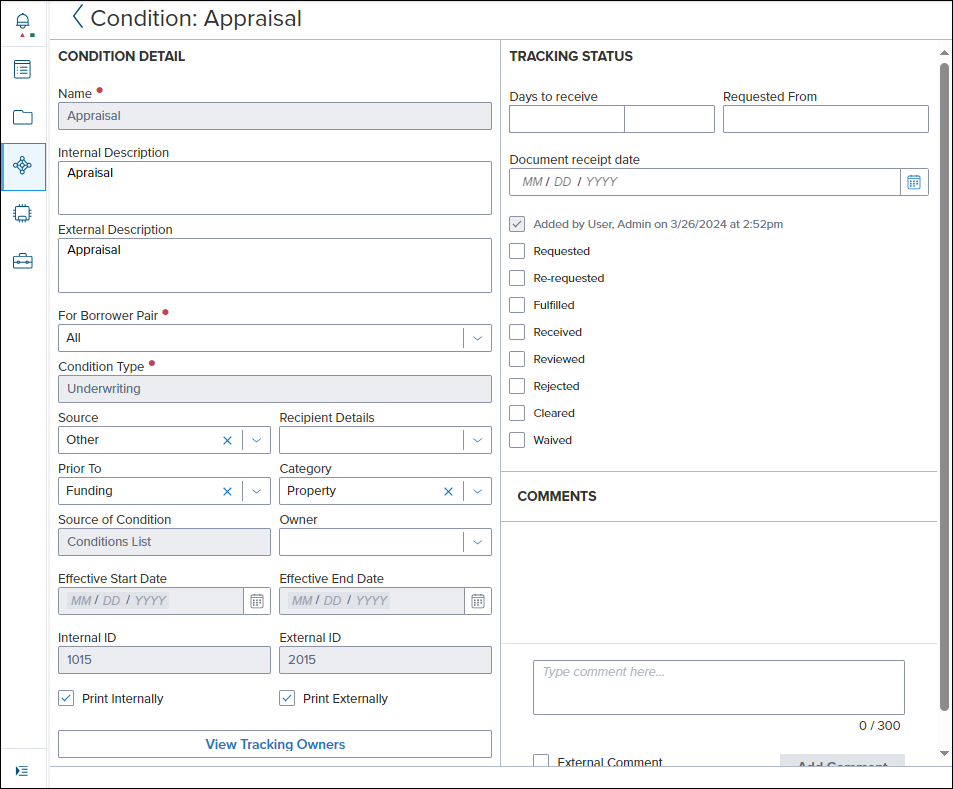
- From the list of Conditions, select a condition to view its details. Once selected, information about the condition and document folders assigned to the condition are displayed. Authorized users can edit and update details here as needed.
-
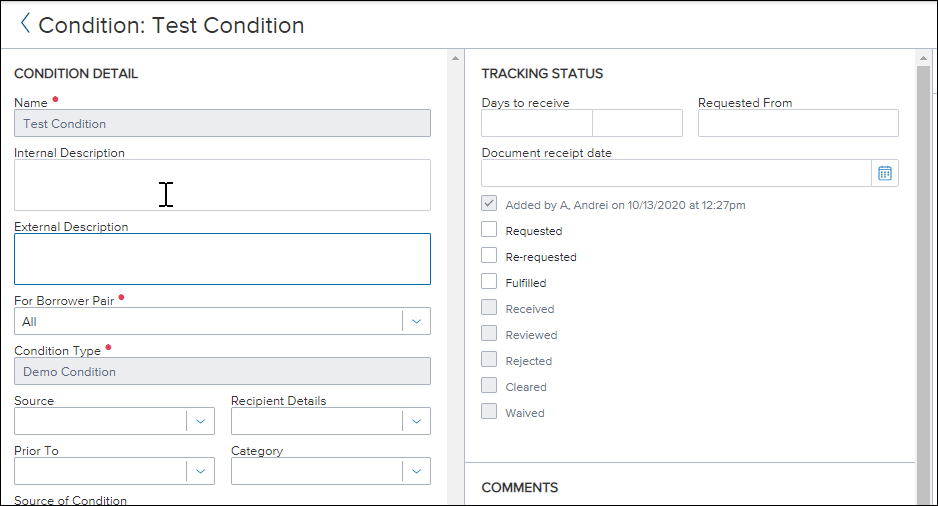
All of the information in the Condition Detail panel on the left is provided by the Encompass administrator within the condition template they have set up in the Encompass Settings (in the desktop version of Encompass). Authorized users with the required permissions can edit certain details in this panel. Fields that are grayed out cannot be edited.
Here you can also assign document folders and view the attachments. (These buttons are located in the top-right.)
- Note that authorized loan team members are not required to only use this condition details view to manage and update information about conditions. The instructions in the Performing Additional Actions with Enhanced Conditions section below explain how to access specific information and views within a condition directly from the Conditions landing page, rather than using this condition details view.
- If you do make any changes in this condition details view, click the Save button in the bottom right corner to save them. If you do not select this button, you will be prompted to save your changes when you close this view.
To Add a Condition From a Conditions List or Set to a Loan:
-
In the loan file, click Conditions in the left navigation menu.
-
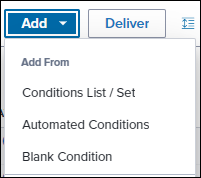
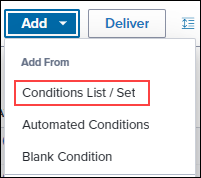
In the top-right of the loan workspace, click Add, and then select Conditions List / Set.
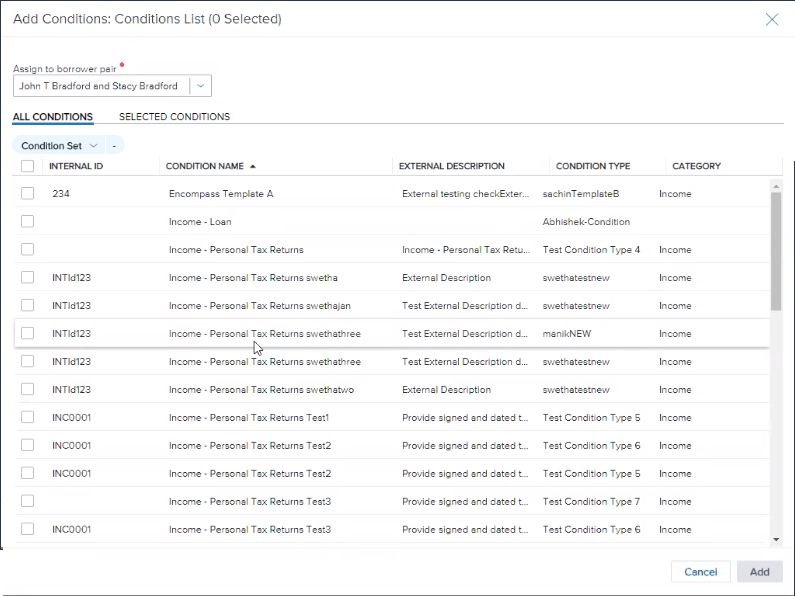
- A list of conditions that you can add to the loan are displayed. This list consists of conditions created by the Encompass administrator. The conditions you see are based on the permissions set up by the administrator based on your persona. For example, if you do not have permission to add conditions, they will not be listed here.
-
When configuring conditions in Encompass Settings, administrators can select an option that prevents the condition from being duplicated. If a condition has already been added to a loan, and if that condition has been configured so that it cannot be duplicated, the condition will not be listed here and cannot be added to the loan.
-
By default, the conditions are assigned to all borrower pairs. If there are multiple borrower pairs associated with the loan, you can select a different borrower pair from the drop-down menu at the top of the list if you want to assign conditions to that pair.
-
Select the conditions to add to the loan. Selected conditions can be viewed by selecting the Selected Conditions tab.
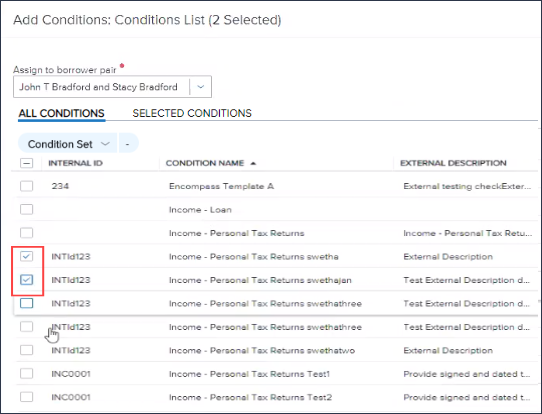
- To filter the conditions list by a condition set, select Conditions Set and then select the conditions set you want to view.
- To add the selected conditions to the loan, click the Add button.
To Add Automated/One Click Conditions to a Loan:
-
In the loan file, select Conditions in the left navigation menu.
-
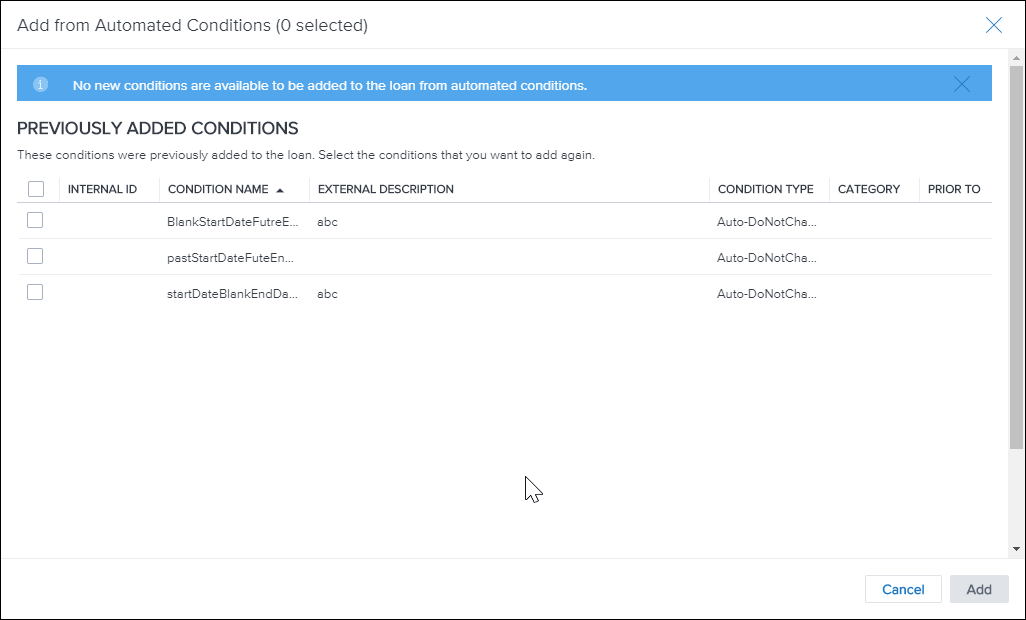
In the top-right of the loan workspace, click Add, and then select Automated Conditions.
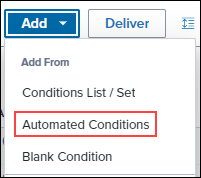
- The loan is then evaluated against the Automated Enhanced Conditions business rules defined by the administrator to determine if the loan meets the criteria for any active rules.
-
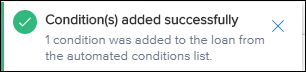
Any applicable conditions are automatically assigned to the loan file.
-
If conditions had already been added through this method, a window displays indicating that no conditions were added. If you have permissions to create duplicate you can select conditions from the list and select Add to add a duplicate of those conditions.
To Add a Blank Condition to a Loan:
-
In the loan file, click Conditions in the left navigation menu.
-
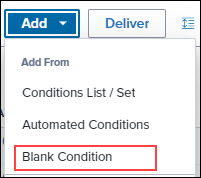
In the top-right of the loan workspace, click Add, and then select Blank Condition.
-
Select the borrower pair that the condition will apply to, the condition type, and then either select the condition name or enter one manually. when you are finished, select Add.
-
If you entered a condition name manually, the new condition details display.
- If you selected a condition name, the Conditions landing page displays.
Importing Conditions
Conditions can also be imported from supported partners from within the Encompass web interface. Partners who have integrated into Encompass Investor Connect can configure the workflow to electronically send delivery conditions for a loan back to the lender. For example, investors can send purchase conditions that must be resolved before the lender can sell the loan, and warehouse lenders can send funding conditions that must be addressed before the warehouse lender provides funding for the loan.
Lenders can then import the conditions into the Encompass web interface, track and resolve the conditions, and electronically send condition responses back to the partner. Lenders can also receive updates against existing conditions from Encompass Investor Connect Partners, maintaining the connection for all updates that are made for an existing condition.
Note: In order to use this feature, your administrator must configure Encompass to use both Enhanced Conditions and Investor Connect and the investor partner must have enabled the workflow for electronically sending conditions between lenders and partners via Encompass Investor Connect. For more information on configuring Encompass to utilize Investor Connect, see the Encompass Investor Connect Lender User's Guide.
To Import Investor Connect Conditions to a Loan:
-
From a loan in the Encompass web interface, click Conditions from the left navigation menu.
-
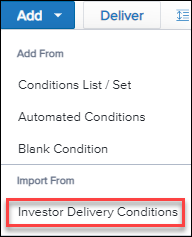
Click Add, and then select Investor Delivery Conditions from the Import From section.
-
Select the checkbox for the conditions that you want to import, and then select Import. The Tracking column indicates the current status of the conditions as either New, Updated, or Imported.
-
To view details about an individual condition, select the blue arrow
 icon to expand the condition details
-
Imported conditions can be easily identified in the Conditions Pipeline by viewing the Source of Conditions column, as these conditions are labeled with Investor Delivery.
Delivering Conditions
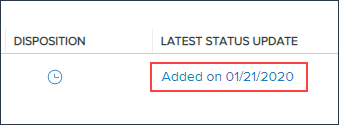
In order to deliver a condition back to the partner, the status for the condition must be updated and a comment or document must be assigned to the condition. To update the status, select the current status in the Latest Status Update column.
Note: Only statuses that have been configured by the admin in the Encompass Settings > External Company Setup > Investor Connect Settings > Conditions Delivery section are eligible for delivery.
-
When you are ready to deliver conditions to the lender, click the Deliver button.
-
On the Deliver Condition Responses page, a list of eligible conditions displays. To deliver the conditions, select Deliver. The Delivery in progress message displays.
-
To view a history of conditions delivered for the loan, select Delivery History. The Delivery History page updates once the delivery is completed.
To Assign a Document to a Condition:
- In the loan file, select Conditions in the left navigation menu.
-
Select the left-arrow to expand the row and display the condition’s details.
-
It is important to note that you can only assign documents to conditions if the document is provided on the Documents screen (i.e., at least one Document Folder is listed on the Documents screen within the loan file). When viewing the Conditions landing page, the number of documents already assigned to the condition is displayed in the Documents column.
-
-
Select the Assign Document button.

-
Select the document to assign to the condition, and then select Assign.
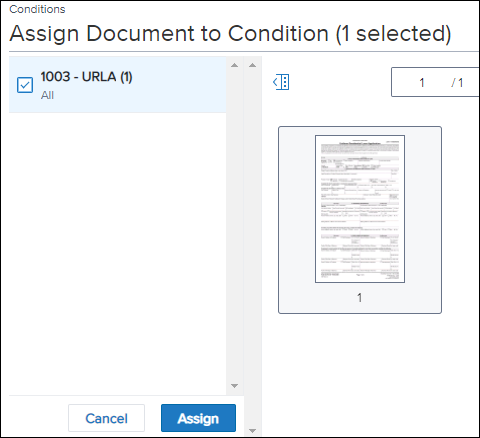
Note: Documents folders are listed in alphabetical order, with folders containing special characters and numbers coming before those with letters. Additionally, if there are multiple document folders with the same name, the newest document folder is listed first.
To Attach a File to a Document:
When you assign a document folder to condition, you are essentially assigning a document folder or container to the condition. The document folder may already have file attachments or you can add file attachments later. These file attachments are the actual source documents that will be used to satisfy the condition.
-
Within the condition, select the document you assigned to the condition.
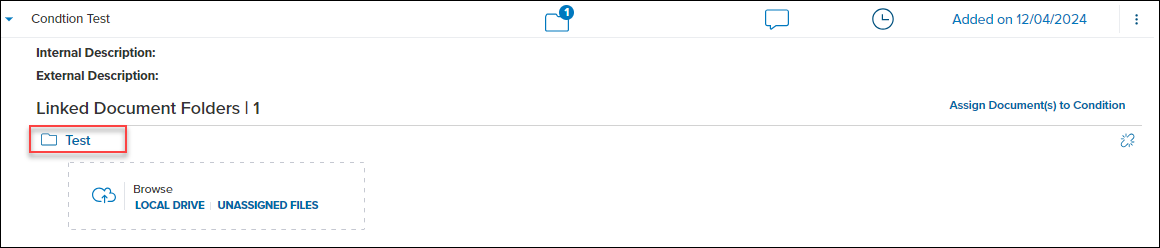
- Select an option from the Browse section to locate, select, and then associate one or more file attachments to this document folder.
-
Files already associated with the document folder are listed below the Browse section.
-
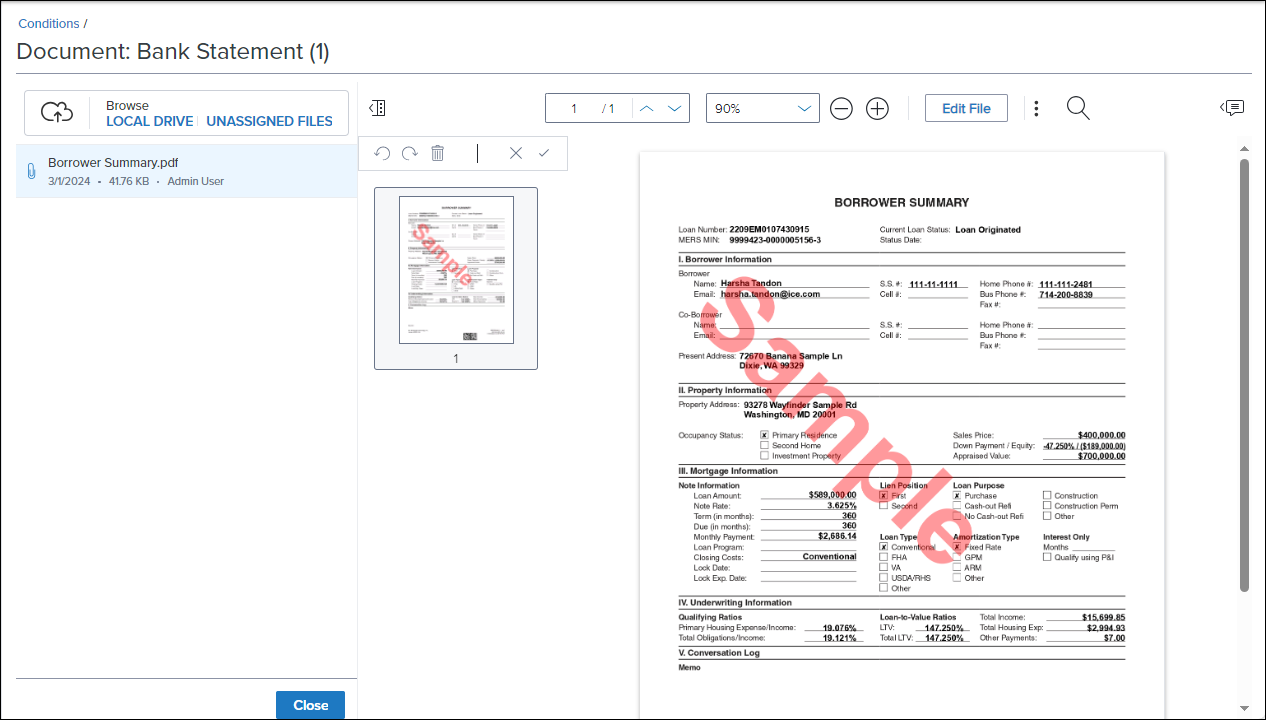
Click Local Drive to select files from your computer. You can drag-and-drop files from the Browse window to this view or select the files and then select Open.
-
Click Unassigned Files to select files from the Unassigned Files list. This list files are the unassigned files in the eFolder. Select the files to attach, and then select Attach.
- Click Unassigned Files to select files from the Unassigned Files list. This list files are the unassigned files in the eFolder. Select the files to attach, and then select Attach.
- Click the Edit File button to manage the file (extract pages, re-order pages, etc.).
- When finished, click Close.
Performing Additional Actions with Enhanced Conditions
Authorized loan team members can perform all of the following actions with conditions directly from the Conditions landing page in the Encompass web interface.
To Add a Comment to a Condition:
-
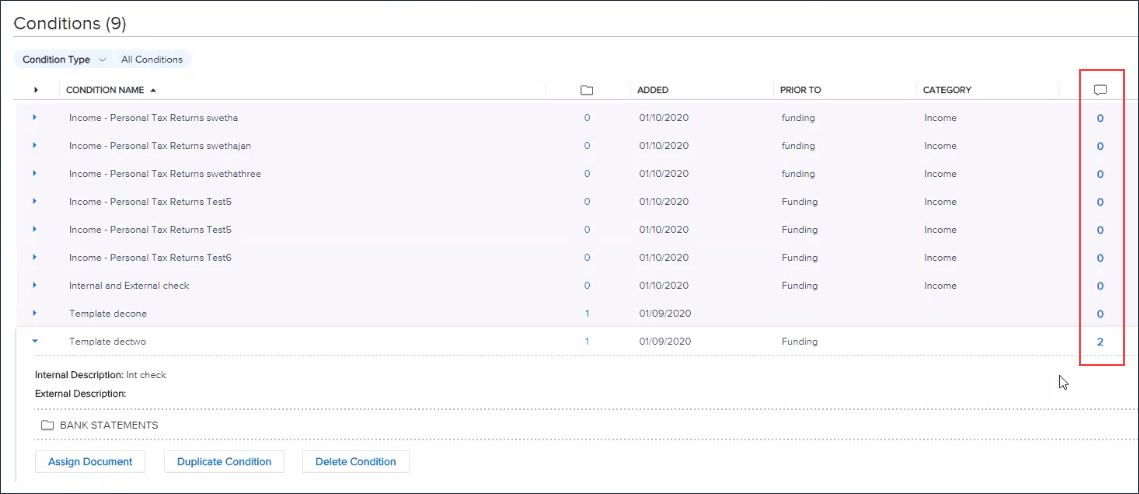
On the Conditions screen, locate the condition for which you want to add a comment, and then click the number in the Comments column.
-
Type the comment in the text box, and then click Add Comment.
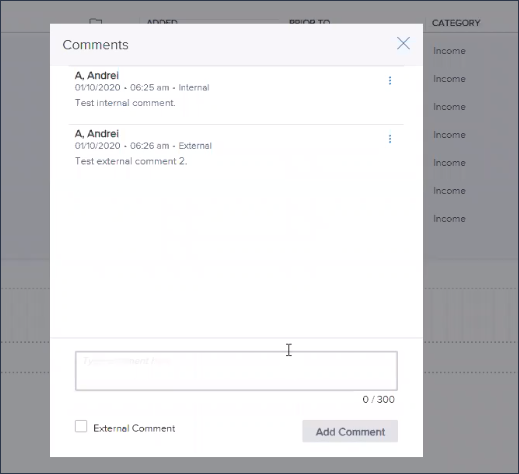
- Select the External Comment checkbox to make this comment visible in the loan when a user is viewing the loan’s condition details using an Encompass TPO Connect website.
- By default, all comments are set as internal comments, which means that the comment is only visible within the loan file when viewed by authorized loan team members using the Encompass web interface.
- Previous comments added to loan are listed above the text box. The most recently added comment is listed at the bottom of the comments list.
-
Select the menu
 icon to the right of each comment for additional actions. Authorized users can delete a comment, and set a comment as an Internal Comment or External Comment.
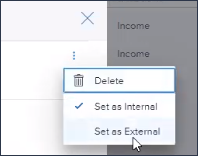
- Select the External Comment checkbox to make this comment visible in the loan when a user is viewing the loan’s condition details using an Encompass TPO Connect website.
- When finished, click the X in the top right corner to close the Comments window.
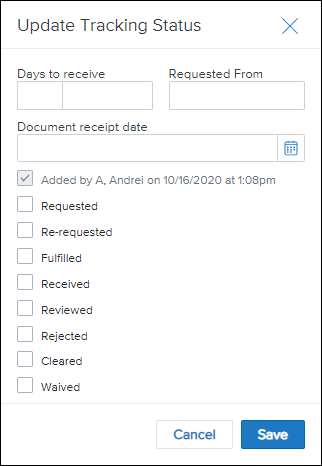
To Update Tracking Status:
Once you have taken an action with a condition, you can update the condition tracking status accordingly.
Note: Access to update specific tracking statuses is determined by the Encompass administrator.
-
On the Conditions screen, locate the condition to update, and then select the link in the Latest Status Update column.
-
Select the new status, and then select Save. (These tracking status options are configured by the Encompass administrator.)
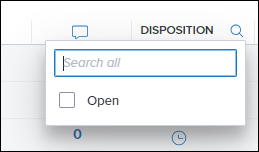
To Check the Disposition Status:
- On the Conditions screen, hover your mouse pointer over the Disposition icon for a condition.
![]()
- One of the following statuses will be displayed:
- Open – This status indicates that the condition has not been met yet.
- Satisfied – This status indicates the condition has been met and it is closed (i.e., the condition has been cleared or waived).
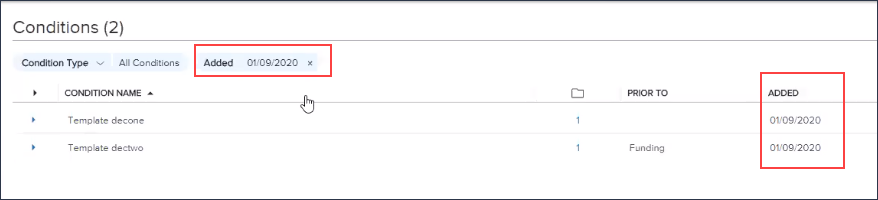
- To filter the Conditions view so that only Open conditions are displayed, select the Disposition column header, and then select Open.
- To filter the Conditions view so that only Satisfied conditions are displayed, select the Disposition column header, and then select Satisfied.
- Note that the Open and Satisfied status options will be available as search filters only if at least one condition in the list has been opened or satisfied. For example, if no conditions have been satisfied, then only the Open option will be displayed and available for use as a search filter.
To Duplicate a Condition:
Note that the option to duplicate a condition will be provided only if the Encompass administrator has configured the condition so that it can be duplicated and if the loan team member has the required permission (based on their assigned persona).
- In the loan file, click Conditions in the left navigation menu.
- Select the Menu
 next to the condition you want to duplicate, and then select Duplicate
  .
.
If the administrator has configured this condition so that it cannot be duplicated (or if you do not have the required permissions to perform this action), the Duplicate button will still be provided here. However, when you select the button, an error message indicating that the condition already exists will display and the condition will not be duplicated.
To Delete a Condition:
- In the loan file, click Conditions in the left navigation menu.
- Select the Menu next to the condition you want to duplicate, and then select Delete
 .
. - On the confirmation page, select Yes.
To Unassign a Document From a Condition:
-
Click the Unassign icon for the document folder.
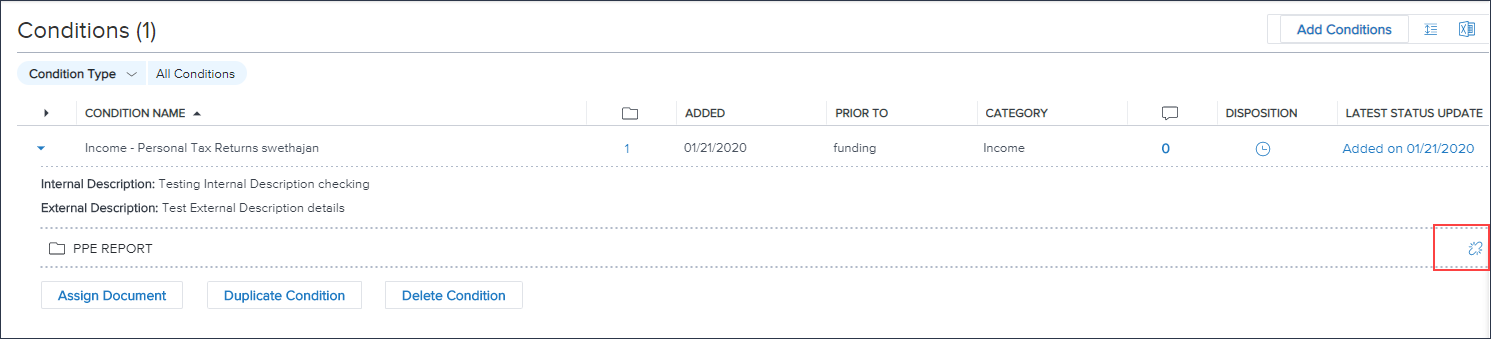
- Click Yes to confirm that you are unassigning this document folder from the condition. This will unlink the document from the condition but it does not remove the document folder.
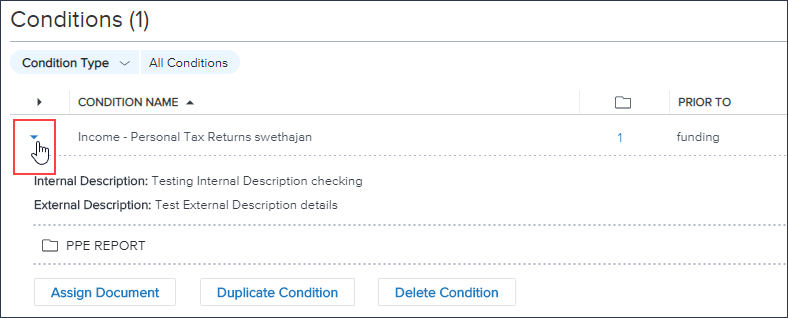
To Expand Condition Details:
-
By default, the Conditions landing page features each condition in its own row, with just the Condition Name displayed, followed by additional information in columns displayed to the right. You can click the arrow for a condition to expand the row to display the documents assigned to the condition, action buttons, and more. You can then click the arrow again to collapse the row.
-
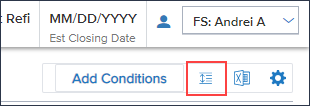
Click the Expand/Collapse icon to expand the row for every condition in the list. Click the icon again to collapse all of the condition rows.
To Export Conditions:
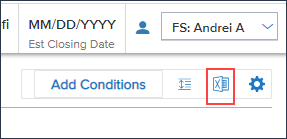
- Click the Excel icon to export the conditions list to an Excel spreadsheet (CSV) that you can save to your computer. This export includes only the fields (i.e., columns) that are in the view that you are currently using when you select the Excel icon.
To Customize the Conditions List:
Customization options for the Conditions landing page are described below. If you close the loan and then return the Conditions list, the customization options will not be retained, and the Conditions list will be displayed in its default view.
Add or Remove Columns:
-
To add or remove columns from the Conditions list, click the Gear icon.
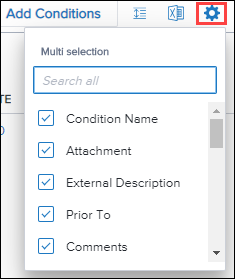
- To remove a column from the list, clear the checkbox for the column in this list.
- To add a new column, select the checkbox for the column in this list.
Change the Column Order:
- Each new column you add to the Conditions landing page is placed to the right of the columns that were already displayed in the list. To move a column to the left or right in the Conditions list, click the column header, and then drag the column to the desired position in the list.
Sorting the Data:
- Click a column header to display data in ascending order based on the information in the column.
- Alternately click the header to sort the data in descending or ascending order.
Applying Search Filters:
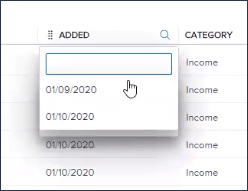
- Click the Search icon (magnifying glass) in a column header to search for specific data within the column. Enter a value in the blank field or select a filter from the list of options.
-
After selecting one or more filters, only the conditions matching the search criteria are displayed in the list. Additionally, the selected filters are displayed at the top of the list. To remove a search filter, click the x for the filter. Or, click the Clear link to remove all search filters at once.
Saving a View:
Once changes have been made to a view, you can save the view, save the view as a new view, set the view as a default, delete the view, and more.
To Save the View:
-
After changes have been made to the view, click the dropdown arrow next to the name of the view.

-
Click the Menu
and select Save View to update the view or Save as to save a new view.- If you select Save as, enter the view name. To set the new view as a default view, select Set as default. Click Save to save the view.
You can also rename a view, delete a view, or set the view as your default from this menu.
Closing Instructions
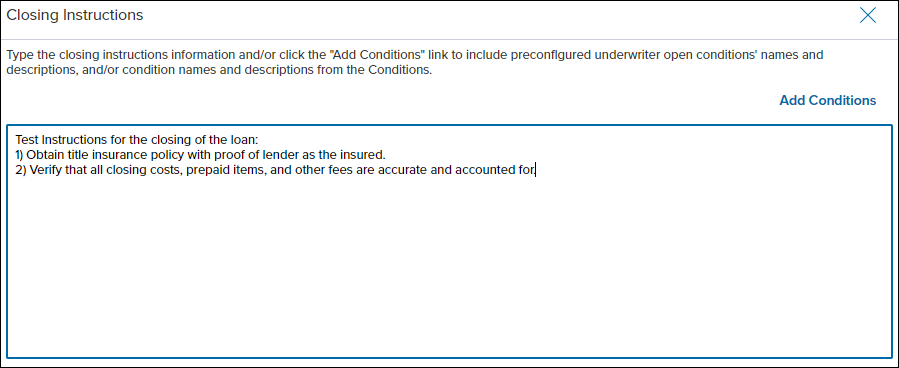
Users are able view or add any conditions that must be met prior to closing the loan using the Closing Instructions option. Users are also able to append additional closing instructions or overwrite the existing conditions in the Closing Instructions/Conditions field (field ID 1952) completely.
Note: The new Closing Instructions button is only available if the person has access to the Closing Conditions input form on the Forms/Tools tab.
To Access Closing Instructions
-
From a loan, select Conditions in the left navigation menu.
-
Select Closing Instructions.
-
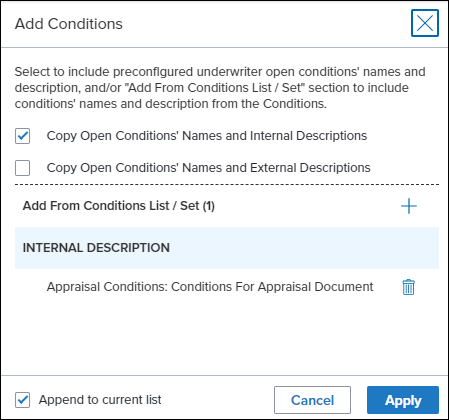
You can manually type closing instruction information in the provided field. To include preconfigured underwriter condition information, select Add Conditions.
-
Select the appropriate check box to include underwriting open conditions names and the desired description to the closing instructions.
-
To expand the list of conditions available to copy, select the new Expand
 option. Once expanded, users can select the checkbox to include any individual open condition names and internal/external descriptions that they want to include in the closing instructions.
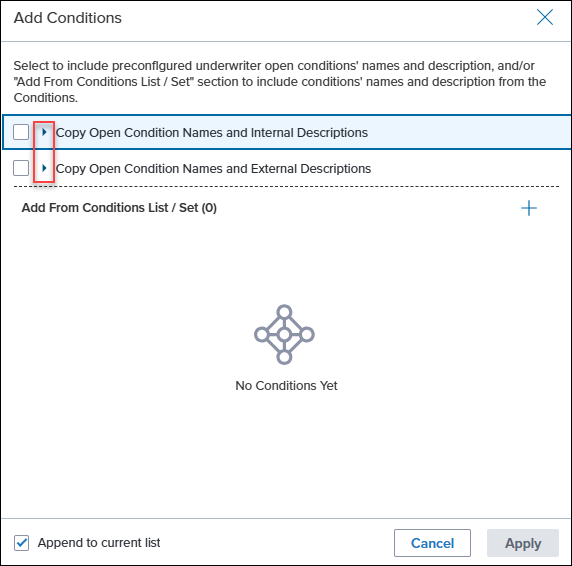
-
-
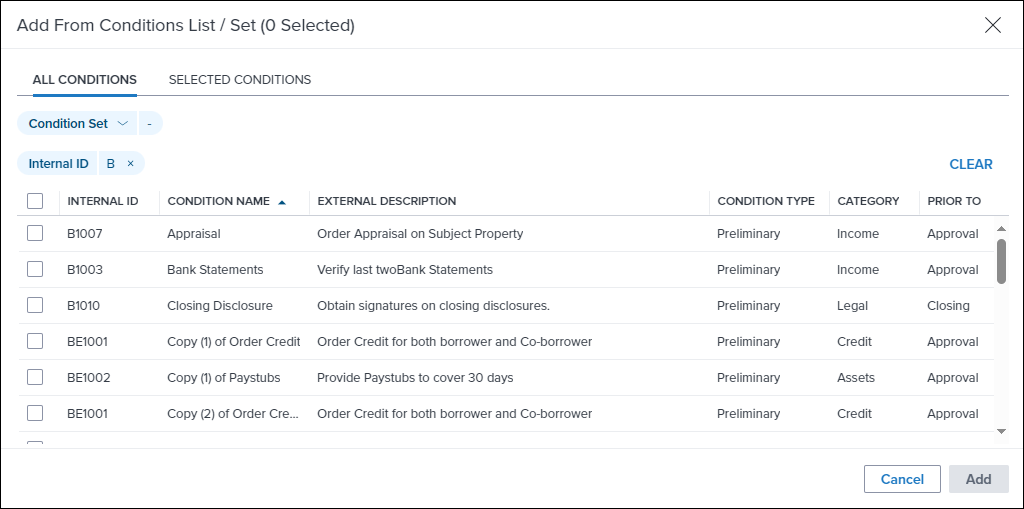
Select the Add
 icon to add additional conditions to the closing instructions.
 -
Select the conditions to add, and then select Add.
-
The Append to current list checkbox is selected by default and will append the information on the Add Conditions window to the Closing Instructions page. Clear the Append to current list checkbox to overwrite any existing closing instructions with the information selected on the add conditions window.
-
If you need to remove any conditions that have been added to the internal or external description sections, select Delete
. -
Select Apply.
-
Select Save and Close.