Admin Tools: Server Settings Manager
Use the Server Settings Manager to configure server-based features. After opening the Server Setting Manager, select a Category from the dropdown list, and then configure the options in the selected category.
-
On your Windows task bar, click the Start menu or Start icon, navigate to the Ellie Mae Encompass program folder, and then click Admin Tools.
-
Double-click Settings Manager.
-
If you are prompted to log in to the server, type the User ID, Password, and Server that you use to log in to Encompass as the Admin user.
-
![]() Set the Automated Data Completion Settings
Set the Automated Data Completion Settings
Use these settings to enable Encompass to retrieve data systematically and automatically populate/complete data within specific forms and settings. This enables the data to be completed without users having to open the form or setting and then manually click a button or similar to populate the data.
-
Select Automated Data Completion from the Category list.
-
Double-click an option, and then select Disabled or Enabled from the Value list.
- Home Counselors - When enabled, Encompass will retrieve Home Counseling data systematically as follows, provided these prerequisites are met. Once met, Encompass will populate the Home Counseling Providers List automatically rather than relying on a loan team member to manually click the Get Agencies button. Refer to knowledge article #000115391 - 24.1 Home Counseling Providers Automation for additional requirements and information.
- The Home Counseling Services Data Template must be applied to the loan.
- The following fields must be populated:
ZIP Code [for Borrower’s Address] (field ID FR0108) (Or, if the borrower’s present address is a Foreign Address (field ID FR0129), then the subject property’s ZIP code (field ID 15) is required.)
Distance (field ID HCSETTING.DISTANCE)
At least one checkbox (field ID HCSETTING.SERVICES) in the Multiple Services list must be selected.
At least one checkbox (field ID HCSETTING.SERVICES) in the Multiple Languages list must be selected. (English is selected by default.)
- Area Median Income (AMI) - When enabled, the AMI data for the loan will be automatically populated on the Borrower Summary - Origination (and other) input forms when the subject property ZIP code (field ID 15) is entered for the loan. Encompass queries the Area Median Income (AMI) Limits table in Encompass Settings and applies the most current year’s AMI limits.
- When disabled, loan team members must use the Get AMI button to populate the AMI fields for the loan with the latest AMI limits.
- This data is provided on the Borrower Summary - Origination, Fannie Mae Additional Data, and Freddie Mac Additional Data input forms.
-
Select Client from the Category list.
- Double-click an option, and then select False or True from the Value list.
- Show Pipeline Tab at Startup - If enabled (True), when logging into Encompass, users will bypass the Home page and land directly on their Pipeline tab (with a splash message if applicable) so that they can begin working on their loans immediately.
- When disabled (False), the users will land on the Encompass Home page (with a splash message if applicable) when they log in.
- Note that for users who do not have access to the Pipeline, they will continue to land on the Home page when logging in, even if this setting is enabled.
- Enable Web Login - This option is provided to give the Encompass administrator the option to enable or disable the Web-based Encompass login screen that was introduced in Encompass 20.2.
- If False (which is the default value “out-of-the box”), the Web-based login screen is not used. The legacy Encompas Log In screen provided for Encompass versions prior to Encompass 20.2 is presented to users.
- If True, the Web-based login screen is used for users to log into Encompass.
- Review the Logging into Encompass topic for more information about these log in options.
-
Select Components from the Category list.
-
Double-click an option, and then click Enabled or Disabled from the Value list. For the Autosave Interval (sec) option, enter a numeric value.
-
Autosave - If enabled, open loan files are saved to each user's local temp folder. If the user abnormally closes Encompass while working on a loan, the data can be restored when the user logs back in.
-
Autosave Interval (sec) - The number of seconds between each autosave.
-
Autosave User Config - If enabled (and Autosave is globally enabled) users can change the global autosave settings for their computer in the Personal Settings category on the Settings screen.
-
Document Scanning - If enabled, users can scan images into the eFolder in Encompass.
-
Instant Messenger - If enabled, Encompass users logged in to the same server can send and receive Encompass instant messages.
-
Calendar Sharing - If enabled, Encompass users can share access to their calendars with other users.
-
PDF Print to File - If enabled, a Print to File button displays when the Documents window opens prior to printing selected forms. Users can click this button and then save the forms to a PDF file.
-
Min Pipeline Auto-refresh Interval (sec) - The number of seconds between each Pipeline refresh. For example, if set to 60, the Pipeline data will refresh every 60 seconds. The interval must range from 30 to 3600 seconds.
This option is available with Encompass Banker Edition only.
-
-
Templates Ignore Fee Mgmt Persona/Biz Rules - If enabled, users can choose to override Business Rules with data from public Loan Program, Closing Cost, and Data templates. If enabled, users can also choose to overwrite existing Itemization form fee attributes entered by authorized personas with applicable fee data from public Loan Program, Closing Cost, and Data templates when the template is applied to the loan file.
This option is available with Encompass Banker Edition only.
-
Duplicate Loan Check - If enabled, a pop-up message displays when a user attempts to save a loan file that contains data that matches the data in another loan file. All potential duplicate loans are listed in the message window. The user can then select a loan and review the file to confirm if it is a duplicate or not. Please note the following:
-
The following fields are reviewed for duplicate data: SSN (field IDs 65 and 97), Home E-mail (field IDs 1240 and 1268), Work E-mail (field IDs 1178 and 1179), First Name (field IDs 4000 and 4004), Last Name (field IDs 4002 4006), Home Phone (field IDs 66 and 98), Cell (field IDs 1490 and 1480), Subject Property Address (field ID 11).
When the system checks for duplicate subject property addresses, it is not just the Subject Property Address field (i.e., the street address) that is reviewed. The system reviews this field and the City (field ID 12), State (field ID 14), and Zip (field ID 15) fields as well. The Duplicate Loan Check will be triggered only if all four of these fields (i.e., the complete mailing address) match the complete mailing address used in another loan file.
-
The Duplicate Loan Check does not examine completed loans (i.e., loans where the Completion milestone has been finished).
-
In a loan file that has been imported into Encompass, the Duplicate Loan Check is also triggered when one of these trigger fields is updated, for the first time, to a value that matches the value in another loan file.
-
Enable External Reporting Database - You can create an External Reporting Database (ERDB), which is a Microsoft SQL Server database containing the loan fields used most often in your reports, on a computer separate from the Encompass Server and the Encompass Database. The first time you set this option to True, the Register External Reporting Database window displays when you click Apply or OK. Use this window to enter the connection settings that will connect the External Reporting Database Application Server (ERDB App Server) to your Encompass loan file system, the Encompass Database, and the ERDB.
To make changes to these settings after the database has been created and registered, click the Re-register ERDB button to display the window.
After setting the Enable External Reporting Database option to True and saving your connection settings, you must open and set up the loan fields using the External Reporting Database tool. For more information, refer to the Setting Up the External Reporting Database document.
-
Encompass ERDB Server - Enter the name or IP Address of the computer where the ERDB App Server is installed.
-
Port - Enter the connection Port for the computer where the ERDB App Server is installed. (This field is populated with the applicable port by default.)
-
EncompassData Folder - Enter the file path where the EncompassData folder is located when viewed from the ERDB App Server.
-
In the fields provided, enter the ERDB SQL Server and instance name, followed by the ERDB name, login ID, and password.
-
Re-enter the External Reporting Database's password in the Confirm DB Password field.
-
Once the ERDB has been created and registered, you can click Test Connections to test the connection between the ERDB and the ERDB App Server.
-
-
In the ERDB Server Failure Notification section, enter the required email settings, including the email address where an email will be sent if the connection to the ERDB is lost.
-
Click Test to send a sample email to the contact entered in the To Emails field.
-
Click Save Notification Settings Only to save only the ERDB Server Failure Notification information.
-
-
Click Create Database and Register.
After the initial database creation and registration, you can click Register Only to save changes made to the ERDB. You must stop and then restart the Encompass Server in order for the changes to take effect.
This option is available with Encompass Banker Edition only and only when you log into Settings Manager using the Local connection.
-
LO Compensation - If enabled, the active LO compensation plans set up in the LO Compensation setting (in Encompass Settings) are applied to loan files as applicable. If disabled, none of these LO compensation plans are applied to loans.
Even if this component is disabled, the administrator may still utilize the LO Compensation setting in Encompass Settings to create LO compensation plans and assign them to loan officers and brokers.
- Loan Open Performance Improvements - When enabled, the following loan open system performance enhancements are applied to the Encompass client machines.
- When opening a loan file, the system now retrieves and processes the following user information and settings from the system cache instead of retrieving these from the Encompass database:
User license information
Business calendar
The user’s service configuration settings (such as the configurations set up in the Encompass Compliance Service, Mortgage Insurance settings, etc.)
Input form access permissions level
Milestone access permission level
Access to print forms
Input field validation
Dynamic Data Management (DDM) trigger timestamp
- When opening a loan file, the system now retrieves and loads various types of loan-related information (rate lock status, loan property information, Pipeline information, and additional loan data) at the same time (in one API call) instead of loading them individually.
Plan Code conflicts are managed more efficiently
Print Auto Selection business rules can be created so that specified forms are automatically listed in the Selected Forms panel of the Print window when the required loan conditions are met so forms can be printed quickly. When enabled, the system will now perform the actions required to attach the forms to the Print window accordingly after the user logs into Encompass- and before the user opens a loan. Prior to this option being available, the attach process was performed after the user opened the loan.
-
Click Apply or OK.
-
Select eClose from the Category list.
-
Double-click an option, and then click an option from the Value list.
- Allow user to discard an approved but undelivered package – Select Enabled or Disabled to enable Encompass users to an eClose package that has been approved for delivery but has not yet been delivered to the settlement agent.
-
Allow "Hybrid with eNote" Closing - When Enabled is selected, Encompass users will see promissory note options for eNote or Paper Note when selecting a closing type from the eClose window. When Disabled is selected, these options are not visible.
-
Allow user to send a closing package to Third Parties - This option enables Encompass eClose to support Encompass Loan Connect. Your business partners such as realtors, appraisers, attorneys, and other non-Encompass third party users can contribute to a loan file using Encompass Loan Connect. Instead of mailing or faxing document packages to your business partners, you can store electronic copies of the documents on Loan Connect where your contacts can access them. For more information, refer to the Lender's Guide to Encompass Loan Connect for Business Partners.
-
Package expiration default days – Select the day when the package expires, after one day or two days, on the day of the signing (default option) , or you can elect to set No Expiration for this setting. When the No Expiration option is enabled, the default expiration date for eClose packages is 30 days after the package signing date.
-
Package Preview – Enable or disable the ability of signers to preview the package. The setting is disabled by default.
-
Approve for signing default date – Select Todays Date or Closing Date. The default setting is Todays Date.
-
Select EDS from the Category list.
- Double-click an option, and then select False or True from the Value list.
- EDS Custom Form Processing When enabled (True), the processing of Microsoft Word custom forms is performed by the Encompass Docs Solution instead of the Encompass system.
- By default, this policy is set to True. When testing your custom forms using the Encompass Docs Solution, ensure they are rendering as expected. Once you have completed testing your custom forms and you are ready to use it for your custom forms going forward, keep this policy set to True.
- You can disable this policy by setting it to False, which ensures that the Encompass system will process custom forms. Once you are ready to use the Encompass Docs Solution for your custom forms, reset this policy to True.
When this policy is set to True, custom Word forms generated from the Print menu in Encompass will no longer be returned in Word (.docx) format. They will be returned in PDF format. This is by design to maintain consistency and with the understanding that PDF forms are editable.
-
Select eFolder from the Category list.
-
View Original Format - Double-click the View Original Format option, and then click View Original Attachment in Original Format or View Modified Attachment as PDF from the Value list.
-
View Original Attachment in Original Format - The original attachment opens in its native viewer. For example, a Word file opens in the Microsoft Word application, and a PDF will open in an Adobe PFDF viewer. This is the default setting.
-
View Modified Attachment as PDF - The original attachment opens in an Adobe PFDF viewer.
-
-
Merge PDFs to single document container - If the attachment has been split, edited, annotated, or merged, the modified attachment displays as a PDF. However, if the original attachment has not been split, edited, annotated, or merged, the original attachment opens in its native viewer.
This setting applies only when the Document Conversion setting (in the eFolder Setup settings) is not enabled in Encompass.
-
Size of the buffer used for downloading files – If your company uses cloud-based storage for eFolder file attachments, double-click this option to adjust the buffer used for downloading files. The default value is 81920 bytes per second, the Microsoft default value. The option can be adjusted in a range of 4096 to 262144 bytes per second. Encompass must be closed and reopened before adjustments to the buffer value are applied.
-
Size of the buffer used for uploading files – If your company uses cloud-based storage for eFolder file attachments, double-click the option to adjust the buffer used for uploading files. The default value is 81920 bytes per second, the Microsoft default value. The option can be adjusted in a range of 4096 to 262144 bytes per second. Encompass must be closed and reopened before adjustments to the buffer value are applied.
Adjusting the buffer size for uploads and download affects system performance when downloading or uploading files. Performance varies based on download sizes and internet connection speeds. The recommended best practice is to have your IT department test the performance of various buffer settings during off hours to determine what works best for your company.
-
- Select Feature from the Category list.
-
Double-click an option, and then click False or True from the Value list.
- Show Loan Save Progress Bar - When enabled (True), the new loan save progress bar (introduced in Encompass 20.1.0.12 Server Patch 9) will be provided in the loan workspace to indicate when the loan save process starts and when it is completed. Any time a user clicks the Save icon to save changes to a loan, the progress bar displays at the very bottom of the loan workspace. This enhancement provides the user with a clear indication of how the loan save process is progressing and when it is finished. In earlier versions of Encompass, there was no indicator for this process.
- When disabled, the loan save progress bar will not be provided in the loan workspace.
-
Select Import from the Category list.
-
Double-click an option, and then click Enabled or Disabled from the Value list.
-
Import - Outlook - If enabled, users can import borrower and business contacts from Microsoft Outlook.
-
Create New Loan # on Import - If enabled, an Encompass loan number will be assigned to all imported loans using the Auto Loan Numbering settings.
-
Automatic Assignment of Loan Officer - If enabled, when the name of the loan officer in the loan file does not match an Encompass user, Encompass will automatically assign a loan officer as follows:
- If the importing user is a loan officer, the loan will be assigned to the importing user.
- If the importing user is an admin, the user will be asked to select a loan officer to assign, or to bypass auto-assignment. -
Loan Officer is Allowed to Import - Use this setting to control whether or not loan officers can import loans where the subject property is in a state in which they are not licensed. The setting options are:
- Allow Import - LO can import the loan
- Do Not Set Current Loan Officer - LO can import the loan, but the File Starter is set as the current user
- Do Not Allow Import - LO cannot import the loan. -
FNMA Loan Import - Use this setting to control whether or not specific fields in Fannie Mae loan files are recalculated when imported into Encompass.
- Keep Calculated Value - The values in the fields are not recalculated and may be edited as needed.
- Use Encompass Calcs - The values in the fields are recalculated by Encompass. Only authorized users are then permitted to edit these fields. (Authorized users click the Lock icon and then update the fields as needed.)
 Fields controlled by this setting
- Net Rental Income (field ID 106)
- Estimated Closing Costs (field ID 137)
- Estimated Prepaid Items (field ID 138)
- Closing Costs Paid by Seller (field ID 143)
- PMI, MIP, Funding Fees (field ID 969)
- Debts to be paid by refinanced loan proceeds (field ID 1092)
- Discount (field ID 1093)
-
LOS Loan Import - Use this setting to control whether or not specific fields in Point, Contour, and Genesis loan files are recalculated when imported into Encompass.
- Keep Calculated Value - The values in the fields are not recalculated and may be edited as needed.
- Use Encompass Calcs - The values in the fields are recalculated by Encompass. Only authorized users are then permitted to edit these fields. (Authorized users click the Lock icon and then update the fields as needed.)Fields controlled by this setting
- Net Rental Income (field ID 106)
- Estimated Closing Costs (field ID 137)
- Estimated Prepaid Items (field ID 138)
- Closing Costs Paid by Seller (field ID 143)
- PMI, MIP, Funding Fees (field ID 969)
- Debts to be paid by refinanced loan proceeds (field ID 1092)
- Discount (field ID 1093)
-
WebCenter/DU 3.2 Application Import Date - Use this setting to control whether or not the Application Date (field ID 745) is auto-populated with the current date (i.e., "today's date") when importing loan files from an Encompass Consumer Connect site or Fannie Mae 3.2 loans into Encompass.
- Do Not change - The Application Date is not automatically populated with the current date after importing the loan file.
- Use Current Date If Blank -If the Application Date field is blank, the current date is populated into it after importing the loan file. If a date has already been entered in the Application Date field, that date will remain in the field after importing the loan file.
-
TPO WebCenter Loan Import - Use this setting to control whether or not specific fields in loans originated in an Encompass TPO WebCenter site are recalculated when imported into Encompass. The setting options are:
- Keep Calculated Value - The values in the fields are not recalculated and may be edited as needed.
- Use Encompass Calcs - The values in the fields are recalculated by Encompass. Only authorized users are then permitted to edit these fields. (Authorized users click the Lock icon and then update the fields as needed.)Fields controlled by this setting
- Net Rental Income (field ID 106)
- Estimated Closing Costs (field ID 137)
- Estimated Prepaid Items (field ID 138)
- Closing Costs Paid by Seller (field ID 143)
- PMI, MIP, Funding Fees (field ID 969)
- Debts to be paid by refinanced loan proceeds (field ID 1092)
- Discount (field ID 1093)
-
TPO WebCenter Application Date Import - Use this setting to control whether or not the Application Date (field ID 745) is auto-populated with the current date (i.e., "today's date") when importing loan files from the Encompass TPO WebCenter loans into Encompass. The setting options are:
- Do Not change - The Application Date is not automatically populated with the current date after importing the loan file.
- Use Current Date If Blank - If the Application Date field is blank, the current date is populated into it after importing the loan file. If a date has already been entered in the Application Date field, that date will remain in the field after importing the loan file.
-
Click Apply or OK.
-
Select Password from the Category list.
-
Double-click an option, and then enter values to define the rules for maintaining and setting passwords.
-
Set the first five options to define the requirements for new passwords; such as minimum password length and the minimum number of upper-case, lower-case, digits, and special characters.
For the Min # of Digits setting, enter the amount of numbers that must be included in the user's password.
Please note that the following password settings are not enforced for dedicated user accounts that access Encompass via the Encompass SDK since there is no physical user in place to actually change the password if prompted. To control which dedicated user accounts in your organization can access Encompass via the SDK, it is recommended that you utilize the Disable Login or Disable Account options in the SDK account’s user profile (i.e., the User Details screen in the Organization/Users setting in Encompass Settings).
-
# of Days to Expiration - The number of days before a password must be changed.
-
# of Passwords Before Reuse - The number of times a password must change before a previous password can be reused.
-
# of Days Before Reuse - The number of days before a previously used password can be reused.
-
Password Failure Limit - The number of allowed failed log in attempts before a user's account is locked. Please note, 0 (zero) is the default value for this setting. With 0 set here, no number of password log in errors will lock the account. Enter 1 (or a larger number) to specify the number of times the user can enter an incorrect password before their account is locked.
-
Enable Timeout Reset - Use this option to enable a time-based lock-out period for users so that a series of failed log in attempts causes the account to be locked for a set period of time. It will then be automatically unlocked. By default, this option is disabled. Double-click the value, and then select Enabled to enable this option.
-
Password Failure Lockout Time in Minutes - If Enable Timeout Reset is enabled, double-click the Password Failure Lockout Time in Minutes value, and then select the number of minutes that users will be locked out of Encompass after a set number of failed log in attempts. (The number of failed log in attempts is determined by the Password Failure Limit value that has been set.)
-
Apply Lockout For 'admin' User - To enable a timeout reset for the user who has been assigned with the admin user ID (i.e., the 'admin' user), double-click the value for the Apply Lockout For ‘admin’ User option, and then select Enabled. (The default value is Disabled.)
-
Enable MFA Login - Administrators can use this button to enable or disable multi-factor authentication (MFA) for the following Encompass products: Connect Products (Encompass Web), Encompass, and the Encompass Consumer Connect Admin Portal where administrators and authorized users can set up and configure settings for their Encompass Consumer Connect websites. In the Enable MFA pop-up window, select the options to enable MFA or clear the checkbox to disable MFA. Click OK, and then click OK again to close the Server Settings Manager screen.
When MFA is enabled, users are required to authenticate to their corporate network by providing a user name and password, and then by providing a pin or code from their smartphone or device. Once authenticated, then they can proceed into their destination.
Encompass supports Okta Verify and Duo Mobile identity providers for MFA. Refer to the How to Set Up MFA for Encompass guide for information about setting up MFA for Encompass and Encompass Consumer Connect Admin Portal.
-
Select Policies from the Category list.
-
Double-click an option, and then select or enter the appropriate setting in the Value list.
-
Default to URLA 2020 - Indicate when URLA 2020 input forms will be used for all new loans. On or after the date indicated here, the URLA Form Version > URLA 2020 option in new loan files will be automatically selected so that the new URLA 2020 input forms are used for the loan. Prior to this date, the URLA 2009 forms will be used.
Note: By default, this policy is set to use the URLA 2020 forms on all loans created on or after 3/1/2021. In previous versions of Encompass this date was set to November 1, 2020 by default.
- HELOC Important Terms Historical Table Loan Amount - Sets the value used to calculate the draw period and repayment period for the HELOC Important Terms disclosure output form.
-
Default to RESPA-TILA 2015 LE and CD - Use this setting to specify the date on which the RESPA-TILA 2015 LE and CD forms will be used by default when a new loan is started. By default, this date is set to October 3, 2015.
-
Default to HMDA 2018 - Select the date when the 2018 HMDA input forms will be used by default when a new loan is started and for existing loans with no disposition date. The setting also sets the default 2018 reporting year view for the HMDA Information content on the 1003, HMDA Information, FNMA Streamlined 1003, and other input forms. By default, this date is set to 01/01/2018.
Note: If an existing loan does not have an Action Date (field ID 749) entered, or if the date is on or after the date set for the Default to HMDA 2018 setting, then the loan will use the 2018 HMDA forms. If the Action Date in the loan is prior to the Default to HMDA 2018 date, then the loan will continue to use the 2017 HMDA forms.
-
Use CD to Baseline Date - Your company will allow the Closing Disclosure to reflect changes in costs if an estimated closing cost was disclosed in good faith for loans with a Closing Date (field ID 748) on or after the date entered here, regardless of when the Closing Disclosure was provided relative to consummation. The date is set to 6/1/2018 by default.
This feature was introduced in Encompass 18.3.
-
Itemize Escrow Disbursements - If enabled, the aggregate escrow account disclosure is generated with each disbursement itemized on a separate line. Multiple payments within each month are listed separately. If disabled, the total escrow payments for a month are combined and display in a single line entry for the month.
-
Prevent Aggregate Escrow from moving disbursements - If enabled, disbursement dates do not adjust in the aggregate analysis schedule when the 1st Payment Date (field ID 682) is changed. When this option is enabled and an adjustment to the 1st Payment Date causes an escrow due date to fall outside the date range in the aggregate analysis schedule, that date does not display in the schedule.
-
Loan Amount Rounding - If enabled, all loan amounts are rounded to the nearest full dollar value. Note that regardless of the setting selected here, FHA loan amounts are always rounded, and the USDA Guarantee Fee Financed (field ID NEWHUD2.X1593) and PMI/MIP Financed (field ID 1045) fields are never rounded.
-
Interviewer Info Populated From - Use this option to select the File Starter or the Loan Officer as the source for the interviewer information that appears on the bottom of page 3 of the 1003 (and on the FNMA Streamlined form).
-
Allow Non-sequential Milestone Rollback- If enabled, a user with access rights to a milestone can clear the Finished checkbox, even if subsequent milestones in the workflow have been completed. The Finished checkboxes on the subsequent milestones will also be cleared, even if the user does not have access rights to those milestones. If disabled, a user cannot clear the Finished checkbox on a milestone if subsequent milestones (for which the user does not have access rights) have been completed.
Note: This option is available with Encompass Banker Edition only.
-
After Disclosure Copy fees to GFE - Use this tool to control how fees are updated to the 2010 GFE input form due to a changed circumstance. Your selection here controls whether or not fees changed directly in the Borrower column on the 2010 itemization input form or indirectly as the result of a recalculation (for example, a recalculation that occurs if the loan amount changes) will automatically update in the GFE (Section #) column. The options are:
-
Always Update - When selected, fees will always automatically update in the GFE (Section #) column.
-
Selective Update - When selected, fees will automatically update in the GFE (Section #) column only if one or more select criteria are met. The select criteria are:
-
A loan that has never been disclosed (both the Last GFE Sent Date (field ID 3137) and Initial GFE Sent Date (field ID 3148) fields are blank) will allow automatic updates to the GFE (Section #) column regardless of whether the fee is changed directly (i.e., manual key entry) or indirectly (i.e., change in loan amount, change in calculated value, application of new closing cost template, etc.).
-
Changes made after the Changed Circumstance checkbox (field 3168) on the 2010 GFE has been selected will automatically update the GFE (Section #) column regardless of whether the fee is changed directly (i.e., manual key entry) or indirectly (i.e., change in loan amount, change in calculated value, application of new closing cost template, etc.).
-
A loan where the GFE has expired (the GFE Expiration Date (field ID 3140) is earlier than today’s date) and the Borrower has not expressed an intent to continue with the loan (the Borrower intends to continue with this loan checkbox (field ID 3164) is not selected) will allow all fees on the 2010 itemization input form to automatically update on the GFE (Section #) column whenever the fee is changed directly (i.e., manual key entry) or indirectly (i.e., change in loan amount, change in calculated value, application of new closing cost template, etc.).
-
Locking a rate, providing rate lock details (lock date and lock term), and then selecting the Changed Circumstance checkbox after a loan has been initially disclosed will allow all fees on the 2010 itemization input form to automatically update on the GFE (Section #) column whenever the fee is changed directly (i.e., manual key entry) or indirectly (i.e., change in loan amount, change in calculated value, application of new closing cost template, etc.).
-
Manual Update - When selected, fees will not automatically update in the GFE (Section #) column. Instead, loan team members need to manually update these fees or create business rules to control how these fees are updated.
Note: Clicking the Copy Borrower column to 2010 GFE button on the 2010 Itemization will result in these fees being copied to the 2010 GFE even if this option is selected.
-
Include Unsubscribe Link in Emails - If enabled, emails sent using the Campaign or email merge features on the Contacts tab will include an unsubscribe option that recipients can select to be removed from your email list.
-
This setting is available only when the Encompass Server is running under IIS. If the Encompass Server is running under TCP or IIS/TCP, this setting is not visible.
Note: To disable or enable this policy, you must log in to the Settings Manager using a Networked connection.
-
Allow access from certain IPs - If set to Enabled, you can specify the IP addresses from which users are allowed to access Encompass.
To Configure Access Based on IP Addresses:
-
Double-click the Value column, and select Enabled from the dropdown list.
-
Click Apply.
- Click the Set Allowed IPsbutton.
-
Click the Add icon, and then select a user from the User list:
Note: Select Everyone to apply the same IP settings for all users.
-
Select the options for IP Address Range or IP Address.
-
Enter the address or range of addresses, and then click Save.
-
Repeat steps 3-5 until all your users are added.
-
Select the Apply to Encompass Connect products… checkbox at the top of the window to enable users to access Encompass Loan Officer Connect and Encompass Developer Connect if their systems use any of the IP ranges or IP addresses you have specified. Note that you only need to select this checkbox if you want to provide access to these Connect products. This setting will still be applied to Encompass even if this checkbox is not selected. Users on systems using the specified IP ranges or IP addresses will still be able to access Encompass accordingly, just as they were prior to this enhancement.
- It is important to note that after configuring and enabling this setting in Encompass for use by Encompass Loan Officer Connect or Encompass Developer Connect users, it will take at least 30 minutes for this setting to be applied for the users in those Connect products.
-
When finished, click Close.
-
TPO Originator - Use this setting to control the name entered in the Loan Originator field (field ID 1612) on the 1003 Page 3.
-
Keep_TPO_Originator - When selected, the TPO that originated the loan in TPO WebCenter is populated to the Loan Originator field.
-
Update_TPO_Originator_With_Assigned_LoanOfficer - When selected, the name of the loan officer assigned to the loan in Encompass is populated to the Loan Originator field.
-
QM GSE Patch Expiration Date - Use this setting to configure the expiration date for the ATR/QM patch originally scheduled to expire in 2021 for GSE-approved loans, resulting in less stringent ATR/QM guidelines for these loans. By default the date is set to 7/1/2021.
-
Lock Snapshot Recapture - Use this setting to control whether the Allow Lock Snapshot Recapture tool is enabled or disabled. By default, the tool is disabled.
-
Skip execution of Custom Calcs during Loan Open - Use this setting to configure whether custom field calculations are executed during the loan opening process. By default, this policy is set to False, which means the custom calculations will continue to execute during the loan opening process. To ensure that custom calculations are not executed during the loan opening process, update the value to True.
-
Note that if you enable this policy so that the custom calculations are not executed at loan open, when a loan has been updated since the last loan open (through the Encompass SDK, API, or other method), the custom calculation fields in the loan will not be calculated/updated until the loan is saved, documents are printed, or a service is ordered.
-
-
URLA Collect Language Preference - Use this setting to control the availability of the Language Preference fields on the 1003 URLA Part 1 input form. When set to True, the fields display on the input form. When set to False, the fields are hidden.
-
URLA Collect Homeownership Counseling - Use this setting to control the availability of the L5. Homeownership Education and Housing Counseling section on the 1003 URLA Lender input form. When set to True, the section displays on the input form. When set to False, the section is hidden.
- Enhanced Condition Workflow - Once the enhanced conditions have been defined in Encompass Settings, you can enable enhanced conditions for use in loan files in Encompass (desktop and web versions) and Encompass TPO Connect (if applicable). Use this policy to make enhanced conditions available to loan team members in loan files. To enable enhanced conditions, select Disabled in the Value list, and then select Enabled. (Note that Enhanced Condition workflows and settings are not available in Encompass Broker Edition.)
- Once you select Enabled, the Enhanced Condition Workflow Start Date option displays. Here you will indicate the date in which enhanced conditions will be enabled for new loans that are created and accessible by loan team members working with loan files. By default, the current date (i.e., "today's date") is displayed. Double-click the date in Value list, and then enter a new date or click the dropdown arrow and select a new date from the calendar. (Note that Enhanced Condition workflows and settings are not available in Encompass Broker Edition.)
-
Use Price Based QM General Definition Date - Use this setting to set the date when loans are determined to be a General Qualified Mortgage based on the price-based rule, without relying on the Agency/QM DTI rule. The default date for the option is set to 10/1/2022. Administrators can select an earlier date, but the date cannot be set earlier than 3/1/2021.
-
ARM Index Precision - Use this setting to use and display five decimals versus three decimals for the Index % field (field ID 688) on Encompass forms and tools. By default, this setting is set to Three Decimals.
-
Consumer Can Order Home Insurance on ECC - The Homeowners Insurance Service with GEICO® is enabled on Encompass Consumer Connect sites and borrower portal widgets by default. This means that borrowers are automatically presented with a GEICO Homeowners Insurance task card in the borrower portal unless a lender administrator disables the service or configures another provider. Encompass administrators can use this policy to disable and re-enable this service for Encompass Consumer Connect sites. Double-click the policy's current value, and then select False to disable the Homeowners Insurance Service or select True to enable these features. For more information about this service, review the Homeowners Insurance Service setup and user guide.
-
Validate all system rules prior to Ordering Docs - Use this setting to enable Encompass to validate business rules and Dynamic Data Management (DDM) rules when a loan team member is sending an eDisclosure request or ordering closing documents. This setting helps ensure that users cannot proceed with sending eDisclosures or ordering closing documents when a DDM rule or business rule should be restricting the user from proceeding. By default, the setting is turned off (False).
-
When this setting is turned enabled (True), the loan team member is presented with this pop-up window each time they click the eDisclosures, Order Docs, Audit, View, or eClose button in the loan file:
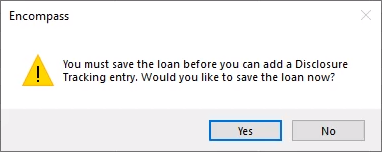
-
-
When the loan team member clicks Yes to proceed with the loan save, the following message displays and the rule validation begins:
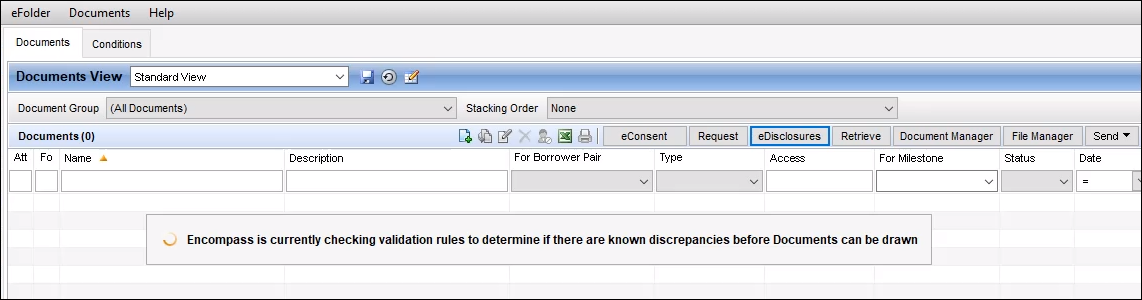
-
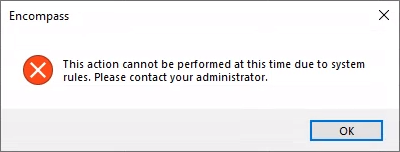
During this validation, Encompass saves the current loan data, validates the DDM rules, and then validates applicable business rules. Once the validation is complete, the loan team member can click the eDisclosures, Order Docs, Audit, View, or eClose button again to proceed. However, if there is a rule applied during the validation that results in a restriction of the eDisclosures, Order Docs, Audit, View, or eClose button, then the button is disabled (grayed out) and the user will not be able to proceed with the sending or ordering of documents. The following message is also provided:
Please note that when this policy is enabled, the loan save that is performed may take longer than a typical loan save due to the evaluation of DDM and business rules that is performed during the loan save. When enabling this policy, a pop-up message informing the administrator of this potential performance impact is provided.
-
- When finished, click Apply or OK
-
Select Printing from the Category list.
-
Double-click an option, and then select the appropriate setting from the Value list.
-
Standard Forms Location - Use this option to specify where standard Encompass forms are stored; on the Client machine or the Server. The Client selection provides better performance, while the Server selection provides easier maintenance.
-
Print State License # on 1003 - If enabled, values entered in the NMLS Loan Originator ID (field ID 3238) and LO State License Number (field ID 2306) fields on page 3 of the 1003 input form display in the Loan Originator Identifier field on page 3 of the printed 1003 form; values entered in the NMLS ID (field ID 3237) and Company State License Number (field ID 3629) fields on page 3 of the 1003 input form display in the Loan Origination Company Identifier field on page 3 of the printed 1003 form.
If disabled, only the NMLS Loan Originator ID entered in the 1003 input form displays in the Loan Originator Identifier field on page 3 of the printed 1003 form; NMLS ID entered in the 1003 input form displays in the Loan Origination Company Identifier field on page 3 of the printed 1003 form.
Note: In this disabled mode, the printed 1003 form does not display Loan Originator Identifier and Loan Origination Company Identifier fields even if the LO State License Number and Company State License Number fields are populated in Encompass.
-
Autoselect current form when printing - If enabled, the form that is currently open in Encompass will automatically appear in the Selected Forms list on the Print window. If disabled, you will need to manually add forms to this list.
Note: You can also use the Print Auto Selection tool (in the Encompass Settings) to determine the default set of forms that are automatically selected in the Print window for loans that have specified values in selected fields. If the Autoselect current form when printing option is enabled, both the current form and the Print Auto Selection forms will be automatically selected in the Print window.
-
Word Background Printing - If enabled, the Print window does not display when users print a Word document (such as a custom form). The document prints to the user’s default printer in the background. If disabled, the Print window displays when the user prints a Word document; users have the ability to modify the print settings on this window.
-
Click Apply or OK.