Document Viewer page
Overview
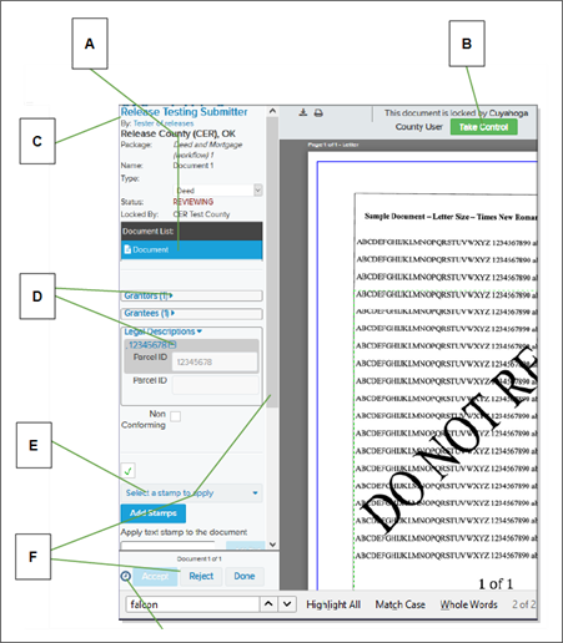
When you access a document to review, that document displays on the right side of the document review page (the document viewer). Information about the document displays on the left. Below is an example.

| Letter | Description |
|---|---|
| A | Package and document information displays here, including the name of the person who has begun reviewing the package. |
| B | Select the status to view the document action history. For more information, see Document activity history. |
| C | Select the Rejection Reason button to view details about a rejection. For more information, see Document rejection. |
| D | Use these tools to work with the document. For more information, see Document Viewer toolbar. |
| E | Hover your mouse pointer over a recording stamp place holder (in red). When the cursor changes to crossed arrows, you can press the left mouse button to choose and drag the stamp. |
| F | To see a list of the types of all documents in the package, hover your mouse pointer over Document # of X at the bottom of the left side. |
Tasks you need to perform also display on the left side of the document viewer. Below is a partial example.
| Letter | Description |
|---|---|
| A | The Document List includes the main document and any supporting documents that should accompany the main document (such as a Declaration of Value or a Mortgage Tax Affidavit). It gives each document’s type. Be sure to select each document as needed until all have been reviewed. |
| B | Someone with the necessary permission can take control of a locked document. |
| C | Select the submitting company name or the submitting username to display contact information for that company. |
| D | Any information you need to verify displays below the Document list. Select arrows or plus/minus signs to expand/compress a section |
| E | Depending on your setup, you may be able to add text or additional types of stamps in this area. |
| F | Use the scroll bar to review all fields before you select the Accept button or the Reject button. |
NOTE: If you have queues from other submitters with documents that have been waiting longer than documents in the current queue, a clock icon ( ![]() ) displays near the Accept/Reject/Done buttons. Hover the mouse pointer over the clock for more information. Select the icon to go to the queue with the oldest documents.
) displays near the Accept/Reject/Done buttons. Hover the mouse pointer over the clock for more information. Select the icon to go to the queue with the oldest documents.
Depending on the type of document you review, you can change the indexing, reference, and property information that the submitter supplied. You can also change fees.
When you finish reviewing a document, you have the following three options, depending on what you found during your review.
| Select this | If you found this |
|---|---|
| Accept | The document is complete, meets all recording requirements, and is ready to be recorded. An "Accepted" document moves out of the reviewing queue only after all documents in its package are accepted or rejected. Until that time, you or another Simplifile user can review and Accept or Unaccept a document. |
| Reject | The submitter needs to work with the document and resubmit it. A document might be returned to a submitter because of formatting errors, missing documentation that is required for the type of submission being made, missing signatures, or other issues. Each county supplies its own rejection list. |
| Done | The reviewer has finished working on the document, but is not ready to start the recording process for the document. When a reviewer clicks the Done |
By default, Simplifile automatically loads the next document in the reviewing queue into your document viewer after you accept or reject a document. If you choose the Done ![]() button, the document remains in the viewing queue and the system displays a list of all of the documents in the package. You can then choose a different document in the package to review or continue reviewing the documents in order.
button, the document remains in the viewing queue and the system displays a list of all of the documents in the package. You can then choose a different document in the package to review or continue reviewing the documents in order.
You can view documents or packages you have reviewed during the day. For more information, see Task tracking.
Document Viewer toolbar
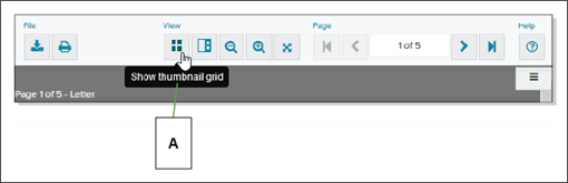
A collection of tools displays in a toolbar at the top of the document viewer. Below is an example.
| Letter | Description |
|---|---|
| A | Hover your mouse pointer over a tool to view a description of the tool. |
NOTE: A balloon with an exclamation mark ( ![]() or
or ![]() ) displays in the toolbar when the submitter has sent you a message. Select the balloon to view the message.
) displays in the toolbar when the submitter has sent you a message. Select the balloon to view the message.
The tools let you do the following:
| Icon | button |
Description
|
|---|---|---|
|
|
Download | Download a document as a PDF or TIFF. Be sure to mark the format you want to use. |
|
|
Print a copy of the document. | |
|
|
Thumbnail Grid | Display small images of multiple pages of a document at one time. You can select and hold the left mouse button and drag a page to change the order of the pages.
|
|
|
Sidebar Display | Display small images of the pages of a document in a fly‑out column. The sidebar remains visible until you select the icon again.
|
|
|
Display Size | Select the plus or minus magnifying glasses to enlarge or shrink the display. You can zoom all the way out to the thumbnail grid, if desired. |
|
|
Page Navigation | If the document has multiple pages, display a different page of the document. Type a page number in the box to go to that page. |
|
|
Keyboard Shortcuts | Select this icon to display a list of keyboard shortcuts you can use in the document viewer. The shortcuts may include the following:
|
Document Viewer page navigation
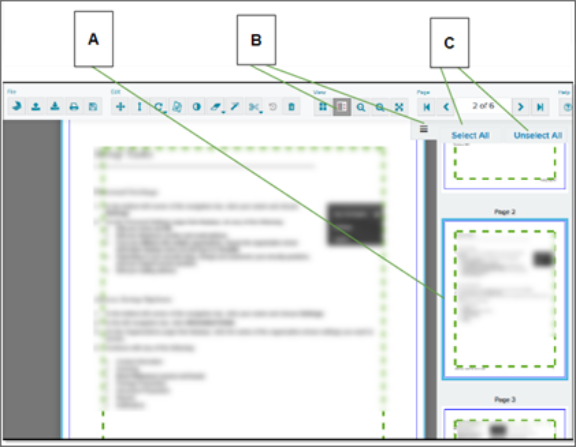
You can use several methods to choose pages where you want to perform an action such as applying a stamp. For example, you can select the hamburger menu icon ( ![]() ) or the thumbnail sidebar icon (
) or the thumbnail sidebar icon ( ![]() ) to open a fly‑out menu that displays all pages of a document on the right side. Below is an example.
) to open a fly‑out menu that displays all pages of a document on the right side. Below is an example.
| Letter | Description |
|---|---|
| A | Pages you select have a border in the sidebar display. |
| B | Select here or here to display the sidebar. |
| C | Instead of selecting each page, you can select these buttons to choose or un‑choose all pages. |
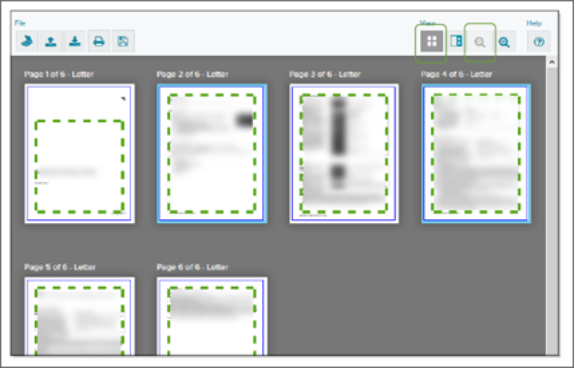
You can also select the thumbnail grid icon ( ![]() ) or use the zoom out tool (
) or use the zoom out tool ( ![]() ) to display and choose the pages where you want to make changes.
) to display and choose the pages where you want to make changes.
After all documents in a package have been approved, Simplifile automatically approves the package for recording and moves it to the Record Queue. For more information about recording, see Package recording and storage. If you reject a document, its package is rejected automatically as soon as every document in the package has been either accepted or rejected. The package goes back to the submitter, who reviews the rejection reasons, makes changes in the rejected documents, and resubmits the entire package. Depending on your settings, you can then review only the changed documents in the re‑submitted package, or all of the re‑submitted documents.
If desired, you can review which documents or packages you reviewed during the day. For more information, see Daily work review.
I want to ...
Open the Document Viewer
- Open the Recipient Menu page.
- Do one of the following:
- To review the next document in the review queue, select the Review Next Document
 button.
 - To choose a document from the list of packages in the queue, in the navigation menu, select the Review item and do any of the following:
- To review the next document in the queue, select the Begin Reviewing Next Document
 button.
 - To begin reviewing documents in a specific package, select the Begin Reviewing
 link on the right side of the package card header.
 - To continue reviewing the documents in a
specific package in the order in which they
are listed in that package, select the Continue Reviewing
 link on the right side of the the package card.
 - To work with a specific document, select the document name.
- To take control of a document locked by
another person, select the Unlock
 button. Then select the
document name.
button. Then select the
document name.
- To review the next document in the queue, select the Begin Reviewing Next Document
- To review the next document in the review queue, select the Review Next Document
Review a document
- Open the Document Viewer.
- Display the document you want to review. For more information, see Document review.
- Review all pages of the document to make sure it meets the submission requirements. For example, you may need to verify that the page is legal or letter size, or that the text of the document fits within your prescribed margins.
- Review and complete the fields and tasks on the
left side, as necessary. For example, you may need
to add information such as the tax ID number or
address of a specific property.
Be sure to select arrows (
 ) and plus signs (
  ) to display all available information.
 - Verify that the fees are correct. When they are, mark The recording fees are correct.
To review or edit fees, select the displayed fee total. For more information, see Document review.
- Make sure that any stamps are added and in the right positions. When they are, mark The stamps are positioned correctly.
For instructions on adding and moving stamps, see the Add a Stamp section below.
- Do one of the following:
- If everything is correct and the document is ready to be recorded, select the Accept
 button.
 - If you did not finish your review or want another reviewer to check the document, select the Done
 button. The system unlocks the document so that another reviewer can work with it.
 - If a document needs to be returned to the submitter for any reason, select the Reject
 button and complete the Rejection Details window that displays. For more information, see the Reject a document section below.
- If everything is correct and the document is ready to be recorded, select the Accept
View the document's Submitter Information window
- At the top of the left column in the Document Viewer page, select the large submitter organization name. The Submitter Information window opens.
- Review the wanted information.
- To close the window, either select the OK
 button in the lower left corner of the window or the X in the upper right corner of the window.
View the document's Submitting User Information window
- At the top of the left column in the Document Viewer page in the By field, select the submitter name. The Submitting User Information window opens.
- Review the wanted information.
- To close the window, either select the OK button in the lower left corner of the window or the X in the upper right corner of the window.
Fee verification (for recipients)
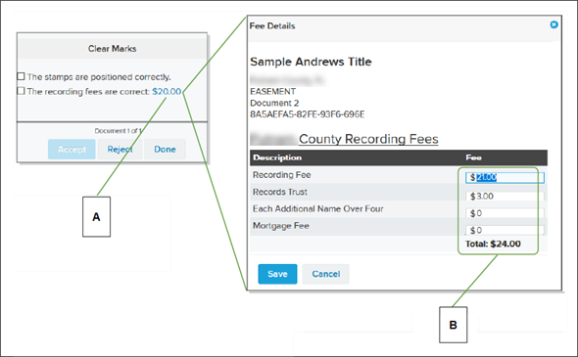
The estimated fees associated with a submitted document display near the bottom of the left column of the document display window. A document’s fees are estimated based on the fee schedule your recording county (or jurisdiction) provides to Simplifile. You should review the estimated fees and make any necessary changes. Below is an example of the fee details display.
You may be able to add to or edit the fees. In the example above, the fees have changed in such a way that the total increased from $20.00 to $24.00.
| Letter | Description |
|---|---|
| A | To review fee details (including the breakdown of fees), select the fee total. |
| B | You may be able to add to or edit the fees. In the example above, the fees have changed in such a way that the total increased from $20.00 to $24.00. |
Add a Stamp
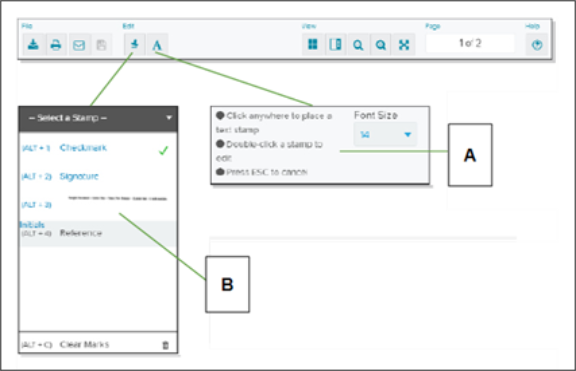
Simplifile offers tools that help you place stamps on documents. Below are examples of how the tools work.
| Letter | Description |
|---|---|
|
A |
Select the text icon to choose a font size and place a text stamp. Double‑select an existing stamp to edit it. |
| B | Select the stamp icon to choose a stamp. Then follow the instructions that display to place the stamp. You can add more than one stamp. You also select the stamp icon to remove or edit stamps. You can select and drag text. You can also rotate some stamps. |
Instead of selecting the stamp icon and choosing a stamp, you can use the keyboard shortcuts listed in the Select a Stamp dropdown to add stamps. The Keyboard Shortcuts ![]() button or the trash can
button or the trash can ![]() icon remove all stamps from the document.
icon remove all stamps from the document.
- Open the Document Viewer.
- Open a document in the document viewer.
- Select the Stamps
 button.
 - Select the stamp you want to apply from the Select a Stamp dropdown list. If desired, make a note of the keyboard shortcut so you can add stamps without first selecting the stamp icon.
- Select the stamp mouse pointer where you want the stamp to display.
You can do this multiple times to add the same stamp in multiple locations.
- When finished, select the Done
 button.
Add a text stamp
- Open the Document Viewer.
- Select the text stamp icon (
 ).
). - If desired, change the font size for your text.
- Select anywhere in the document to place a text box.
- Enter in the text box the text you want to add as a stamp.
- When you finish, select the Done button.
Edit a stamp
- Open the Document Viewer.
- Position your mouse pointer over the stamp.
- Do one of the following:
- Select and drag the stamp to a new location.
- Select the rotate icon (
 ) to rotate the stamp.
 - Double‑click a text box to change the text.
- When finished editing, select the Done button.
Resize a stamp
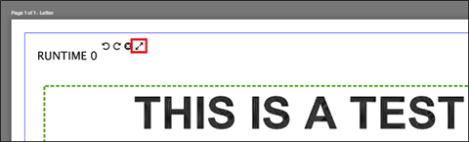
Stamps can now be resized within the Document Viewer to ensure that they fit in the margins of submitted documents without obscuring any document content. All stamps remain not adjustable by default, but if you would like to take advantage of the ability to resize stamps, please contact our Support team. After a stamp is marked as resize‑able, a new resizing icon displays as you hover over the stamp as shown below. Users can select and drag this icon to increase or decrease the size of the stamp.
- Open the Document Viewer.
- Select and drag the Resize icon to increase or decrease the size of the stamp.
Clear all stamps
- Open the Document Viewer.
- To clear all stamps from the document, select the stamp icon, select Select a Stamp, and select the trash can
 icon at the bottom of the dropdown list.
Reject a document
If you reject a document, you must record the reasons for rejection in Simplifile. Then, when the system returns the package to the submitter, the submitter knows what he or she needs to do to prepare the document before re‑submitting the package. You or your administrator sets up the rejection reasons. For more information, see Setup tasks for recipients.
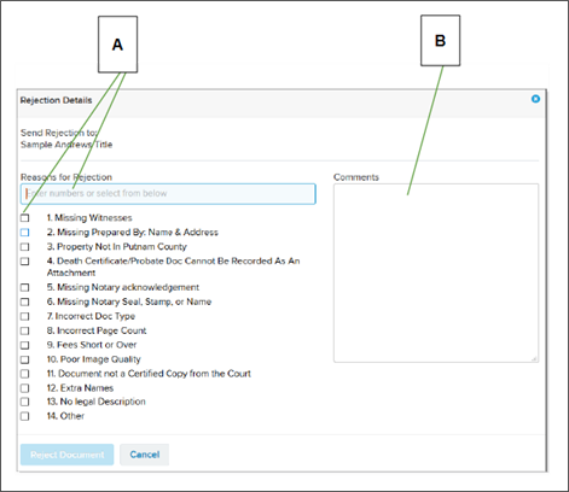
Below is an example of a list of rejections in Simplifile.
| Letter | Description |
|---|---|
| A | Enter the numbers of the rejection reasons you want to include, separated by commas. You can also mark the boxes of the reasons you want. |
| B | Use the Comments box to add information you want to give to the submitter. For example, you can give specifics about a reason or, if none of the listed rejection reasons meet your needs, you can use the box to add a reason. |
A document can always be rejected to the submitter. However, you may be able to choose additional rejection options. For example, you might be able to return a document to someone in your own organization, such as the treasurer, or to any office in the document’s workflow.
For more information, see the Reject a document.
- Open the Document Viewer.
- Review a document and find that it does not meet the requirements or standards in some way.
- At the bottom of the left side, select the Reject button.
- Do one of the following to add rejection reasons to the document:
- In the Reasons for Rejection box, enter the numbers of the rejection reasons you want to use from the list.
- Mark the boxes of the rejection reasons you want to use in the list.
- In the Comments box, enter any comments you have about the rejection reasons. This can help the submitter understand what they need to do to fix the document so that it can be successfully submitted.
- Select the Reject Document button.
Link Tray App
If you open the Document Viewer and the Tray app not linked window opens,
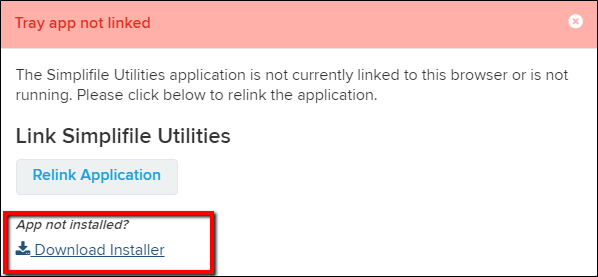
Do the following:
- Select the Download Installer link.
-
Select the Simplifile_Utilities.exe that is downloaded. The following window opens.
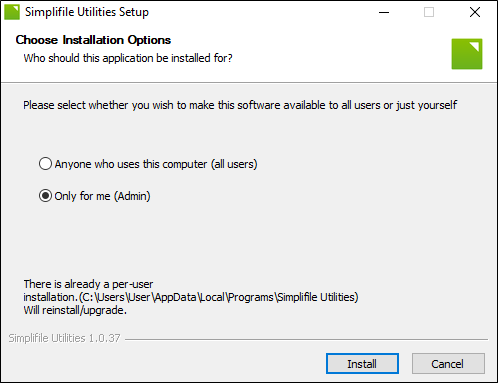
- Choose the wanted option:
- Anyone who uses this computer (all users)
- Only for me (Admin)
- Select the Install button.
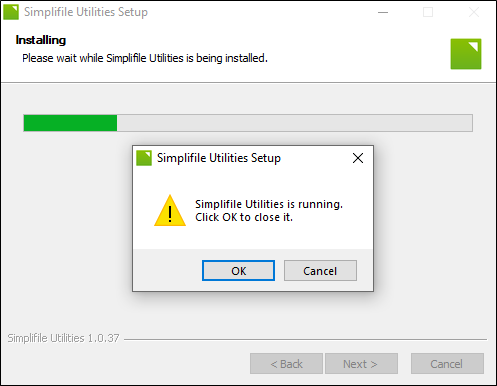
- If the Simplifile Utilities Setup window open display "Simplifile Utilities is running. Select the OK button to close it.", select the OK button to close the Simplifile Utilities.
- When the Completing Simplifile Utilities Setup is displayed, select the Finish button.
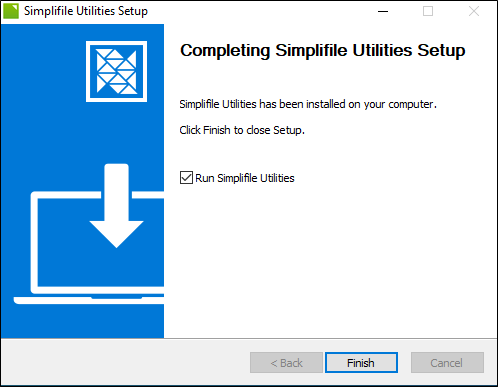
- The Open Simplifile Utilities? window opens.
If you are using Chrome, the window looks like:

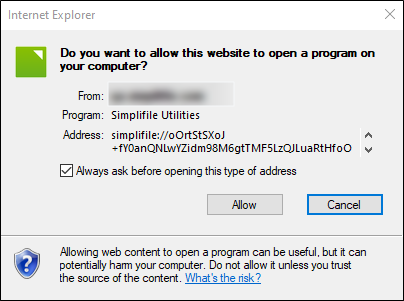
If you are using Internet Explorer, the window looks like:
If you are using Edge, the window looks like:
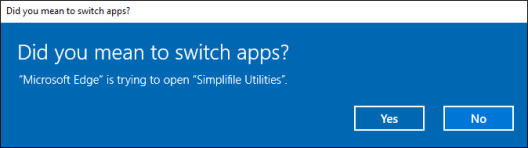
Select the applicable button to open the Simplifile Utilities.
- In the Simplifile Utilities Setup page, you should see a spinner next to he Link button. When the linking process completes, the page displays "Linking Successful".
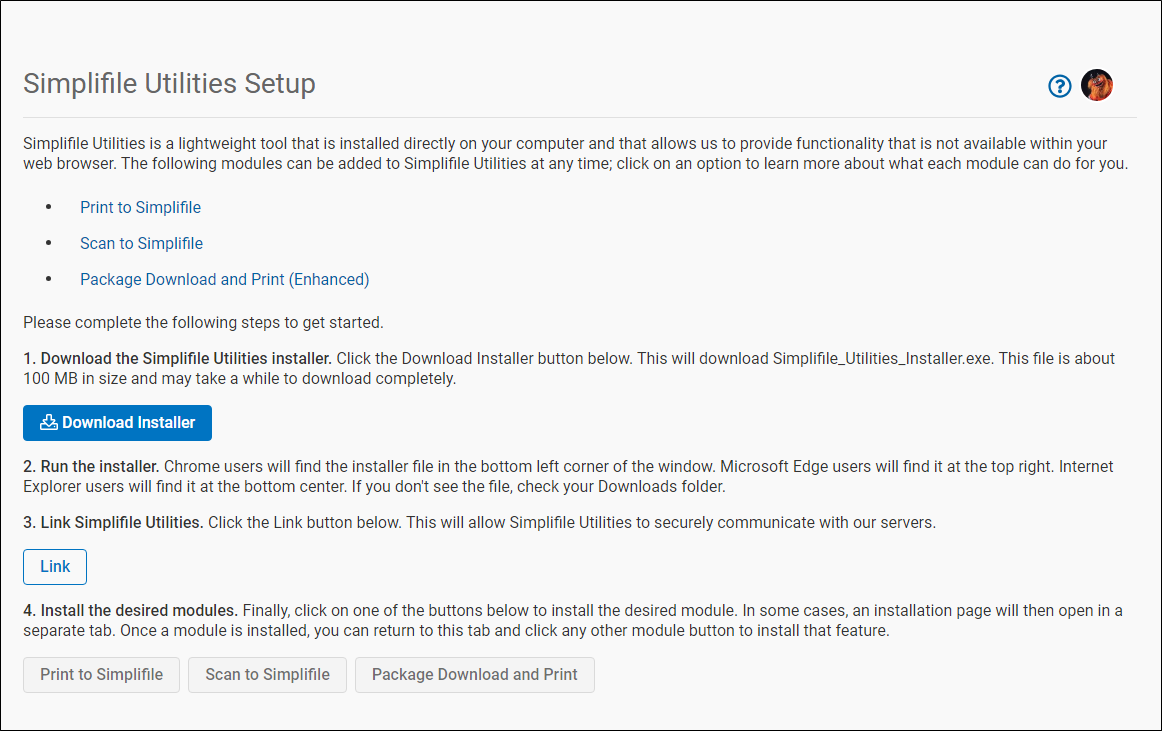
The Simplifile Utilities Tray app is now installed.