View Loan Delivery Statuses
After sending a submission package to a partner, you can view the status of the submission package by:
-
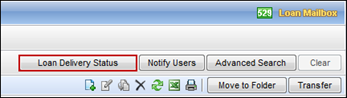
Clicking the Loan Delivery Status button on the Encompass Pipeline (Encompass desktop interface).
Or
-
Selecting the View Status tab (Encompass web interface).
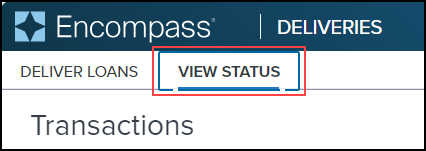
The Transactions window opens.
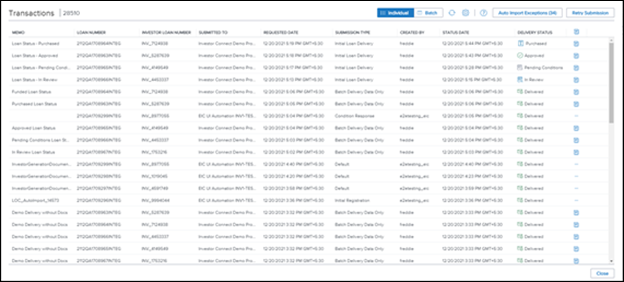
Buttons at the top of the Transactions window enable you to switch between individual or batch views of loan deliveries that have been sent to partners. By default, the Loan Delivery Status window opens with the Individual view displayed.

-
Individual – This view displays information about individual loans that have been submitted to your partners. Each loan is listed on a separate row in the window. Click an entry to access additional details about the loan.
-
Batch – This view provides access to information about each delivery that has been sent to your partners and provides a one-stop location for accessing a consolidated view of the loans in each delivery. A delivery may include one loan or multiple loans. Each delivery is listed on a separate row in the window. Click an entry to access a Batch Details window that lists the loans in the delivery package. From there you can navigate to windows where you can view additional details about each loan in the delivery.
By default, the Loan Delivery Status window opens with the Individual view displayed. Use the Individual and Batch toggle buttons at the top of the Loan Delivery Status window to toggle between the two views. Detailed information about each view is provided in the View Individual Loans That Have Been Submitted and View Batch Deliveries That Have Been Submitted sections below.
Both the Individual and Batch views share features that display across the top of the window.
![]()
The number of transactions displays at the top next to the Transaction heading. The number changes when switching between Individual and Batch views.
The Individual view displays the number of loans sent.
![]()
The Batch view displays the number of deliveries sent. Each delivery can contain one or more loans.
![]()
Click the Refresh icon to update the data on the window.
![]()
Click the Gear icon to configure the columns that display on the window.
![]()
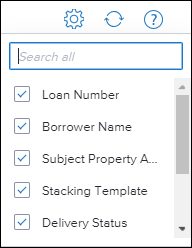
A search field at the top of the dropdown list allows you to filter the column options. Select or clear checkboxes in the dropdown list to add or remove columns.
![]()
When a user creates a custom view on the Loan Delivery Status Transaction window by adding or removing columns, the custom view is retained by Encompass Investor Connect and displays on the Transaction window when the user opens a new session. Each user can create unique custom views on the Individual and Batch tabs on the Transaction window.
Use the Auto Import Exception to import a document when the auto import functionality fails. Use the Retry Submission buttons or to resubmit one or more loan packages when the initial delivery failed. Detailed information about these procedures, refer to the Auto Import Workflow and Resubmit Loan Packages help topics.
![]()
Different workflows are used for accessing additional information from the Individual and Batch views. Detailed information about each view is provided in the View Individual Loans That Have Been Submitted and View Batch Deliveries That Have Been Submitted sections below.
The Individual view lists the individual loans that have been submitted to partners.
![]()
The following columns display by default on the window:
-
Memo
-
Loan Number
-
Investor Loan Number
Entries in the Investor Loan Number column are blank if the partner has not provided the lender with an investor loan number.
-
Submitted To
-
Requested Date – Date and time when an Encompass user clicked the Submit button for a loan package.
-
Submission Type
-
Created By
-
Status Date – Date and time when the loan package status was last changed.
-
Delivery Status
-
View Files
The window displays the following statuses for a delivery when it is initially sent:
-
In Progress - The loan package creation is in progress.
-
Completed - The loan package has been created but has not been sent to the partner.
-
Submitted - The loan has been submitted to the partner but has not yet been acknowledged by the partner.
-
Failed - An error occurred while creating or submitting the loan package.
-
Delivered - The partner received the loan package.
-
Error – An error occurred when the investor attempted to download the loan package.
The following additional statuses are available if partners opt to send status updates to the lender after the loan packages have been received:
-
In Review
-
Approved
-
Denied
-
Pending Conditions
-
Purchased
-
Funded
-
Additional partner-defined statuses can also be created by a partner as needed.
Icons in the Delivery Status column provide a direct visual representation of the delivery status for a loan.
![]()
A partner can enable a Dual Delivery workflow by configuring specific Submission Types to automatically send a second loan package to another Encompass Investor Connect partner. For example, an investor might send another loan package to a due diligence provider. When this happens, the Submitted to entry for the package displays an Information icon. The lender can hover over the icon to view the primary and secondary recipients of the packages.

The following columns can be added by clicking the Gear icon to customize the Loan Status Delivery window view:
-
Submission Date – Date and time when Encompass Investor Connect finished processing the package and sent it to the partner.
-
Transaction ID
-
Stacking Template
Entries in the Stacking Template column display only when a loan package includes both data and documents with a stacking template selected. Otherwise the column is blank.
In previous versions of Encompass Investor Connect, you could access additional information for only some loans (based on the status of the loan) by clicking links in the Status column. Starting with the Encompass Investor Connect 22.1 release, you can view additional information about any loan listed in the table. Click an entry to access the Delivery Details windows, where you can view additional information about the loan. For detailed information, refer to the View Delivery Details for a Loan help topic.
You can also click the Document icon in the View Files column to view the file attachments for a loan that has been successfully delivered. For details, refer to the View the Contents of a Loan Delivery Package help topic.
![]()
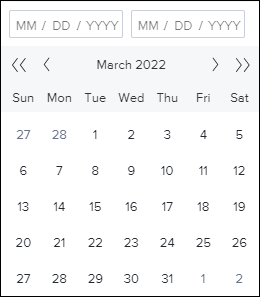
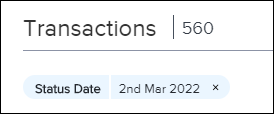
For the Submission Date and Status Date columns, lenders can select a date or a range of dates.
-
To select a single date, click the column header. When the calendar displays, click the date twice.
-
To select a date range, click the column header. When the calendar displays, click the first date in the range once, and then click the second date in the range. Or use the date fields above the calendar.
The Batch Details window displays data for the previous 30 days only.
The selected date or range of dates displays on the upper-left.

The Batch view displays a list of each delivery that has been sent to partners. A delivery can include one loan file or multiple loans.
![]()
Each entry includes information that displays in the following columns:
-
Requested Date
-
Submitted To
-
Created By
-
Memo
-
Submission Type
-
Status
-
Transaction ID (This column does not display by default but can be added by clicking the Gear icon at the top of the window.)
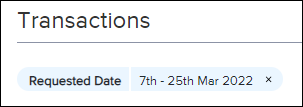
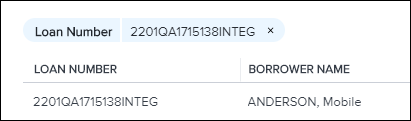
Click a column header to sort or filter the content on the page based on information in a column. As filters are selected, the filters display above the table and the number of batches is updated to indicate the number of batches on the window that match the filter criteria.
![]()
For the Submission Date and Status Date columns, lenders can select a date or a range of dates.
-
To select a single date, click the column header. When the calendar displays, click the date twice.
-
To select a date range, click the column header. When the calendar displays, click the first date in the range once, and then click the second date in the range. Or use the date fields above the calendar.
The selected date or range of dates displays on the upper-left.
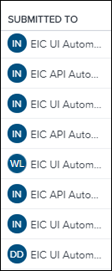
In the Submitted To column, circular blue icons with white lettering display in front of the partner’s name to indicate the business category of the partner:
-
IN – Investor
-
WL – Warehouse Lender
-
DD – Due Diligence Service Provider
The status column displays the current state of the delivery. It lists the number of loans that have been successfully delivered and the total number of loans in the delivery. The colored line represents loans with a status of Delivered in blue, loans with a status of Failed and Error in red. When a delivery contains one or more failed loan, a red triangle displays on the right side of the Status column along with the number of failed loans.
![]()
When at least one loan in a delivery is still in progress, the label reads Delivery Processing and loans with a status of In Progress are represented by a gray line.
![]()
To view the loans in a delivery, click a delivery entry to open the Batch Details window.
The Batch Details window lists the loans included in a delivery.
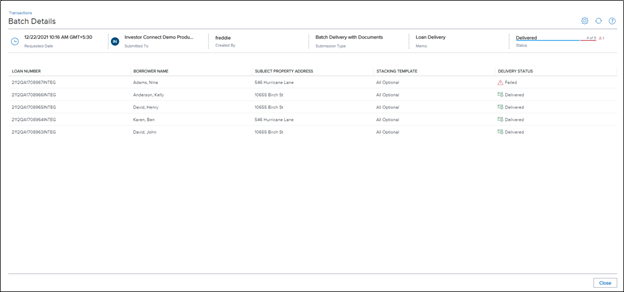
Basic information about the delivery displays in the header across the top of the window. This is the same information that displays on the Batch View window for the delivery.

Three icons display on the upper-right of the Batch Details window.

Click the Gear icon and use the dropdown list to configure the columns that display on the window. A search field at the top of the dropdown list allows you to filter the column options. Select or clear checkboxes in the dropdown list to add or remove columns.
Click the Refresh icon to update the data on the window.
Click the Question Mark icon to open the Encompass Investor Connect help topic for the window.
The table below the header displays a list of loans in the delivery.
Click a column header to sort or filter the content on the page based on information in a column. As filters are selected, the filters display above the table and the number of batches is updated to indicate the number of batches on the window that match the filter criteria.
Click a loan to open the Delivery Details window, where you can view additional information about the loan. For detailed information, refer to the View Delivery Details for a Loan help topic.
The following columns display by default on the Batch Details window:
-
Loan Number
-
Borrower Name
-
Subject Property Address
-
Stacking Template
-
Delivery Status
The following columns can be added by clicking the Gear icon and customizing the columns:
-
Investor Loan Number
-
Status Date
-
Submission Date – Date and time when Encompass Investor Connect finished processing the package and sent it to the partner.
The Delivery Status column displays the following statuses for the delivery when it is initially sent:
-
In Progress - The loan package creation is in progress.
-
Failed - An error occurred while creating or submitting the loan package.
-
Delivered - The partner received the loan package.
-
Error – An error occurred when the investor attempted to download the loan package.
The following additional statuses are available if partners opt to send status updates to the lender after the loan packages have been received:
-
In Review
-
Approved
-
Denied
-
Pending Conditions
-
Purchased
-
Funded
-
Additional partner-defined statuses can also be created by a partner as needed.
The Batch Details window displays data for the previous 30 days only.
Click a column header to sort or filter the content on the page based on information in a column. As filters are selected, the filters display above the table and the number of batches is updated to indicate the number of batches on the window that match the filter criteria.
Click a loan to open the Delivery Details window, where you can view additional information about the loan. For detailed information, refer to the Delivery Details Window help topic.
The following columns display by default on the window:
-
Loan Number
-
Borrower Name
-
Subject Property Address
-
Stacking Template
-
Delivery Status
The following columns can be added by clicking the Gear icon and customizing the columns:
-
Investor Loan Number
-
Status Date
-
Submission Date – Date and time when Encompass Investor Connect finished processing the package and sent it to the partner.
The Delivery Status column displays the following statuses for the delivery when it is initially sent:
-
In Progress - The loan package creation is in progress.
-
Failed - An error occurred while creating or submitting the loan package.
-
Delivered - The partner received the loan package.
The following additional statuses are available if partners opt to send status updates to the lender after the loan packages have been received:
-
In Review
-
Approved
-
Denied
-
Pending Conditions
-
Purchased
-
Funded
-
Additional custom statuses can also be created by a partner as needed.
The Batch Details window displays data for the last 30 days only.
For the Submission Date and Status Date columns, you can select a date or a range of dates.
-
To select a single date, click the column header. When the calendar displays, click the date twice.
-
To select a date range, click the column header. When the calendar displays, click the first date in the range once, and then click the second date in the range. Or use the date fields above the calendar.
Tracking Loan Delivery Statuses
Encompass also provides fields that enable you to track loan delivery status information by adding the fields to Encompass Pipeline views, custom forms, and reports. Use the following fields to track the current status of deliveries:
-
Investor Connect Delivery Status (field ID INVESTORCONN.X1)
-
Investor Connect Delivery Status Date Time (field ID INVESTORCONN.X2)
-
Investor Connect Delivered to Company (field ID INVESTORCONN.X3) - The partner to whom the loan was delivered.
-
Investor Connect Delivered to Category (field ID INVESTORCONN.X4) – The partner’s service category.
To add the columns, right-click a column header, select the checkboxes for the fields in the Customize Columns window, and then click OK.
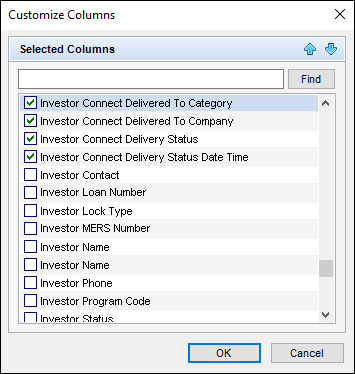
The selected columns display in the Pipeline.

A set of repeatable fields is also available to track changes in status for a delivery and to maintain a history of status changes for audit tracking purposes. The repeatable fields are read-only and capture the same information as the fields listed above, but instead of overwriting the information each time the status changes, a new set of fields are created to record each change in status to catalog the history of status changes for the loan. The following new repeatable fields can be added to custom forms, and reports:
-
Delivery Status Date/Time (field ID INVESTORCONN0001)
-
Delivery Status (field ID INVESTORCONN0002)
-
Company Delivered To (field ID INVESTORCONN0003)
-
Category Delivered To (field ID INVESTORCONN0004)
![]()
A standard naming convention is used to assign a field ID to each of the repeatable fields. The field ID includes a prefix that identifies it as an Investor Connect field (INVESTORCONN), followed by a set of two digits that identify the number of the status record, and a final set of two digits that identify the specific field.
Example: The generic field ID for a Delivery Status is INVESTCONN0002.
-
The prefix and the last two digits in the field ID identify it as an Investor Connect Delivery Status field: INVESTCONN0102
-
The first two digits in the field ID identify the number of the record. For example, the first Delivery Status record for the loan would be INVESTCONN0102; the second Delivery Status record for the loan would be INVESTCONN0202.
Before you can add these fields to views, reports, or custom forms, your administrator must add the fields to the Encompass Reporting Database.