Auto Import Workflow
If your company has enabled the Auto Import functionality for the responses that are returned from partners (enhanced conditions, funding details, or shipping details), investors (investor cure by date), or if a partner has sent partner-generated documents, these responses are automatically imported into Encompass. This enables lenders to automatically import the responses sent by partner and/or investors into Encompass without manual Intervention, resulting in a more streamlined workflow that does not require manual intervention.
When a response is returned, Encompass displays messages on the Pipeline (desktop interface), green messages in the Alerts & Message tab within a loan (desktop interface), and messages in the Notification Messages window within a loan (web interface). If a response is not imported successfully, this is known as an auto import exception. Exceptions typically occur when a loan is locked, for example when the responses arrives while a user is working in the loan or has left their desk without closing the loan file.
Three workflow scenarios can occur with an auto import.
-
Scenario 1: All responses are imported successfully, and no manual intervention is required.
-
Scenario 2 and 3: One or more exceptions occurred, and you must import these responses manually:
-
In scenario 2, you clear exceptions by opening individual loans, and manually importing the responses. This option is optimal when you have a small number of loans and you want to review the exceptions for each loan.
-
In scenario 3, all exceptions are viewed and cleared at once via the loan delivery status window. This option is recommended when you have many loans and you want to import all the exceptions quickly and with minimal effort.
-
Scenario 1: All Responses Are Imported Successfully
In this scenario, all responses are imported successfully, and no additional manual efforts are required, but you can review the imported items to view the responses that were returned.
To Review Auto Imported Conditions from the Pipeline:
-
When Auto Import is enabled, and a response is auto imported, a different message displays for each response type.
-
Conditions Details Auto Imported
-
Funding Details Auto Imported
-
Shipping Details Auto Imported
-
Investor Cure By Date Auto Imported
For example, if both conditions and funding details have been auto imported, separate messages display for Funding Details Auto Imported and Conditions Details Auto Imported.
-
Depending on the type of response, following the steps below to review the imported items.
-
For investor delivery conditions, click the green Message icon on the Alerts & Messages tab in the loan to open the investor delivery conditions import window.
-
For funding details or shipping details, click the green Message icon on the Alerts & Messages tab in the loan to open the Funding Details or Shipping Details pages.
-
For investor cure by date, click the Loan Delivery Status button, then click the Auto Import Exceptions button, and then select the Investor Cure By Date tab.
-
After reviewing the responses (for investor delivery conditions, funding details, or shipping details), close the window. The green message disappears when the window closes.
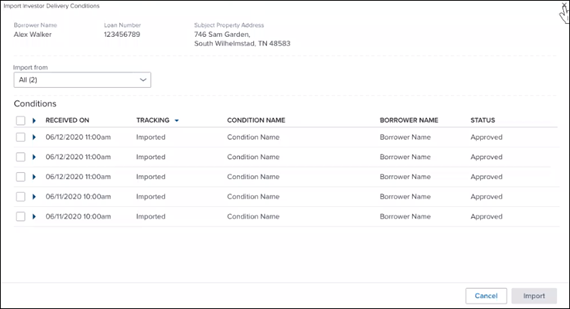
In this example, the Import Investor Delivery Conditions window is shown. Because all the conditions were auto imported, the checkboxes and the Import button are disabled.
Scenario 2: Exceptions Are Manually Imported from Within a Loan
In this scenario, not all responses are imported successfully, and you will import the responses by opening a loan and clicking the Message icon in the Alerts & Messages tab. When the Auto Import feature is enabled, and a response does not successfully auto import, one or more of the following message display:
-
Error importing Condition details.
-
Error importing Funding details
-
Error importing Shipping details
-
Error importing Investor Cure By Date
To Import Responses:
-
Click the green Message icon on the Alerts & Messages tab in the loan to open the appropriate Import window (for investor delivery conditions, funding details, or shipping details).
-
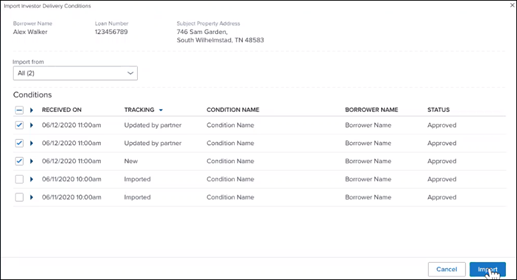
On the Import Investor Delivery Conditions window, imported conditions are indicated in the Tracking Column, the checkboxes are selected by default for the responses with exceptions, and the Import button is enabled.
-
On the Import Investor Cure By Date window, responses with exceptions are listed. Select the checkbox next to the one(s) you want to import.
-
Click the Import button to import the responses.
-
The window closes, and the green message disappears.
Scenario 3: Some Responses Are Not Auto Imported Successfully and You Import the Responses Manually from the Loan Delivery Status Window
In this scenario, some responses are not auto imported successfully, but instead of importing responses on a loan-by-loan basis, you can click the Loan Delivery Status button on the Encompass Pipeline to open the Loan Delivery status window to clear all the exceptions at once. An Auto Import Exceptions button displays on the window and lists the total number of exceptions in parentheses.
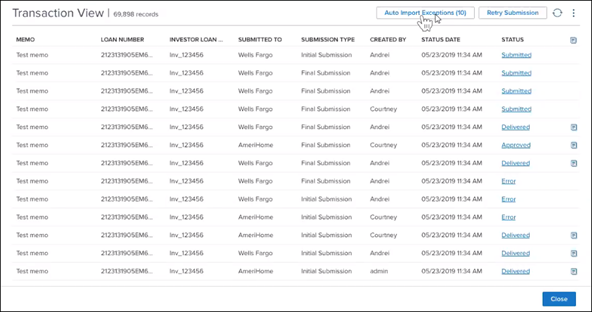
Click the Auto Import Exceptions button to open the Auto Import Exceptions window.
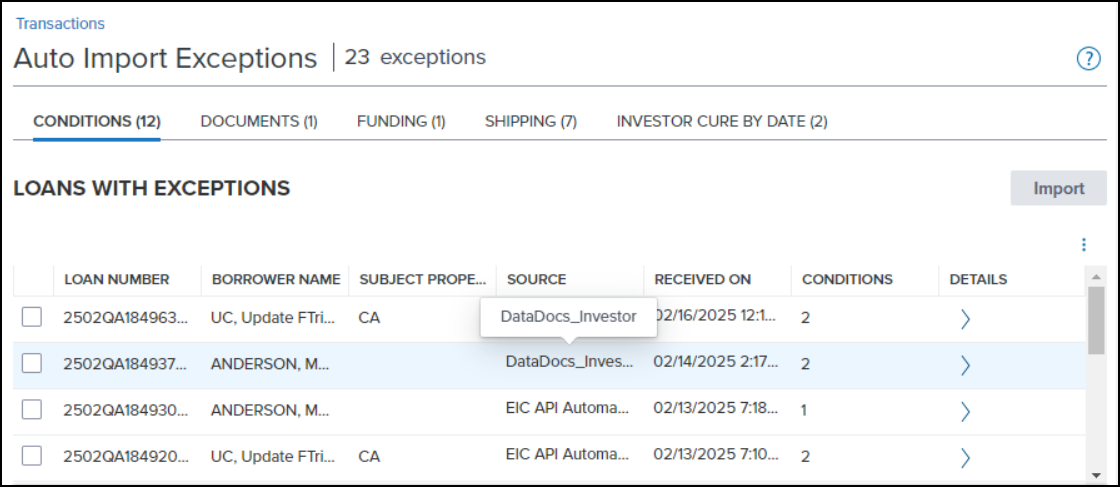
On the Auto Import Exceptions window, the Conditions, Documents, Funding Details, Shipping Details, and Investor By Cure Date tabs display across the top. Tabs display based on a user’s persona permissions for these features. When a user has access to a tab, the tab displays even when no conditions are listed on a tab.
The total number of exceptions across all the tabs displays in parentheses in the Auto Import Exceptions heading at the top of the window. Each tab lists the loans in the appropriate category (Conditions, Documents, Funding Details, Shipping Details, or Investor Cure by Date) with auto import exceptions. Each tab has a layout in table format with a row for each loan with an exception. The rows on each tab contains columns for:
-
Loan Number
-
Borrower Name
-
Subject Property Address for the loan
-
Source that sent the conditions
-
Received On date for the condition
-
Number of Conditions or Documents
-
Wire Amount (Funding Details tab only)
-
Shipping Carrier (Shipping Details tab only)
-
Description (Investor By Cure Date tab only)
On the Funding Details and Shipping Details tab, when a loan has responses from more than one category, the investor’s name displays along with a +1 to indicate that another category is present. Hover over the +1 to display pop-up text with the name of the second category.
Select specific loans to manually import the exceptions for those loans. When one or more checkboxes are selected, the Import button is enabled, and you can click the button to import the selected responses.
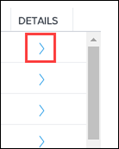
To view additional information about each entry, click the Arrow icon in the Details column on the far right. The appropriate import window for investor delivery conditions, funding details, shipping details or investor cure by date will open. You can also import exceptions from these windows.
In this example, the window for reviewing and manually importing investor delivery conditions is shown. The most recent investor delivery condition exceptions display at the top of the window. The Import button is enabled by default and checkboxes are selected for the exceptions.
On the review and import windows for funding detail, shipping details, or investor cure by date, the radio buttons on the far right are selected for the exception. Click the Import button to manually import and clear the exception.
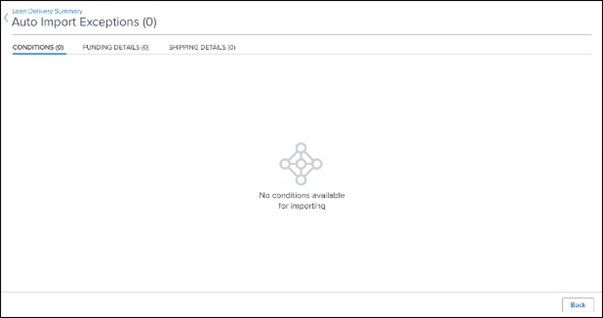
When all responses are cleared, you will be taken back to the Auto Import Exception page and the following message displays, stating that no conditions are available for import.
In the rare event that an additional issue prevents the import of the conditions, the following error message displays at the top of the window. You can try to manually import the exceptions later.
