Distribution: Adding a Distribution Program
TOPICS COVERED IN THIS ARTICLE
- How To Add A Distribution Program
ENVIRONMENT
- LeadManager - Advanced Edition only
STEP BY STEP INSTRUCTIONS
A Distribution Program is a configurable set of rules governing how leads are distributed to user and groups. Here’s how to create a distribution program.
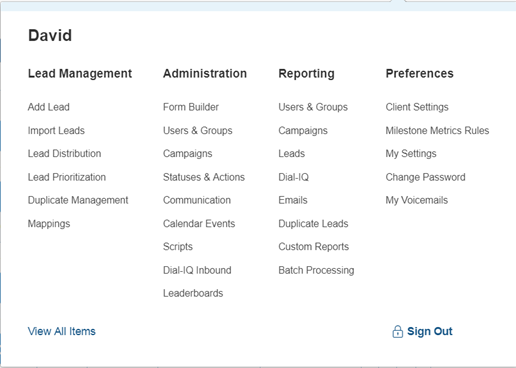
Access the Menu page by clicking on your name in the upper right of the header.

Under Lead Management, click Lead Distribution.
The Distribution Programs page will load.

- Click the Add New Program button to create a new Distribution Program.

- Give your distribution program a Title.
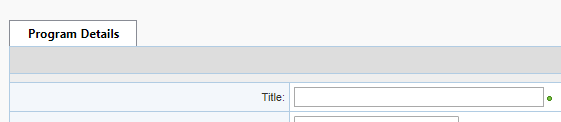
Give it as descriptive a name as you can. When you have multiple distribution programs listed on the distribution program page, it is helpful if they all have names that help you differentiate between them.
- Choose a Distribution Method from the drop-down.
Note: Dial-iQ options are only available for clients who have purchased this feature.

- Default options available for all clients are Push or Pull.
- Push Distribution vs. Pull Distribution are key LeadManager concepts.
- Push: Distributes Leads in real time as they are imported into the LeadManager.
- If you are have Velocify Dial-IQ, there will be a check box to enable Shotgun Connect. If this program is a Shotgun connect program, you can pick the method of user alerts from the dropdown that becomes active when you check the Enable Shotgun Connect check box. For more information on Shotgun Connect, see Dial-IQ: Creating a Shotgun Connect Distribution Program.
- Pull: Distributes leads based on users making requests for new leads.
- There are two types of Pull distribution programs:
- Pull Blind and Pull Preview
- Pull Blind: Users may "pull" leads based on the allotted number of leads set by the administrator within the distribution program. Users cannot see or “cherry-pick” leads before they are delivered. If you have Dial-IQ, the Pull (Blind) programs are the programs that will assign leads to users when they use Demand Connect by clicking the Get Lead button. For more information on Demand Connect, see Dial-IQ: Demand Connect - Get Lead Button.
- Pull Preview: Users may pick and choose (cherry-pick) leads from a shared queue.
5. Leave the Enabled checkbox unchecked until the program is configured. Enabled programs will distribute leads once filters are saved.

Check this box to enable lead recycling. Checking this box and specifying a number of minutes results in the redistribution of any leads distributed by this program that have had no actions taken on them within the specified time. Note that this is not necessary for any Pull Program.

Select the check box and enter a number of minutes into the minutes field to enable this feature. Use this to require that your agents remain busy within the Velocify system in order to receive leads.

Check this setting if you would like an assignment email to be sent when the lead is distributed by this distribution program.

The lead assignment email can be found and configured by clicking Manage Emails on the Administration submenu.
Select which email is sent on the Client Settings page in the Email, Notification & Calendar Event Settings section.
Click the Change Status upon Distribution check box if you would like the lead to change status when it is distributed by this program. If you do configure this distribution program to trigger a status change, the next field is a pull down from which you must select the status you would like the lead changed to.

Click this check box if you want Emails to be sent upon status change. Sometimes statuses are configured to trigger automatic emails when leads are changed to that status. If you want to override any automatic emails that are sent upon status change, make sure this check box is not selected.

Click this check box if you want posts to be sent upon status change. Sometimes statuses are configured to trigger automatic posts when leads are changed to that status. If you want to override any automatic posts that occur upon status change, make sure this check box is not selected. An example of this would be when we post lead data to an outside system that requires a lead assignment.

- After you have configured the settings on this form, click the Save button.
- When you have clicked the Save button, new tabs will appear.

- Click the Schedule: When does it run? tab.
- Use the form on this tab to schedule when this distribution program will run.
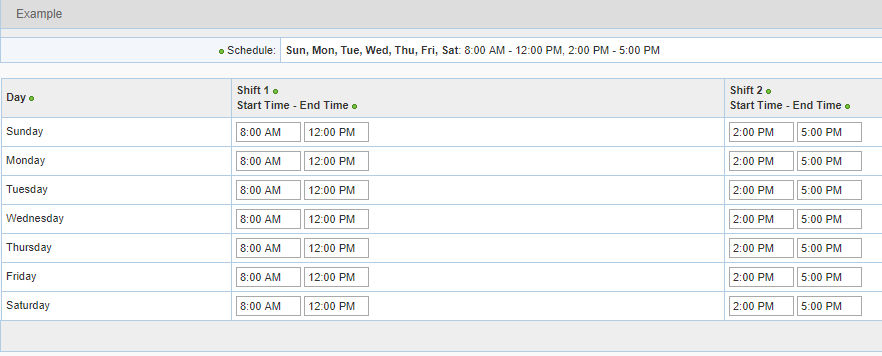
- It is possible to schedule a distribution program to run multiple time ranges (shifts) in a day.
- Click in the start and end times fields to expand the Time Picker. Select values from the Time Picker for both the start and end time.
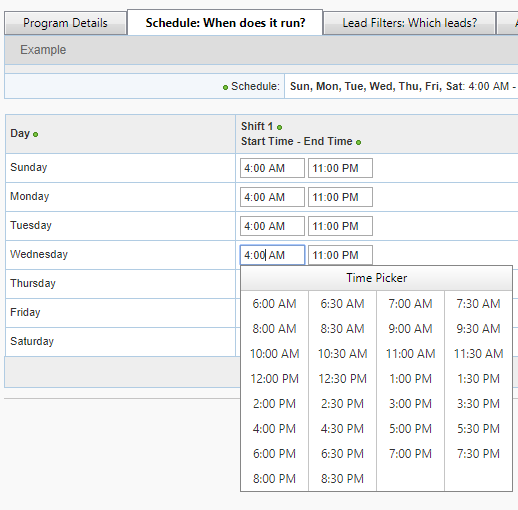
If you want this distribution program to run in shifts throughout the day, set start and ends times for multiple shifts.
For example, using shifts, a distribution program can run from 8:00 AM to 12:00PM, then again from 2:00PM to 5:00PM
- When you have set the schedule for the lead distribution program, click the Save button.
- LeadManager Advanced clients, click the Lead Filters: Which leads? tab.
Note: This tab is inactive for Small Business clients.
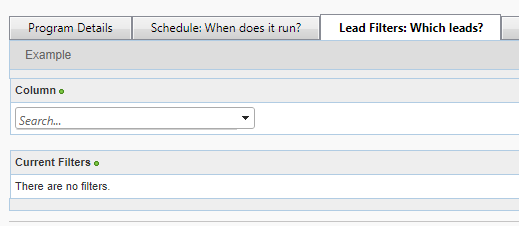
Use this tab to define which leads will be distributed by this distribution program.
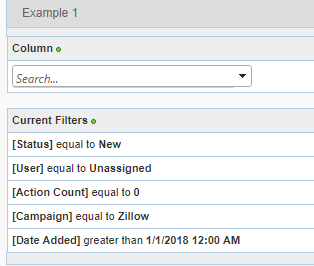
The example pictured below shows a distribution program with four filters. The filters are listed in the column with the heading that reads Current Filters.
These filters enable the distribution program to find leads that are in the New status, unassigned, have an action count equaling zero, in the Zillow campaign. Leads that do not match this criteria will not distributed by this program.
When new leads enter the system, they will be distributed by this program if they meet all of the following filter criteria:
- [Status] equal to New
- [User] equal to (Unassigned)
- [Action Count] equal to 0
- [Campaign] equal to Zillow
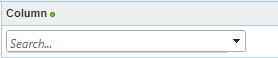
Click inside the Column drop down where it reads Search…
When you click in the field the pull-down will expand.
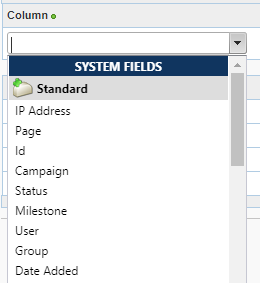
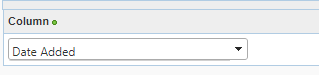
From Column drop-down select the field(s) to filter by.
Use the scroll bar to find the field(s) or type in the first few letters. Only field names containing the letters you type will be displayed in the Column dropdown.
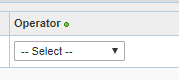
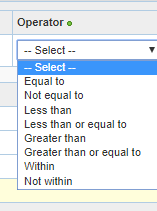
Once a field is selected, select an operator by clicking the operator drop-down.
Operators will vary depending on the field being selected for the filter. For example, adding a status filter will cause the operator dropdown to show all available statuses.
If a date field is selected for the filter, the operators will show additional options for numeric values and date ranges.
The Value drop-down will display corresponding options based on the filter and operator.
- Using the Date Added filter, Operator Within

- Using the Date Added filter, Operator Greater than

Once the operator and value(s) are chosen, click Add Filter.
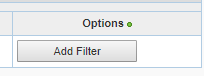
The new filter will appear in the list of Current Filters.
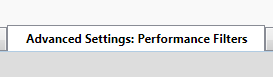
- Click the Advanced Settings: Performance Filters tab.
Use the Performance Filters tab to dynamically increase or decrease lead maximums based on the following metrics:
- Speed to Contact Attempt
- Speed to Contact
- Contact Rate
- Qualification Rate
- Conversion Rate
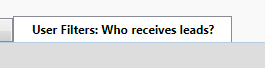
- Click the User Filters: Who receives leads? tab
Use this tab to configure which users will receive leads from this program. This is done by configuring two types of settings:
- Max Leads Maximum number of leads distributed to a group or user within a defined timeframe
- Filters Criteria that help you drill down to define the specific subset of leads you want to be distributed. Note that this is a second level of lead definition. You will be determining a subset of leads to be pulled from the group of leads already defined by the filters on the the Lead Filters: Which leads? tab
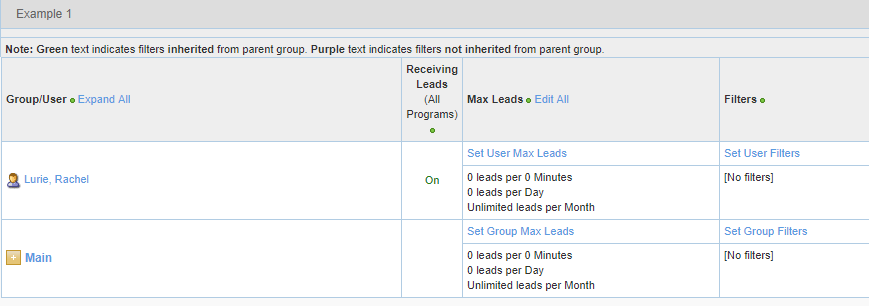
Max Leads and Filters can be set at the user level or the group level. Any settings that are applied to a group will automatically be inherited by members of the group.
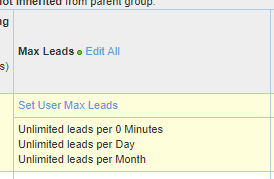
To set maximums for a user, click the Set User Max Leads link in the Max Leads column. The process of setting maximums is the same for a group as it is for a user.
When you click the Set User Max Leads link, the fields become active.
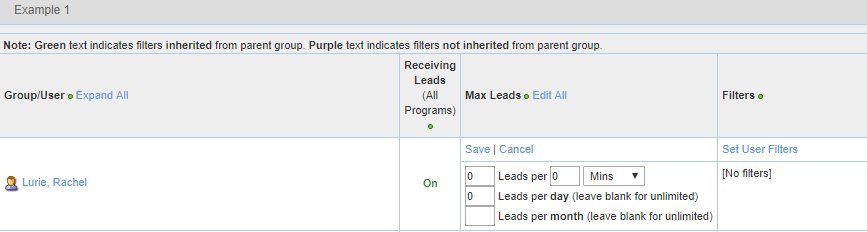
Note the message in parenthesis to the right of these filters. If these fields are left blank, the values default to Unlimited.
To set limits on the maximum leads received by a user, insert desired values into these fields. Set the first two fields to correspond to your desired limits, for example 3 leads per 30 minutes.
The Per drop-down contains the values: minutes, hours, days, and weeks to give you more control over your maximums.
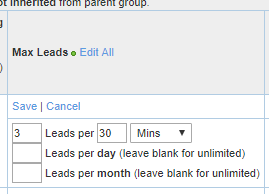
Additionally, you can enter a maximum number of leads per day and/or per month.
After you have set the Maximum leads for this user click the Save link.
The Filters column displays the existing filters and has several options that can be performed by clicking links.

The available options in the filters column are:
- Set User Filters - Click this link to load the User Filters page. This is explained in the next section of this article
- Clear User Filters - Click this link to clear user filters
- Inherit Group Filters - Click this link to inherit any filters that are applied to the group to which this user belongs
- Ignore Group Filters - Click this link to inherit any filters that are applied to the group to which this user belongs
Note that for the Inherit and Ignore Group Filters settings, the group filters that will be inherited or ignored when these links are clicked are the group filters that are applied to the lowest subgroup of which the user is a member. Meaning that if Steve Ramirez is a member of the Team 1 Group, and the Team 1 Group is a subgroup of the Main Group, when you click to inherit or ignore the group filters, the filters you will be inheriting or ignoring are those applied to the Team 1 Group, not the Main Group.
At the bottom of the page there is a pull-down you can use to copy user maximums from another distribution program.
Use this if you have user or group maximums in another distribution program that have proven themselves effective and you wish to use them in this program without having to key in the values all over again.
Click the Set User Filters link to apply filters that will determine what types of leads the associated user or group will receive through this distribution program.
To set filters for a user click the Set User Filters link in the Filters column. The process of setting filters is the same for a group as it is for a user.
Applying filters that control which leads are distributed for a user is done by the same process that is used on the Lead Filters: Which Leads tab, except there are a few more options. Setting User Filters is recommended for advanced users only so please read through this entire section carefully before using this functionality.
In addition to filters, the following check boxes are available under Set User Filters
- Global Filter: Selecting this insures that the filter will be applied for this user to all distribution programs. If you leave this option unchecked, this filter will apply to this user ONLY within this program. If you know that you want this filter to be applied for this user for every distribution program, click to select the Global Filter checkbox. Note that this feature is not available for clients using the Velocify Small Business product.
- Restrictive: Clicking this check box will make this filter a requirement for leads distributed by this program to this user. Leaving it unchecked will mean that the user prefers leads that meet the defined criteria. An example of how this would be used is if you selected a filter State equal to CA. If the Restrictive box was checked next to this filter, it would mean that this user could ONLY receive leads that were from CA. On the other hand, if the Restrictive box was not checked, the system reads this as an indication that the user has a preference for CA leads.
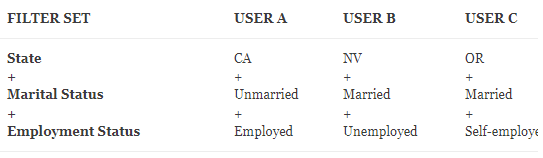
Understanding how the system determines user preference is best described by an example. Let’s first set up users A, B & C with some user level filters as shown below:
When a new lead is eligible for distribution by a program based on filters in the Lead Filters: Which leads? tab, the system determines which user(s) are assigned the lead based on the User Filters.
When no User Filters are specified, the leads are distributed round-robin.
If User Filters are specified, LeadManager assigns a "match score" for every lead and every user. For every filter that is matched at the User Filters level, the user is assigned a score of 1 point for that lead. For example:
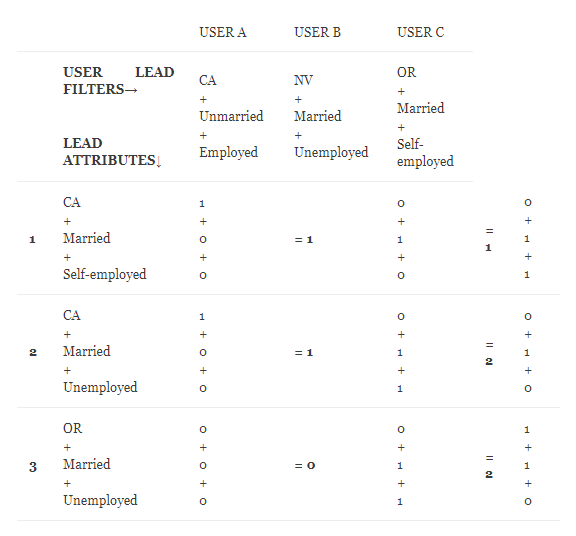
In the above example, Leads 1, 2 & 3 come in with the shown attributes. Let’s consider Lead 1 and User A first. Only one of User A’s preferences (State = CA) matches Lead 1’s characteristics and so User A only gets a score of 1 point for Lead 1.
However, for User C, Lead 1 matches on two attributes (Married, Self-Employed) and hence User C gets a score of 2 points for Lead 1.
Thus, Lead 1 would be distributed to User C. Using the same logic, both Users B and C score 2 points for Lead 3. In this case, between B and C, the user that had gone the longest time without receiving a lead would get Lead 3.
- Testing configuration with Simulate Distribution
This functionality allows Administrators the opportunity to confirm distribution filters have been configured to find the desired subset of leads within the LeadManager
The Simulate Distribution button appears on
- Program Details tab
- Lead Filters: Which Leads? tab
- User Filters: Who receives leads? tab
Once all settings have been configured click the Simulate Distribution button.
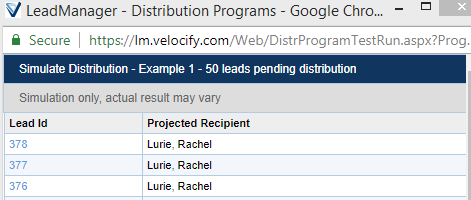
The Simulate Distribution pop-up will load.
This pop-up shows you how leads will be distributed by this program and to which users.
Scroll down and make sure that the program is distributing leads as you expected it to.
Then click the Return to Programs button.
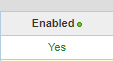
Distribution programs will not run until they are enabled.
Note that the value in the Enabled column is No.
Click the No to change the value to Yes, enabling the distribution program.
Note: As soon as a distribution program is enabled, all qualifying leads will be distributed.