New Features & Forms in Version 25.1
This section discusses the new features being introduced in this Encompass release.
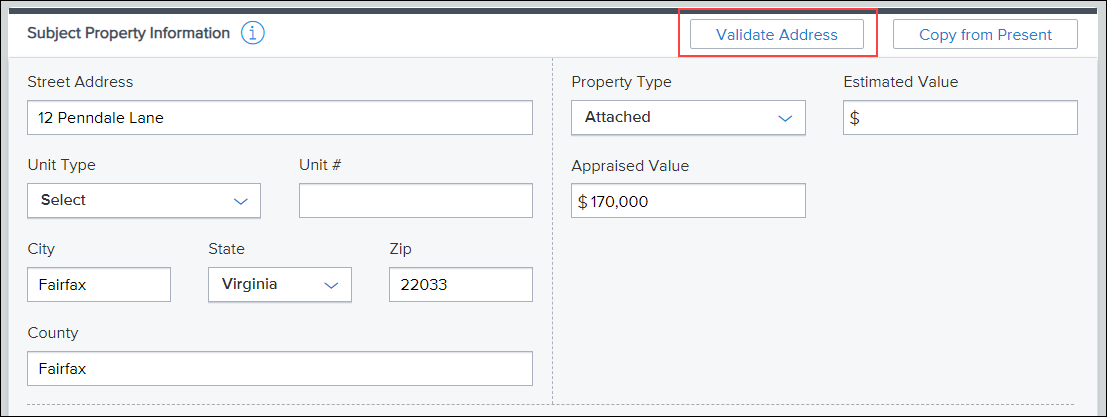
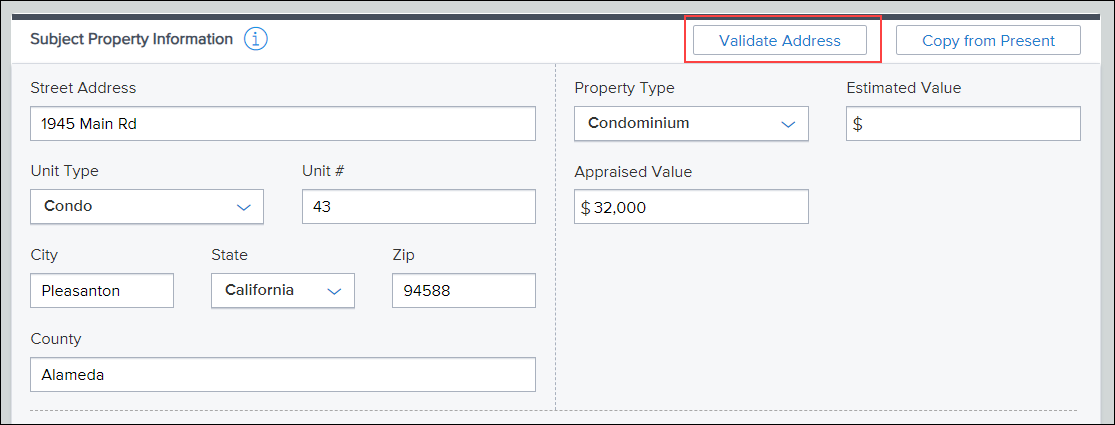
Validate Subject Property Address
A new Validate Address button (validateuspsaddress) is now provided on the Borrower Summary - Origination and Borrower Summary - Processing input forms to enable users to validate the user-entered subject property address. This is a new feature that uses address information from the US Postal Service (USPS) to validate the following subject property information:
-
Street Address (URLA.X73)
-
City (12)
-
State (14)
-
ZIP Code (15)
The Unit Type (URLA.X74) and Unit # (URLA.X75) fields are not included in this validation.
Use this new feature to help ensure the subject property information provided for the loan matches the address information used by the USPS and reduce the possibility of loan processing issues.
This address validation feature is available only for Encompass 25.1 (and future versions).
Prerequisites
The following prerequisites must be completed using the Encompass web interface to ensure successful use of this feature. The instructions for completing these prerequisites are provided in the following knowledge articles: KA #000115834 - for manual setup or KA #000115835 for automated setup.
-
Sign up for a USPS Developer Portal Account: Sign up for a free account with the USPS Developer Portal. When you sign up you are provided with a Client ID and Client Secret that are required for configuring your company credentials in the Encompass web interface. For more information about setting up your USPS developer account and the Client ID and Secret, please refer to the Steps to obtain Credentials from USPS section of the Using USPS Address Validation in Encompass user guide.
-
Set up the USPS Address Validation service - Administrators must add the USPS Address Validation service to their Encompass instance. There are two options for setup: manual to enable users to manually verify the address or automated to automatically verify the address once conditions are met.
-
Refer to the Set Up the USPS Address Validation Service (Manual Service) information for the steps to set up this service.
-
Refer to the Set Up the USPS Address Validation Service (Automation Service) information for the steps to set up this service.
-
-
User access - When using the manual service option, users must be authorized to access the Validate Address button in Encompass that is used to validate the address. Users can be authorized by the administrator when setting up the USPS Address Validation service.
-
Refer to the Set Up the USPS Address Validation Service (Manual Service) information for the steps to set up this service.
-
If using the automation service option, the address validation service will run automatically based on conditions you define in workflow rules.
-
-
Configure company credentials for USPS - Valid company credentials are required to authenticate with the USPS Address Validation service.
-
Refer to the Configure Company Credentials for USPS Service (Manual Service) information for instructions.
-
Refer to the Configure Company Credentials for USPS Service (Automation Service) information for instructions.
-
-
Activate the Service - The service must be manually activated before it can be utilized by users.
-
Refer to theActivate the Service (Manual Service) information for instructions.
-
Refer to the Activate the Service Rule and Service Order (Automation Service) information for instructions.
-
Validating the Subject Property Address
Once all of the prerequisites have been completed for the manual service option, authorized users can use the Validate Address button on the Borrower Summary input forms to validate the subject property address in a loan file.
If using the automation service option, the USPS Address Validation pop-up window displays automatically when the workflow rule conditions are met. Proceed to step 2 below if using the automation service option.
To Validate the Subject Property Address:
-
After entering the address information in the Subject Property Information section of the Borrower Summary - Origination or Borrower Summary - Processing input form, click the Validate Address button.
-
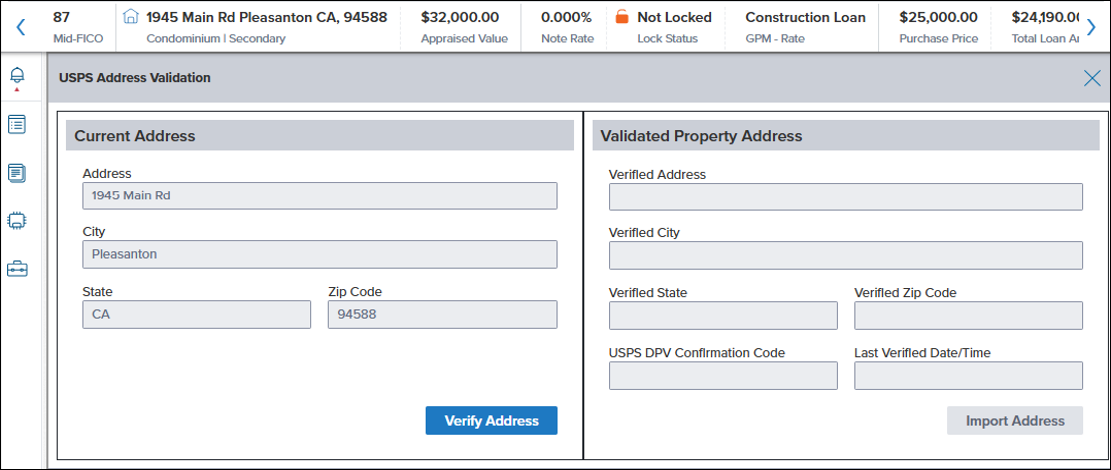
The USPS Address Validation pop-up window displays. Click the Verify Address button to run the validation.
-
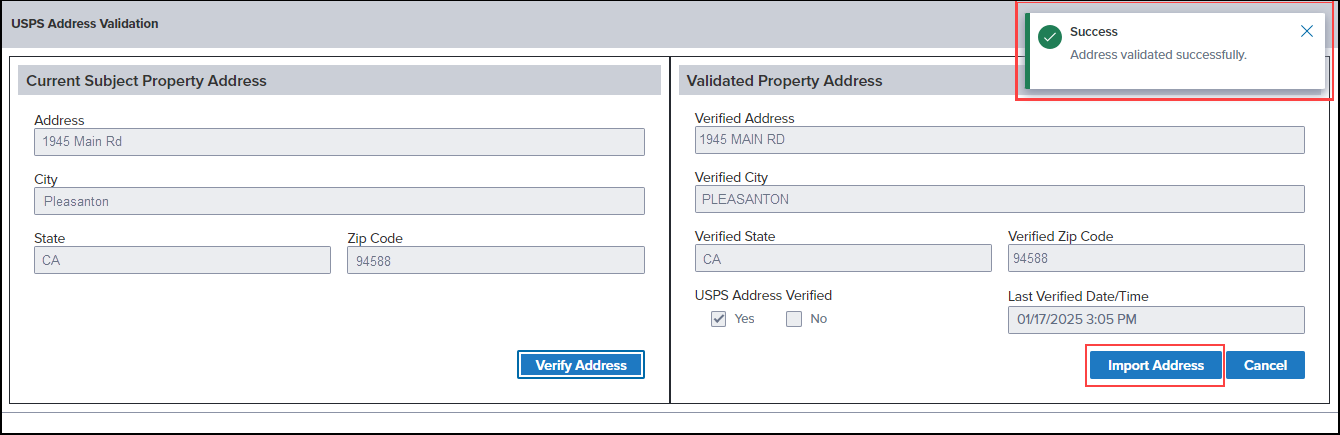
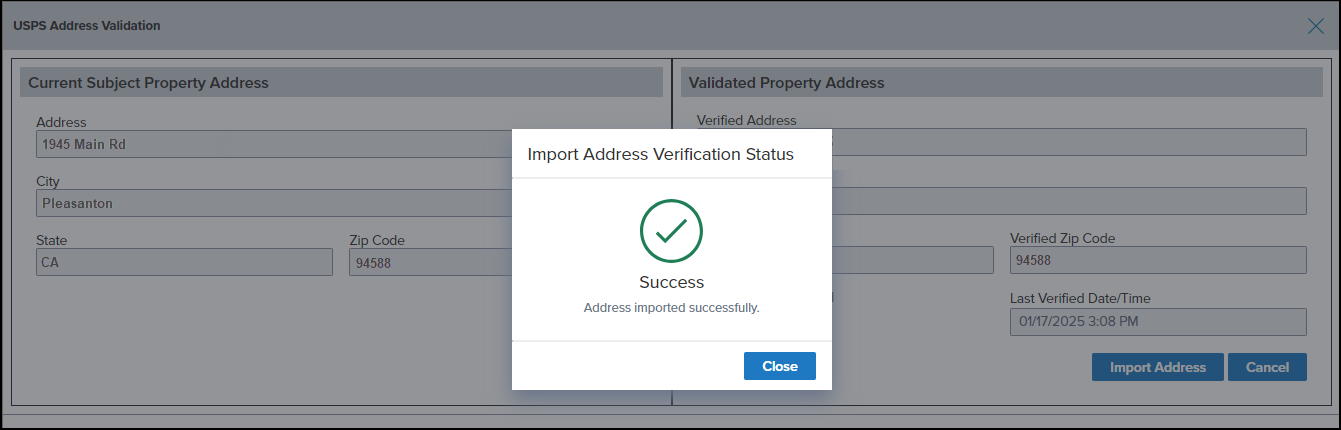
If the address is successfully validated by the USPS, a message confirming the address has been validated successfully is displayed and the Import Address button is activated. Click the Import Address button to import the validated USPS address information to the applicable fields in the loan.
-
Click Close to close the confirmation message and return to the loan file.
If the address cannot be validated, an error message is returned. Click View Error Details to view more information about why the validation failed.
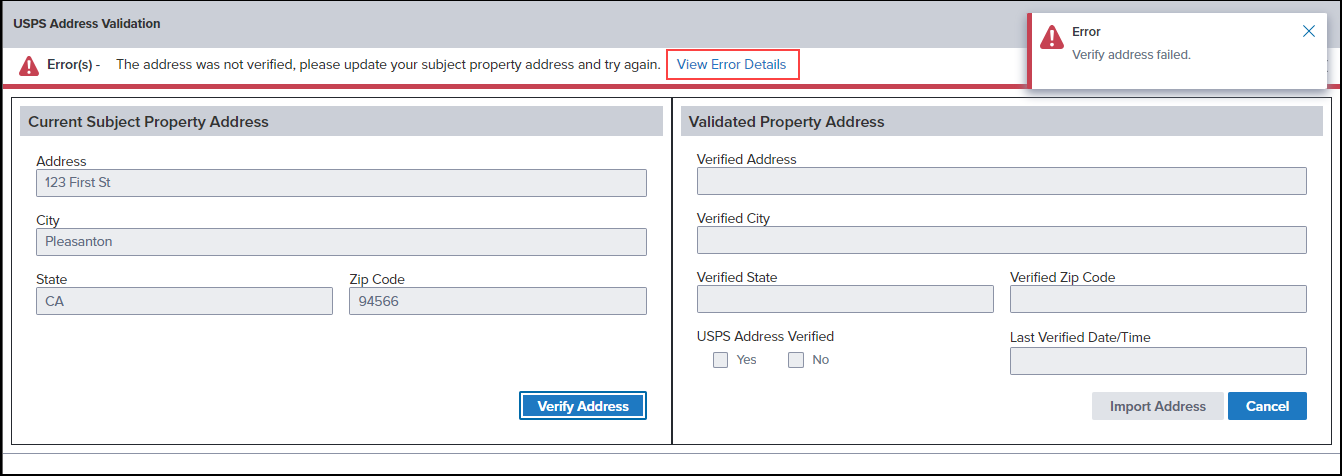
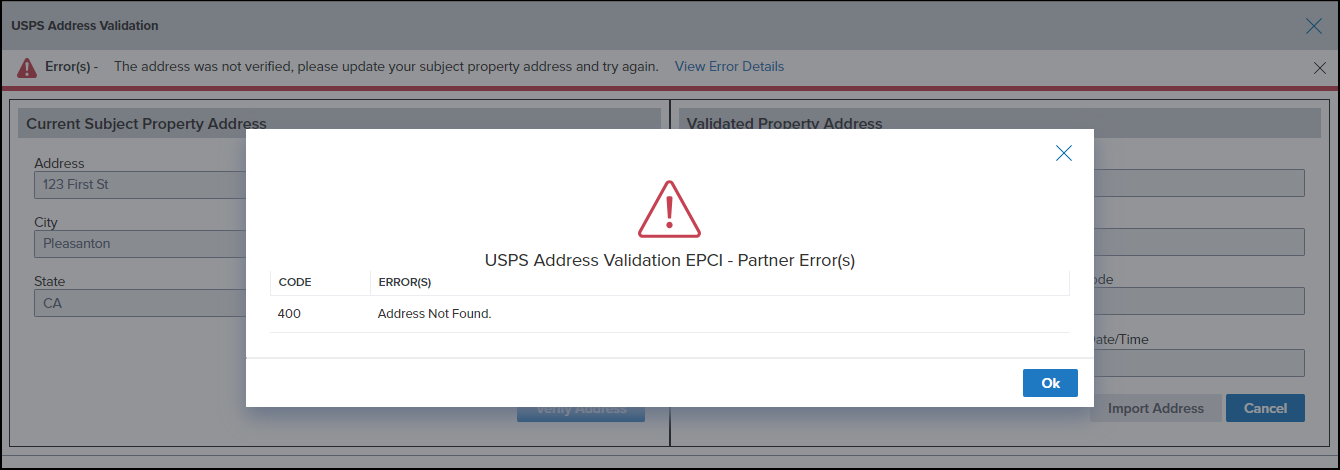
Click Ok to close the error details pop-up window, and then click the Cancel button to return to the loan file.
Error messages will also be returned if any of the required subject property information is missing from the loan file or if the company credentials for the service are missing
As part of this feature, the new Validated Property Address read-only fields that are displayed when validating the address have been added to the Encompass Reporting Database.
-
USPS Validated Street Address (5048)
-
USPS Validated City (5049)
-
USPS Validated State (5050)
-
USPS Validated ZIP Code (5051)
-
USPS Address Validated Checkbox (5047)
-
USPS Validation Date/Time (5046)
CBIZ-63407
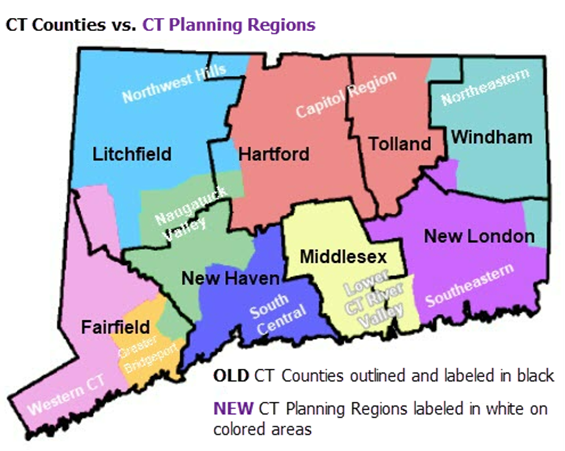
In 2022, the state of Connecticut (CT) announced the U.S. Census Bureau-approved proposal for Connecticut’s Planning Regions to become County Equivalents. Starting in this Encompass 25.1 release, support for the new planning regions is provided for Connecticut loans as described below.
Working with ZIP Codes
The ZIP Code data available in Encompass has been refreshed to include the most current data available for all US cities. This update includes the new planning regions for Connecticut. For users managing loan files, the new planning regions will be available to add to the County field (13) on the Borrower Summary - Origination, 1003 - Lender, and other input forms. The preexisting Connecticut counties used in previous versions of Encompass are also still provided for use with loan files.
Based on the subject property ZIP Code (15) that is entered for the subject property, the City field (12) is then populated. (This is existing behavior for all loans.) When a ZIP Code for CT is entered, a pop-up window is displayed where users can then select the city and county or the city and new planning region to use for the loan.
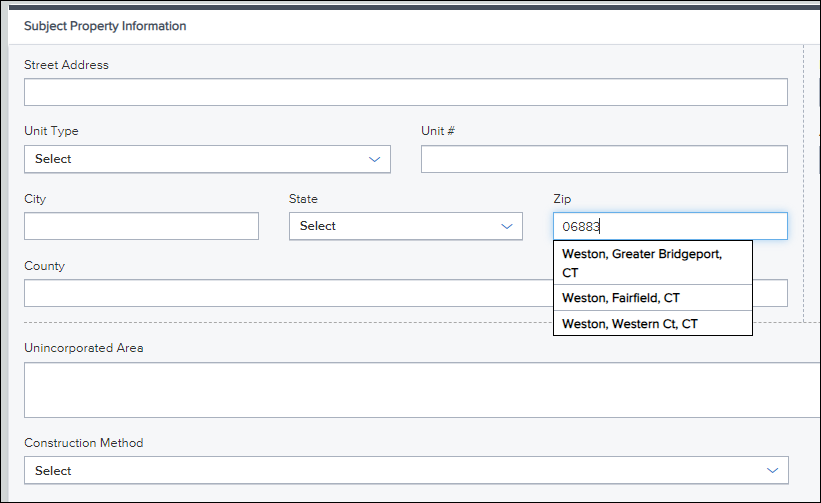
Based on the city that is selected, the State (14) and County (13) fields are then populated. If the city and planning region was selected from pop-up window, the planning region is populated to the County field.

Conventional County Limits
The new Connecticut planning regions and the preexisting Connecticut counties are available in the Encompass Settings > Tables and Fees > Conventional County Limits table for 2024 in the Encompass desktop interface. Once this data is downloaded and synchronized in your Encompass instance, if a user selects a subject property city and county in Connecticut, the conventional loan limits for the county will be used. If a user selects a subject property city and new Connecticut planning region, the new conventional loan limits for the new planning regions will be used.
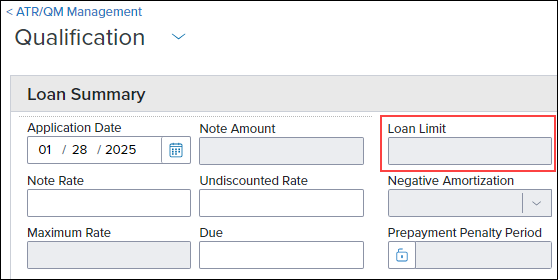
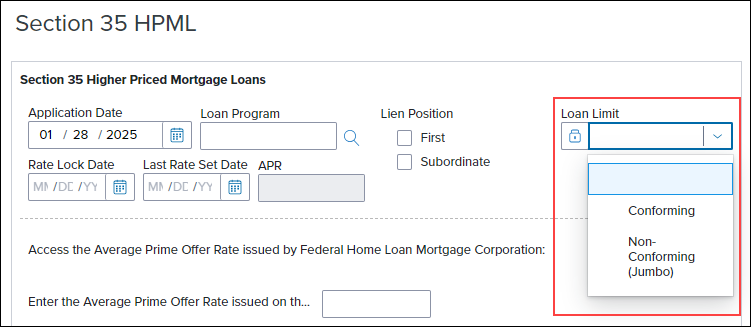
For 2025, the new Connecticut planning regions are not included in the 2025 Conventional County Limits table. The conventional county limits were not the same as they were for 2024, therefore, the new Connecticut planning regions do not have a loan limit value for 2025 loans. If a user selects a subject property city and new Connecticut planning region, the Loan Limit field (3331) on the ATR/QM Management > Qualification screen will be blank. It is recommended that users open the Section 35 HPML input form and manually update the Loan Limit field (3331) to either Conforming or Jumbo, based on what they determine to be the correct loan limit for the new Connecticut planning regions.
Affordable Lending Income Limits
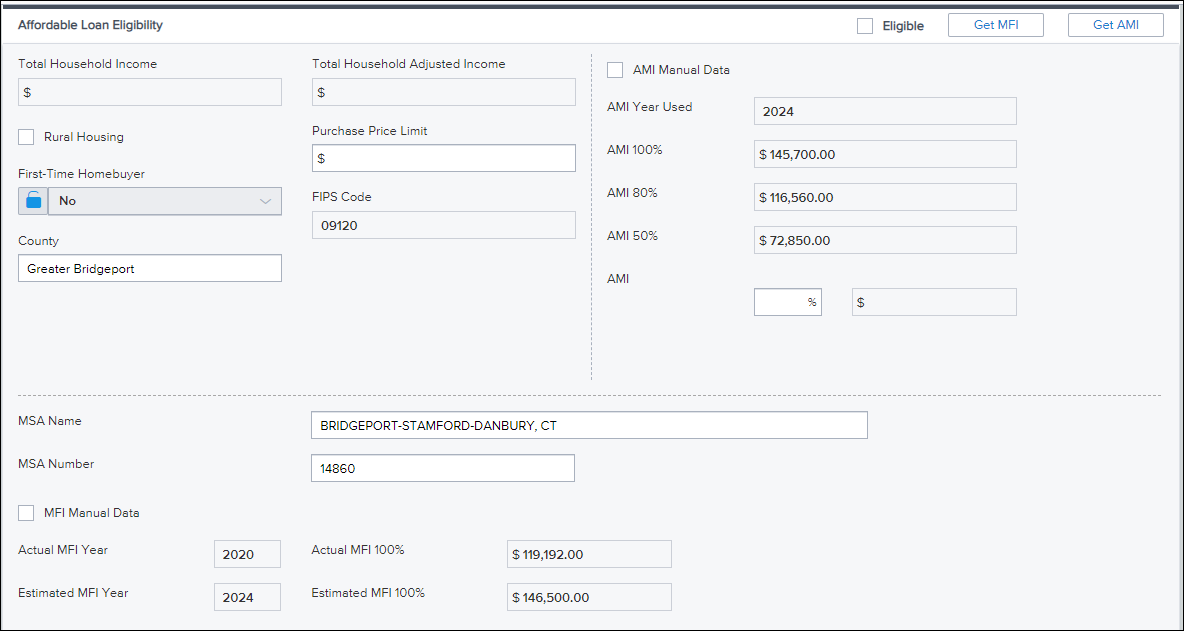
The new Connecticut planning regions and the preexisting Connecticut counties are available in the Encompass Settings > Tables and Fees > Affordable Lending > AMI Limits table in the Encompass desktop interface. Administrators can download the latest Area Median Income (AMI) limits to determine income eligibility for affordable housing programs such as USDA, HomeReady® and Home Possible®. The new CT planning regions and the preexisting counties are both included in the AMI Limits table.
As shown here, the Tract Number column was introduced to the AMI Limits table where the tract numbers assigned to the new planning regions are provided. Users can get the AMI limits based on the tract number when using a new planning region instead of a preexisting county in a loan.

The new Connecticut planning regions and the preexisting Connecticut counties are also available in the Encompass Settings > Tables and Fees > Affordable Lending > MFI Limits table in the Encompass desktop interface. Administrators can download the latest Median Family Income (MFI) limits to determine median income eligibility for affordable housing programs. However, the Federal Housing Finance Agency (FHFA) uses the Metropolitan Statistical Areas (MSA), not counties or planning regions, and the MSA FIPS codes have remained the same. Some MSA names in various states have changed, but there is no major impact to the MFI data in Encompass due to the addition of the new CT planning regions.
FHA Loan Limits
The Department of Housing and Urban Development (HUD) is not using the new CT planning regions for their 2025 FHA county loan limits. Since this data is not available from HUD, it is not available in the Encompass Settings > Tables and Fees > FHA County Limits tables in the Encompass desktop interface. To address this, a new pop-up warning message is provided to users when they are working with FHA loans in Connecticut. When the County field (13) for the subject property is populated with a new CT planning region, this pop-up message below is then displayed. As stated in this message, it is the responsibility of the lender to ensure the FHA loan limits do not exceed the loan limits for the specific subject property address. Please refer to the FFIEC's: FRB Census Geocoder website for limit information.

A new Print Forms option has been added to the web version of Encompass. The Print Forms tool can be used to preview, download, or print forms. With this tool you can:
-
Print individual and groups of forms.
-
Print forms with borrower data, field IDs, or blank fields.
-
Download forms as a PDF file.
To Access and Use the Print Forms Tool
-
From a loan, select the Print
 icon.
icon. -
On the Print Forms page, select the forms to print as follows:
-
Select the Down Arrow
 next to Form Groups, and then select the Down Arrow next to Personal Form Groups or Public Form Groups.
 -
Select the Down Arrow
next to Standard Forms, and then select the Down Arrow next to the standard form category you want to view. -
Select the Down Arrow
next to Standard Forms, and then select the Down Arrow next to Personal Custom Forms or Public Custom Forms.
-
-
Select the forms you want to add, and then select the Move Arrow
 icon.
icon. -
To remove a form you added, select the X next to the form name.
-
From the Options list, select one of the three printing options.
-
Select Preview to preview the forms, Download to download a pdf version of the forms, or Print to print the forms.
Downloaded forms are saved to your browsers default download location.
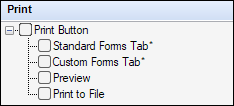
The following Persona settings on the Personas > Loan tab affect the print on demand feature:
-
Print Button - Enables or disables the Print option.
-
Standard Forms Tab - Enables or disables the ability to print standard forms.
-
Custom Forms Tab - Enables or disables the ability to print custom forms.
-
Preview - Enables or disables the print preview option.
-
Print to File - Enables or disables the Download option.
For information on configuring personas in the Encompass desktop interface, click here.
| Next Section: Updates & Enhancements | ||
| Previous Section: Introduction |