Velocify Pulse 22.2 Release: Feature Enhancements
This section discusses the updates and enhancements to existing features, services, or settings that are provided in this release.
Priority Views
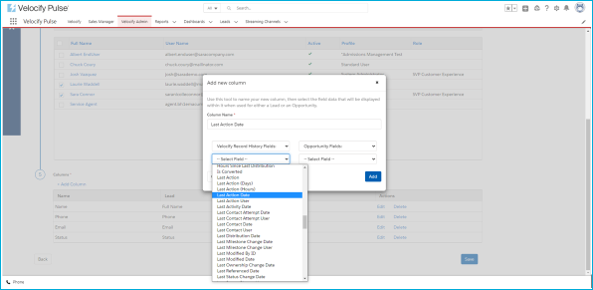
Velocify Pulse admins now have the ability to add Velocify Record History (VRH) fields to their Priority Views. Examples of VRH fields that may be useful to report on from your VRH, and can now be displayed on your Priority View:
-
Last Action
-
Last Contact Attempt Date
-
Last Distribution Date
-
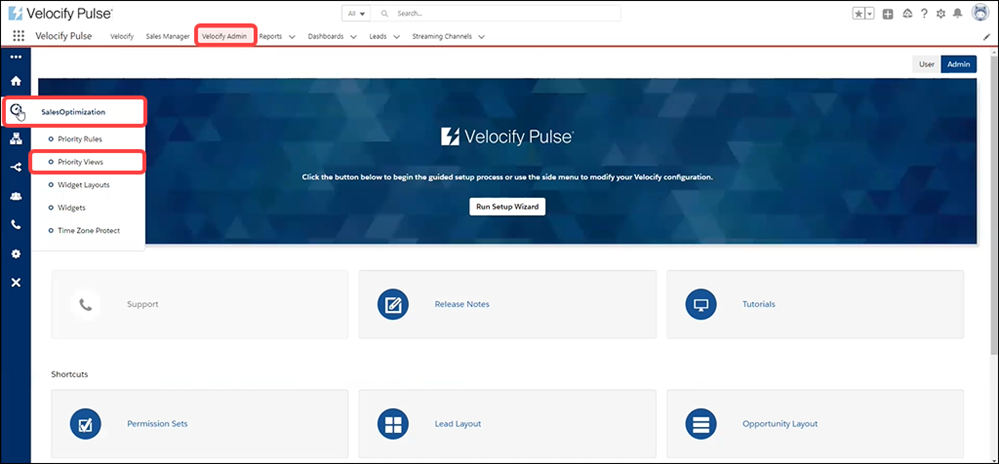
Log into Pulse as an administrator.
-
From the Velocify Admin tab, point to Sales Optimization, and then click Priority Views.
-
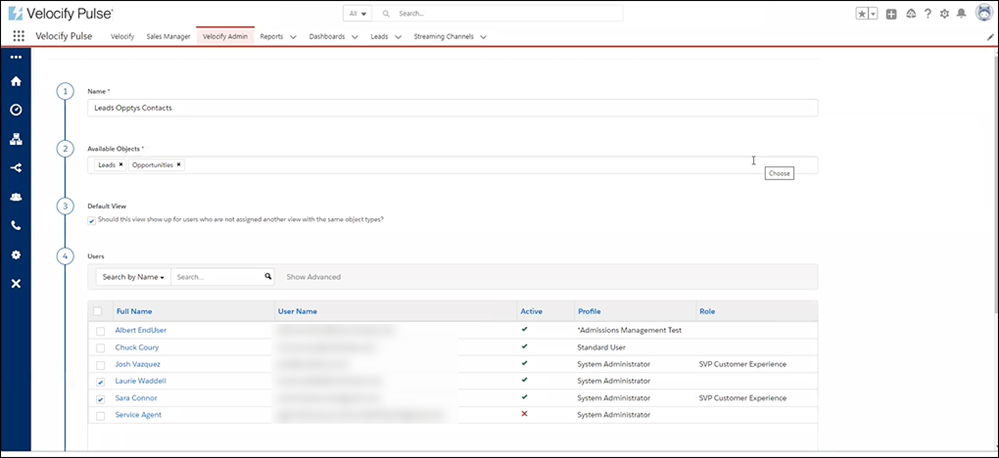
Click the + New View button to create a new Priority View, or click the Edit link corresponding to the Priority View you want to update.
-
For this example, we will click the Edit link for a Priority View.
-

-
Scroll to step 5 in the Priority View Details page.
-
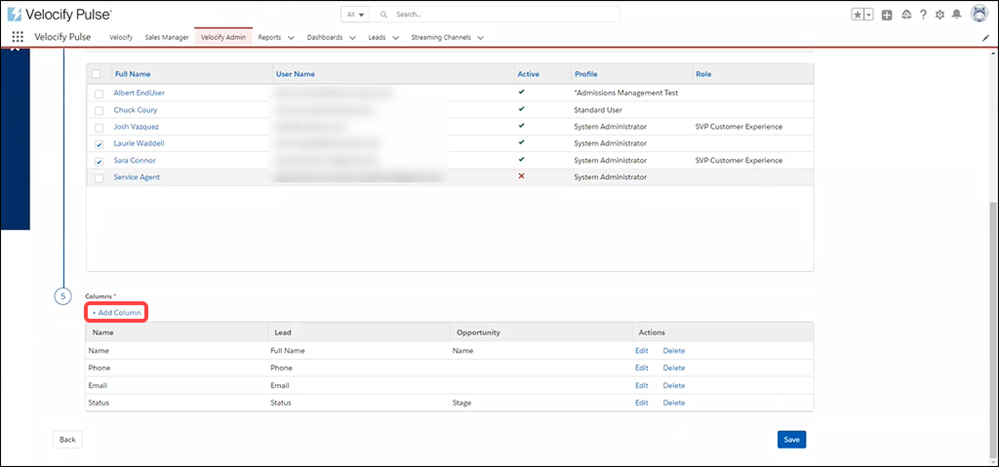
In Step 5. Columns, click the + Add Column link.
-
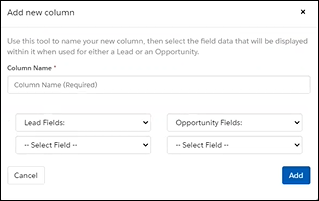
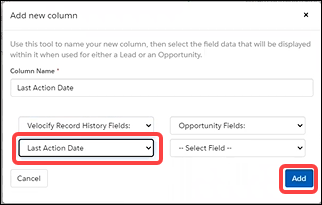
This opens the Add new column window.
-
-
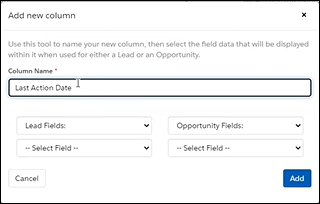
Type a column name.
-
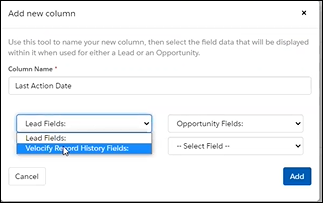
From the Lead Fields drop-down, select Velocify Record History Fields.
-
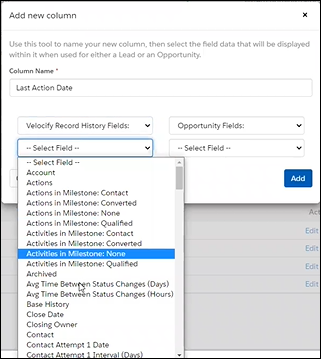
From the - Select Field - drop-down list, select a VRH field.
-
For this exercise, we have selected Last Action Date.
-
-
Click the Add button.
-
This navigates you back to the Priority View Edit page.
-
-
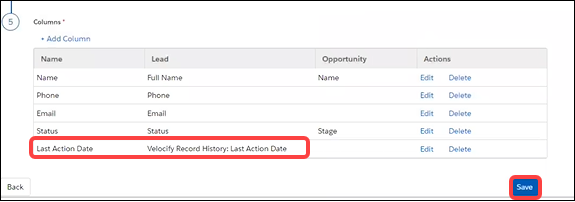
Confirm that the newly added field displays in Step 5, and click the Save button.
-
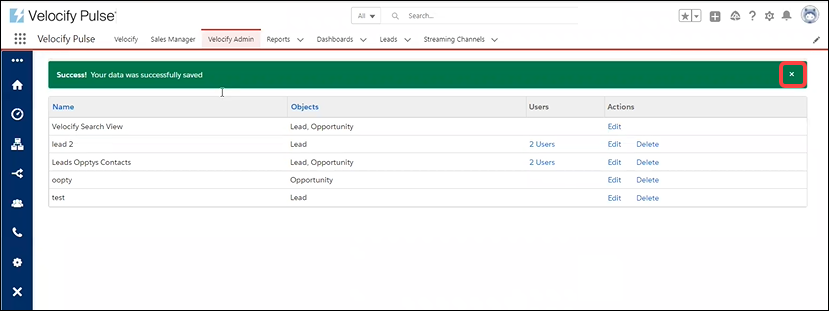
Close the success message or wait for it to disappear.
-
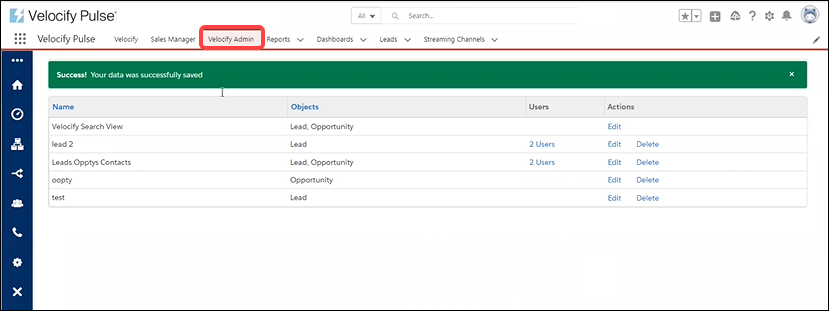
Click the Velocify tab.
-
Select the Priority View to which you added the VRH field.
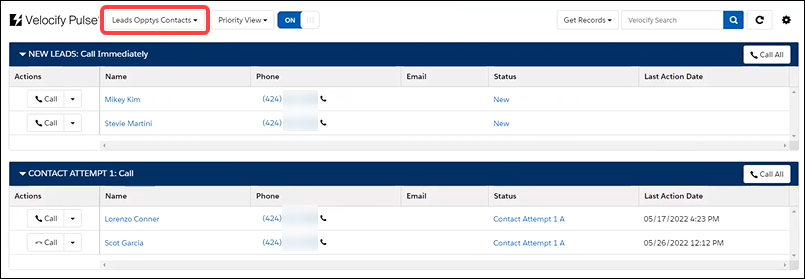
-
Confirm that the VRH field you added is displayed as a column.
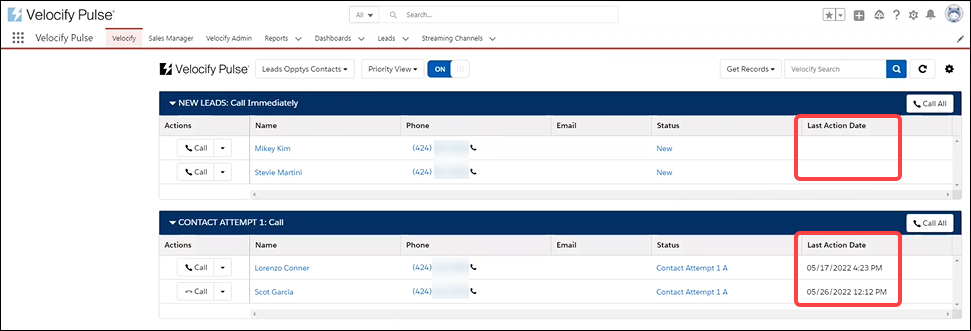
PULS-2976
Distribution Rules
Optional feature: Available week of July 15, 2022, to both Sandbox and Production Environments
Ability to define Push Shotgun programs so that attempt to distribute a lead is ONE time only. A new custom field, Shotgun Distribution Attempted, is now available. This field will populate upon the first shotgun attempt of a lead, whether or not the attempt resulted in a successful assignment. You can then use this field as a distribution filter to ensure that a lead is only able to attempt shotgun distribution once.
-
Yes/No field, set depending on if the record has gone through a shotgun distribution program
-
Default value for this field is No
-
Shotgun Distribution Attempted will be updated to YES the first time a record qualifies for a Shotgun program, but no agents are available to win the Shotgun. This feature will prevent the record from going through another shotgun program, based on where the logic is used.
-
Log into Pulse as admin.
-
Click the Velocify Admin tab, point to Distribution, and then click Distribution Rules.
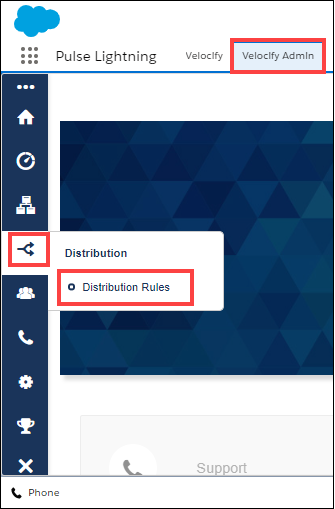
-
In the Distribution Rules page, review the filters on your existing rules.
-
In this Shotgun Push: On-Screen Notification example:
-
Shotgun Distribution Attempted = No
This indicates that qualifying records will never go through a Shotgun Distribution program

-
-
In this Shotgun Distribution Attempted: Push example:
-
Shotgun Distribution Attempted = Yes
This indicates that Shotgun Distribution was already attempted on this round robin program
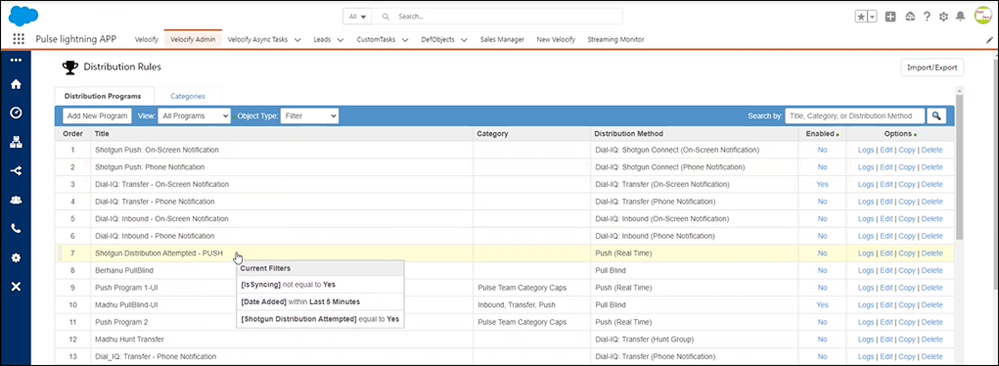
-
-
VEL-48131, PULS-3225
Sales Manager
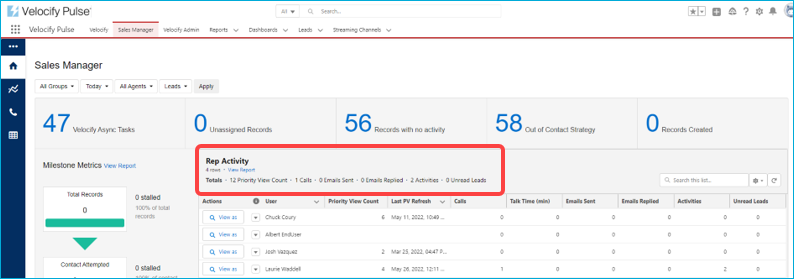
A new Rep Activity panel has been added to the Sales Manager home page displaying the sum totals for all displayed users.
-
Totals will only display for the columns that are included (selected) for display in Rep Activity section
-
Totals will be included for the following columns (if selected for display by the Sales Manager)
-
Last Priority View Count
-
Calls
-
Emails Sent
-
Emails replies
-
Activities
-
Unread Leads
-
-
This feature is available in Lightning UX only
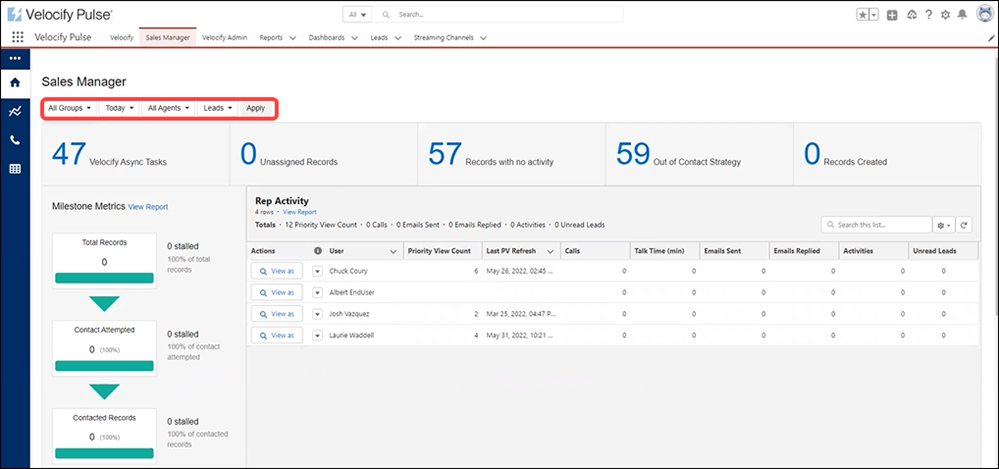
You can use one or more filters (available as drop-down options) in the top of the Sales Manager page, and click the Apply button to view Rep Activity data in the new panel.
PULS-2095
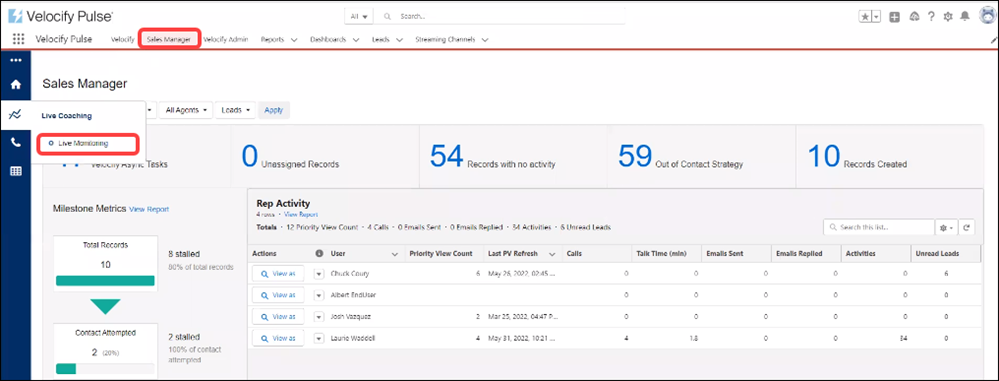
Agent tiles on the Live Monitoring page now display the total time that an agent has been in their current state (Available, Unavailable, On a Call) to help Sales Managers coach and manage their agents better. Prior to this release, this information was only displayed for an agent that was On a Call.

-
From the Sales Manager tab, click Live Monitoring.
-
In the Live Monitoring page, review agent activity in the agent tiles.

PULS-45
Dial-IQ
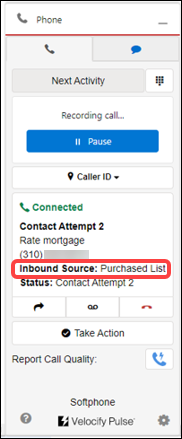
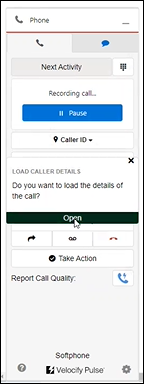
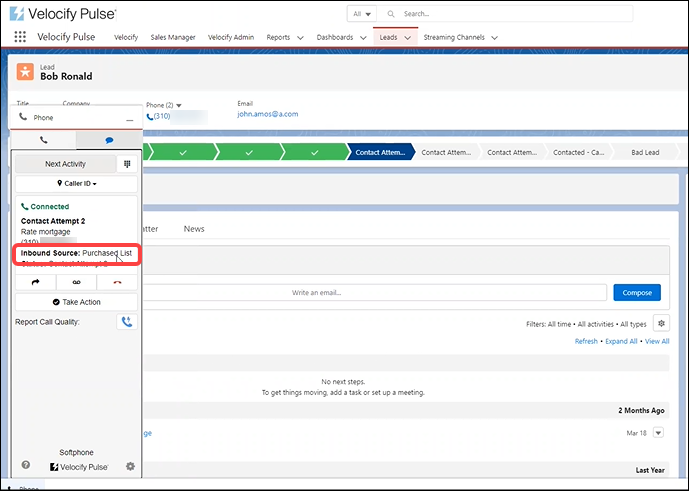
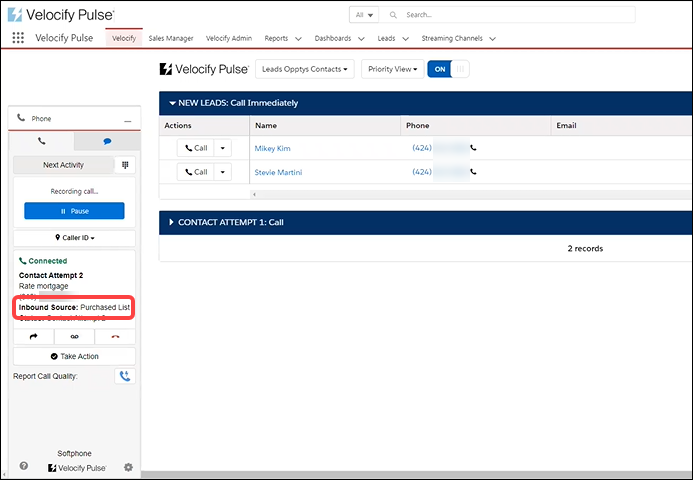
Starting with this release, when an Inbound Call is in progress, the HUD displays the Inbound Source.
For Outbound Shotgun programs, the default Inbound Source will be displayed.
The default Inbound Source is Web. If you need to update the default, contact your Velocify Pulse Client Success Manager.
-
When an inbound call is in progress, go to the HUD and click the Open button.
-
View the Inbound Source in the HUD
The HUD (with the Inbound Source information) displays in all Pulse tabs (such as Priority View, in the example below).
PULS-1912
Ability for admins to associate Inbound Numbers to a user group was included in the Pulse 22.1 Major Release. With this release, when a Call Detail object is created, it includes the associated Inbound Number Group if applicable. This enables Managers and Admins to use the group field in Salesforce reports for Call Details.
-
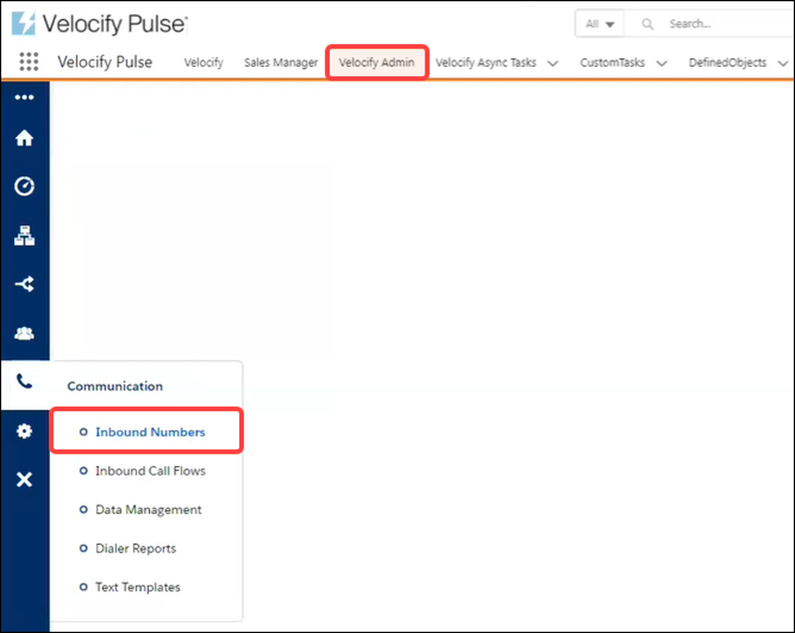
Click the Velocify Admin tab, point to Communication and then click Inbound Numbers.
-
To access your provisioned numbers, click the Toll-Free or Local button.

-
Click the Edit link corresponding to the number.

-
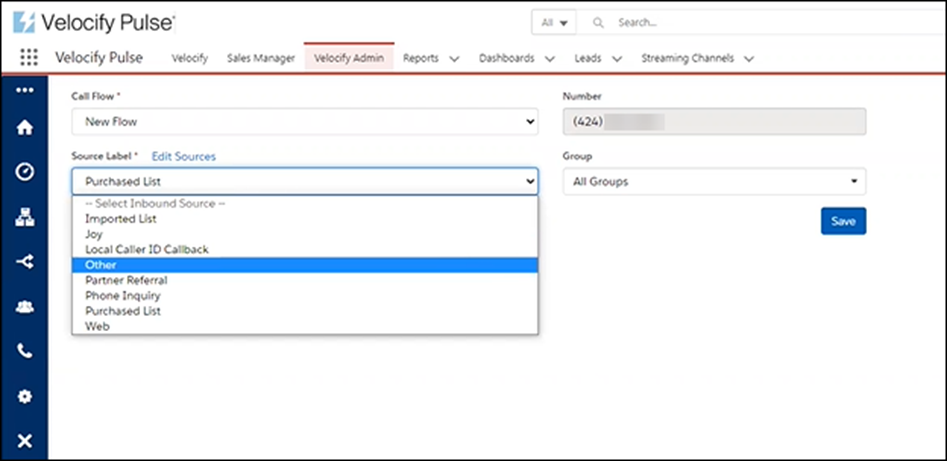
From the Source Label drop-down field, select a source for the provisioned number.
-
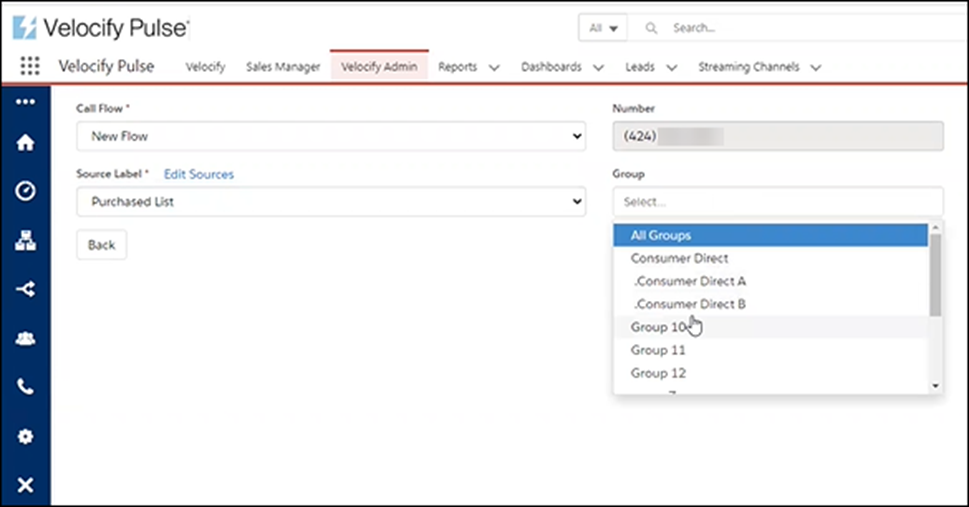
From the Group drop-down field, select a group to associate with the number.
-
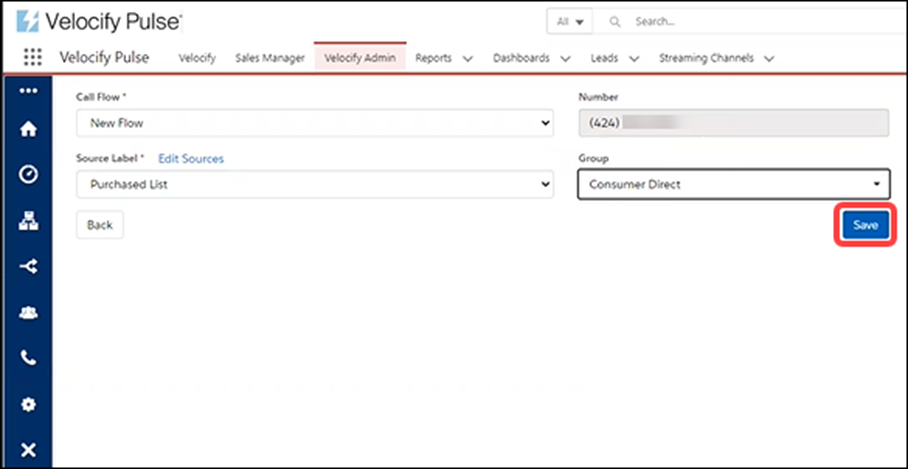
Click the Save button.
-
Close the success message or wait for it to disappear.

PULS-2906
Salesforce: Custom Settings
A new public setting for Enable Velocify Debug is now available in Salesforce. This enables Velocify admins to activate the detailed Velocify debug logs without having to grant ISV login access.

If your Velocify/Salesforce instance has the hidden Debug setting enabled prior to this release, it will be disabled with the Velocify Pulse 22.2 Release.
This feature can be leveraged in scenarios where errors are received in the Velocify application:
-
Enable Velocify Debugging
-
Set your Salesforce Debug Log
-
Reproduce the error
-
Disable Velocify Debugging once your troubleshooting is complete
-
Click the Setup icon, and in the Search field, type custom setting.

-
Select Custom Settings from the search results.
-
On the Custom Settings page, click the Manage link corresponding to Pulse Enabled Features.

-
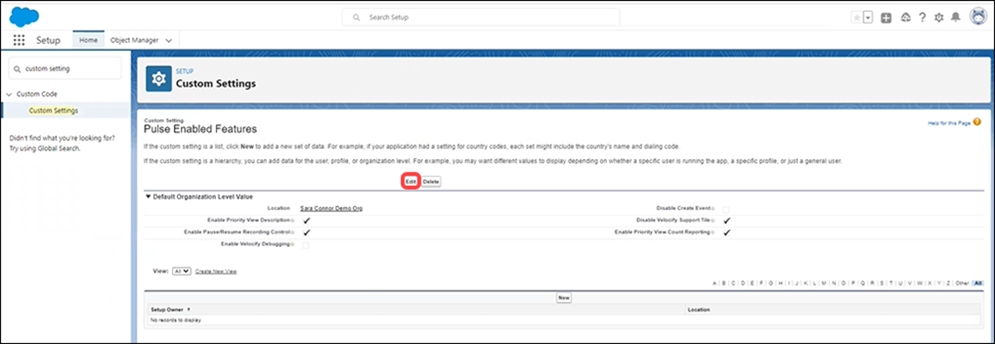
On the Pulse Enabled Features page, click the Edit button.
-
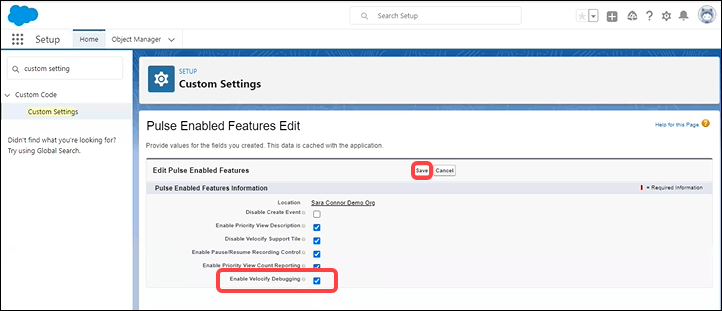
On the Pulse Enabled Features Edit page, select the Enable Velocify Debugging check box, and then click Save.
-
Confirm that the Enable Velocify Debugging check box is selected in the Pulse Enabled Features page.

-
With the Enable Velocify Debugging check box selected in the Pulse Enabled Features page, click the Edit button.

-
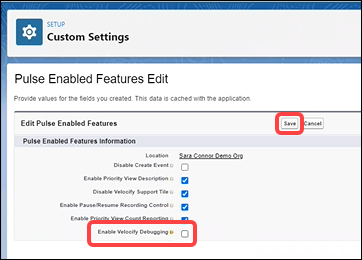
On the Pulse Enabled Features Edit page, clear the Enable Velocify Debugging check box, and then click Save.
-
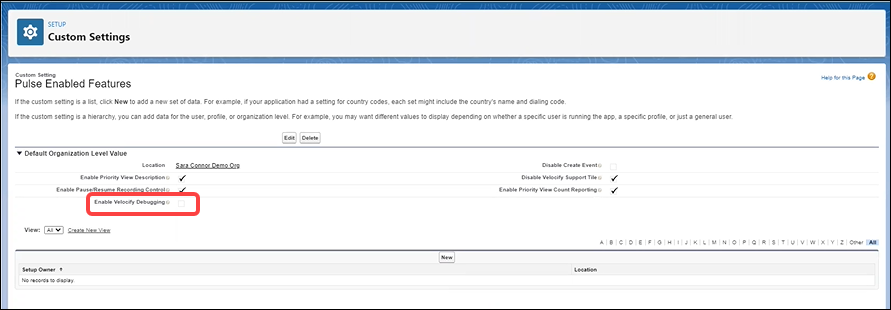
You are navigated back to the Pulse Enabled Features page, where the Enable Velocify Debugging check box is clear.
-
PULS-2607
| Next Section: Fixed Issues | 
|
|

|
Previous Section: Introduction |