How To: Run Standard Reports
TOPICS COVERED IN THIS ARTICLE
- The Basics of Running Reports
- Emailing Canned Reports
- Exporting Reports
- Batch Processing
ENVIRONMENT
LeadManager
DETAILS
The Basics of Running Reports in Velocify
- Velocify ships with many standard or 'canned' reports to help you gain insight on the performance of leads, sales reps, campaigns, lead sources and more.
- There are similar elements that are common to many different forms; for instance filters. Many reports allow you to set filters to determine the scope of the report results. In each case, the filters are inclusive, meaning that whatever value is selected from the drop-down will be reflected in the report results. If for example, “All Statuses” is selected from the Status Filter drop-down when the report is run, then the report will return results for leads from any status. If “New” is selected from the filter when the report is run, then the report will return results for leads only in the “New” status.
When running a report, the filters options will appear similar to this example:
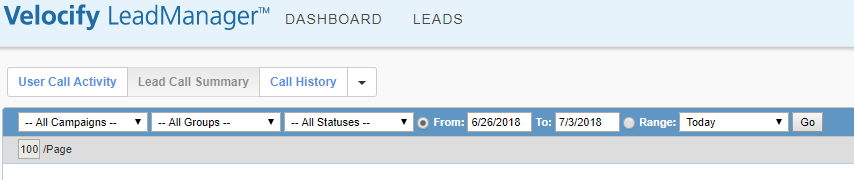
Not every filter appears on every report, and there are some, not listed here that are only applicable for one or two reports, but the most comment filters are:
- Campaigns Filter drop-down - Use the Campaign Filter drop-down to select the campaign that you want to include in your report results. Or select All Campaigns if you do not wish to filter by campaign.
- Statuses Filter drop-down - Use the Statuses Filter drop-down to select the status that you want to include in your report results. Or select All Statuses if you do not wish to filter by status.
- Users Filter drop-down - Use the User Filter drop-down to select the user that you want to include in your report results. Or select All Users if you do not wish to filter by user.
- Group Filter drop-down - Use the Groups Filter drop-down to select the group that you want to include in your report results. Or select All Groups if you do not wish to filter by group.
- Date Range - There are two ways to determine the date range for the report you are running. Select one by clicking the corresponding radio button. The two options are:
- Date Range (From/To) - Select this option if you want to run the report to return results between two specific dates.
- Date Range drop-down - Select this option if you want to run the report to return results from one of several preset date range options. Select the desired range from the pulldown.
- Go Button - When the filters and date range are set, click the Go button to run the report.
- Email Report Button [Advanced Edition Accounts] - Click the Email Report button to email the report results. Clicking this will load the Email Report page. The Email Report page will have a couple of different options depending on if the report is a Canned Report or a Custom Report.
Emailing a Canned Report
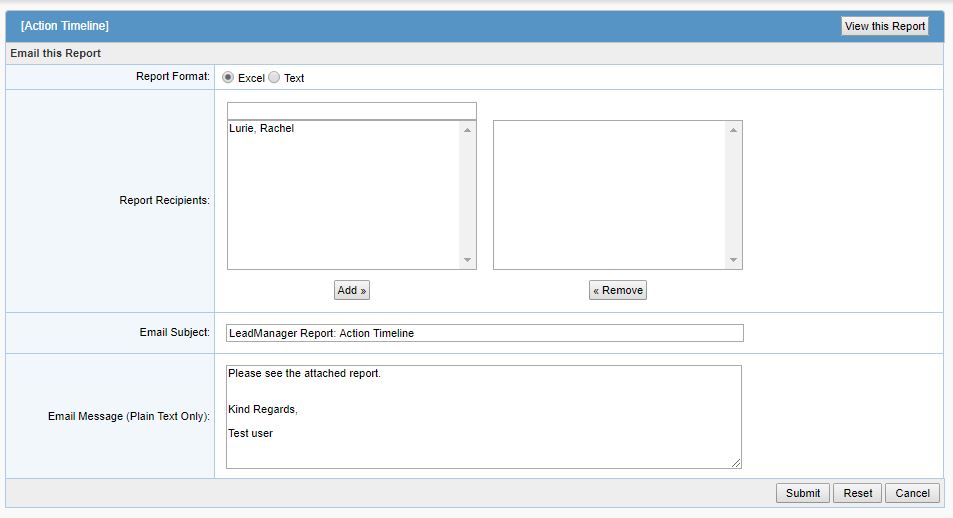
- Choose the Report Format, either Excel or Text.
- Choose your Recipients by clicking their name in the list on the left and clicking the Add button. To remove a recipient, Click the name in the list on the right and click the Remove button.
- Enter an Email Subject
- Enter content into the Email Message field that will appear in the body of the email. Note that this can only be Plain Text, no html.
If you are emailing a Custom Report you will have two additional options:
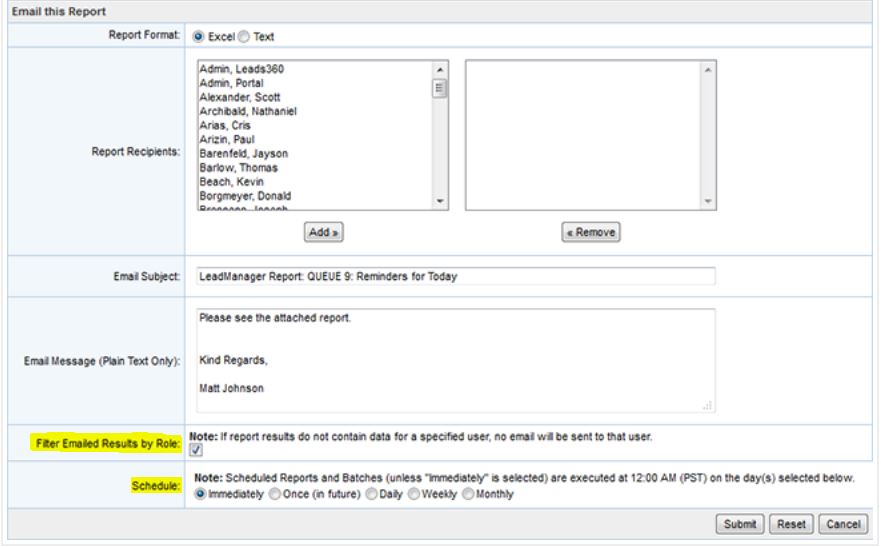
- Select the Filter Emailed Results by Role check box to ensure that report results emailed to users only contain data that their role is permitted to see.
- Set the Schedule. Send the report immediately or schedule it to be sent once in the future, or at regular intervals. Click here for more on scheduling reports.
- When you have configured your settings for emailing your report, click the Submit button.
Export to Excel Button
Clicking the Export to Excel button will pop up a dialog allowing you to save or open an Excel file containing your report results.
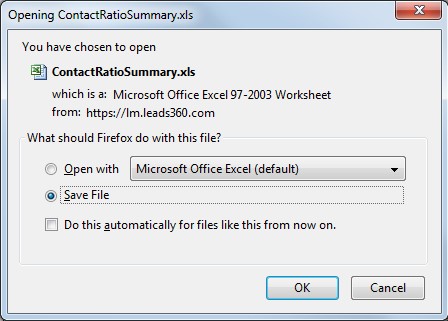
- Select Open with Microsoft Office Excel and click the OK button.
- When the file opens in Excel, use the Excel file menu to save the spreadsheet to the location of your choice.
Export to Text Button
Clicking the Export to Text button will pop up a dialog allowing you to save or open a Text file containing your report results.
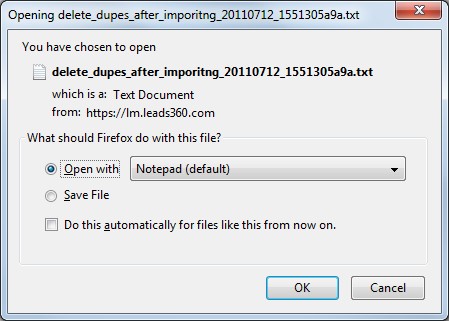
- Select Open with Notepad and click the OK.
- When the file opens in Notepad, use the Notepad file menu to save the text file to the location of your choice.
Manage These Leads Button
This button appears on Custom Report results. Clicking it enables you to load the leads that have been returned by the report in a custom view of the View Leads page. Since the targeted group of leads has been selected by the report, there are no filters on the page. The rest of the View Leads page functionality is intact; including all the options on the lead control menu, the right click menu, the options column, etc.
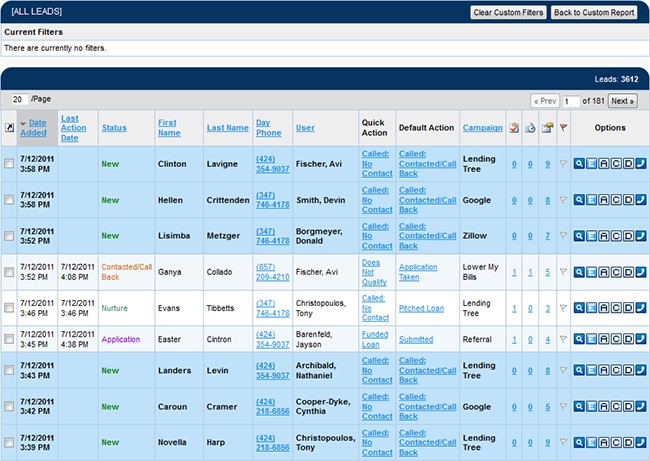
Clicking the Clear Custom Filters button will reload the view leads page in Normal view, with no filters applied. Clicking the Back to Custom Reports button reloads the Custom Report results.
Run Batch Process Button [Advanced Edition Accounts]
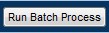
This button appears on Custom Report results.
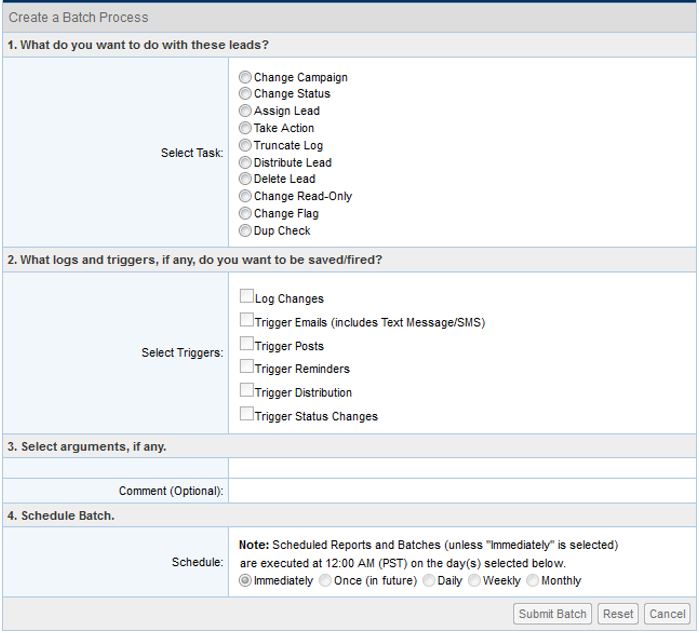
Run batch processes on groups of leads when you want to edit a large number of leads in the same way, for example, change the campaign, assign, distribute. Click here for more on batch processing.
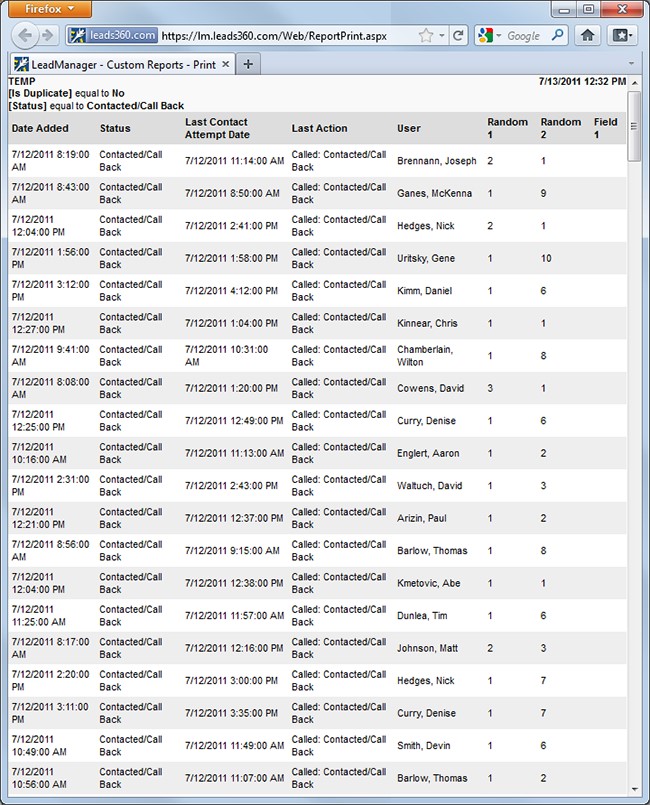
View Printable Report Button
This button appears on Custom Report results. Click it to pop up a printable version of the report. Press Control + P to print the report.