Prioritization: Priority Overview
TOPICS COVERED IN THIS ARTICLE
- What is Prioritization
- How to Enable Prioritization
- How Leads Are Prioritized
- How Prioritizatio Rules Work
- How To Access Lead Prioritization Settings
- How To Add or Edit Priority Queues
- How Users See Leads that are Prioritized
ENVIRONMENT
LeadManager
DETAILS
What is Prioritization?
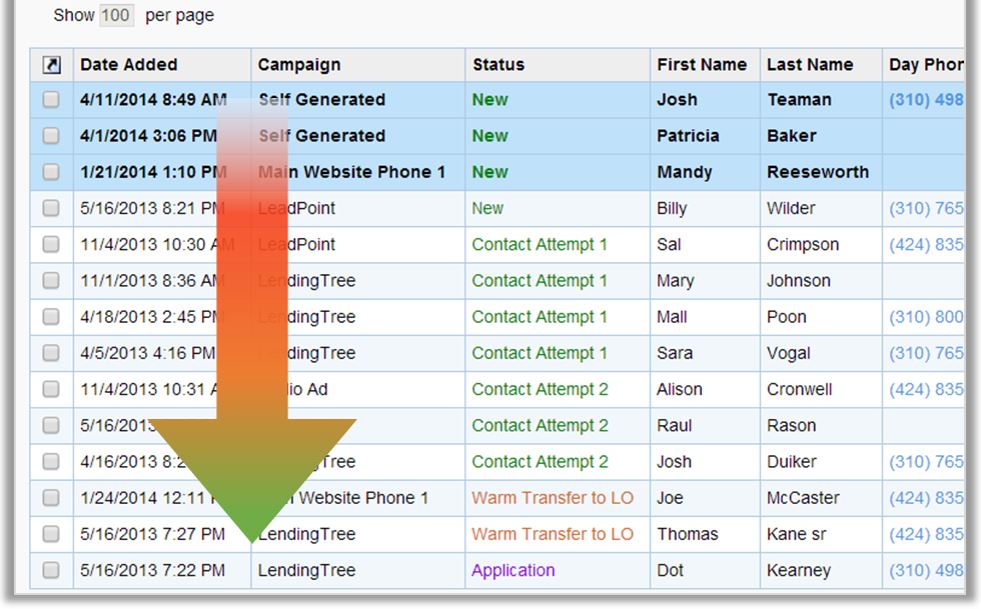
Prioritization is a feature that automatically organizes and ranks leads in order of importance. When enabled, it scans through a user's leads - in real-time - and creates a dynamic call list on the Priority View page. When set up properly, only leads that require an action appear on the list, and they drop off this list once an action is taken. This allows a user to move quickly and consistently move through their leads and eliminates the time spent figuring out which lead should be called next.
How To Enable Prioritization
- Prioritization is automatically enabled for all LeadManager Advanced Edition and Standard Edition clients.
- By default, the rules determining how leads are prioritized are based on best practices for your industry and cannot be customized for LeadManager Standard Edition clients. This configuration can only be further customized by LeadManager Advanced Edition clients.
- Velocify™ has developed these best practices for lead follow up based on ongoing research and analysis.
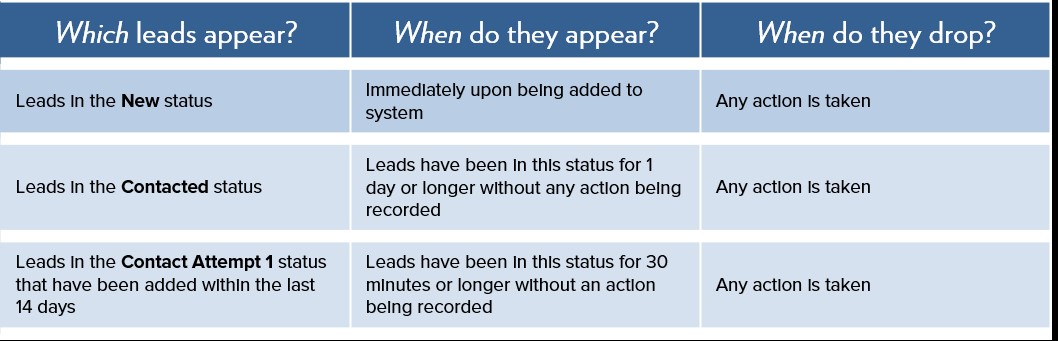
How Leads Are Prioritized
- The leads presented to a user within their Priority View are based on rules that are customizable for Advanced Edition clients and preset to reflect best practices for Standard Edition clients. Typically, these rules look at certain lead conditions such as:
- How old is the lead?
- When was the lead last assigned?
- What is the current status or stage of the lead
- How long has it been since the lead was last called or updated?
- Is there a future Calendar Event set?
- Prioritization best practices advise implementing rules that will prompt those leads that require action to be visible on the prioritized list – in order of importance and urgency – while leads that have been worked recently don’t appear until the next time they require attention. Example prioritization strategy:
How Prioritization Rules Work
Prioritization employs a series of “Priority Queues” where each queue represents a set of leads that meet specific criteria. These queues are then stacked to reflect the order that leads will appear on a user’s prioritized list.

How To Access Lead Prioritization Settings
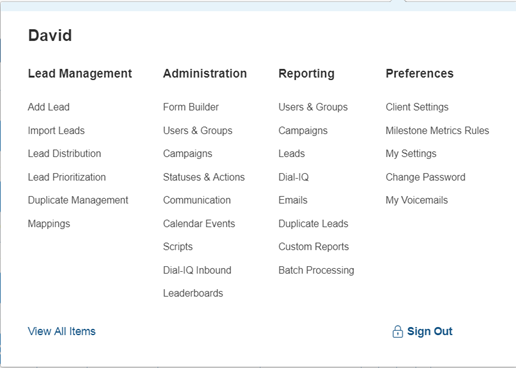
Access the Menu page by clicking your name in the upper right of the header.

Under Lead Management, click Lead Prioritization.
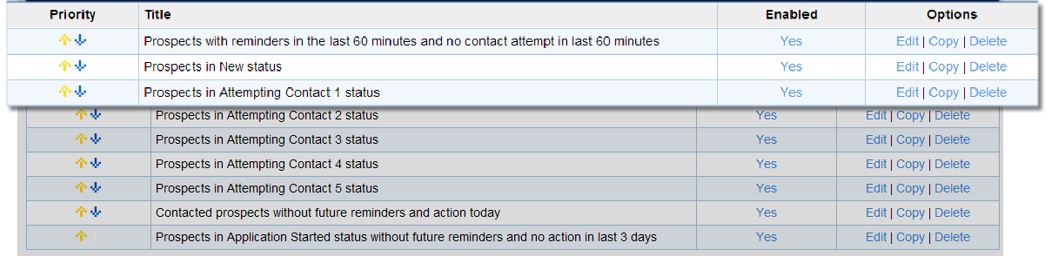
The Prioritization page lists all Priority Queues in ranked order. This order may be changed by moving queues up or down. The Title of each queue is displayed, and the ability to enable or disable individual queue is accessible on the Enabled column.
How To Add or Edit Priority Queues
Advanced Edition clients can access the Add New Queue option. They may also edit an existing queue via the Edit link under the Options column. Details are available here.
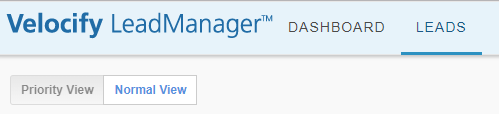
How Users See Leads that are Prioritized
Users can access their list of prioritized leads by navigating to Leads – Priority View. On that page, they will see the top 100 leads assigned to them that are prioritized. This page is limited to only display 100 leads, although more than 100 leads may qualify for the priority queues.
If Single Lead View is enabled, then the page will only the most prioritized lead one at a time. For more information on Single Lead View, see Prioritization: Single Lead View.