How To: Manually Add a Lead
TOPICS COVERED IN THIS ARTICLE
- How to Manually Add a Lead
ENVIRONMENT
LeadManager
STEP BY STEP INSTRUCTIONS
Add a Lead Manually
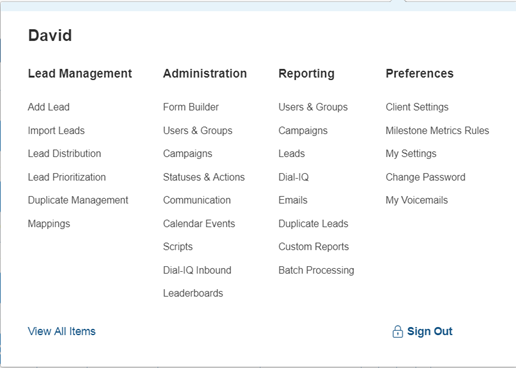
Access the Menu page by clicking your name in the upper right of the header.

Under Lead Management, click Add Lead.
Depending on what industry you are working in and how your system is set up, the Add Lead page will have fields to capture all types of information.
In some cases it returns information as well, as in the lead scoring/loan pricing.
The Add Lead page is fully customizable for Advanced Edition accounts, and preset for Standard Edition accounts. It can range from dozens to hundreds of fields.
At a minimum, and most importantly, it will be the place to record the name and contact information of a lead.
Fields may appear on different tabs. Related data fields are grouped onto separate tabs and sections within each tab. Click the small +/- button in the corner of the section to collapse and expand the section.
After adding information, always click the Save or Save & Close button.
There are also two drop-down menus at the top of the page:
- Campaign: Select a value from this drop-down to assign the lead to a campaign
- Time Zone: Select a value from this drop-down to assign the proper time zone to the lead.
Information on the Drop-down Menus:
Depending on your role, you may also have Status and User drop-downs to enable you to assign the lead to a user and place it into a status other than new. And depending on your industry, you may have a Lead Type drop-down on your Add Lead An example of how Lead Type is used is with Insurance Leads. Insurance Leads may be of several different types, e.g., Auto, Home, Life, etc.
When you add a new lead or if a new lead posted by a lead provider does not include the lead type, you will be able to select a lead type.
Use the Form Builder to customize your Add New Lead Page.