Dial-IQ: How To: Use Scheduled Dial
TOPICS COVERED IN THIS ARTICLE:
Using Scheduled Dial
ENVIRONMENT:
Dial-IQ
DETAILS:
Using Scheduled Dial
Scheduled Dial is a setting on the add/edit Calendar Event popup. It can be used by users who want to schedule a Dial-IQ initiated call to a lead in the future.
-
To use Scheduled Dial, users must be sure to have their Calls button on to be sure they are connected to their scheduled call backs. If a user’s Calls button is off, Dial-IQ will not initiate the Calendar Event Scheduled Dial.
-
When you create a calendar event for a lead, Scheduled Dial allows Velocify to call you at the time of the event. Once you answer the phone, it will immediately call out to the lead, connecting you for your appointment.
Creating a Calendar Event with Scheduled Dial
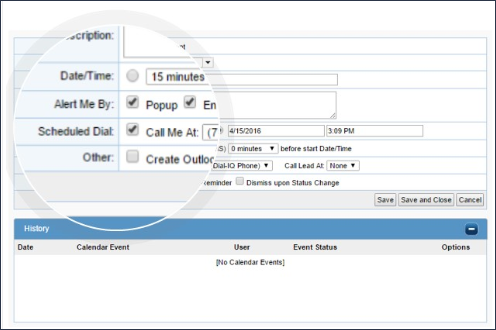
- When you create a new calendar event, select the Scheduled Dial check box to enable Scheduled Dial.

- Select the phone number for Velocify to call you at the time of the event, and choose which phone number should be called for the lead.

To review creating calendar events, click here.
-
If the Calendar Event is a task, the Scheduled Dial occurs at the time of the task. If the Calendar Event is an Appointment, the Scheduled Dial will occur at the beginning of the appointment.
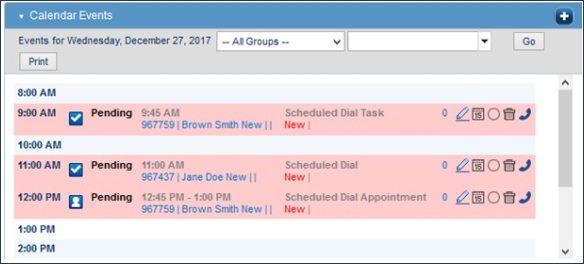
- Once the Calendar Event is scheduled, it will appear in the user’s dashboard calendar.

-
When the time arrives for the Scheduled Dial, Dial-IQ will call the user’s phone.
-
When the user answers his phone, he will hear the Whisper Info Message and have to press the 1 button to be connected to the lead.
