Collaboration preparation
Overview
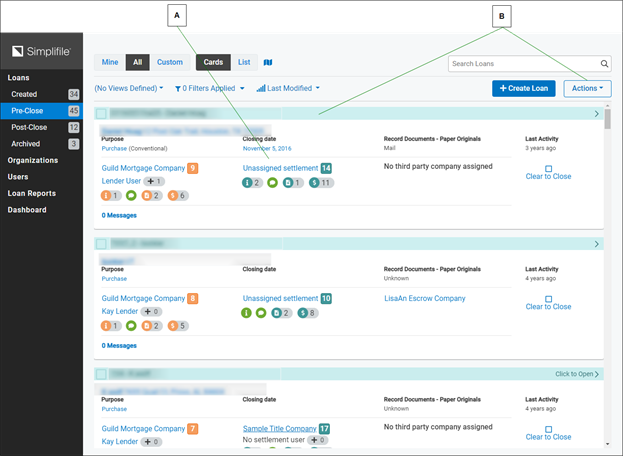
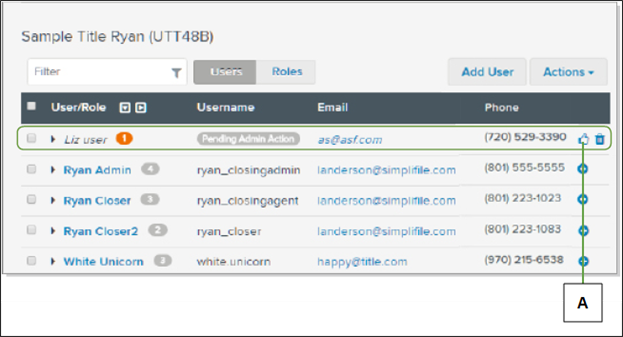
After a lender creates a loan and assigns it to a settlement company, the loan displays to settlement administrators on the Pre-Close page. Loans created by your settlement company also display on the Pre-Close page. Below is an example.
| Letter | Description |
|---|---|
| A | Reminders about tasks you need to complete display here. Select the link to be taken to the page where you can complete the tasks. |
| B | If you have the necessary permission, you can select here to assign an agent to the loan. You can also do this from the Loan Information page (accessed by selecting the loan card header). |
A loan must have an assigned settlement agent and a file number before collaboration can begin.
Assign a settlement agent
A primary agent must be assigned to handle a loan before any collaboration can occur. By default, the first person at your agency who accesses a loan is automatically assigned as the primary agent. Additional agents can be assigned from the Card view of a loan, the List view of a loan, or the Loan Information page of a loan. If wanted, you can assign a single agent to multiple loans at the same time.
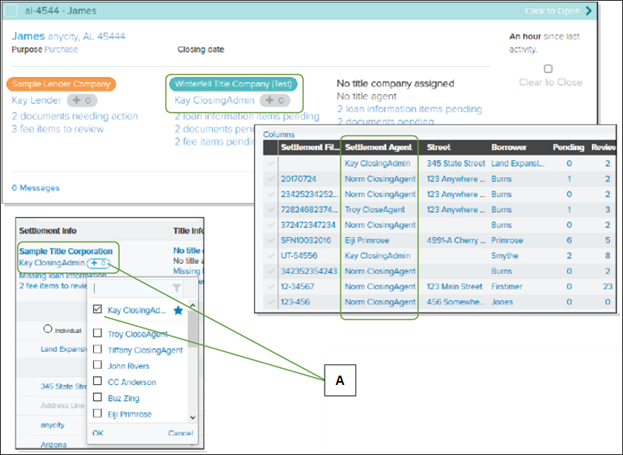
The name of the primary agent displays on the Card view and the Loan Information page as the settlement agent. You can choose to have the primary agent name display on the list view in the Settlement Agent column. Below are examples.
| Letter | Description |
|---|---|
| A | On the Loan Information page, select the Add Users The primary agent is marked with a star. |
| Letter | Description |
|---|---|
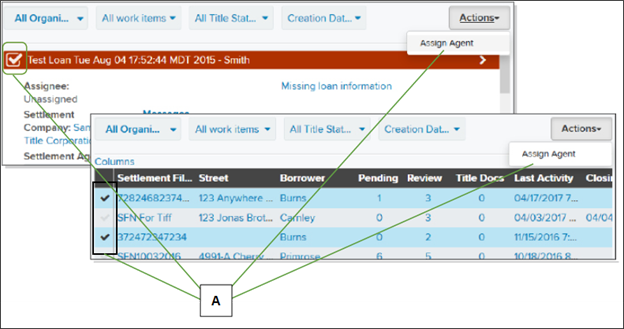
| A | Mark the boxes on one or multiple loan cards or for one or multiple loans on the list view. Then select the Actions |
If you take a collaborative action on a loan (you do something, as opposed to merely viewing), the system automatically adds you to the loan. Any additional collaborators are called assignees.
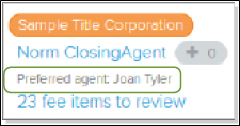
A lender may request a specific agent. Depending on your setup, the system may automatically assign a requested agent to a loan. If your agency has not opted for this feature, the name of the agent the lender requests displays under the assigned agent in the Settlement Info section. Then the administrator can choose whether to assign that agent or a different agent to the loan.
After a primary agent has been assigned to a loan, that agent can access the loan from the Pre‑Close link on the left navigation menu.
If the agent the lender requests does not display in the dropdown list, the administrator can QWEEWQ-SELECT select Manage Users to review the agent and choose whether to approve him or her.
| Letter | Description |
|---|---|
| A | Select here to approve a requested agent. |
You or the lender can also add a title company, if desired. The title company assigns a primary title agent. Settlement and title agents can perform such tasks as uploading documents and messaging the lender. Agents may also assign additional agents with collaboration rights to work with the loan.
Add a settlement file number
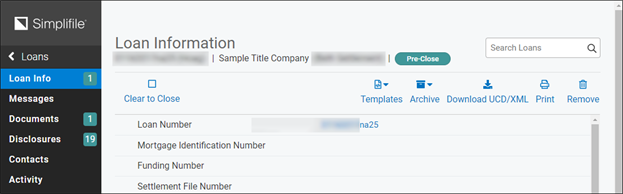
Before you can do anything else with a loan, you must add a file number. As soon as you do this, Simplifile sends a message to the lender. Then both the assigned agent and the lender can add the necessary documents and fees to the loan. For more information on this process, see Work with loan‑related documents and Reviewing and adding loan‑related documents.Other sections of this document may also give you helpful information.
How to assign a settlement agent and a file number from the Loan Information page
- Find the loan on which you want to prepare to collaborate. If necessary, you can search for the loan. For more information, see Find a loan.
- Select the card header or the loan number to open the Loan Information page.
- In the Settlement File Number field, enter the file number you want to associate with the loan.
- Review the Settlement Info section to see whether the lender has requested a specific agent.
- Select Add Users
 button and mark the boxes the agents you want to assign from the dropdown list that displays.
 - If desired, choose a Title Company. The title company will assign an agent.
How to assign agents to one or more loans from the card view
- If necessary, select the Cards button at the top of the page to display the created loans as cards.
- Mark the box in the upper left corner of each loan where you want to assign an agent.
- On the upper right side, select the Actions
 dropdown button and choose the Assign Agent item.
 - In the Assign Agent window that displays, use the Settlement agent dropdown list to choose the agent you want to assign to the loans you marked.
- Select the Close
 button.
How to assign one or more settlement agents from the list view
- If necessary, select the List button at the top of the page to display a list of the created loans.
- On the left side of the list, mark the boxes of the loans you want to assign to a single agent. To choose all the displayed loans, mark the box in the table header.
- On the upper right side, select the Actions dropdown button and choose the Assign Agent item.
- In the Assign Agent window that displays, use the Settlement agent dropdown list to choose the agent you want to assign to the loans you marked.
- Select the Close button.
Re‑assign or un‑assign a settlement company
You may occasionally need to unassign a settlement company from a loan. If you are affiliated with multiple agencies, you may also need to change which settlement company has been assigned to a loan. This can be helpful if a lender has assigned the loan to the wrong branch.
How to re‑assign or un‑assign a settlement company
- Find the loan on which you want to prepare to collaborate. If necessary, you can search for the loan. For more information, see Find a loan.
- Select the Card header or the loan number to open the Loan Information page.
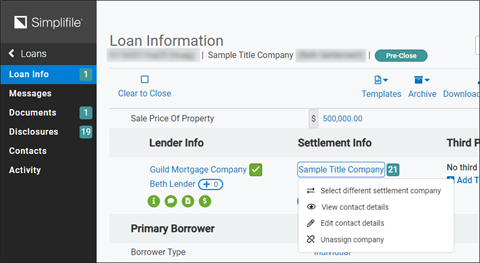
- Find the Settlement Info section.
- Select the name of the currently assigned settlement company.
- From the dropdown list that displays, do one of the following:
- To unassign a settlement company, select the Unassign company item . Then verify that you want to unassign the company.
- To assign a different settlement company, select the Select different Settlement company item. Then select the name of the company you want to assign.
Grant third‑party access
You may want to add entities other than your own company and a lender to a loan. You can grant limited loan access on an organizational level to additional parties such as the following:
| Borrowers | Builders | Notaries |
| Quality Control (QA) reviewers | Real estate agents | Sellers |
| Title companies | Title underwriters |

| Letter | Description |
|---|---|
| A | Use the dropdown list to choose the type of third party you want. Then you can use the Search filter to find a specific party, if desired. |
| B | If a third party has an organization ID, the party has a Simplifile account. Use the Loan Access dropdown list to grant access to loans. |
| C | If a company is not yet part of the Simplifile network, select the Invite button to invite the company to join.
|
You add third parties on the Contacts page. When you select the third party on that page to display information about that party, if you chose Manual on the Third Party Access page, you have the option to enable collaboration.
After you enable collaboration or if you chose Auto add to all loans on the Third Party Access page, the Third Party tab on the Contacts page shows that the third‑party organization has been enabled for collaboration.

The Loan Information page displays a Sharing icon (![]() ) that lets you see the number of third party organizations you have enabled. Select the Sharing icon to display a window that lists the organizations. Below is an example.
) that lets you see the number of third party organizations you have enabled. Select the Sharing icon to display a window that lists the organizations. Below is an example.
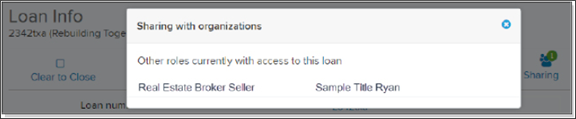
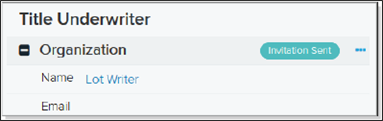
If you add a third‑party contact who has not yet set up an account with Simplifile, the system sends that third party an invitation. You can see the status of that contact on the Contacts page and when you select the Sharing icon on the Loan Information page, as shown at the right.
How to grant third‑party access
- On the left navigation menu, select the Organizations item.
- On the Organizations page that displays, select the name of the organization where you want to set up third‑party access.
- On the left navigation menu, select the Third Party Access item.
- Use the Business type dropdown list to choose the type of entity you want to grant access.
- If desired, select in the Search org field and begin entering part of the name of the third party you want. Simplifile displays only entities that contain the information you enter.
- Do one of the following:
- If there is no dropdown option in the Loan Access column for the entity you want, the third party is not yet part of the Simplifile network. Select the Invite button to invite the third party to join Simplifile.
- If a dropdown option does display in the Loan Access column, choose the kind of access you want for that entity. You can grant any of the following access types:
- None. The entity will have no access to any Simplifile loans.
- Auto add to all loans. Whenever the entity is added to a Contact page, the entity will automatically have limited access to see the loan.
- Manual. Whenever the entity is added to a Contact page, you can select the Enable Collaboration item on the Information tab for this entity to let this entity have limited access to see the loan.
You can choose to give automatic loan access to all organizations of a specified role type. To do this, choose Automatically from the dropdown list that displays to the right of any role type you choose on the Third Party Access page.
If an organization with this role type is added to a loan but has not yet joined Simplifile, the system automatically invites them.
QUICK TIP: A Sharing icon with a number (![]() ) displays on
the Loan Information page if you have granted access to
any third parties. Select the icon to see a list of the
parties.
) displays on
the Loan Information page if you have granted access to
any third parties. Select the icon to see a list of the
parties.
Add people to a loan’s emailing list
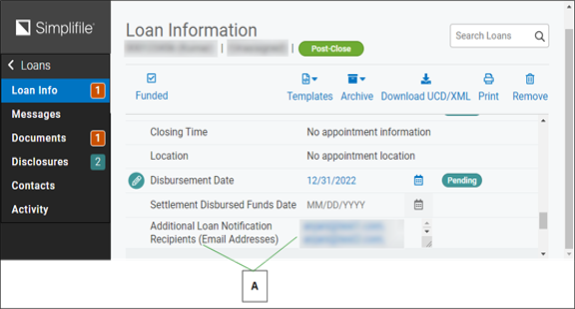
Typically, Simplifile sends notifications to the lender who creates the loan record and the settlement agent who handles the loan. If wanted, you can add email addresses to a loan record so that Simplifile can send additional notifications. The lender cannot see these email addresses.
The people whose email addresses you add do not need to be able to access Simplifile to receive email notifications. However, without Simplifile access, people who receive email notifications about a Simplifile loan cannot use Simplifile to view loan records and documents.
| Letter | Description |
|---|---|
| A | You can add up to 50 additional email addresses. Separate multiple emails with a comma. Drag the lower right corner to make the field larger. |
How to add people to a loan’s emailing list
- Find the loan whose notifications you want to send to additional people. For more information, see Find a loan.
- Select the Card header or the loan number to open the Loan Information page.
-
In the Additional Loan Notification Recipients field at the bottom of the page, enter the email addresses of the people you want to add to the email list.
If you add more than one email address, separate the addresses with commas. You can add up to 50 email addresses.