Updates and Enhancements to Encompass Web Input Form Builder - 23.3 Major Release
This section discusses the updates and enhancements to forms, features or settings in the Web Input Form Builder that are provided in this release.
Updates and Enhancements
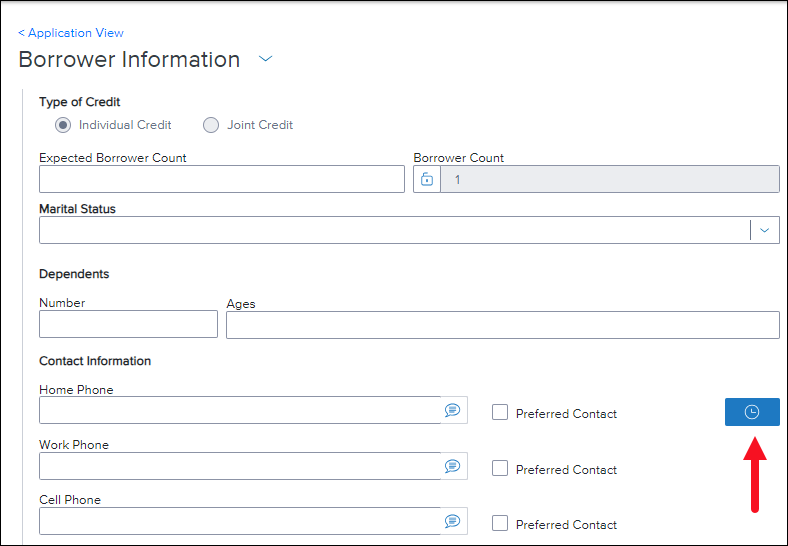
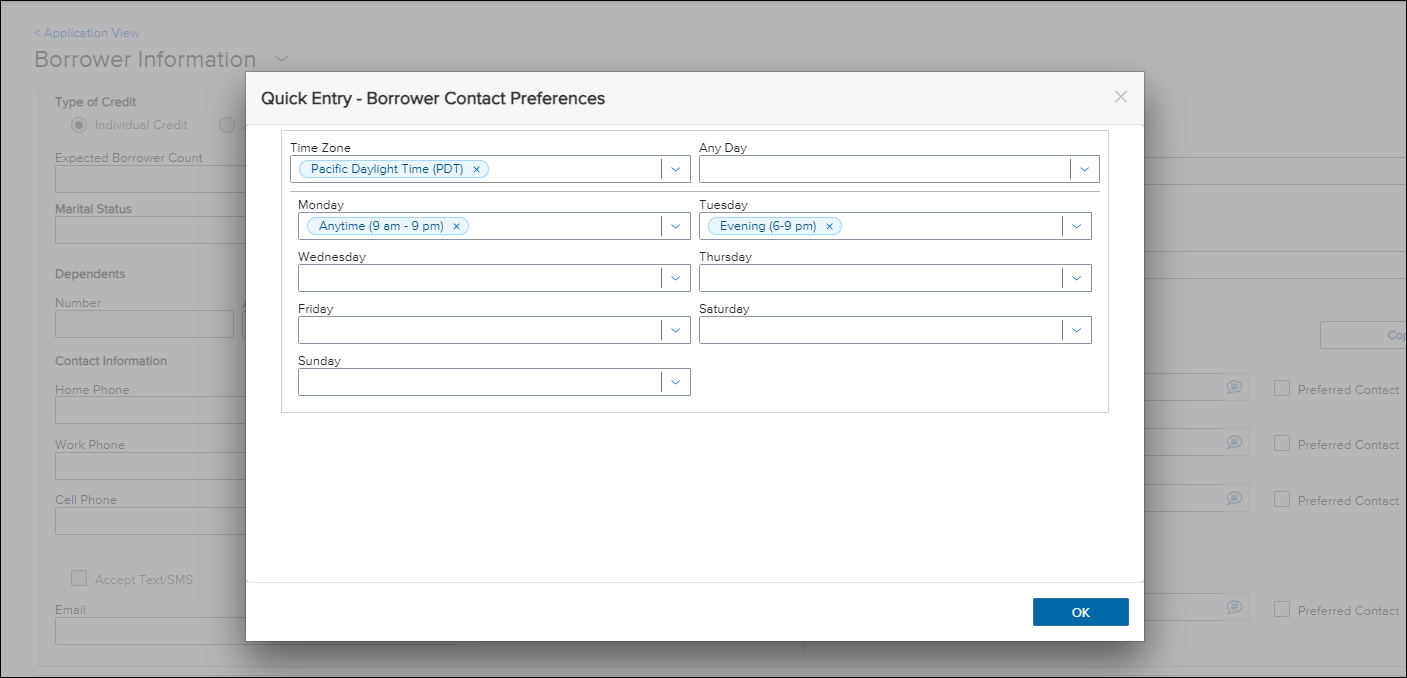
A new Contact Preferences icon is now available in the Web Input Form Builder to add to input forms. After adding the icon to the form workspace, button actions can be applied to it to display borrower contact preferences, co-borrower contact preferences, and non-borrowing owner contact preferences quick entry screens. When using the input form, loan team members can select this icon to display a modal window where they can view or edit the preferred days and time of day to contact the borrower, co-borrower, or non-borrowing owner.
To add a Contact Preferences Icon to an Input Form:
-
Create a new input form or open an existing input form.
-
In the Form Elements panel at the top of the form workspace, select and drag the Button element to the workspace.
-
Select the button to display the Properties panel.
-
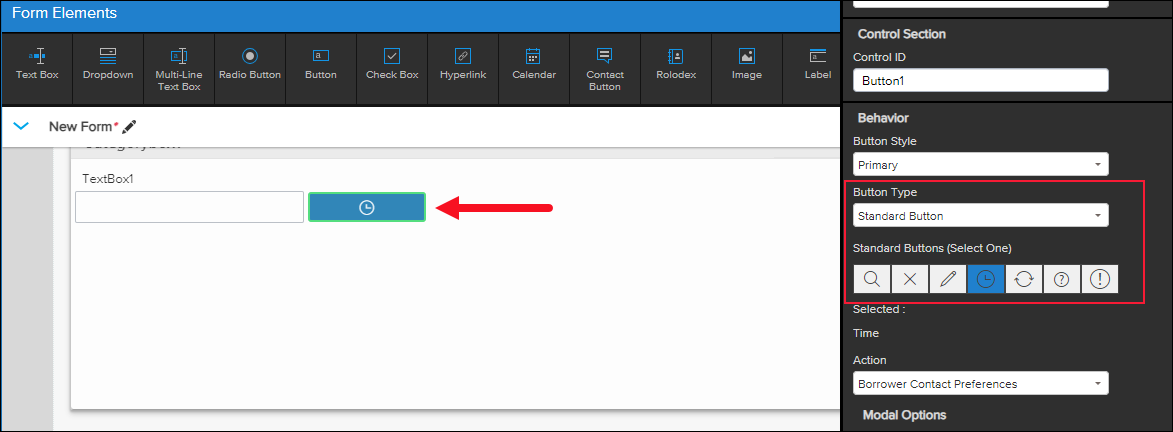
Select Standard Button from the Button Type drop-down list.
-
In the Standard Buttons list, select the Contact Preferences icon. This icon resembles a clock face.

-
In the Action drop-down list, select one of the following options:
-
Borrower Contact Preferences
-
Co-Borrower Contact Preferences
-
Non-Borrowing Owner Contact Preferences
-
As discussed in the New Preferred Contact Method Fields Added for Borrower Contacts entry in the Updates and Enhancements to Features section of these release notes, when working in the Borrower Summary - Origination or custom input form, loan team members can select this Contact Preferences icon, and then view or edit the preferred days and time of day to contact the borrower, co-borrower, or non-borrowing owner.
ENCW-91505
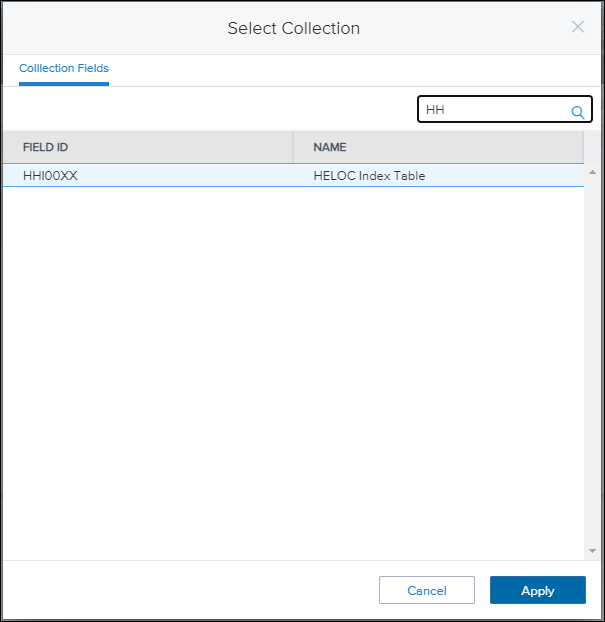
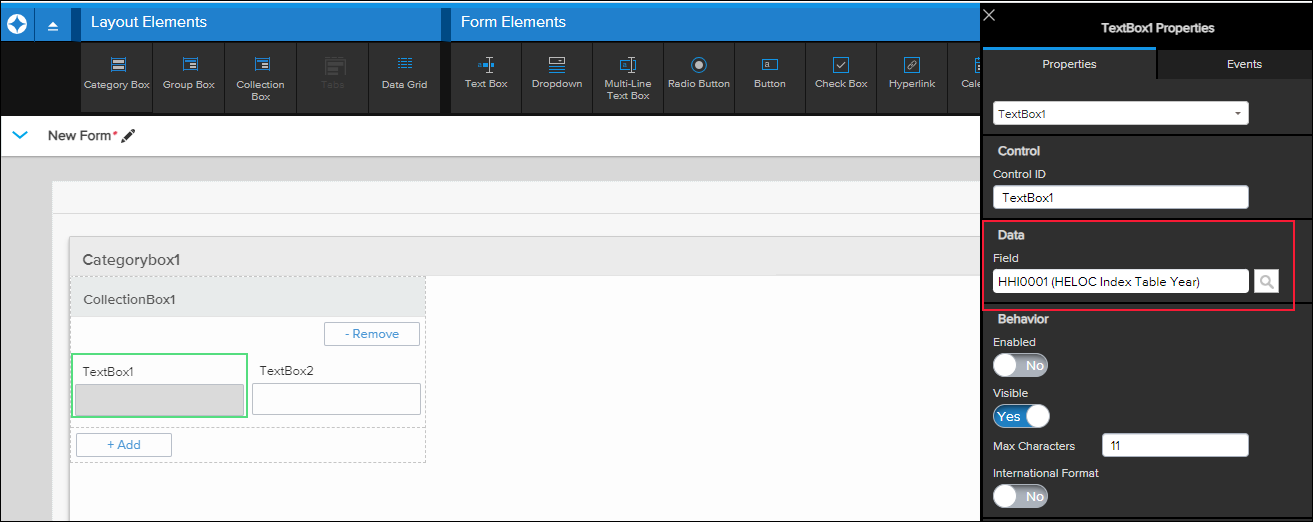
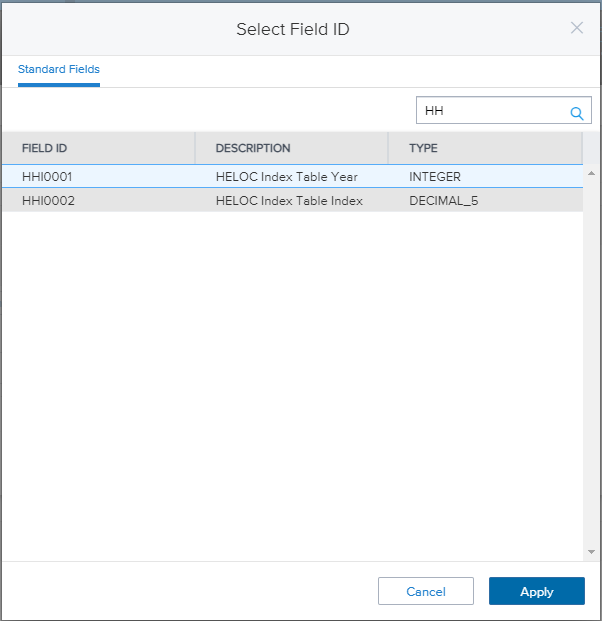
In this release, the HELOC (HHI00XX) and HUD (HUD00XX) collection groups are now provided to enable you (the administrator) to add HELOC and HUD field data to a Collection Box on the input form. The collection group determines and filters the type of fields that will be available for you to select and add to this collection box. By selecting a collection group, you will not have to search through the entire list of available fields that could be added and instead you will have a much shorter list of fields that are specific to the type of data group you have selected. After adding a Collection Box to the form workspace, you can then add text boxes or other form elements into the collection box (or copy and paste form elements into the box) so they are collected together in the box. Add and Remove buttons are provided so that loan team members using this form can add or remove line items within the collection box. The fields that are added are automatically mapped sequentially (for example, HHI0001, HHI0002, etc.).
After adding a collection box to the form workspace, select it to display the Properties panel. There you can select the Find icon for the Collection option, and then apply the new HELOC or HUD collection fields.
New HELOC Collection Fields

New HUD Collection Fields


Then, when adding text boxes to the collection box. you can select the HELOC or HUD field type to apply from a filtered list.
Example of Applying HELOC Field Type
ENCW-91210
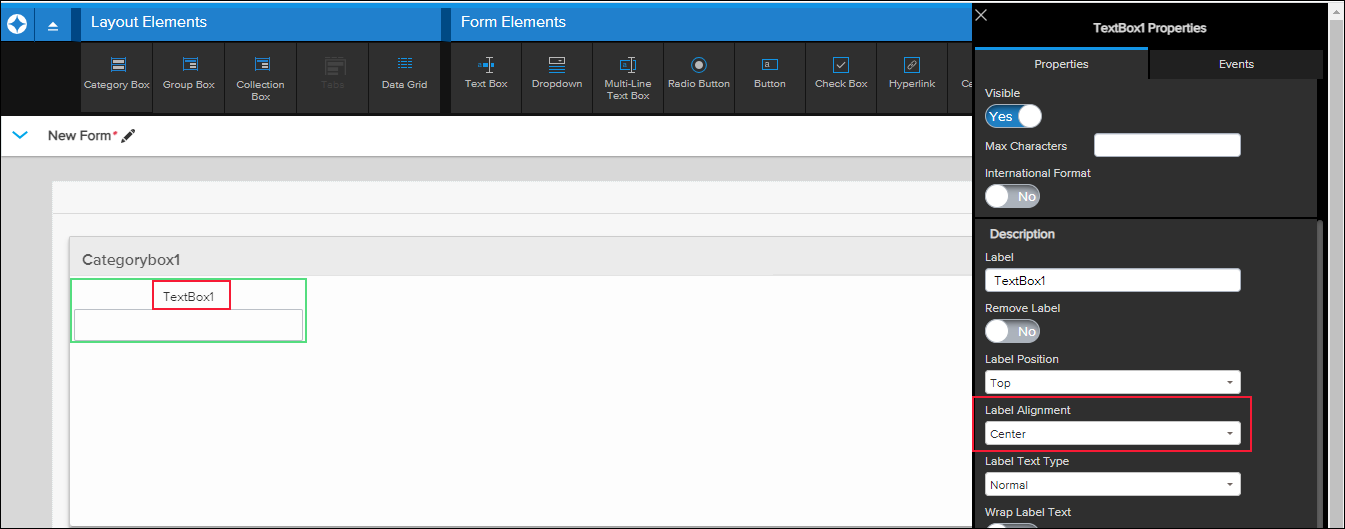
When working with text boxes, administrators can now use the new Label Alignment option to determine where the label above the text box is located (left, center, right).
In the form workspace, select the text box to display the Properties panel. There you can select an option from the Label Alignment drop-down list: Left, Center, Right.
The Label Alignment property is provided only for the Text Box element and only when the Label Position property is set to Top.
ENCW-85684
| Next Section: Change Log | 
|
|

|
Previous Section: Updates & Enhancements in Encompass |