Feature Enhancements
Salesforce Lightning Support
Velocify admins now have the ability to create the following two new types of widgets in the Pulse Insight Panel to help enhance and modernize the UI and providing more flexibility by leveraging more Lightning features:
- Lightning Flow: Use this widget to call a flow/process within Salesforce, such as editing a Lead record.
- Lightning Components: Use this widget to consume Lightning components within the Insight panel.
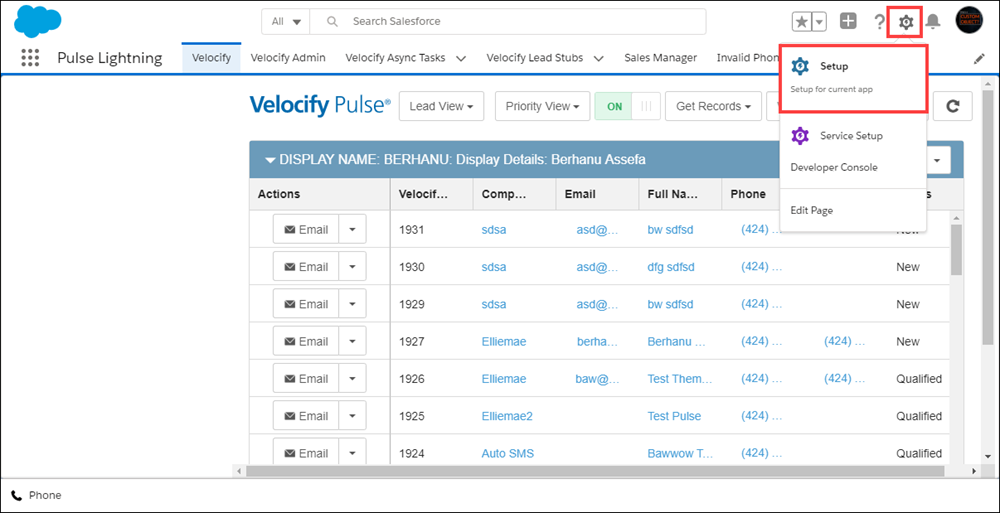
- Log into Salesforce as an admin, and click the Setup icon.
- Click the Setup option from the drop-down menu.
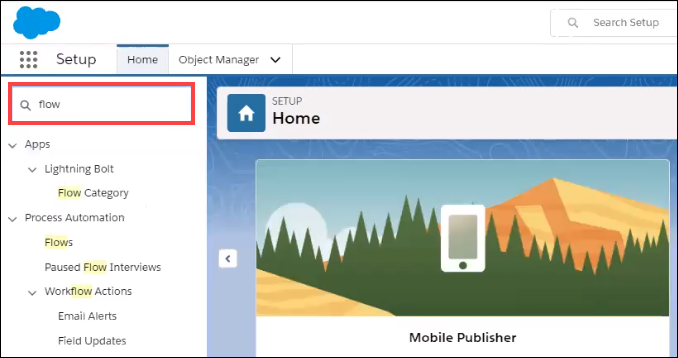
- In the Quick Find field, and type flow.
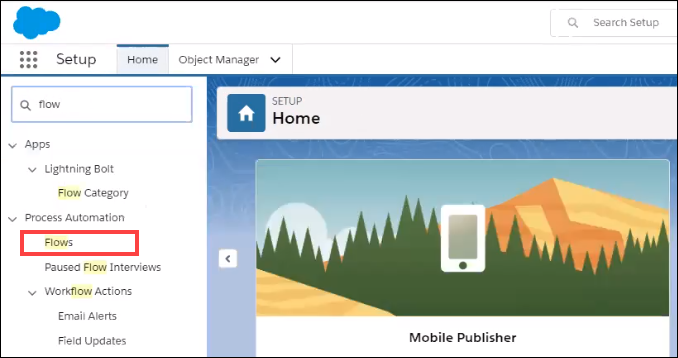
- Go to Process Automation, and click Flows.
- Click the New Flow button to create a flow for your business process.
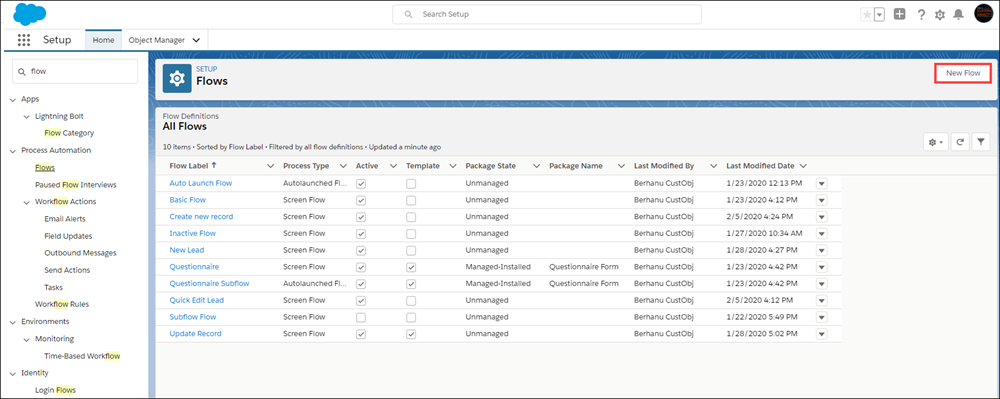
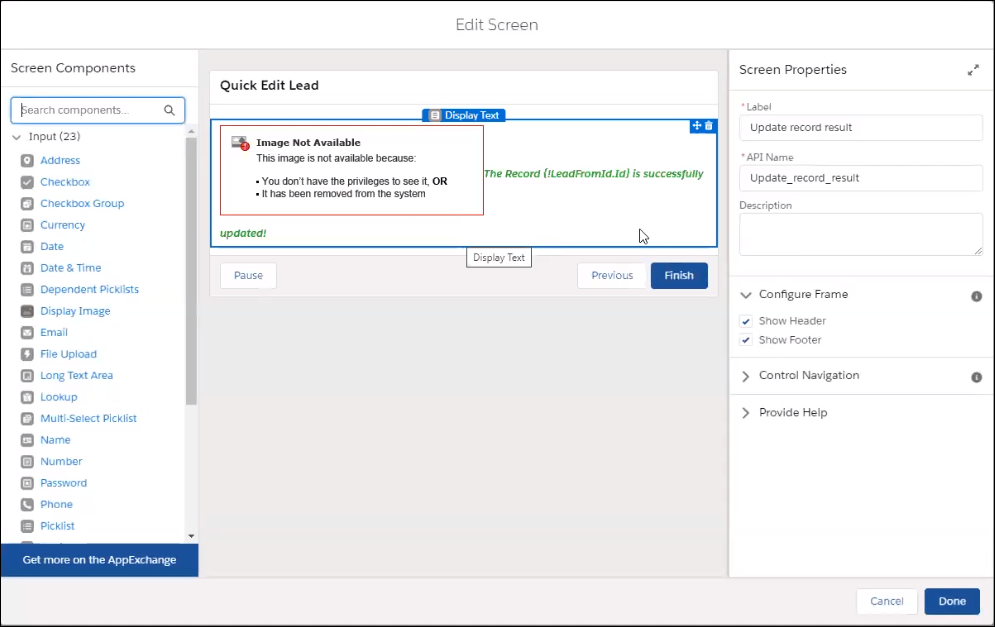
For example, you can create a flow for your Quick Edit Lead business process, leveraging the Salesforce Flow feature.
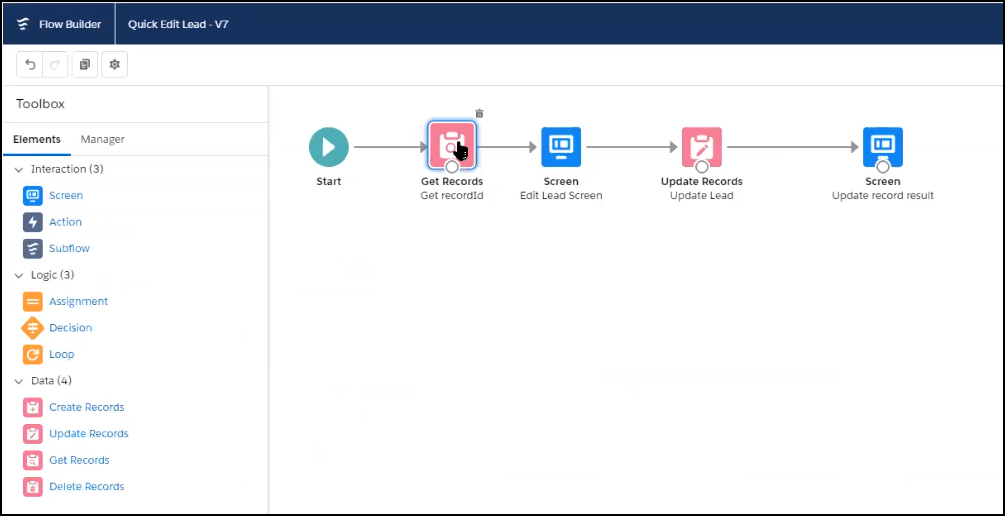
You can include processes such as Get Records, Edit Lead Screen, Update Lead Records, and confirmation window with affirmation, and rejection messages with reasons for rejection. Images of these processes are provided below.
This is a suggestion/sample flow only. You can create different, multiple flows to cater to your organization’s business needs.
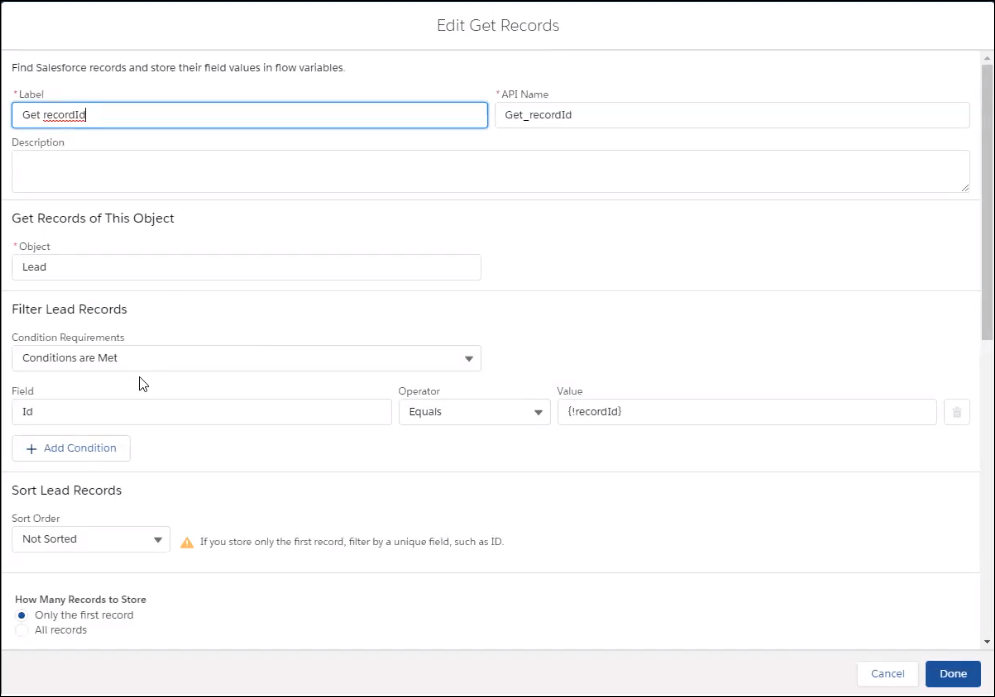
Get Records
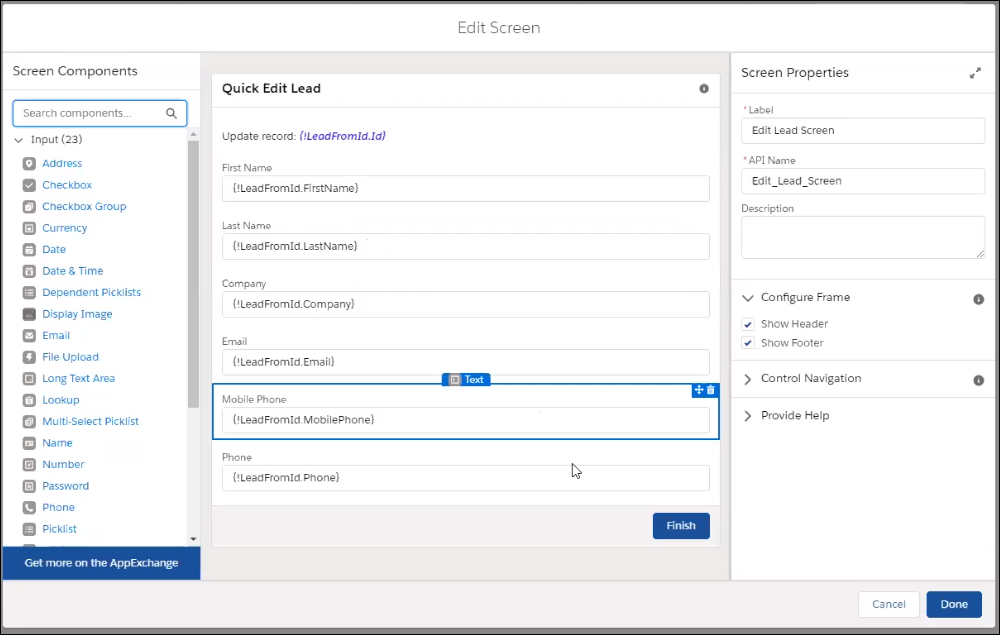
Edit Lead Screen
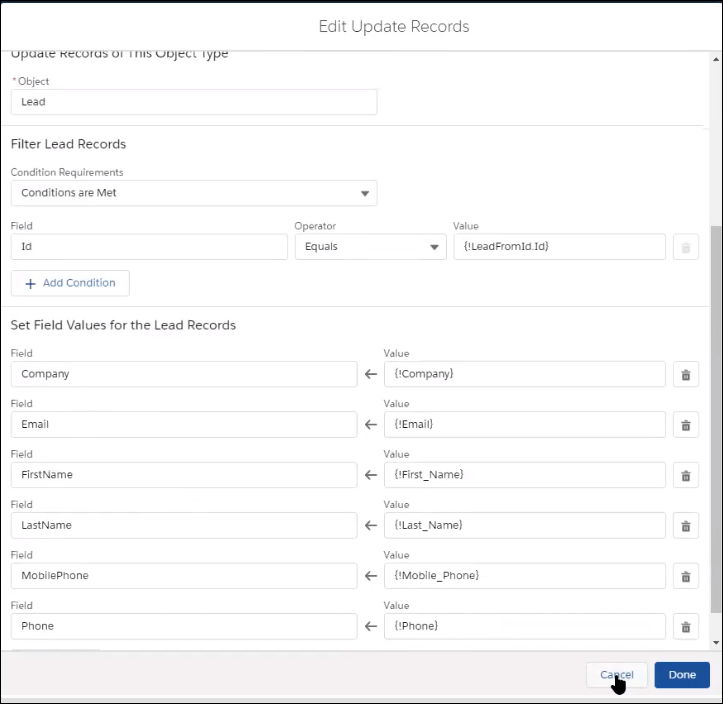
Update Lead Records
Confirmation window with affirmation, and rejection messages with reasons for rejection.
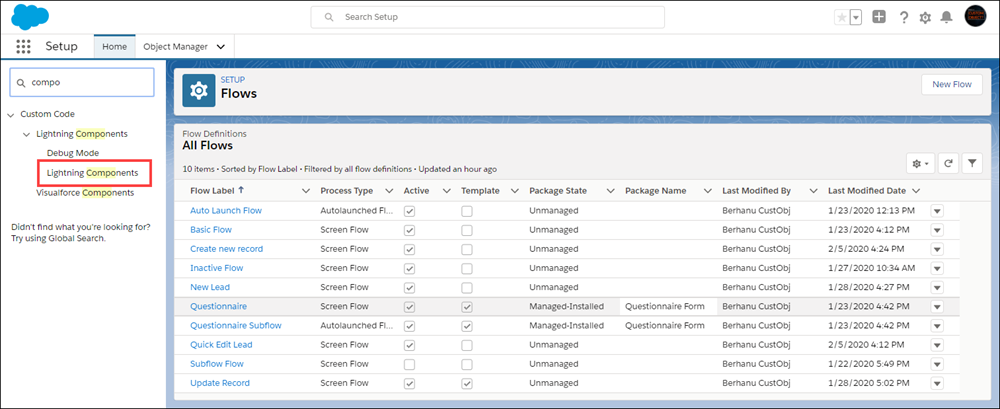
- On the Setup page, go to the Quick Find field, and search on “component”.
- Click Lightning Components.
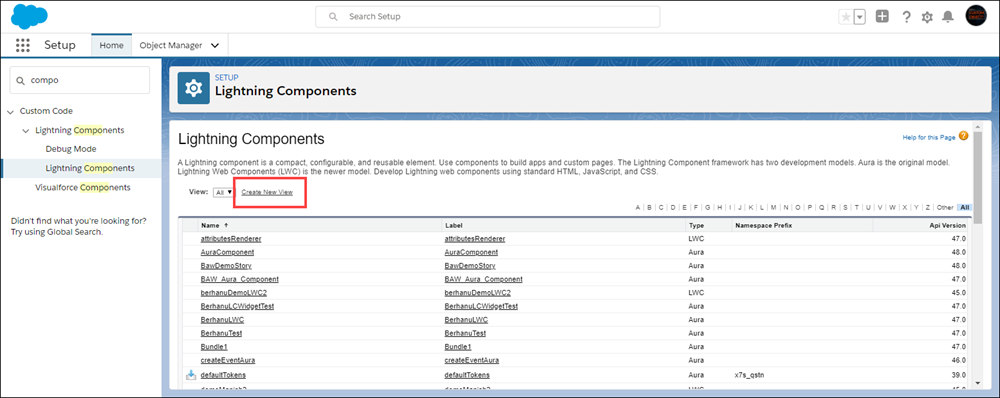
- Click the Create New View link to create a new Lightning Component using the two available development frameworks - Aura and Lightning Web Components (LWC).
Lightning Components need to be flagged and identified as IsEligible. Also, only record-level components are currently supported.
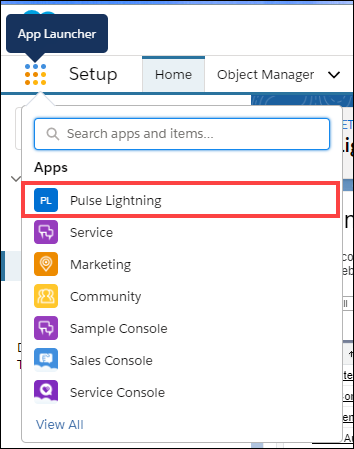
- Click the App Launcher.

- Click Pulse Lightning.
- Click the Velocify Admin tab.
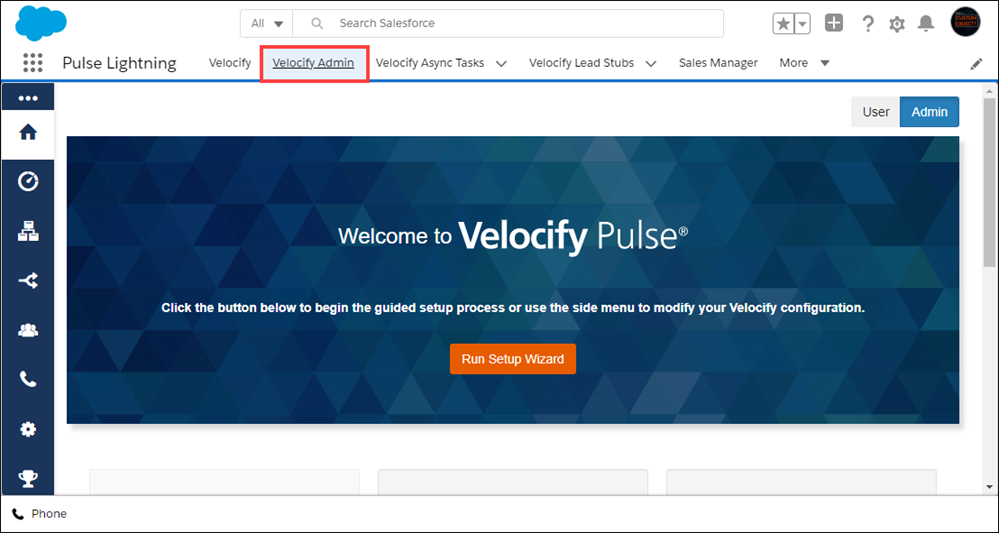
- Point to Sales Optimization, and then click Widgets.
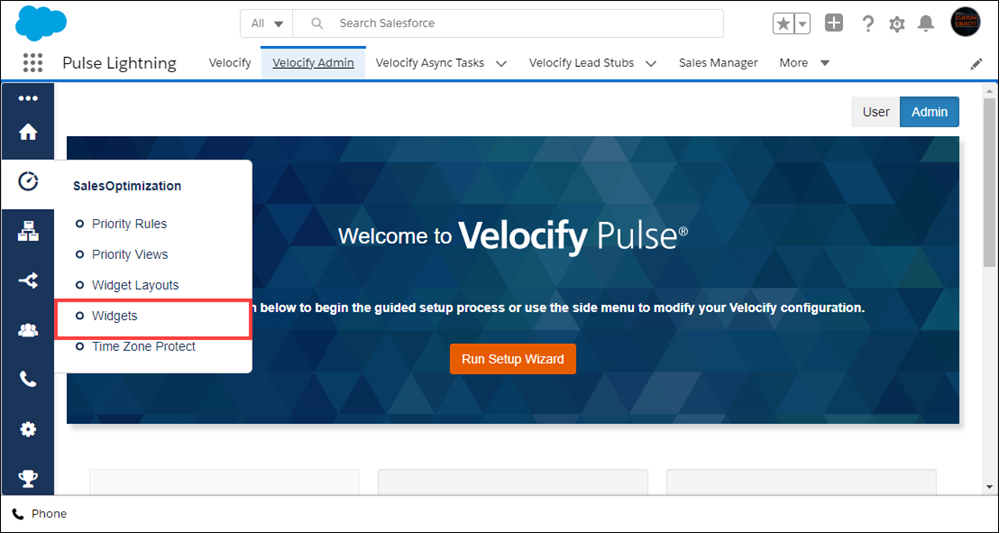
- Click the + New Widget button.
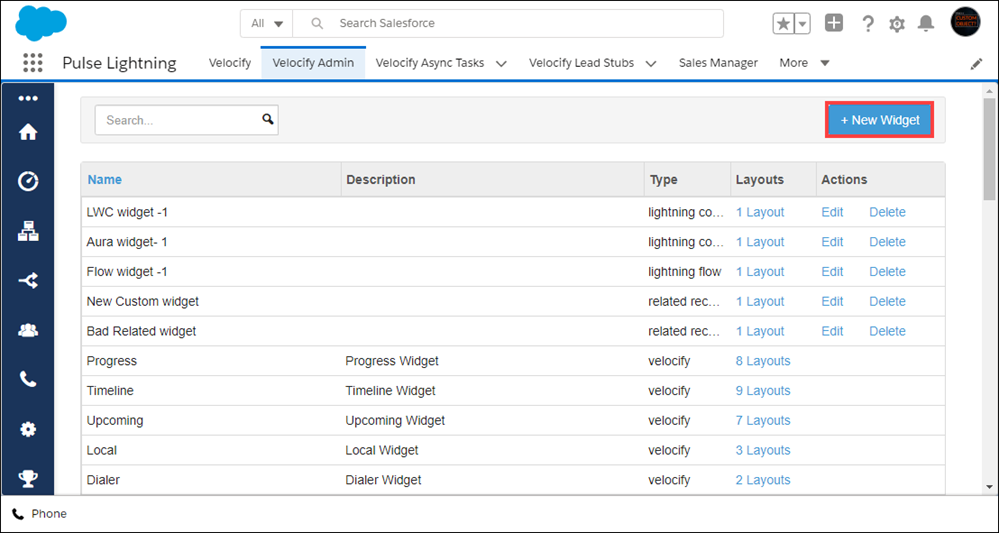
- Type a name, description for your widget.
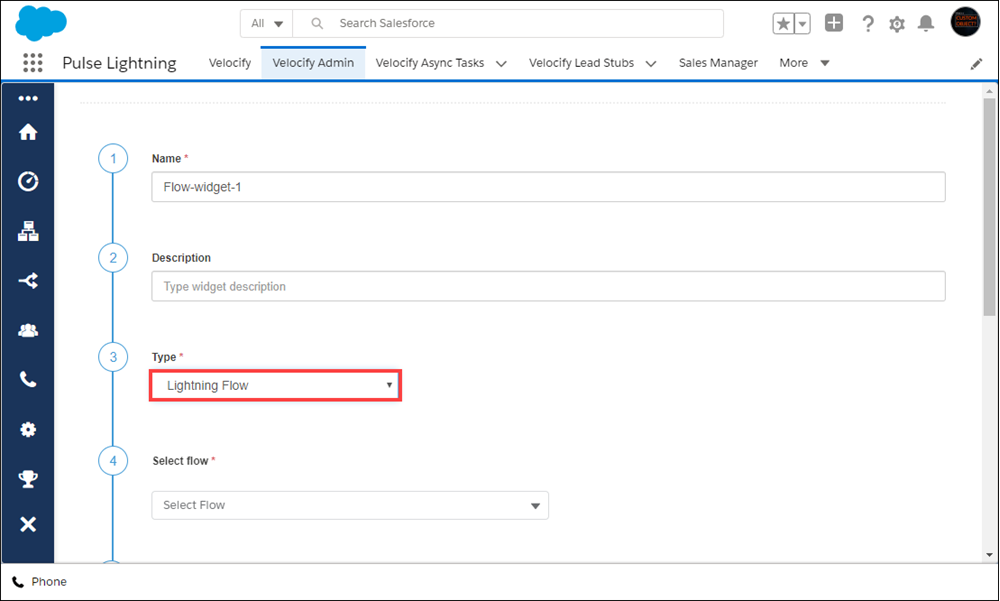
- In the Type drop-down field, note that you now have Lightning Component and Lightning Flow as options.
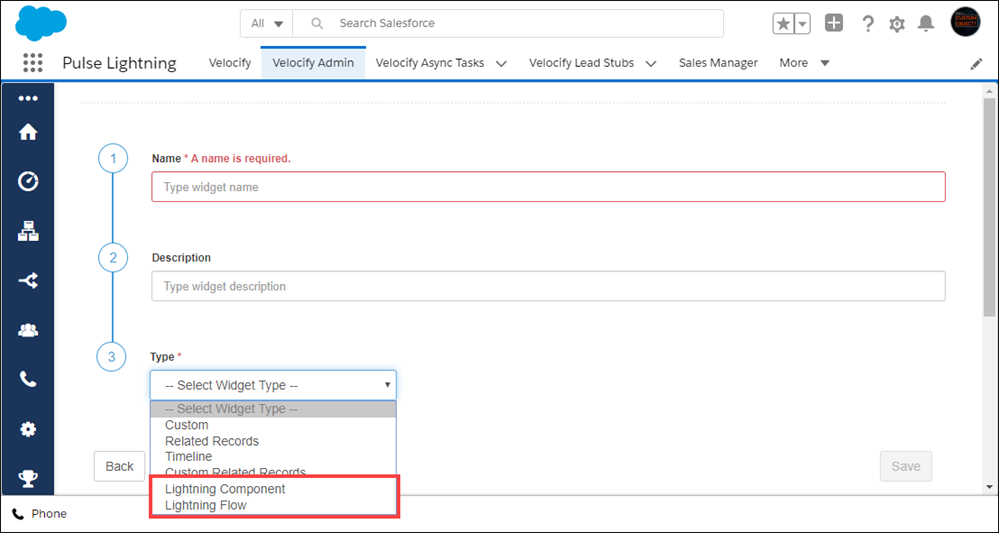
- For the purpose of this exercise, select Lightning Flow.
Selecting Lightning Component will have a similar workflow, with Lightning Component-specific values displayed.
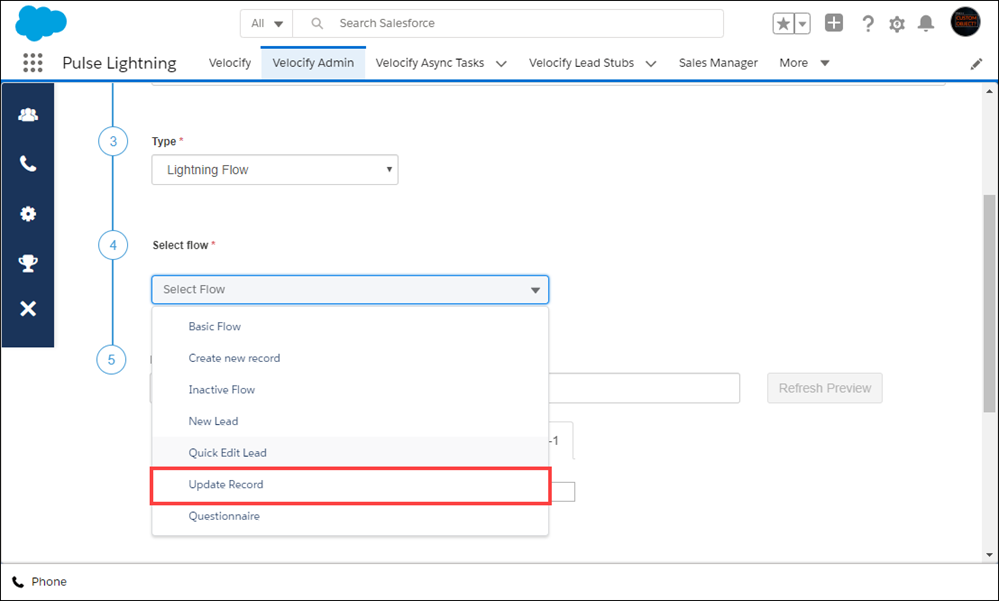
- From the Select flow drop-down list, click to select a flow that you have created, such as Update Record.
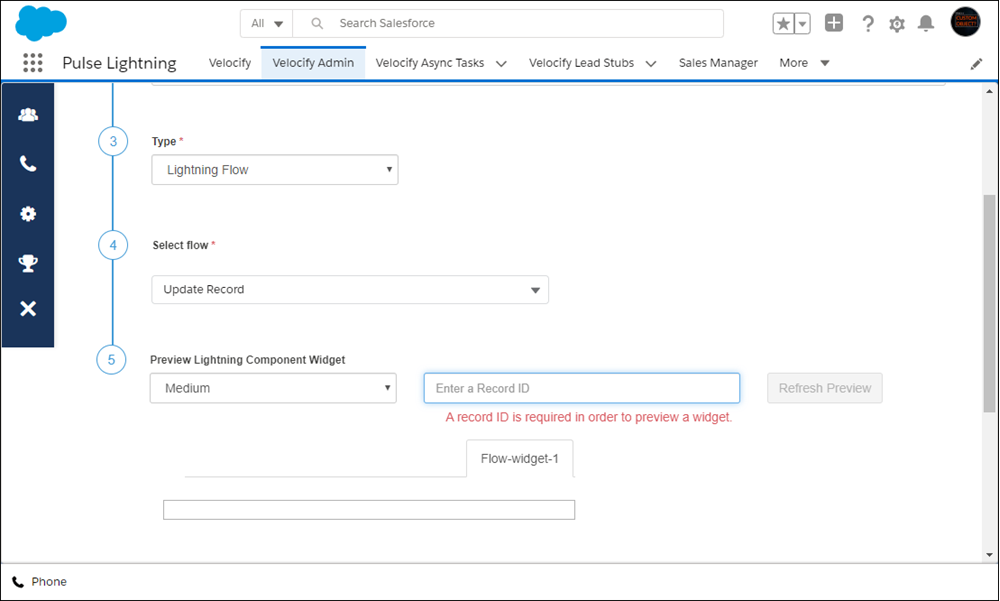
- Enter a record ID and then click the Refresh Preview button to preview the widget.
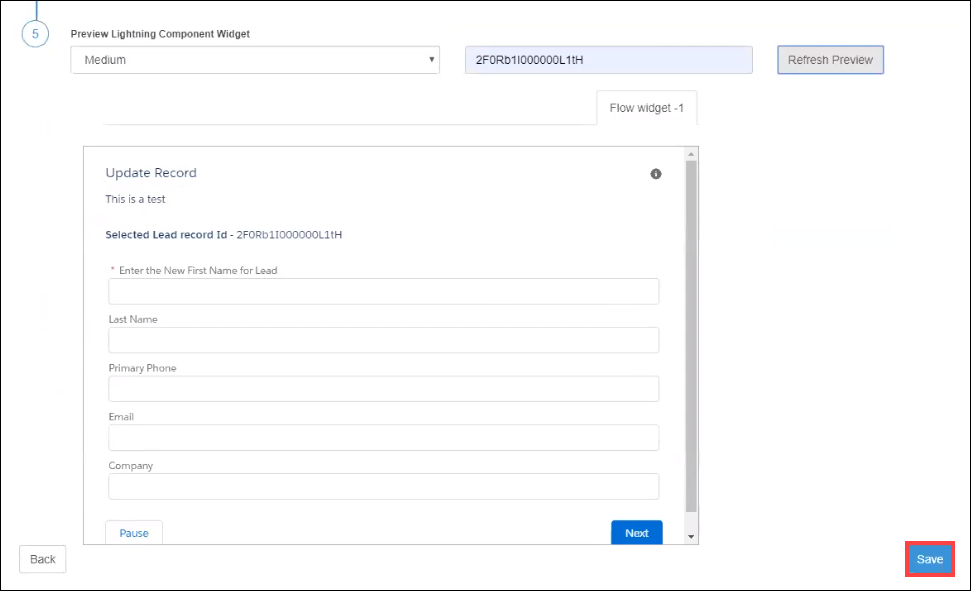
- Review the widget in the preview tab and then click Save.
You will be navigated to the Widgets page where a success message displays and the new widget is now listed.

You can create different flows or components specific to different objects. Use the Create Widget Layout feature to assign a widget layout for each business process and object.
- From the Sales Optimization menu, click Widget Layouts.
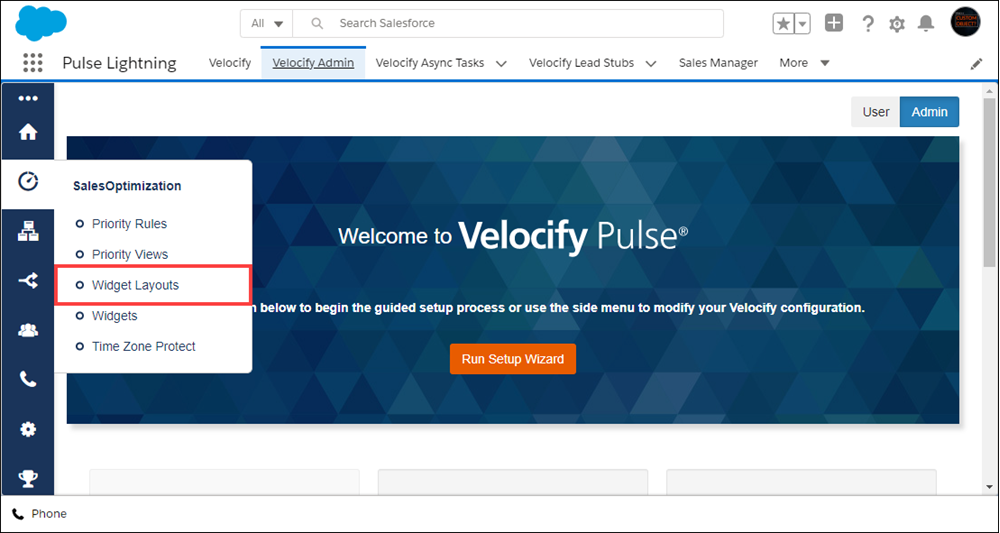
- Click the + New Widget Layout button.
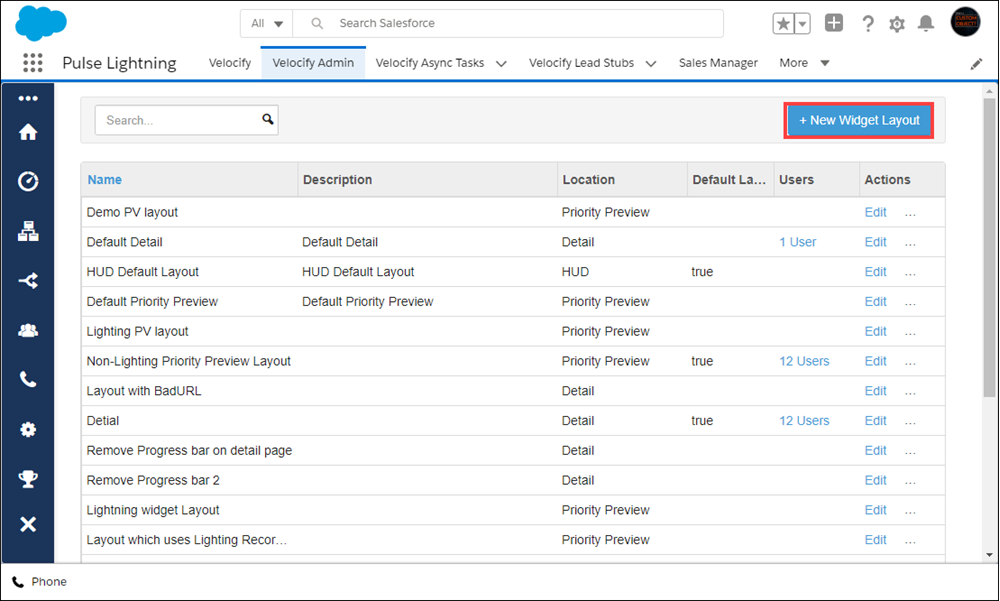
- Update information in the widget layout creation page fields.
- In the Customize Widgets section, add the Lightning Component and/or Lightning Flow widgets created earlier, to the widget layout.
- Click the Save Configuration button.
Starting with this release, when users update information in the Priority View widgets, the data in the Priority View will not refresh automatically. The value will be retained until the user refreshes the Priority View, to help track records/data without the interference of changing views.
VEL-14755, VEL-14153
Use Lightning Console apps to collect different pages within Salesforce with relevant data and displaying them in the same browser window. This helps enable a more streamlined and efficient user experience compared to opening individual browser tabs/windows.
To View Lightning Console Apps:
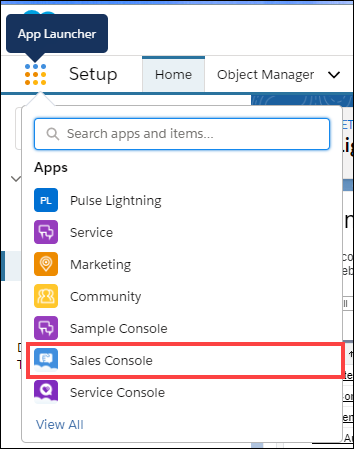
- Click the App Launcher icon, and then click one of the Console apps.
- Click any link in a lead record.
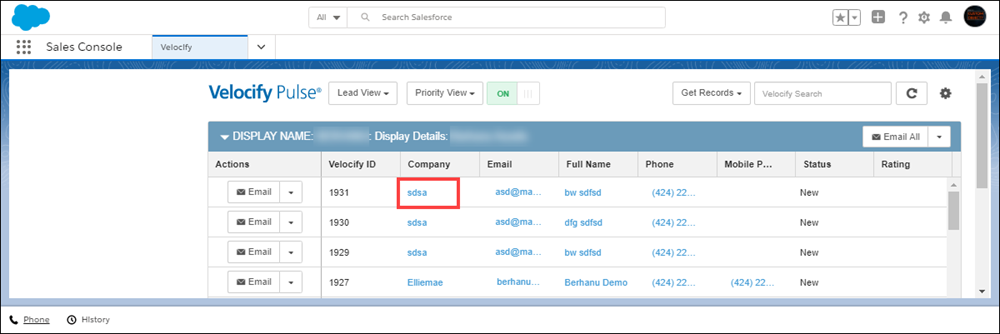
- Note that a new tab is opened within Console, instead of a new browser window/tab.
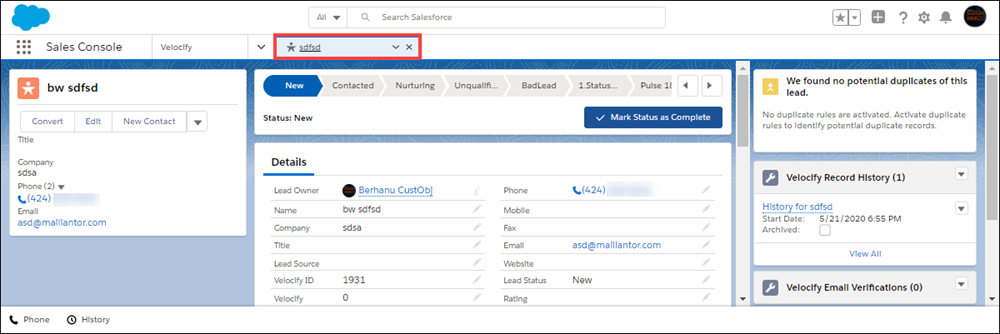
VEL-18007
Reports
Pulse admins now have access to the following two new reports:
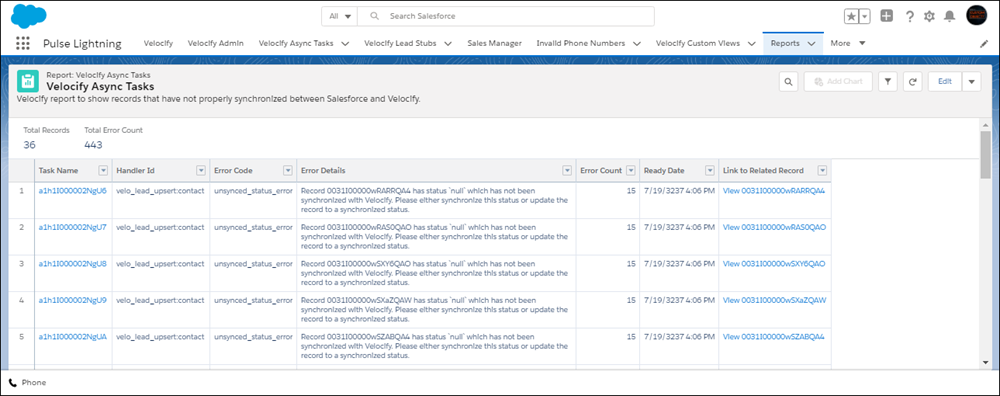
- Async Tasks: Use this out of the box report to monitor sync errors between your Pulse and LeadManager/LoanEngage instances.
- Distribution Log: Use these ad-hoc reports to manage call distribution, and monitor agent availability, call assignments, and distribution program health.
- Log into Pulse as an administrator, and from the menu bar, click Reports.

- On the left navigation panel, click All Folders.
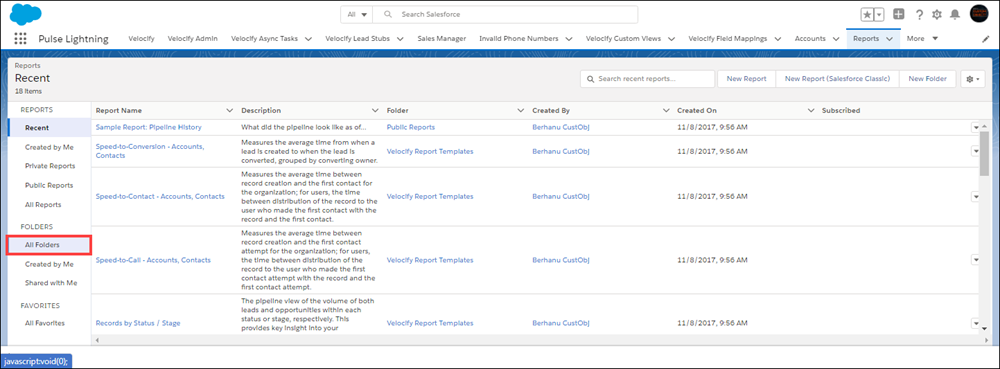
- Click Velocify Report Templates.

- Click Velocify Async Tasks.
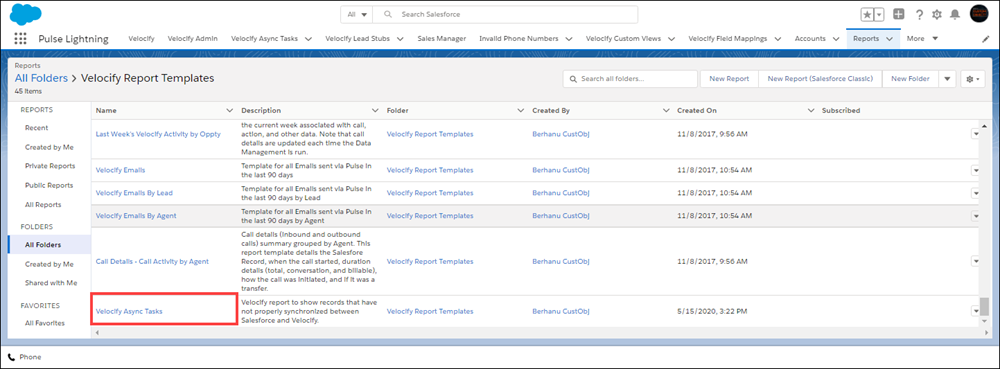
- Use the Velocify Async Tasks report to view records that have not synchronized between Salesforce and Velocify.
- Click the Sales Manager tab.

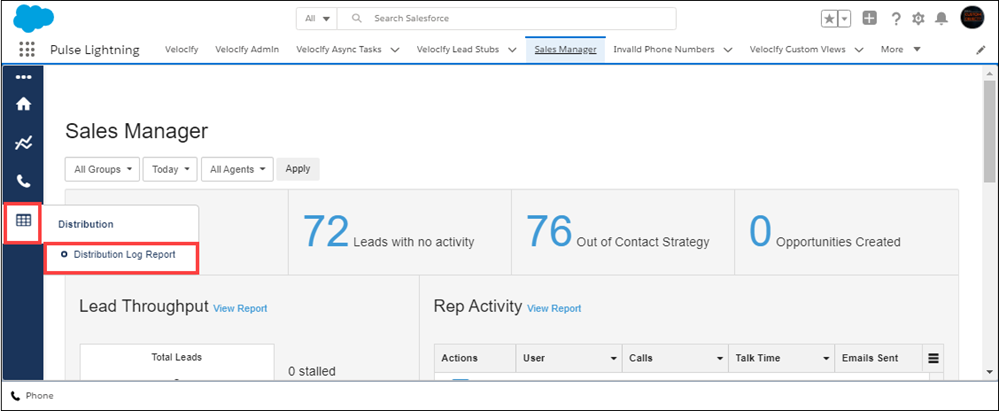
- On the menu bar, point to the new Distribution icon, and then click Distribution Log Report.
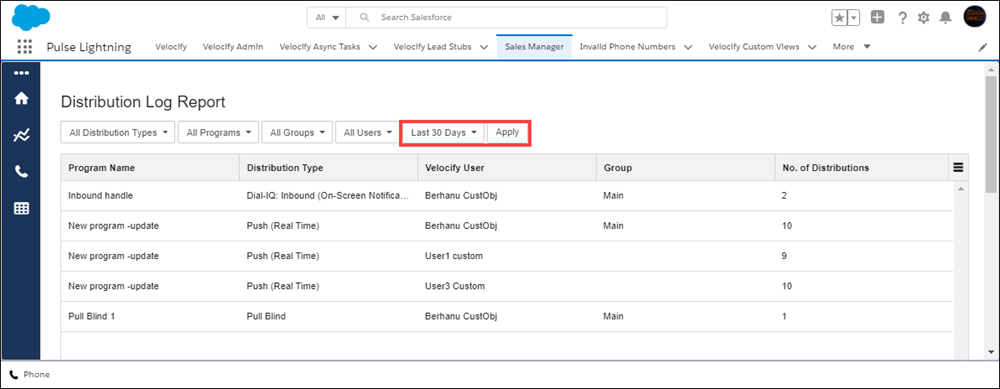
- Select filters from the drop-down lists provided at the top of the page, and click the Apply button to view reports based on the selected filter(s).

The default is set to All – All Distribution Types, All Programs, All Groups and so on. You can select a specific distribution type, and/or distribution program etc. for a summary view of the records worked on by your users. This helps you monitor the number of leads assigned to each user and manage distribution of leads across all users.
VEL-18251, VEL-15331
Distribution Programs
Prior to this release, Velocify Pulse administrators could only set lead distribution caps at the program level. With this release, admins can also set distribution caps based on category, thereby ensuring enhanced and more equitable distribution of lead records between users and groups. Also, since multiple distribution programs can have the same category, this feature enhances the flexibility in setting distribution caps.
To support the new distribution caps by category feature, the following updates have been made to the application:
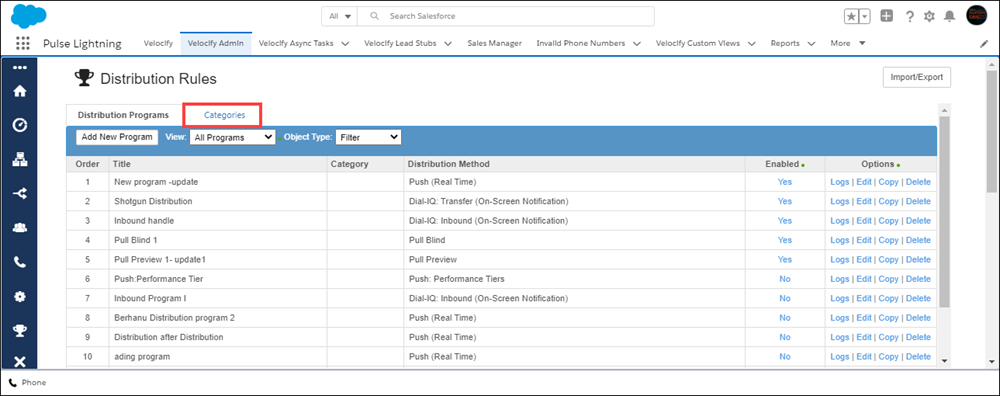
- Categories tab added to the Distribution Rules page
- Category drop-down added to the Program Details tab of the Edit Distribution Rules page
- Category restriction added to the User Filters: Who receives records tab of the Edit Distribution Rules page
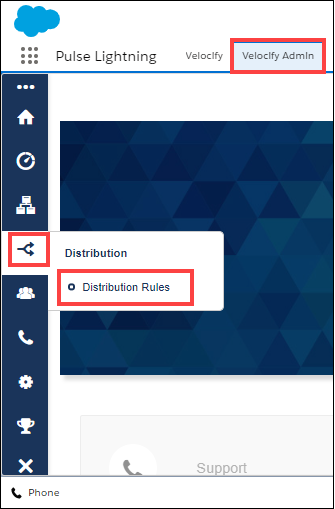
- Click the Velocify Admin tab, point to Distribution and then click Distribution Rules.
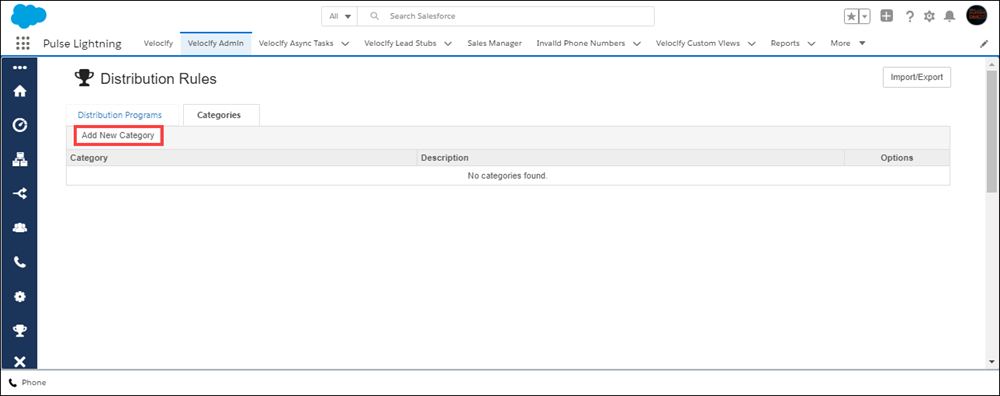
- On the Distribution Rules page, click the Categories tab.
- Click the Add New Category button.
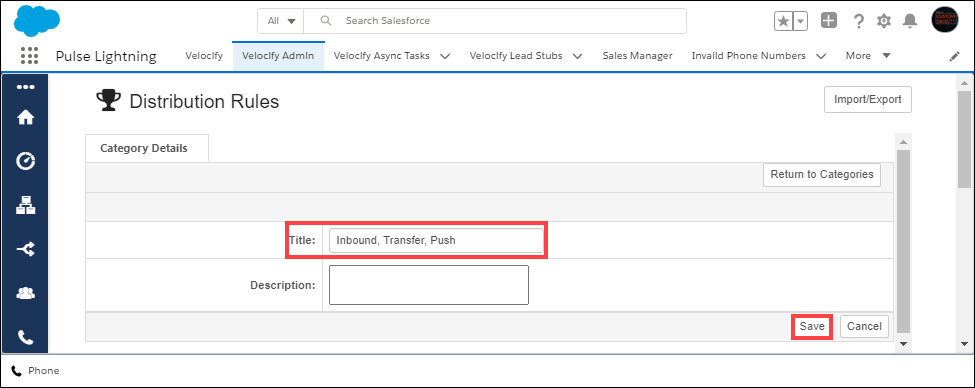
- In the Title field, type a name for the category, and click the Save button.
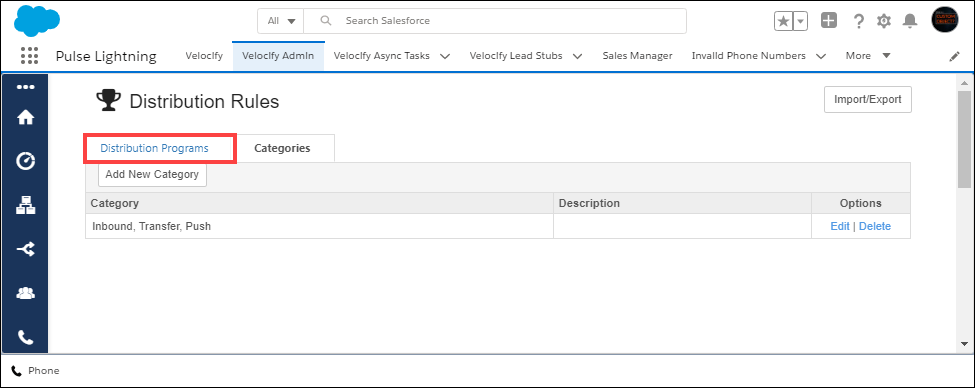
- To add this category to a distribution rule, click the Distribution Programs tab.
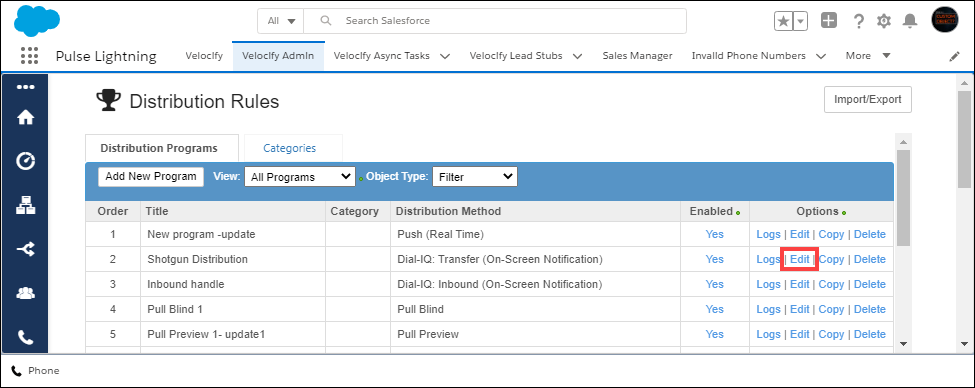
- Click the Edit link for the distribution program to which you want to add the category.
- On the Program Details tab, go to the Category field, and select the category you created from the drop-down list.
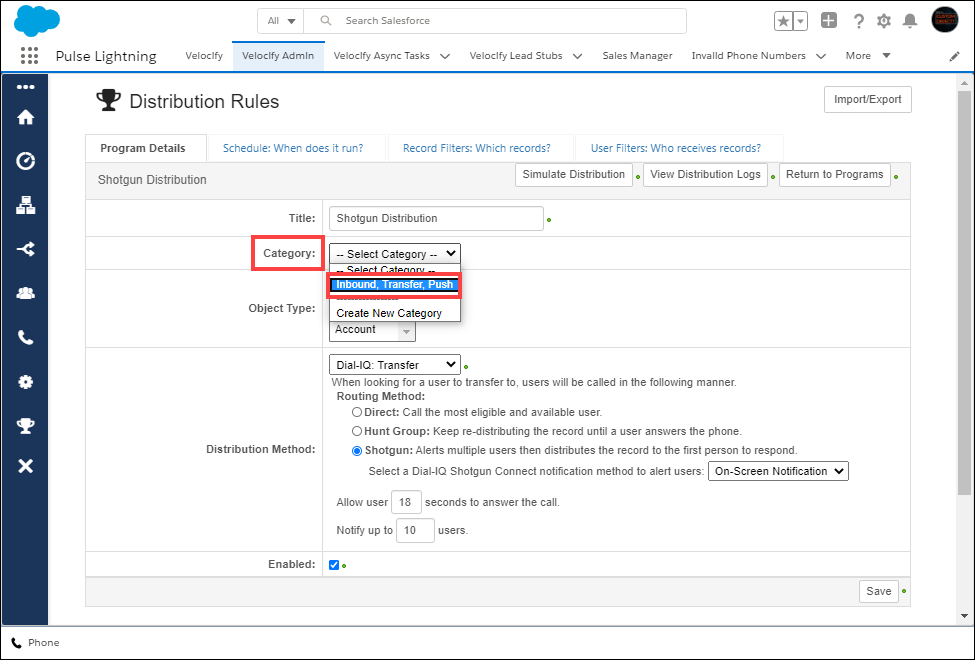
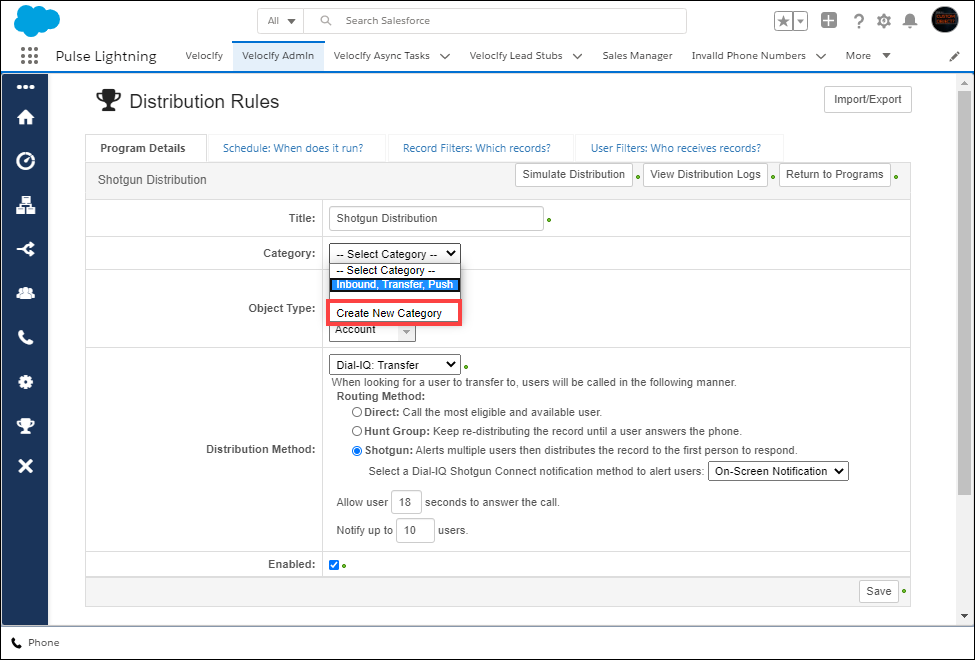
- You can also create a new category here. To create a new category, from the Category drop-down list, click Create New Category.
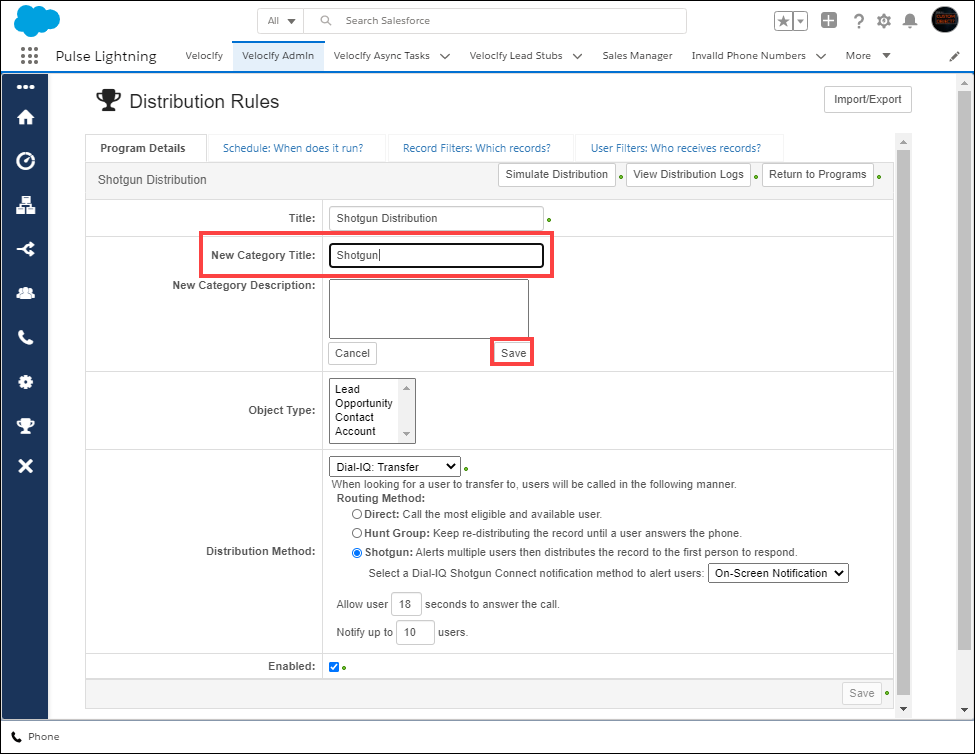
- In the New Category Title field, type a name for the category, and then click the Save button in the New Category panel.
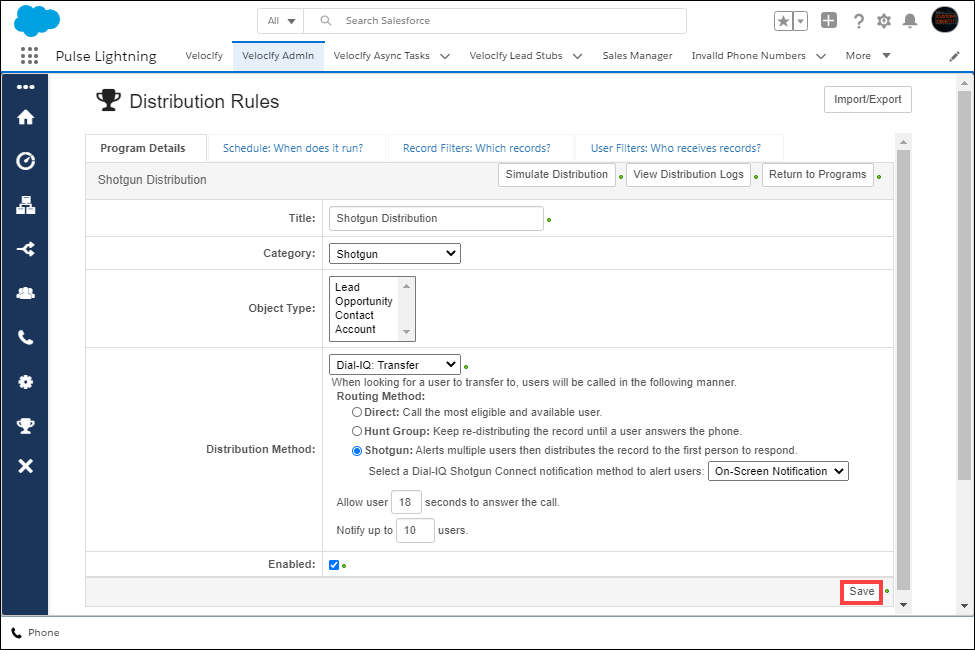
- Click the Save button at the bottom-right corner of the Program Details tab.
- Go to an Edit Distribution Rule page and click the User Filters: Who receives records tab.
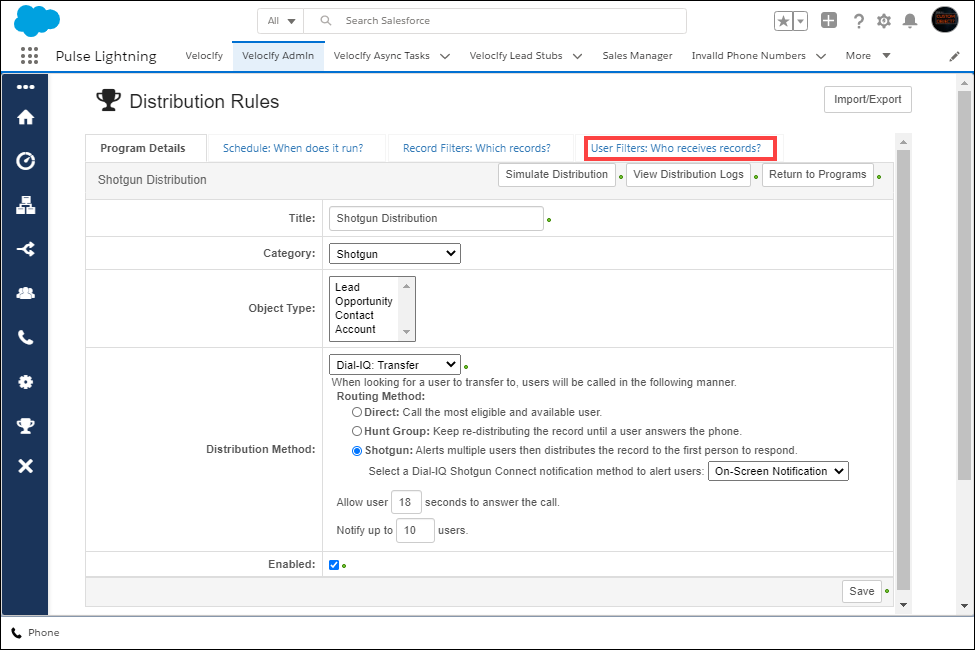
- Note that in addition to the Set User Max Records restriction, a Category Caps restriction is now available.

VEL-17359
Pulse User Updates
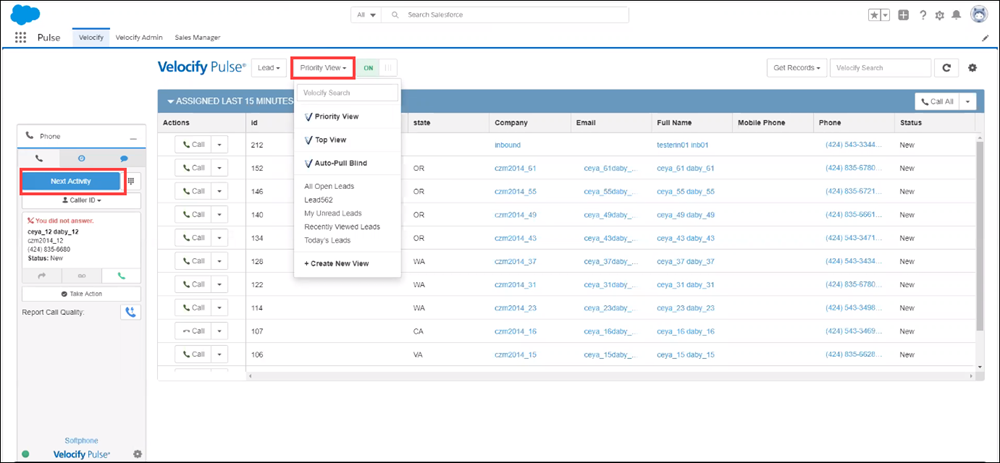
Use the new Auto-Pull Blind and Get Next options to quickly self-assign the next available record and work on it immediately. This feature is particularly useful in high volume call environments for users to easily access the next available record.
To Use Auto-Pull Blind and Get Next:
- From the Priority View drop-down list, click Auto-Pull Blind.
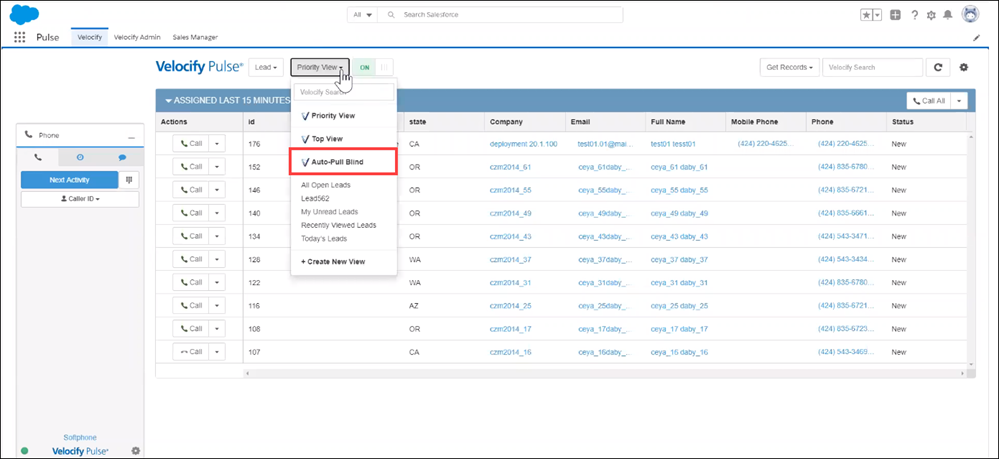
- When the assigned record is displayed, if the record includes a phone number, the Dialer HUD automatically opens and the calls the lead’s phone. A Get Next button also displays to help you get to the next available lead, directly from the HUD.
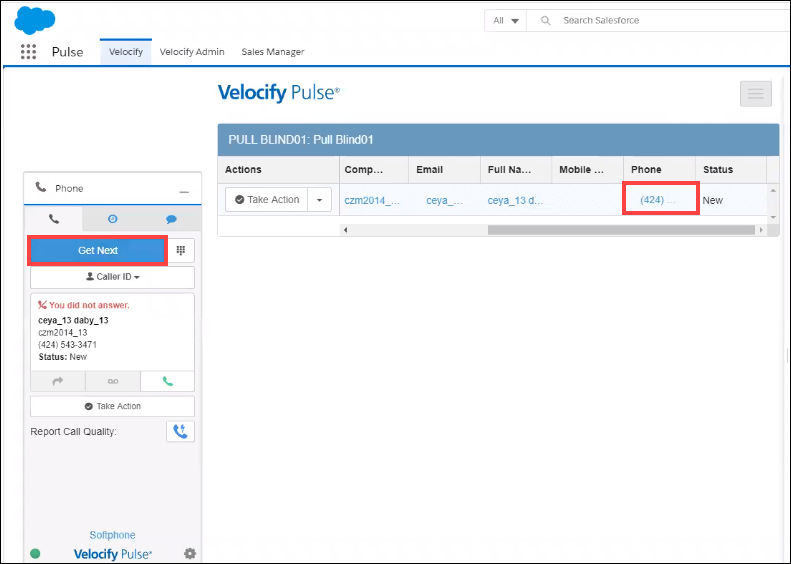
- As you click Get Next, the page refreshes to display the next record, and a call is placed to the record from the HUD.
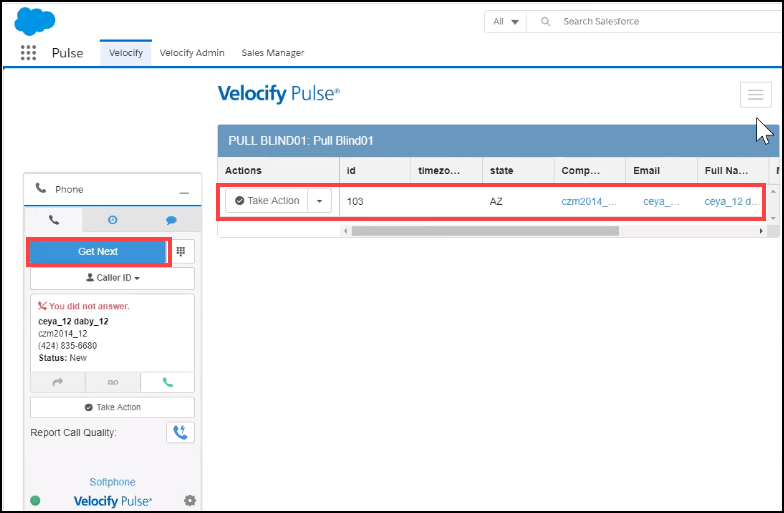
- When you return to Priority View, the Get Next button updates to the Next Activity button.
VEL-12430
