Feature Enhancements
Custom Logo
Starting with this release, authorized users such as Velocify administrators have the ability to update the Velocify logo with their own corporate logo. To support this feature, Settings has been updated with a UI Settings option.

The Velocify logo is the default/out of the box option. You can update this with your company’s logo and revert to the Velocify logo from your custom logo.
Selected logos are displayed in the following two locations:
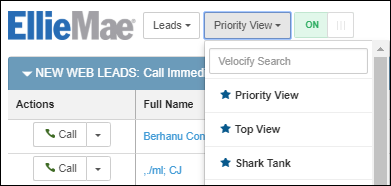
- Priority View

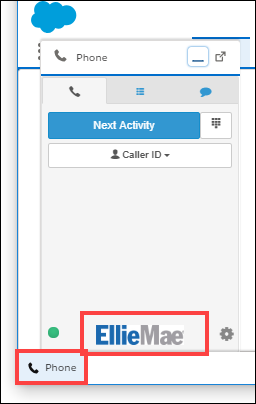
- Dial-IQ Dialer HUD

When you customize the logo, Pull Programs listed under your Priority View drop-down list display Star icons instead of the Velocify logo.

- Log into Velocify Pulse as an administrator.
- From the Admin tab, click Settings, and then UI Settings.

- On the UI Settings page, read the logo specification recommendations, and click the Update link to upload an image file that matches the criteria.

- Use the options in the Update Logo window, to replace the Velocify Pulse logo with your custom logo.

- Use the Upload Image option to add images from your computer.
- After you successfully replace the logo, your image file will be saved as a Static Resource in Velocify. For subsequent updates, you can select your image file from the Select Static Resource option. Since you are accessing this setting for the first time, there are no saved images, so you can only use the Upload Image option to update the logo.
- Drag and drop files or click the Click to Browse button to upload your image file. For the purpose of this exercise, we will use the Click to Browse option.

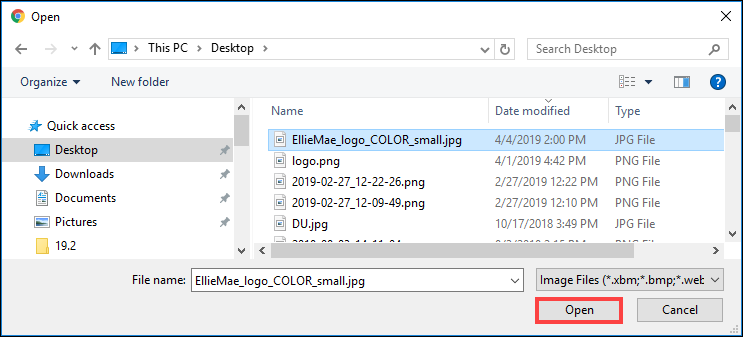
- Navigate to your image file on your computer, select it, and then click the Open button.
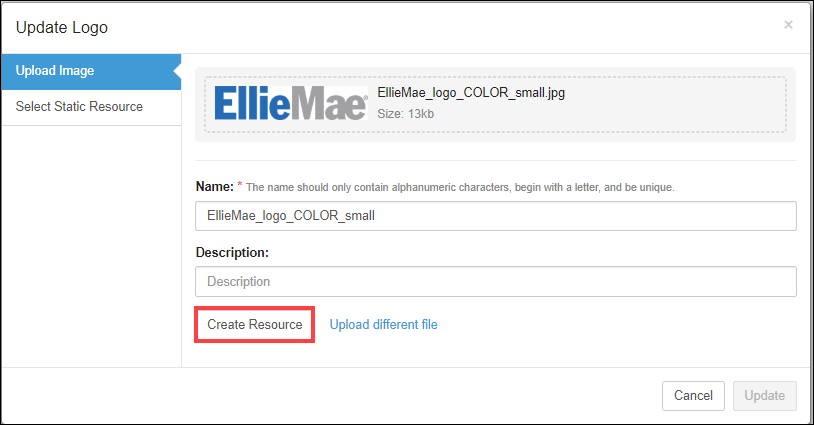
- Click the Create Resource button.
- Click the Update button.

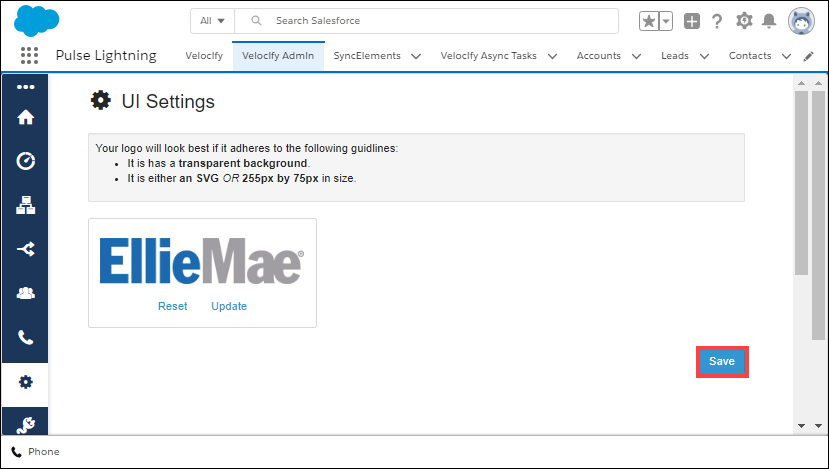
- Back on the UI Settings page, click the Save button.
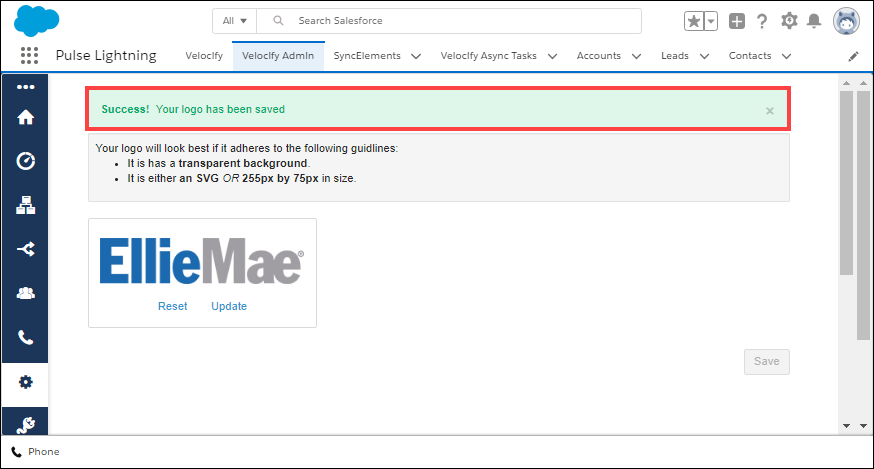
A message will display for a few seconds confirming the success of the image update.
- Click the Velocify tab to view the updated logo on your Priority View.

- If your instance has Dial-IQ enabled, click the Phone icon to view the updated logo in the HUD.
- Click the Priority View drop-down list to view your pull programs that are now updated with Stars (instead of Velocify logos).
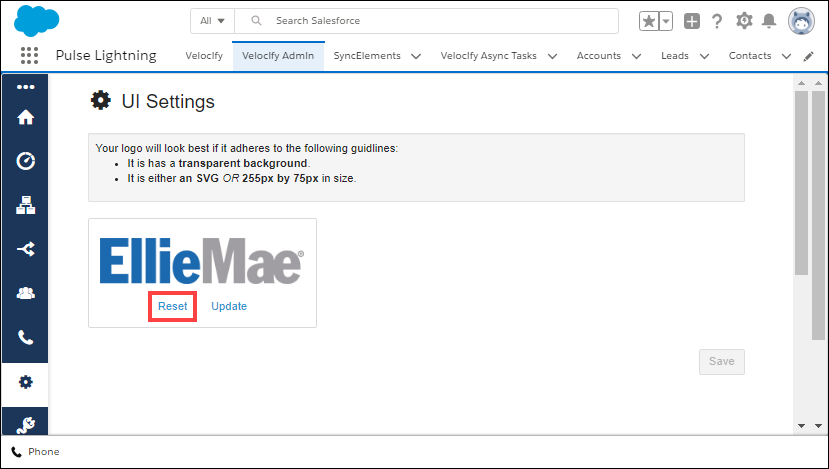
- Go to the UI Settings page (Velocify Admin> Settings> UI Settings).
- Click the Reset link.
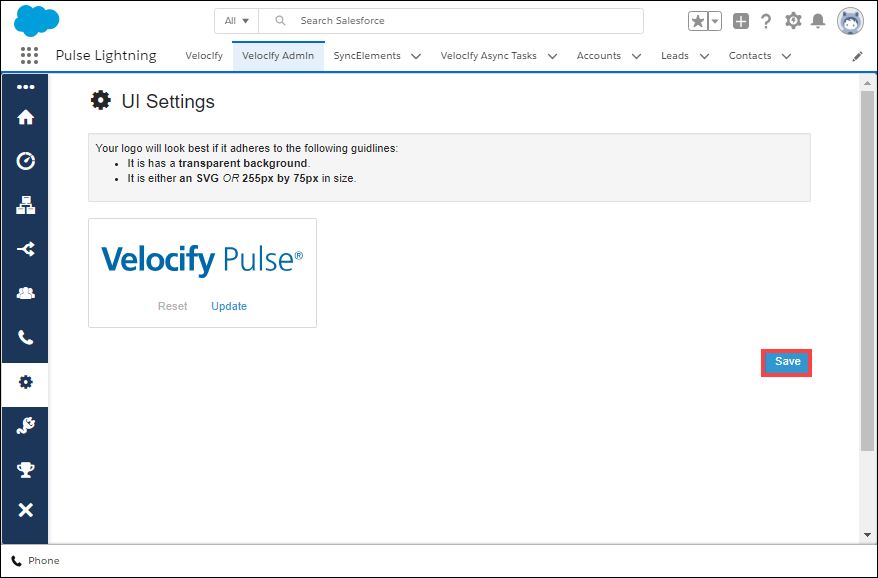
- Click Save.
New Detail Page Widget without Progress Bar
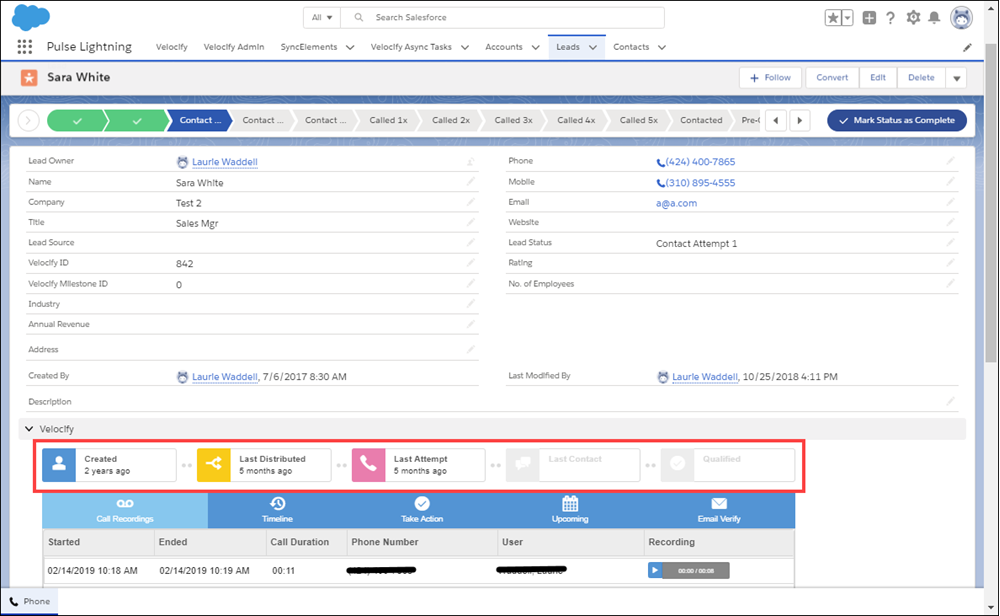
The Velocify Progress Bar displays a record’s contact strategy milestone within the Detail page.
A new Disable Progress Bar check box has been added to the Edit Widget Layout Configuration page. When this check box is selected, the Velocify Progress Bar will not display on the Detail View page.
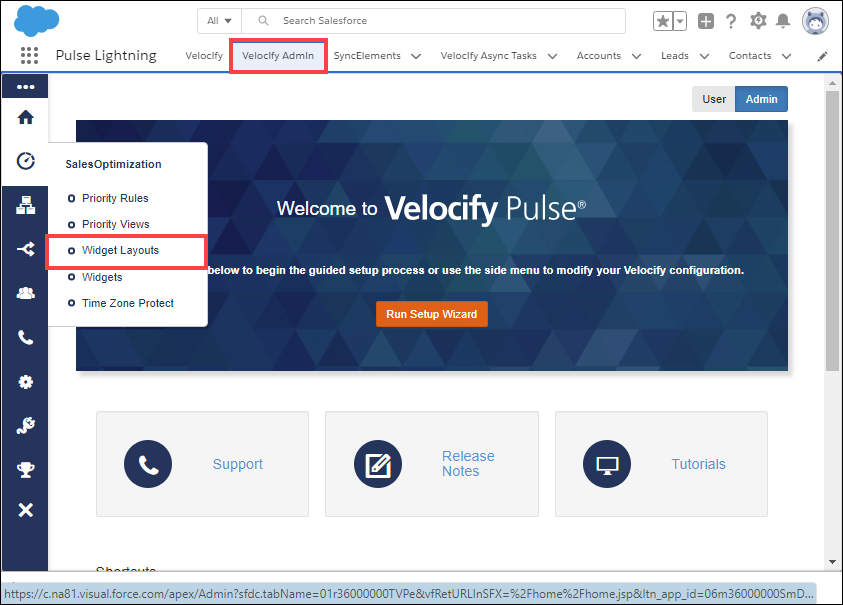
- Click the Velocify Admin tab, point to SalesOptimization, and then click Widget Layouts.
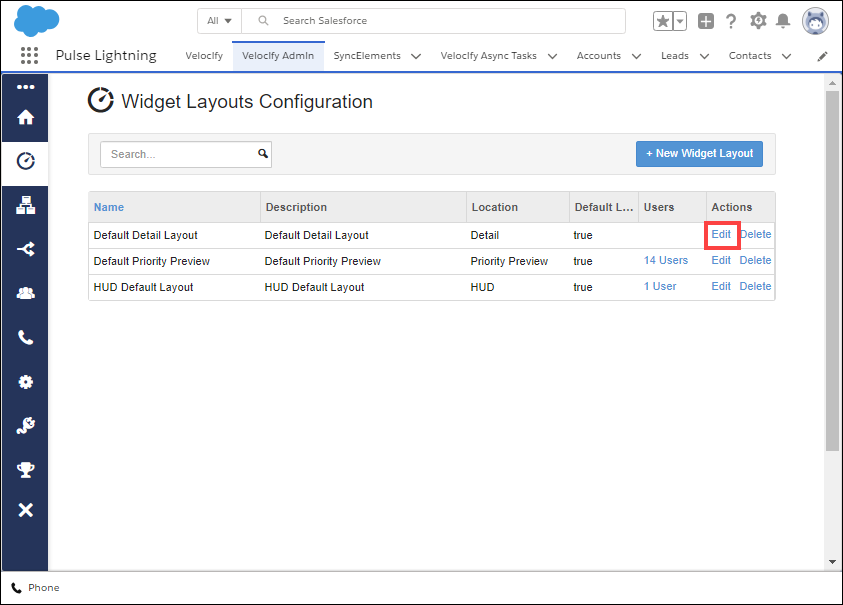
- On the Widget Layouts Configuration page, click the Edit link corresponding to the widget you want to update.
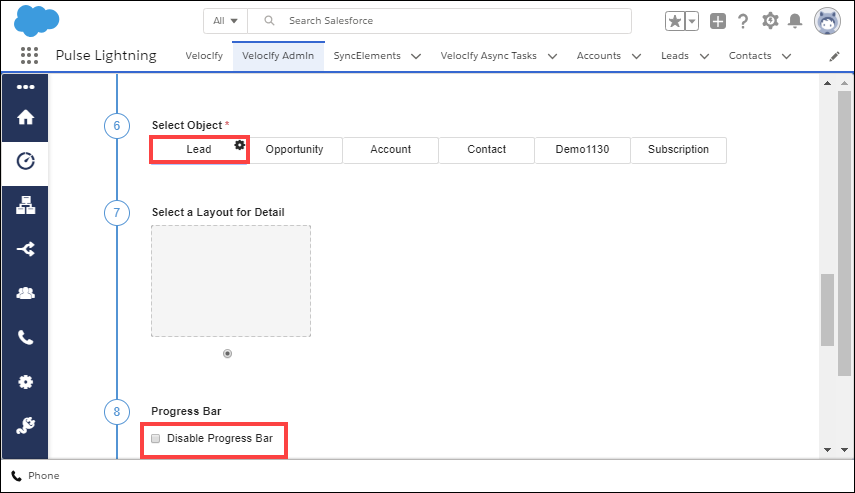
- On the Edit Widget Layout Configuration page, go to section 6. Select Object, and select any object.
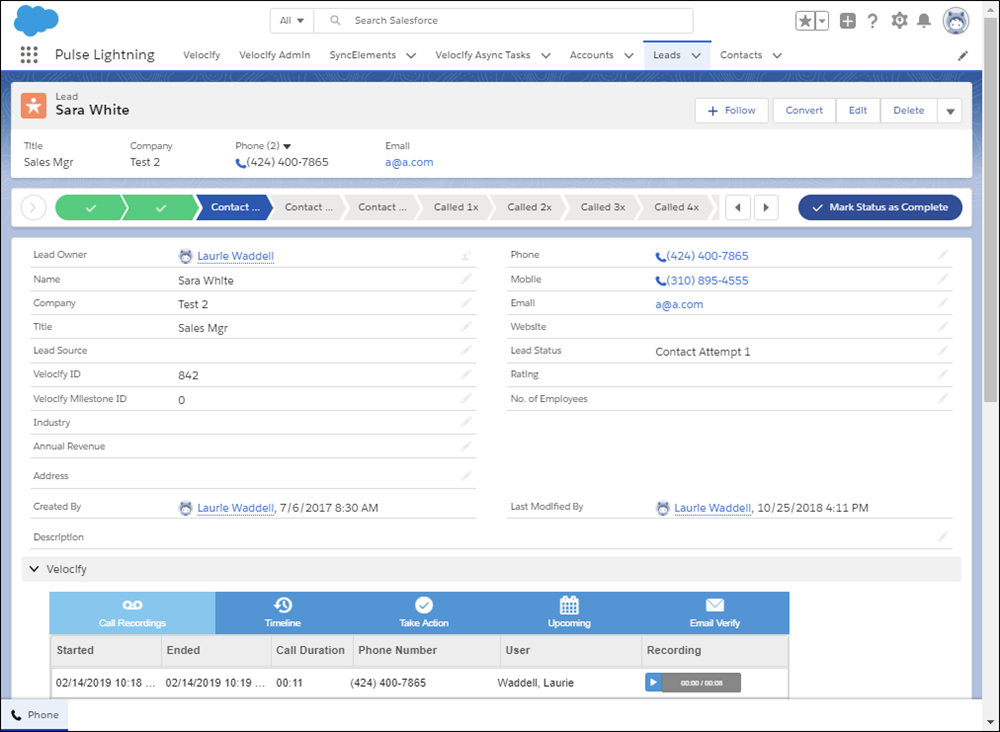
The Disable Progress Bar check box is clear by default (indicating that the Pulse milestone status bar is being displayed on the Lead Detail page).
- You can go to a Lead Detail View page to confirm that the Pulse milestone status bar is being displayed.
- Back on the Edit Widget Layout Configuration page in Velocify Admin, select the Disable Progress Bar check box, and click the Save Configuration button.
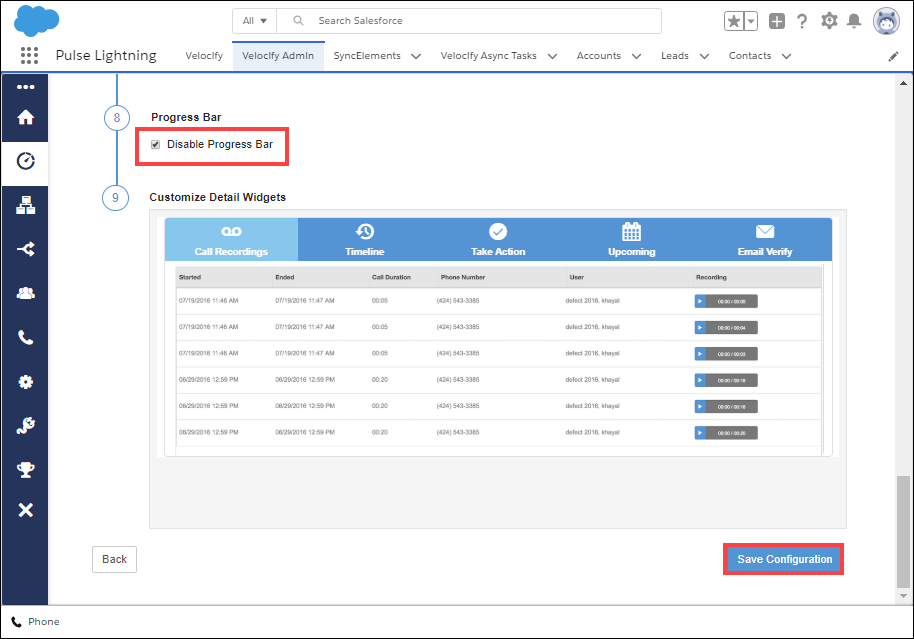
- To view the results of this setting, click the Velocify tab, click any lead to go to the Lead Detail View page, and confirm that the Velocify Pulse bar is no longer displayed.
Bulk Assign Licenses Using Data Loader
Velocify Administrators can bulk update Velocify Licenses using the Salesforce Data Loader. Update the Velocify_License__c field to True to assign a license, and False to unassign a license.
If you do not want this option available for your instance, contact Velocify Pulse Support at ps-techsupport@elliemae.com to request the feature disablement.
Pull Distribution for Non-Lead Objects
Pull Distribution for Leads was introduced with Velocify Pulse 18.2 Major Release. Starting with this release, Pull Distribution will work with all Velocify-supported objects, such as Accounts, Opportunities, Contacts, and Custom Objects.
For more information on Pull Distribution, see the Pull Distribution section of the Pulse User Guide – April 2018.
The Get Leads button on the Priority View has been renamed to Get Records as a part of this feature enhancement and can be used to pull all Velocify objects, including Leads.
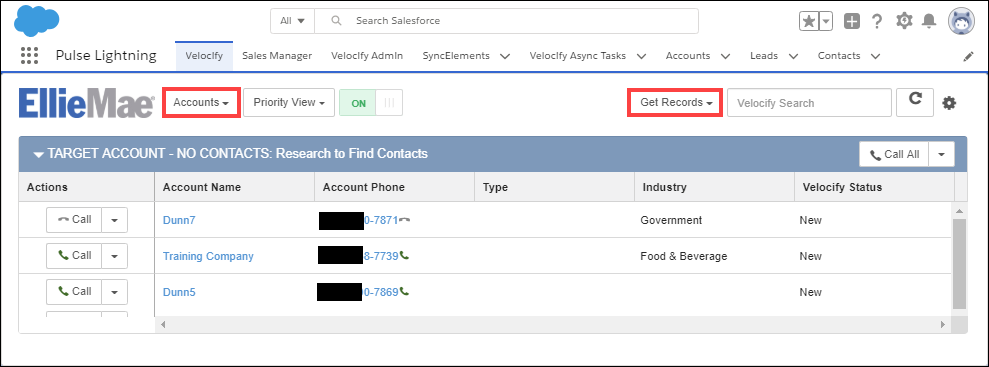
You can use the Get Records button only if your Velocify Pulse administrator has defined Pull Distribution programs for your instance.
The Priority View drop-down list has been updated so that Pull Programs are no longer displayed here.
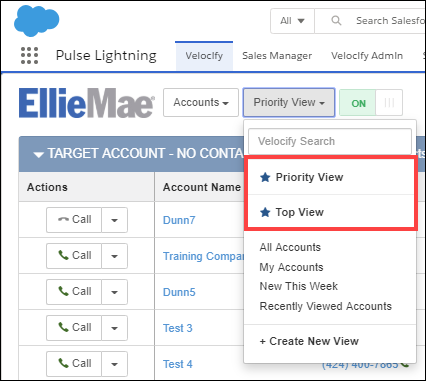
The Get Records button functions similar to the Get Leads button available prior to this release.

Pull Blind programs are listed on top. You can use this option to select the number of records you want to assign to yourself.
In the Pull Distribution window, go to the Desired Quantity field and define the number of records you want to assign to yourself. Click the Get Records button.
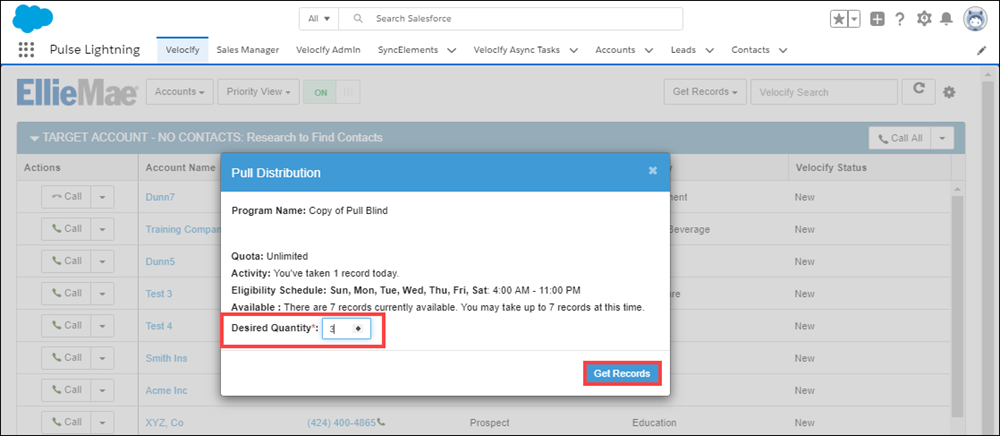
Verify the record assignment in the success message and then refresh your browser.

Pull Previews are listed below Pull Blind and function similar to the Pull Preview/Take Lead feature, available prior to this release. You can use this option to manually assign specific records to yourself.
Click the Get Records button and from the drop-down list, select your Pull Preview program.

Select the check boxes corresponding to the records you want to assign to yourself and then click the Take Records button.
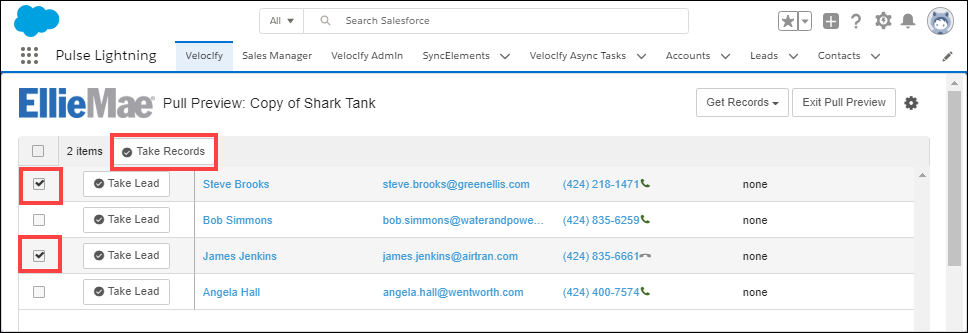
Verify the record assignment in the success message and then refresh your browser.

