Velocify LeadManager 21.3 Release: Feature Enhancements
This section discusses the updates and enhancements to existing forms, features, services, or settings that are provided in this release.
Rebranding
ICE logos, copyright information, and references in emails/product have been updated to ICE Mortgage Technology.
-
Velocify logo replaced by a new Velocify logo

-
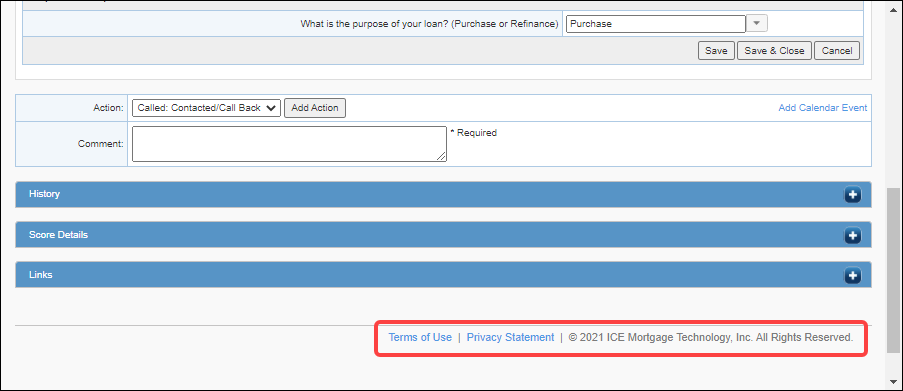
Updated copyright information, Terms of Use, and Privacy Statement on the footer of every Velocify page
Lead Management
A new Lead Form Types setting/page is now available in Administration> Form Builder. Admins can use this setting to create Lead Form Types, and then configure fields in Form Builder to display only when the lead matches a particular Lead Form Type. Permission to access and edit the Manage Lead Form Type page can be configured based on user role.
By default, the Manage Lead Form Types admin page is only enabled for Velocify instances that already use Lead Form Type. It will be disabled for all other instances. Contact ICE Mortgage Technology if you would like to enable this feature.
-
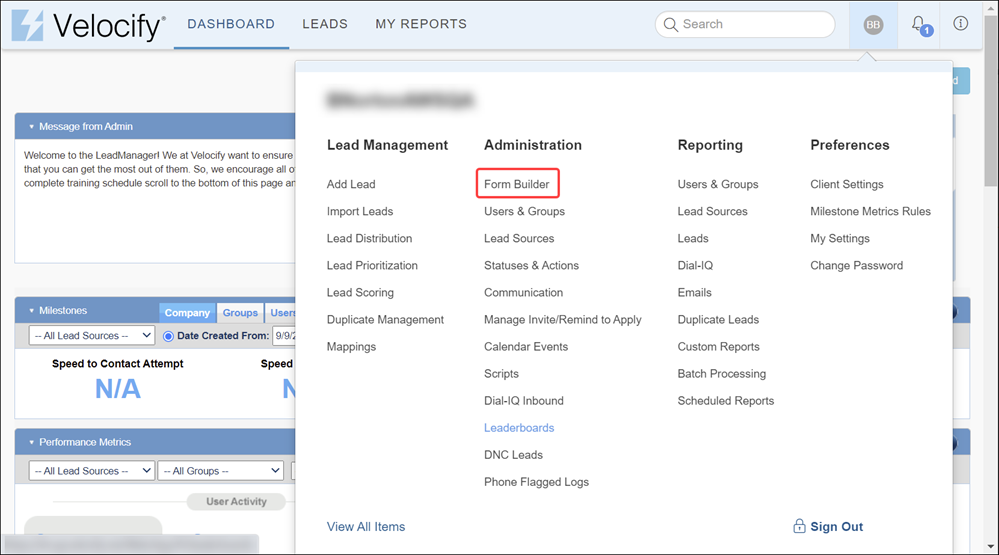
Log in as a Velocify administrator and from the Administration menu, click Form Builder.
-
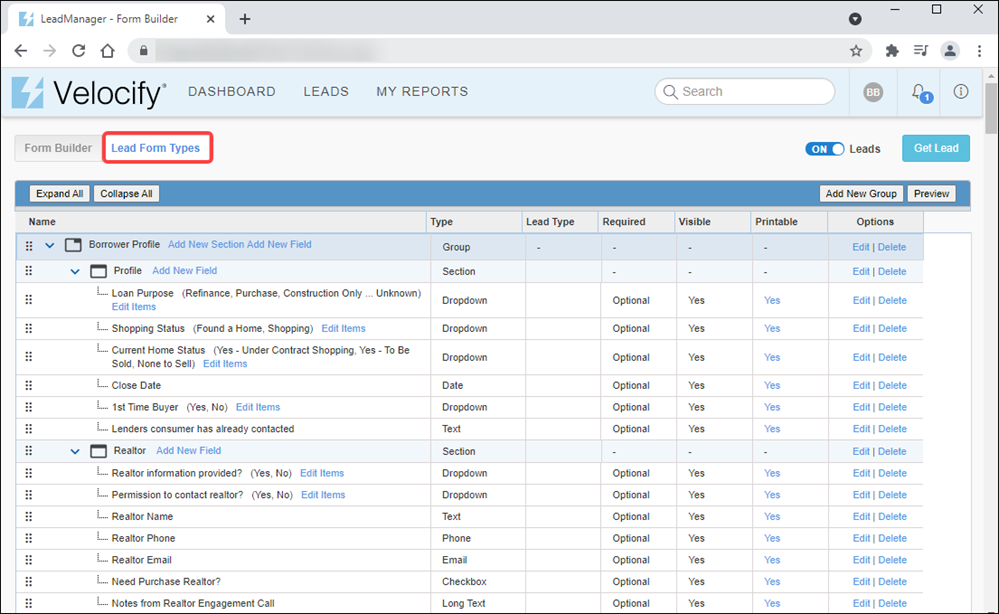
In the LeadManager - Form Builder page, click the Lead Form Types tab.
-
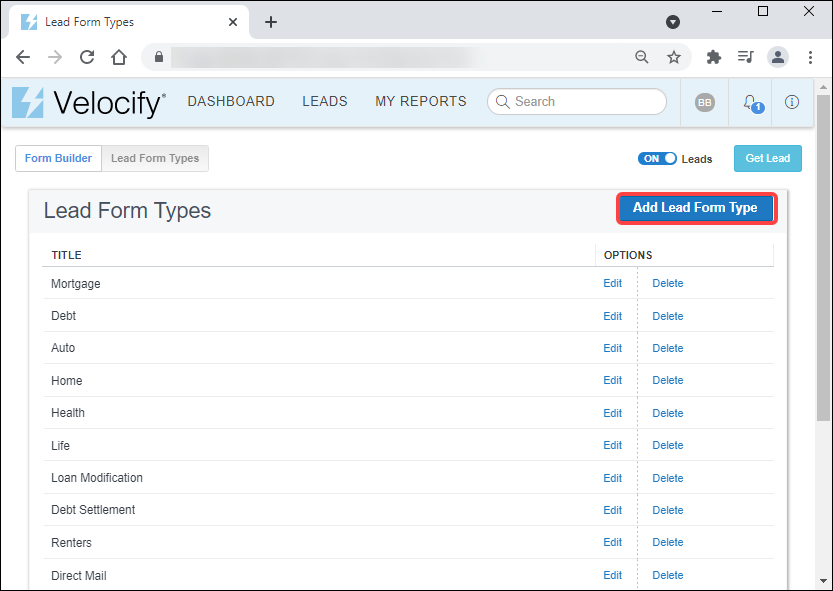
On the Lead Form Types page, click the Add Lead Form Type button.
-
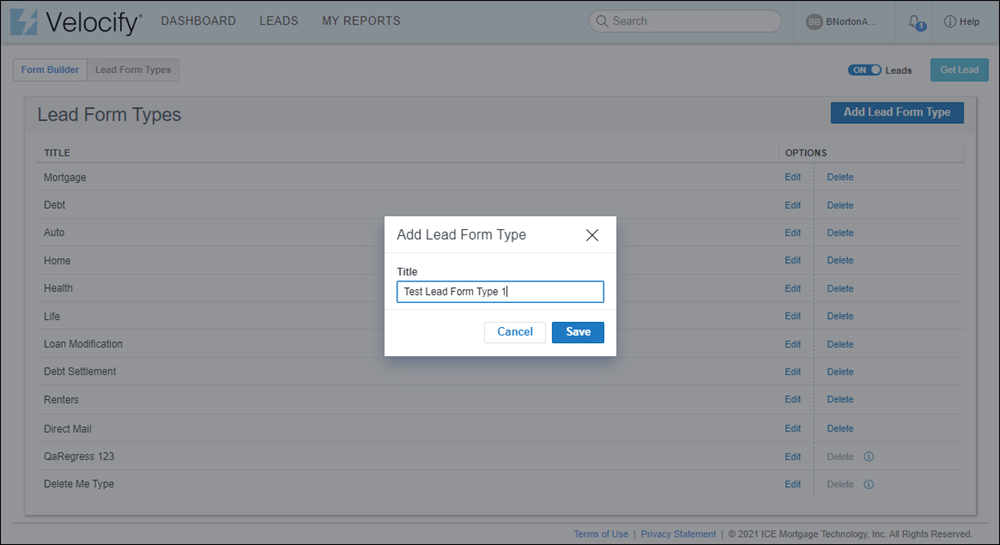
In the Add Lead Form Type window, type the Lead Form Type name, and click the Save button.
For this exercise, we have named the Lead Form Type Test Lead Form Type 1.
-
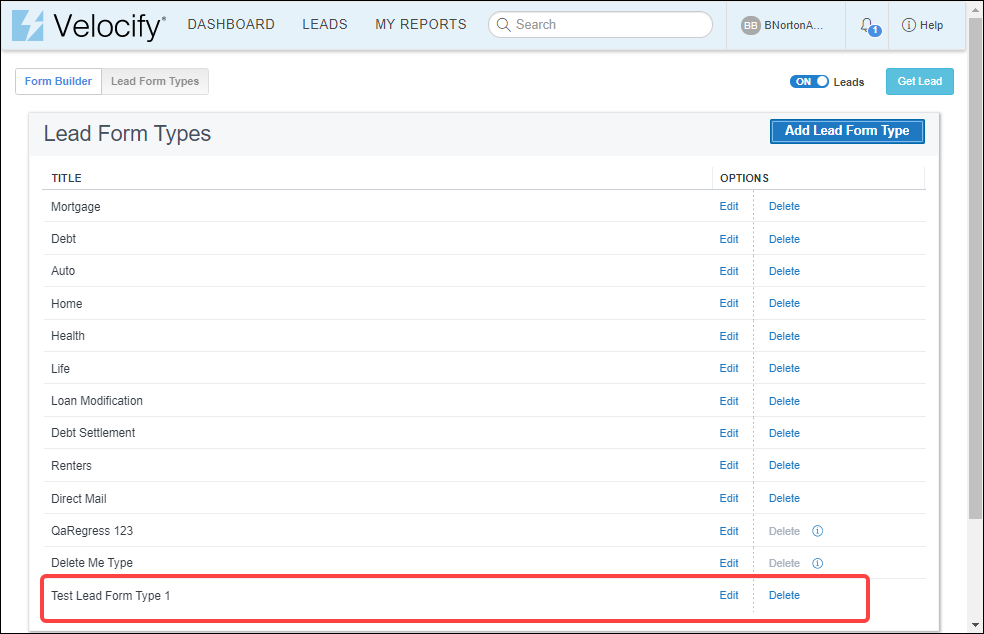
Confirm that the Lead Form Type you created is listed in the Lead Form Types table.
-
Repeat steps 3 and 4 to create additional Lead Form Types.
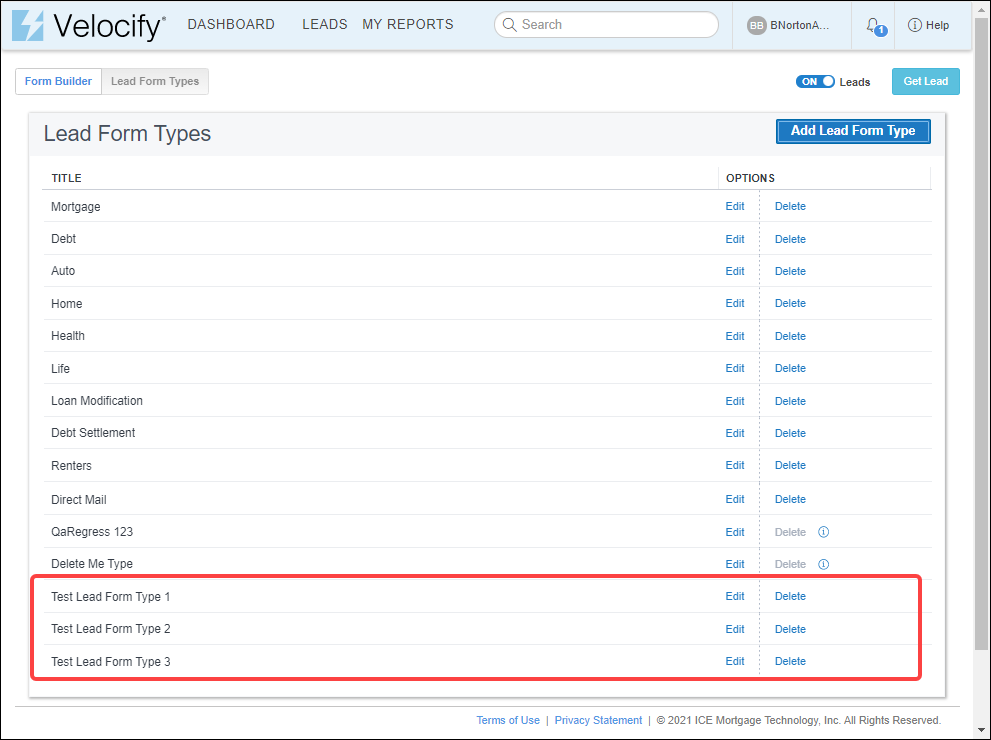
For this exercise, we have named the new entries Test Lead Form Type 2, Test Lead Form Type 3.
-
Confirm that the lead form types are displayed.
-
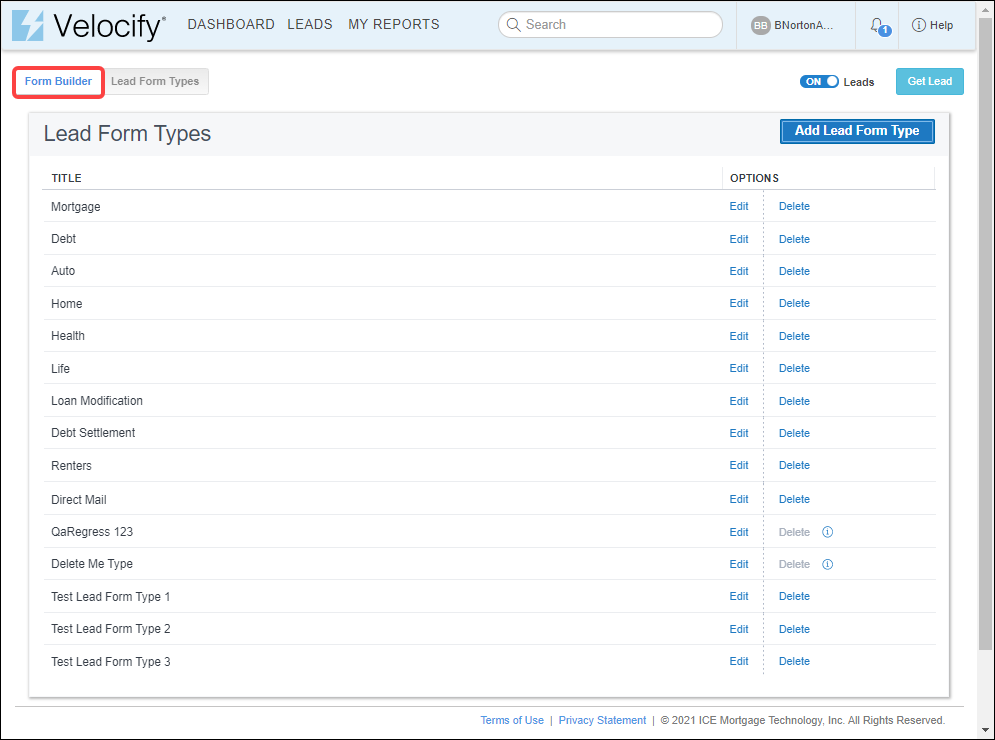
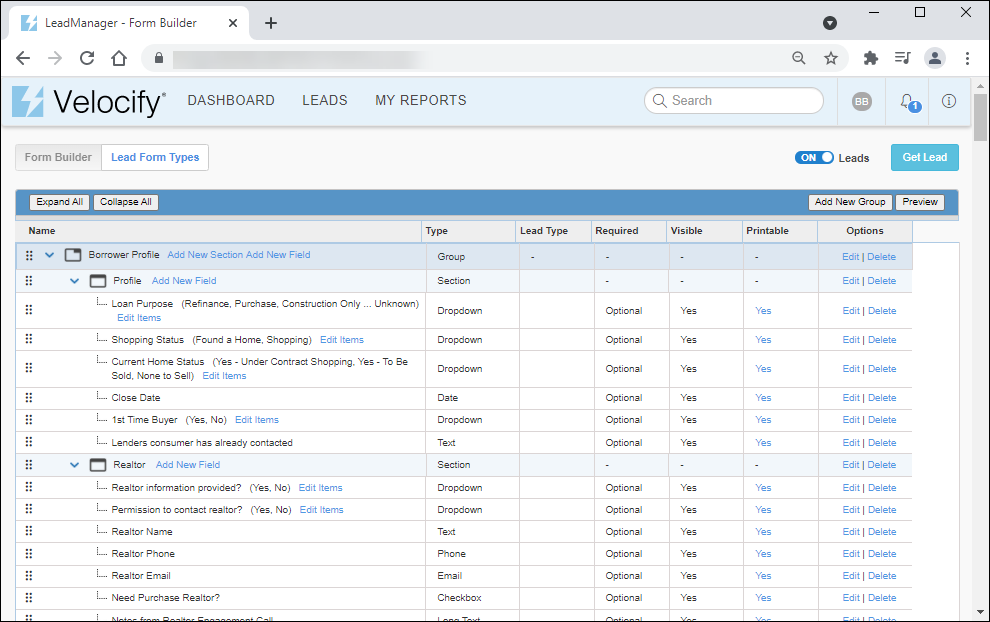
On the Lead Form Types page, click the Form Builder tab.
-
This displays the LeadManager – Form Builder page. For the purpose of this exercise, we will create a custom field in the Miscellaneous Information tab of the Lead Details page.
-
-
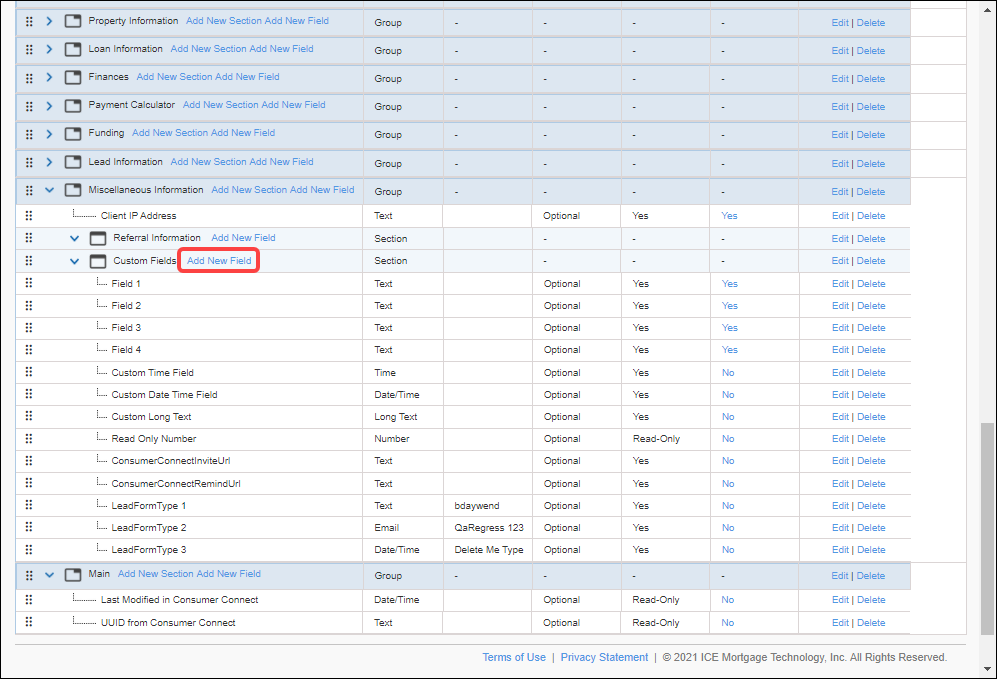
Scroll down to the Miscellaneous Information section> Custom Fields, and click the Add New Field link.
-
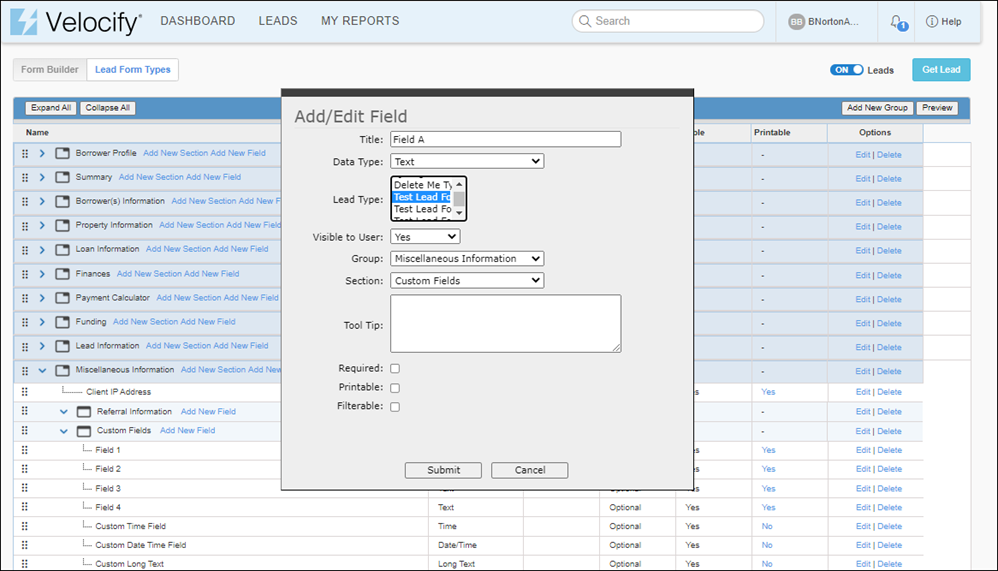
In the Add/Edit Field window:
-
In the Title field, type the name of the custom field. For this exercise, we have named this Field A.
-
From the Data Type drop-down field, select the data type for this custom field.
-
From the Lead Type drop-down field, select the Lead Type you created in Create Lead Form Types. For this exercise, we have selected this Test Lead Form Type 1.
-
Click the Submit button.
-
-
Create another custom field in the Miscellaneous Information tab.
-
In the Miscellaneous Information section, go to Custom Fields, and click the Add New Field link.
-
In the Add/Edit Field window, type the name of the field (for the purpose of this exercise, we have named it Field B).
-
From the Lead Type drop-down field, select a Lead Type you created, different from the one you selected in step 3. For this exercise, we have selected Test Lead Form Type 2.
-
Click the Submit button.
-
-
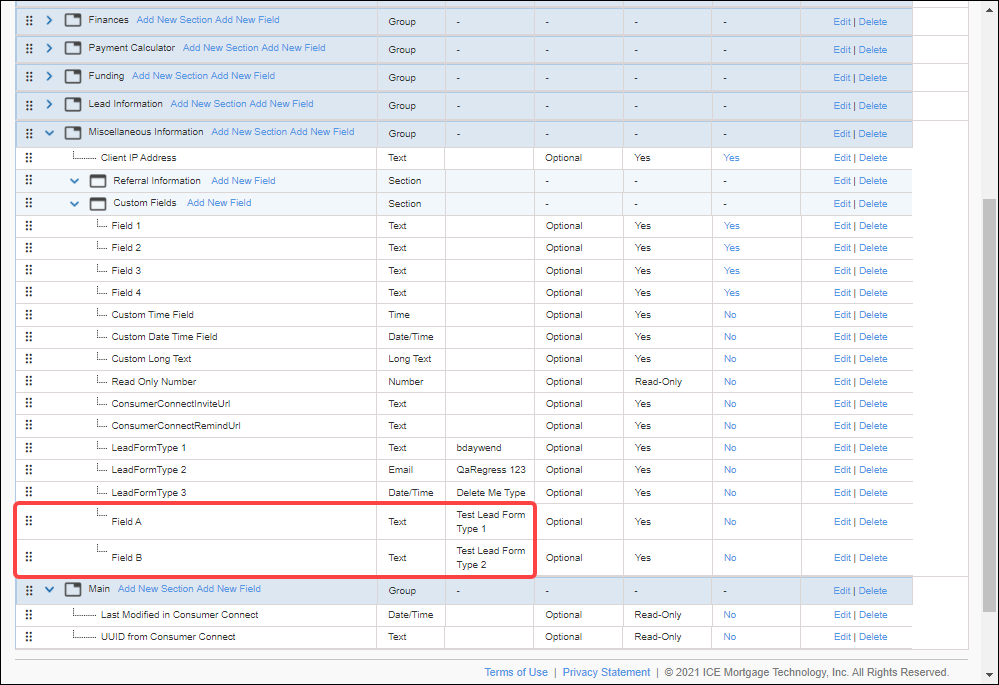
Confirm that the fields are displayed in the Custom Fields section with the Lead Form Types you created assigned to each field.
-
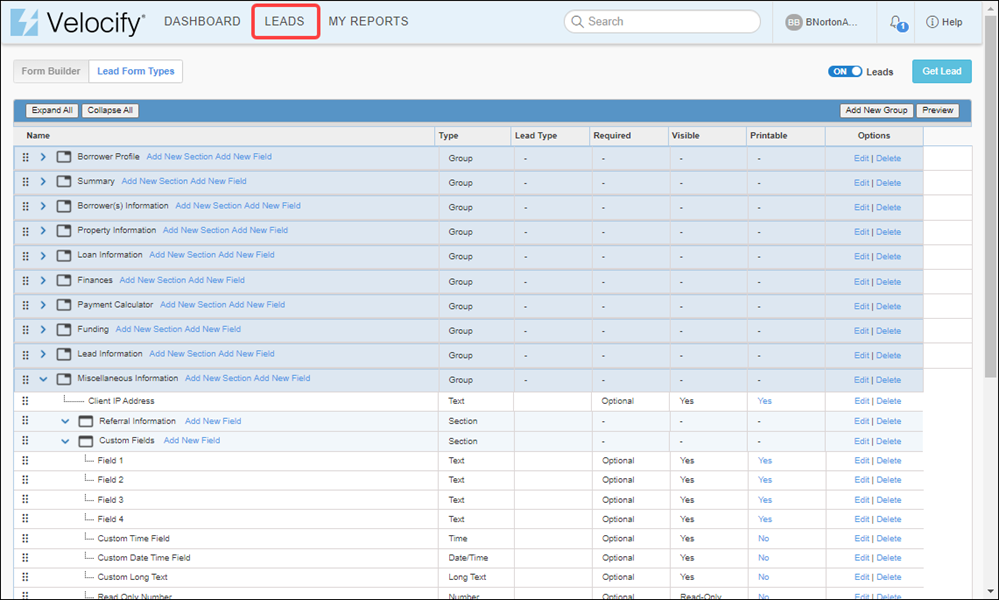
Click the Leads tab.
-
Click the Edit icon corresponding to a lead to view the Lead Details page.
-
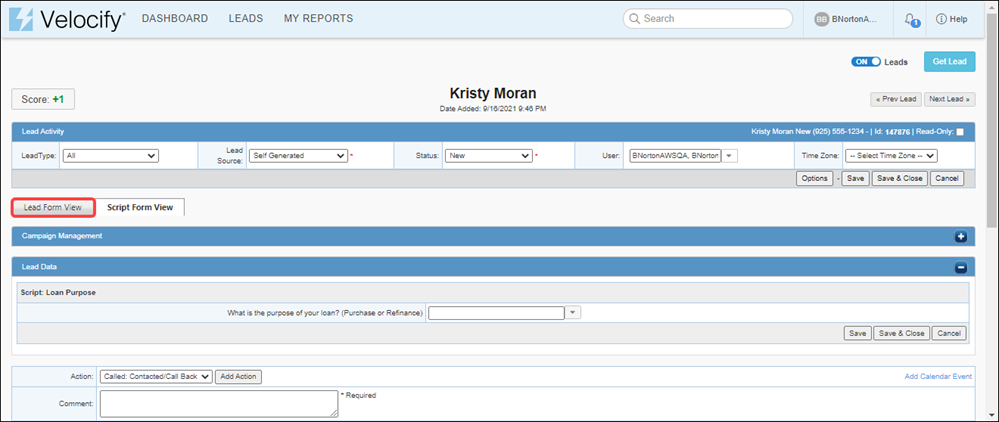
On the Add/Edit Lead page, click the Lead Form View tab.
-
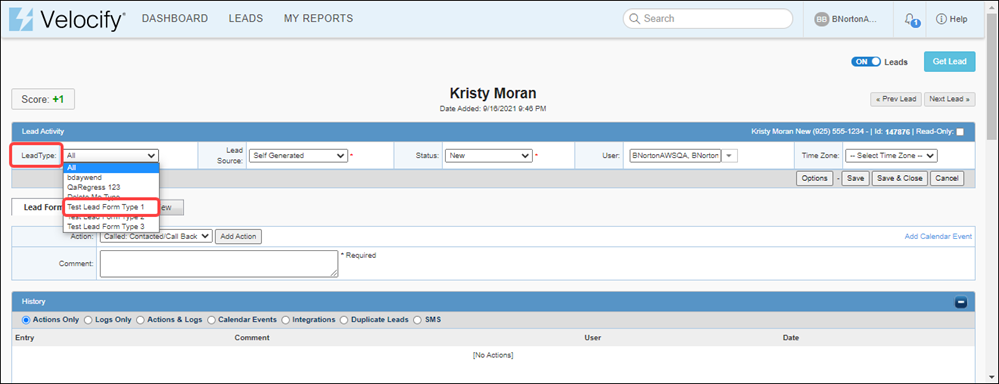
From the LeadType drop-down field, select a Lead Form Type you have created. For the purpose of this exercise, we have selected Test Lead Form Type 1.
-
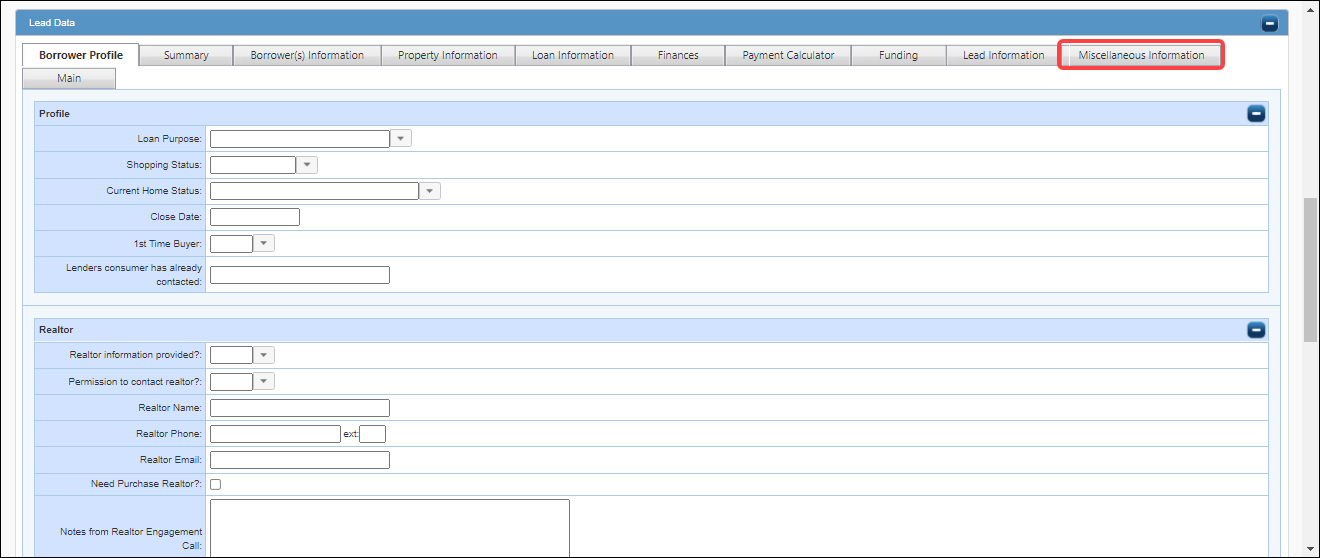
Click the Miscellaneous Information tab.
-
Go to the Custom Fields panel.
-
Note that since Test Lead Form Type 1 is selected as the Lead Form Type, custom field Field A is displayed.
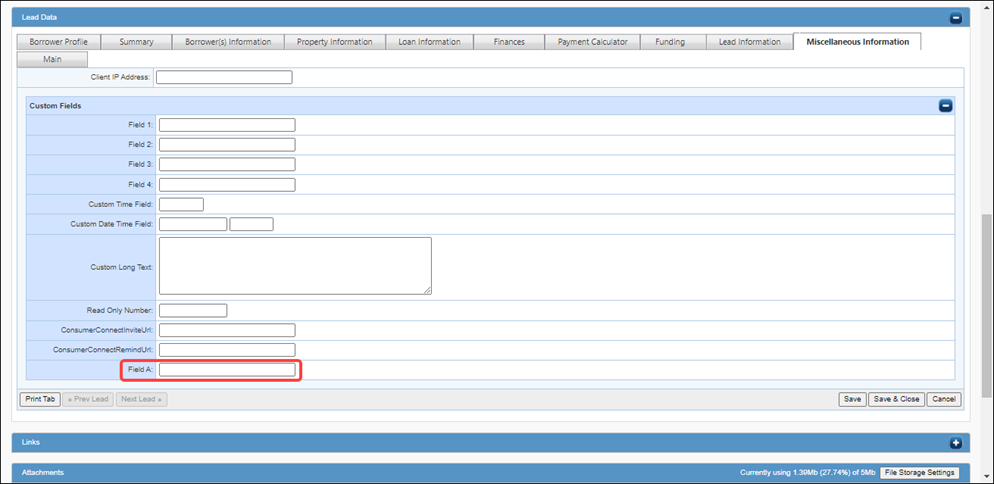
-
-
Scroll up to the top of the Add / Edit Lead page, and from the LeadType drop-down, now select a different Lead Form Type that you have created. For this exercise, we have selected Test Lead Form Type 2.
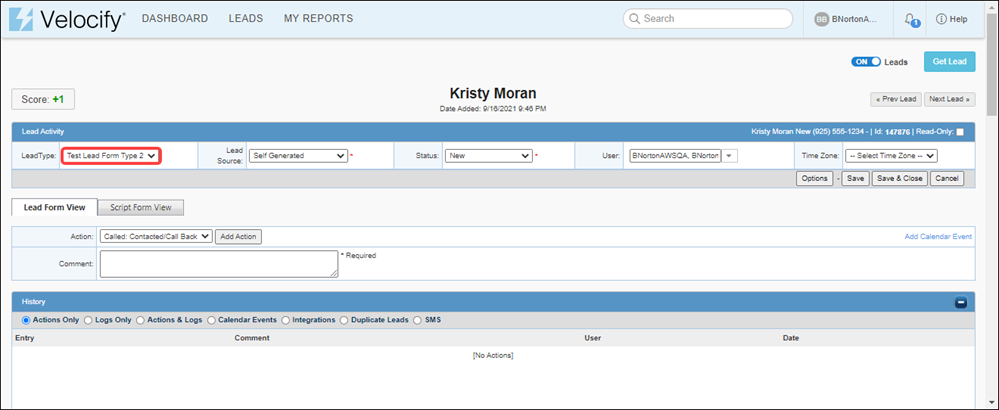
-
Click the Miscellaneous Information tab. Note that instead of custom field Field A, now Field B is displayed.
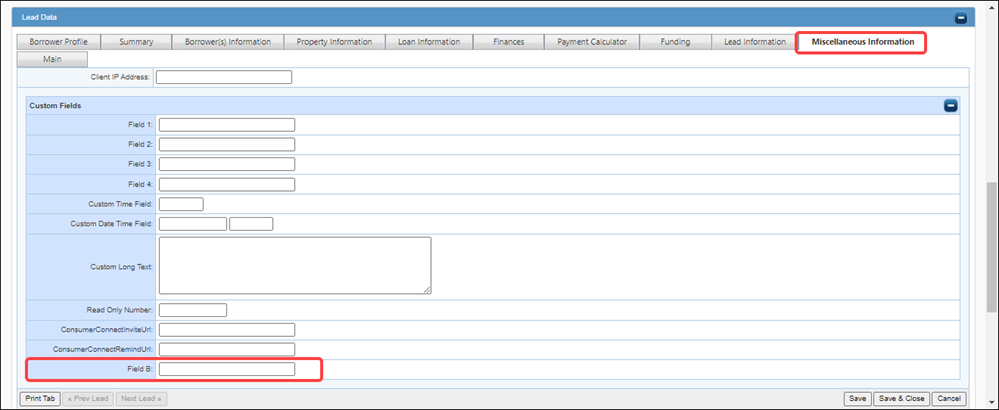
The following Opt-out Customizability updates are included in this release:
-
Opt-out Customizability: The Email Opt-out footer template is now displayed for all Velocify instances. For more information, see: Opt Out Customizability.
-
Opt-out (Re-)Subscribe: Re-subscribe link in every email to each recipient (including To:, Cc:, Bcc:), enabling unsubscribed recipients to subscribe again later.
Reports
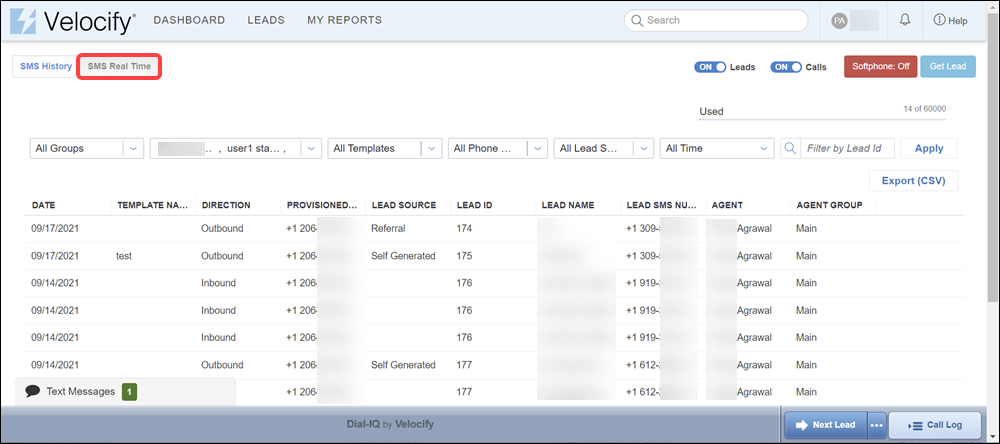
New report providing drill down reporting capability for SMS messages, enabling you to:
-
Select a date range and view all messages sent during that time interval
-
Apply various filters to the view
-
Export the results
- Log in as an administrator.
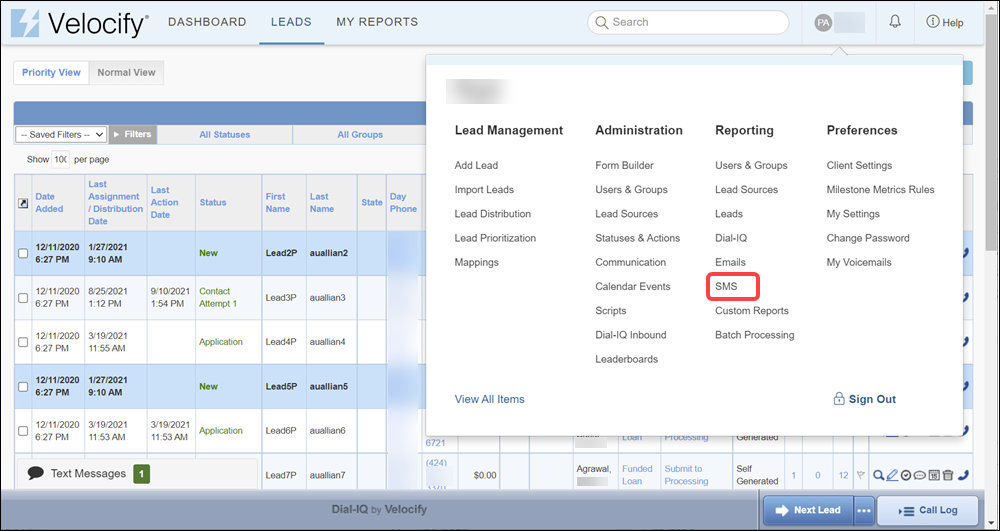
- Click your name on the top right corner of the page, and under Reporting, click SMS.
- Click the SMS Real Time tab.
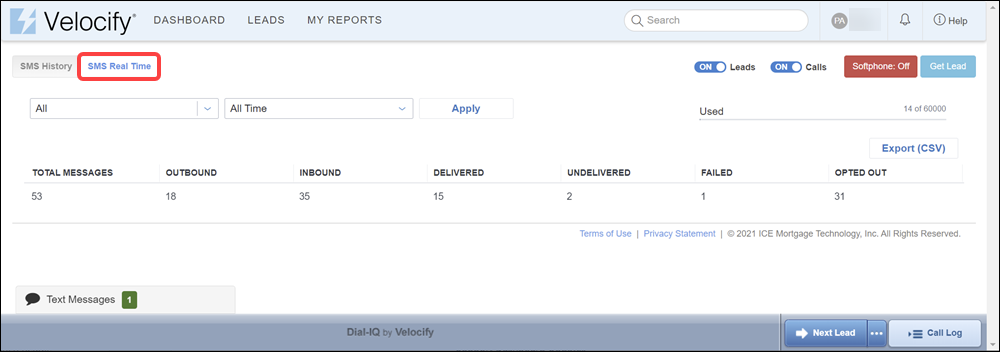
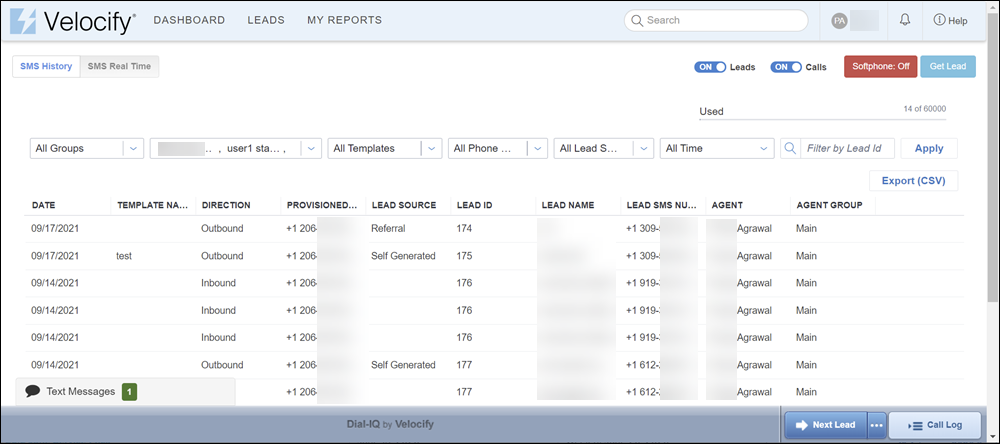
- View the data displayed in the SMS Report.
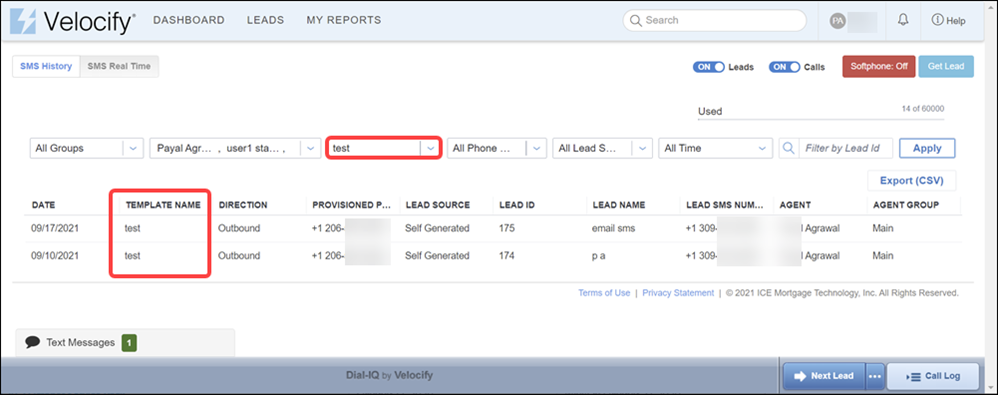
- To view filtered data, select values from the drop-down fields, and click the Apply button. (For the purpose of this exercise, we have selected test from the All Templates drop-down field)
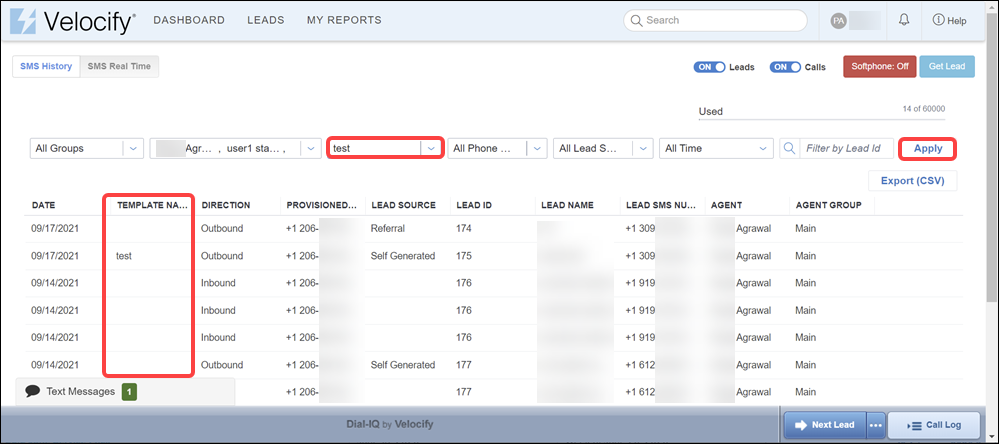
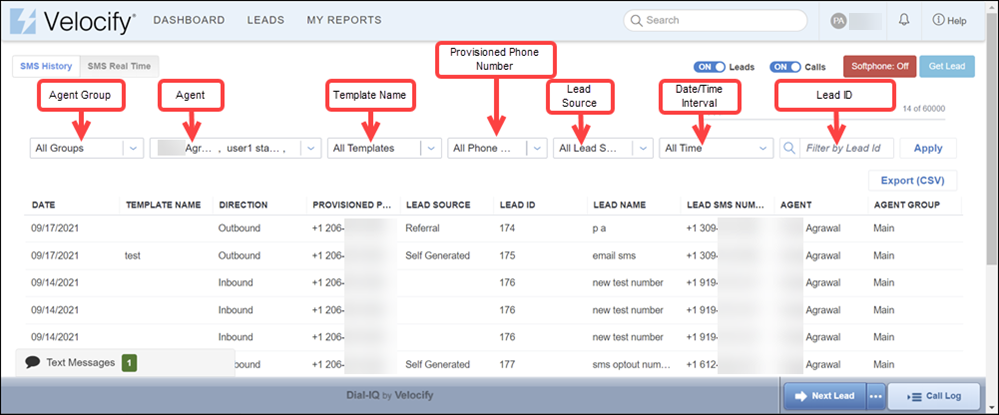
You can filter the data by Agent Group, Agent, Template Name, Provisioned Phone Number, Lead Source, Time Interval, and Lead ID.
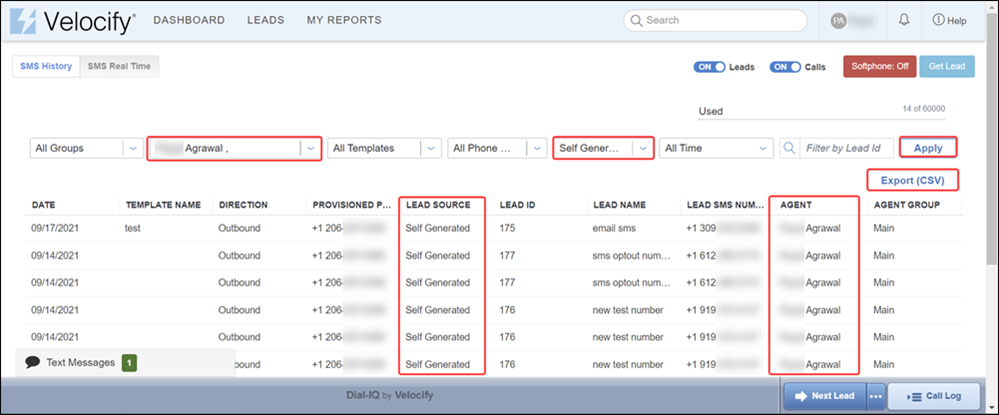
You can export the report results in CSV format.
- Go to SMS reports. (See steps 1 – 3 in View and Filter SMS Report.)
- Apply filters if needed, and click the Export (CSV) button.
- You can see the downloaded CSV file in your browser window.
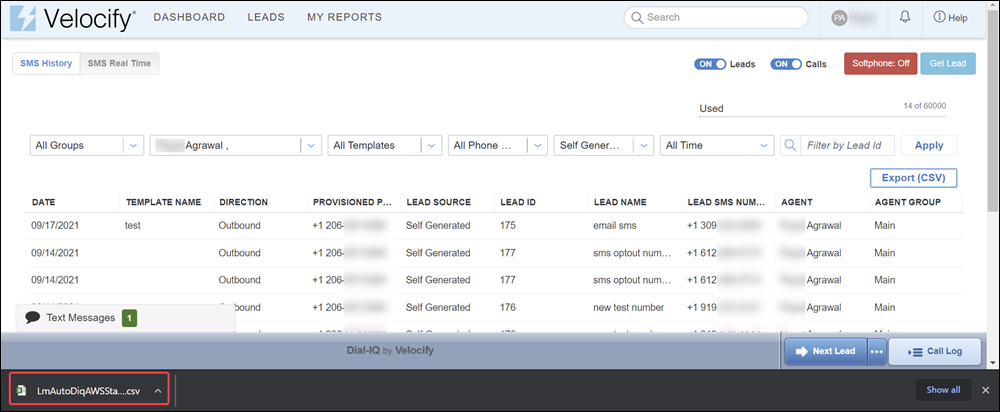
- Open the file from your browser window, or (recommended) go to the Downloads folder on your computer to access the file.
Encompass
Prior to this release, lead data was posted to an Encompass loan only upon initial creation. You can now update loan Conversation Logs with Velocify action, email, and SMS log information.
-
Conversation Logs track interactions with the borrower, service providers, and other contacts related to the loan.
-
Admins can now select any of the following triggers to create Conversation Logs on the associated loan in Encompass:
-
Action Taken
-
Email Sent
-
SMS Sent
-
SMS Received
-
-
Setting is displayed in Client Settings>> Settings: Client > Integration Settings if Encompass your Connector is configured for the Velocify instance.
Velocify Connector/Encompass API Integration
New option to sync an existing lead to a new Encompass loan through duplicate management:
-
Updates to a loan will result in updates to an associated active lead based on the loan ID, otherwise a new lead will be created.
-
If a single active lead had multiple associated loan IDs, the lead will sync with the most recently updated loan.
-
If multiple active leads are associated to a single loan ID, updates to the loan will always sync with the oldest lead.
If there is a duplicate merge:
-
The parent lead will be the active lead
-
The parent lead will absorb any information previously associated to its child lead.
API Export
-
Any lead exported from Velocify using Encompass Connector will create a relationship with the Encompass loan ID
-
If an active lead is associated with multiple loan IDs, then the lead will always sync with the most recently updated loan.
This feature update does not impact the SDK.
| Next Section: Fixed Issues | 
|
|

|
Previous Section: Introduction |