Client Settings: Multi-Factor Authentication
TOPICS COVERED IN THIS ARTICLE
- Multi-Factor Authentication
ENVIRONMENT
LoanEngage
STEP BY STEP INSTRUTIONS
Multi-Factor Authentication (MFA) is implemented in Velocify Lead Manager and LoanEngage. Users can set up MFA using one of the following options: Text, and Email.
While Text and Email options are currently supported, Voice support will be available with a future release.
-
Log in as a Velocify administrator.
-
Point to the Menu tab, point to Preferences, and click Client Settings.
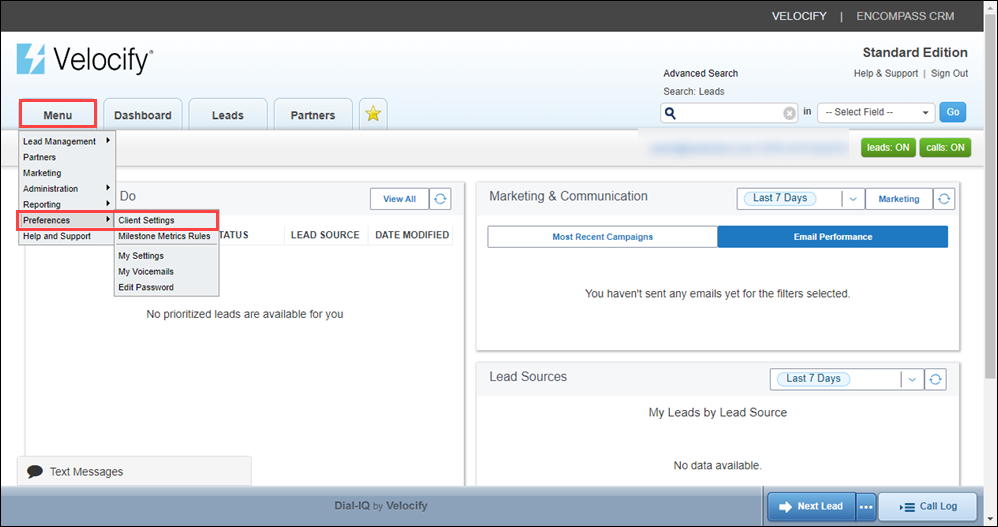
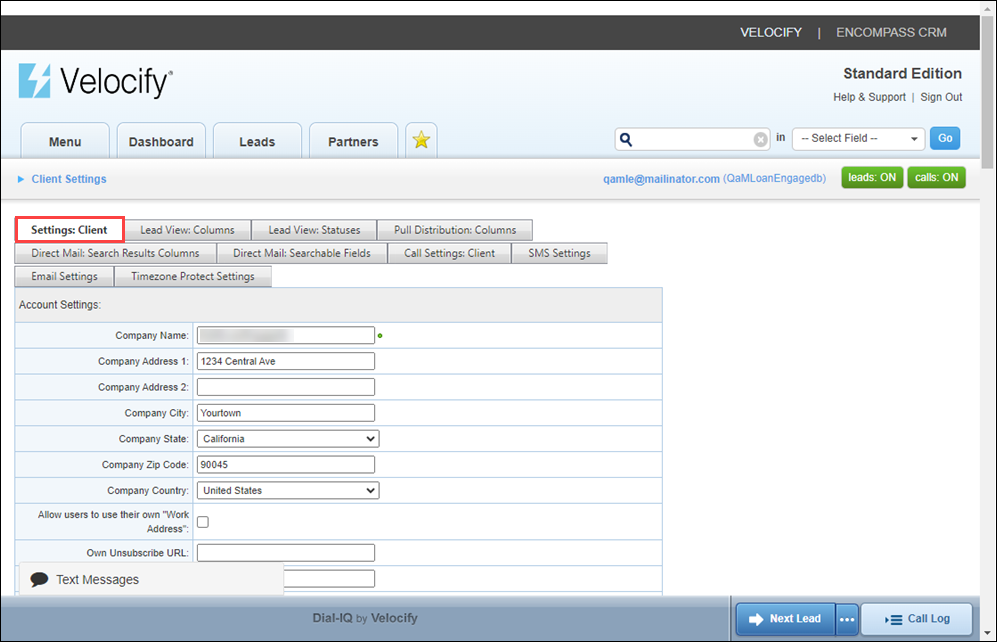
This displays the Settings: Client tab.
-
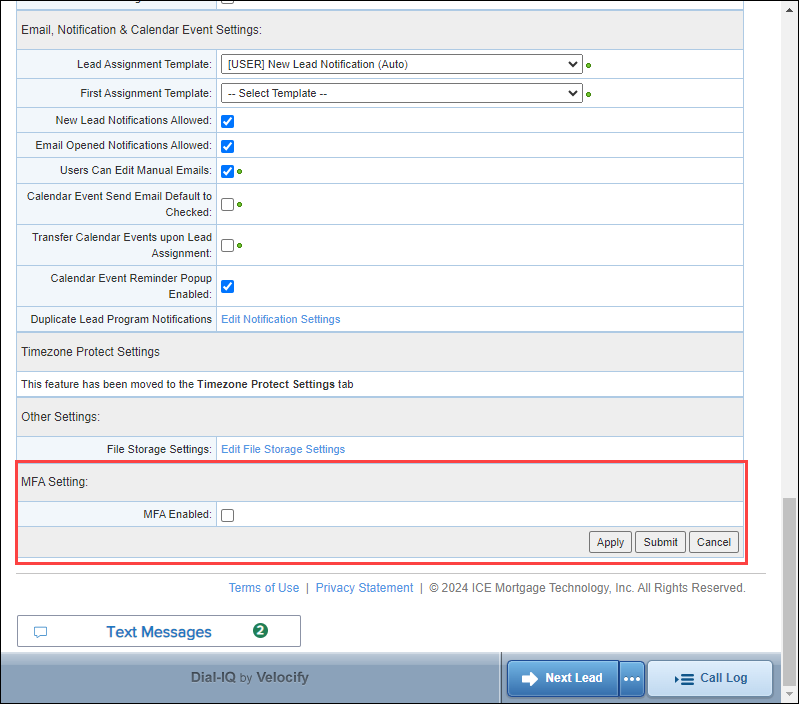
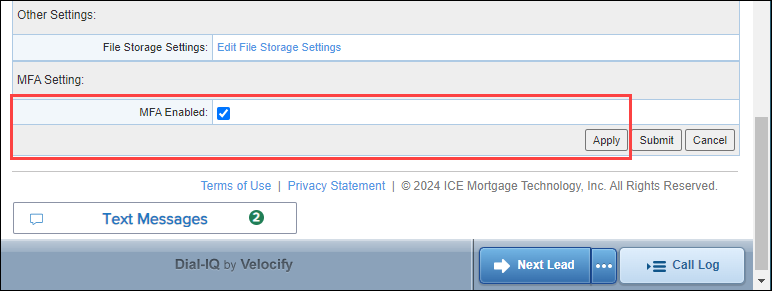
Scroll down to bottom of the page for the MFA Setting: panel. Note that the MFA Enabled checkbox is cleared by default.
-
To enable MFA, select the MFA Enabled checkbox and click the Apply button.
-
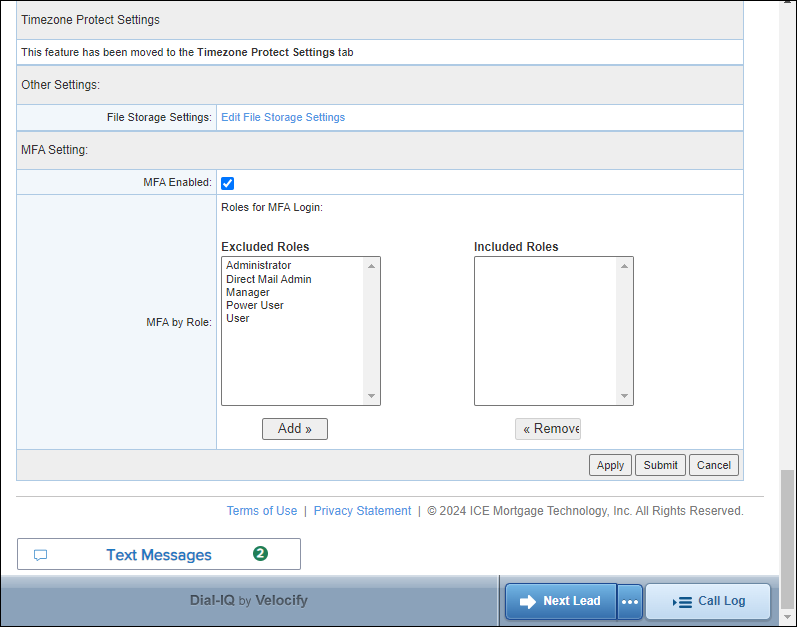
This relaunches the Settings: Client tab page. Go down to the MFA Setting panel to view and configure the new options displayed in the panel.
The authentication permissions are set based on Roles.
-
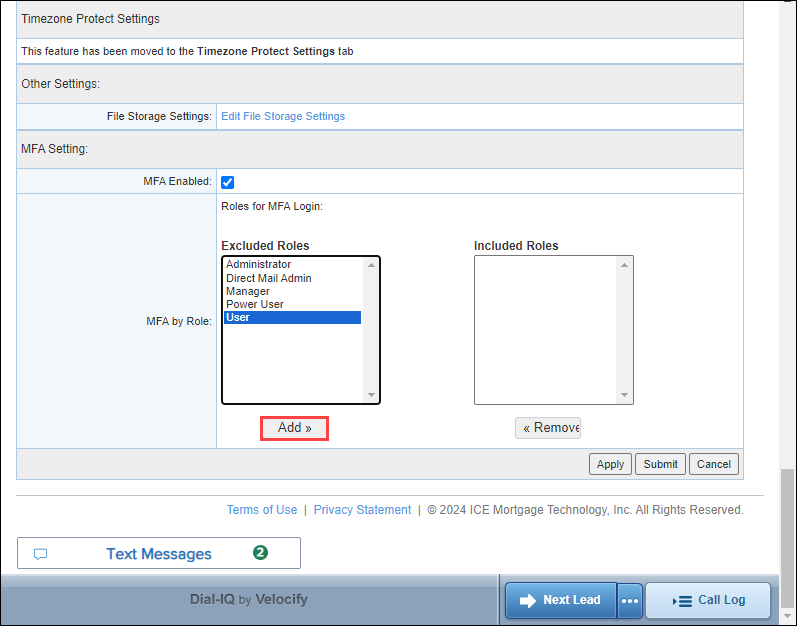
To assign a Role, select it from the MFA by Role: Excluded Roles table and click the Add button.
-
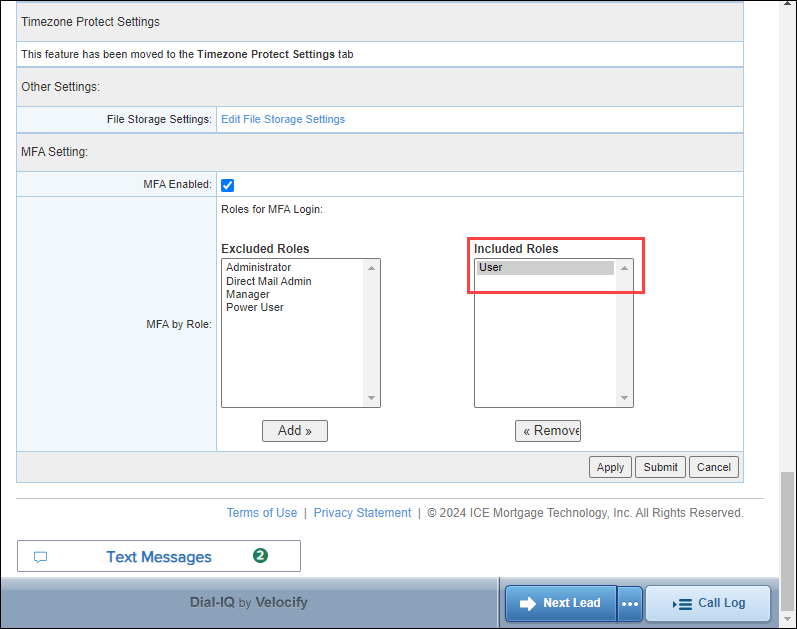
This moves the selected role to the Included Roles table.
-
Click the Apply or Submit buttons.
If a user has multiple roles, and even if one of those roles is present in Included Roles, MFA will be applied when that user tries to log in.
-
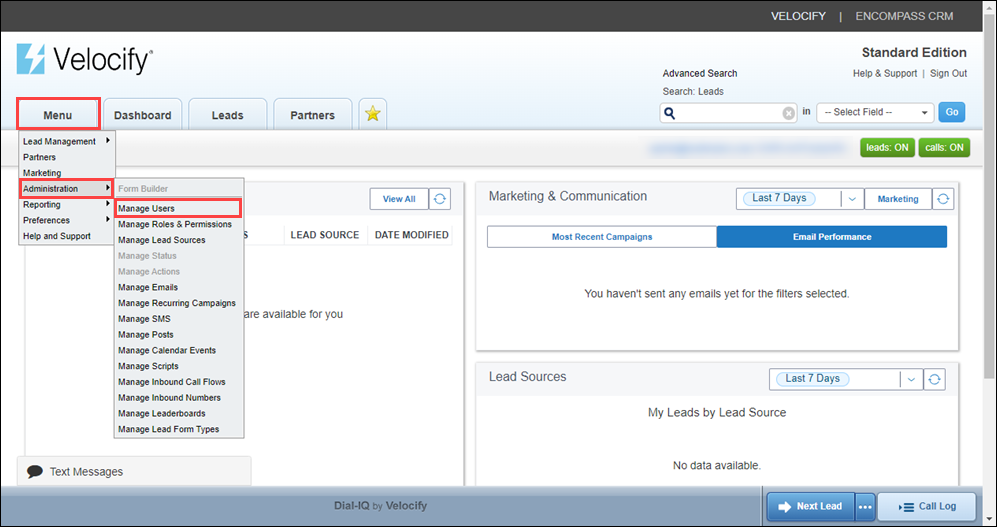
Point to the Menu tab, point to Preferences, and click Manage Users.
-
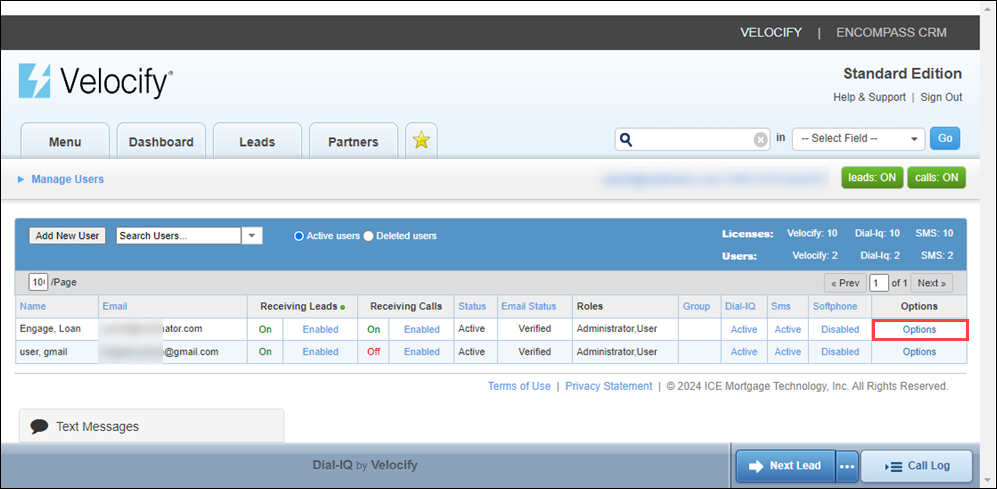
In the Manage Users page, go to the User you want to update the Role for, and click the corresponding Options link.
-
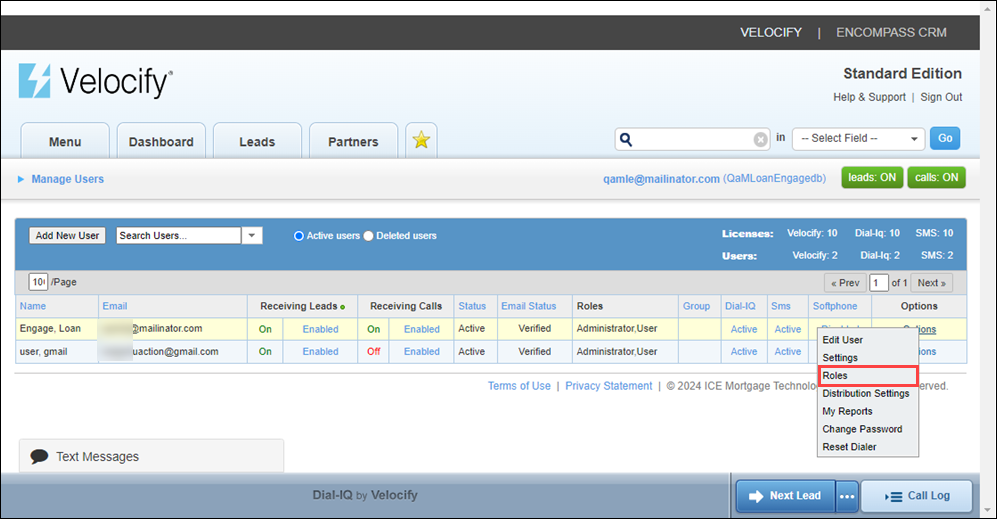
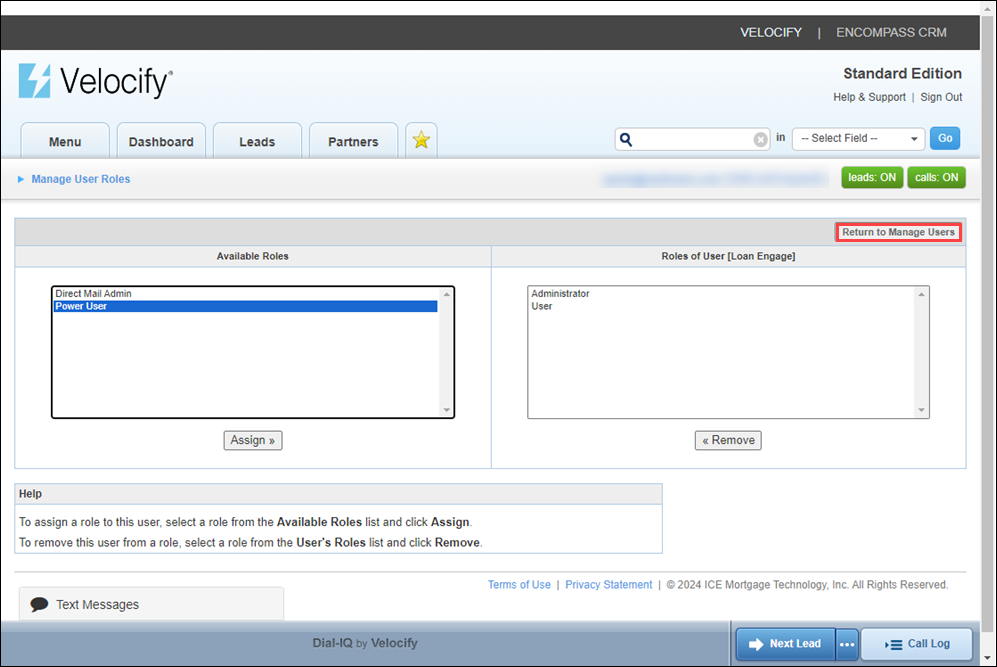
From the Options menu, click Roles.
-
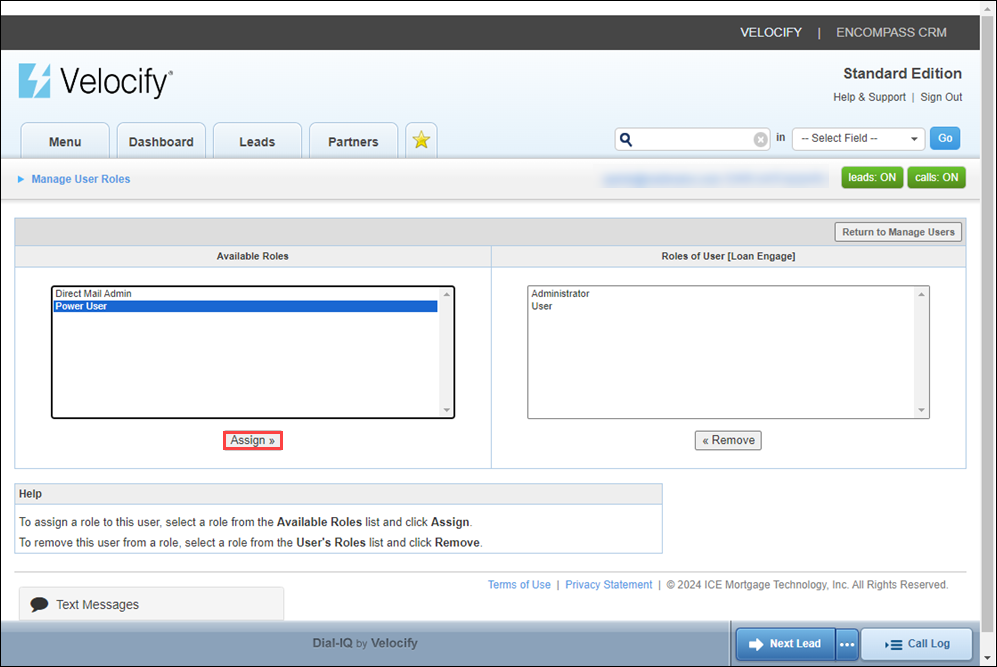
To assign a role to this user, select a role from the Available Roles table and click the Assign button.
-
Click the Return to Manage Users button when done.
Go to Administration > Manage Users >Select a User > Options> Edit User page, and enter values for the following fields:
-
First Name
-
Last Name
-
Email
-
Work Phone
-
Mobile Phone
-
Other Phone

Phone number provided in the Mobile Phone field is the number where the authentication message will be sent if the user selects Text option in their Authenticate window during login. If there is no value in Mobile Phone field, Text option will be disabled in the user's Authenticate window during login, a No Phone number available message will display.

-
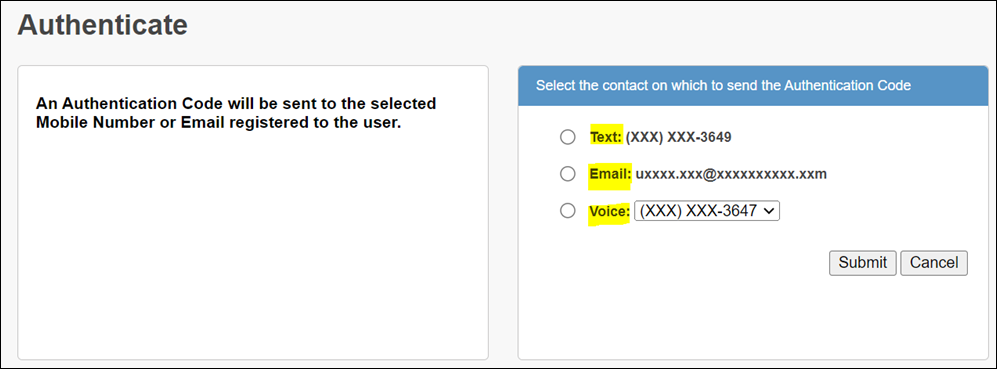
Once the user details are configured and saved, the next time the user logs into Velocify, an (MFA) Authenticate page will display.
-
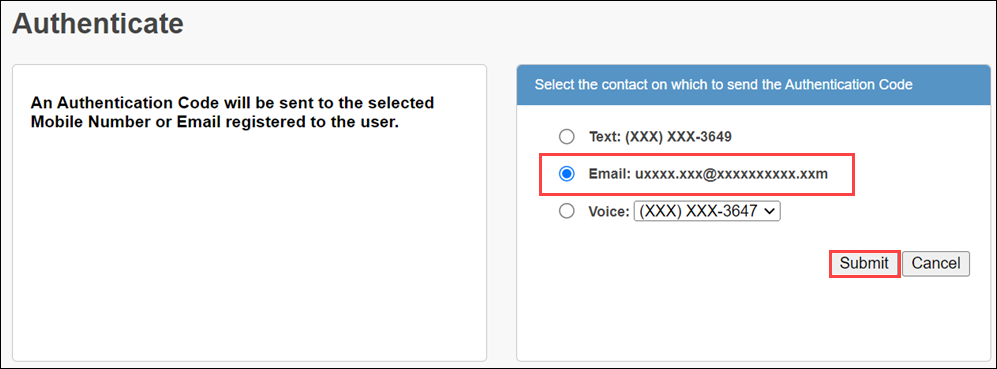
Select an option and click the Submit button. For the purpose of this exercise, we will select Email.
-
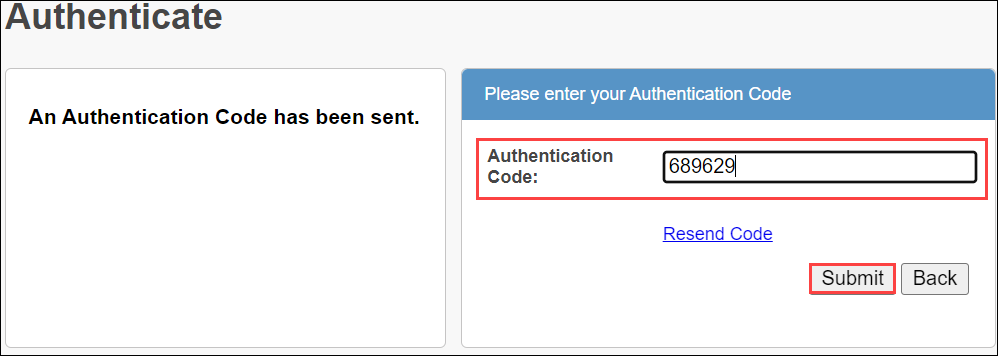
Check your email inbox for a 6 digit authentication code sent from noreply@ice.com. This code is valid for 15 minutes only.
-
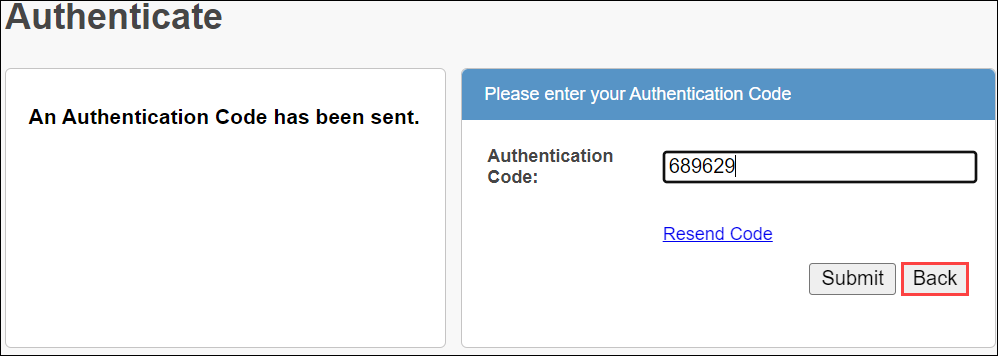
Go back to your Velocify login page and in the Authentication window, enter your 6 digit authentication code and click the Submit button.
-
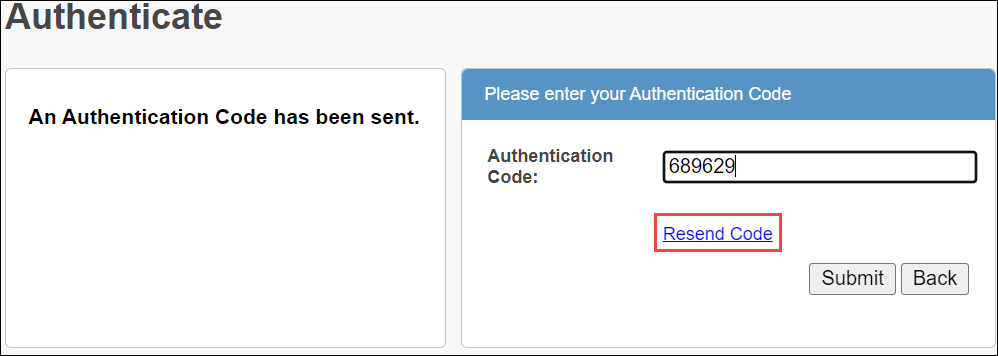
If it's past the 15 minute window, click the Resend Code link to receive a new code. Any previous codes will be rendered invalid.
-
-
Upon clicking Submit on this page, if the code is valid, you will sign into Velocify successfully.
-
If you want to change the MFA option at any time, click the Back button to go back to the MFA options page.
This will send you a text with an authentication code that is valid for 15 minutes.
If you have Unsubscribed to text messages from Velocify, you will not receive the authentication message.
