My Settings Page
TOPICS COVERED IN THIS ARTICLE
- An Overview of My Settings Page
ENVIRONMENT
LeadManager
DETAILS
The My Settings Page is the location where you input your contact information and configure some settings that govern how Velocify™ functions.
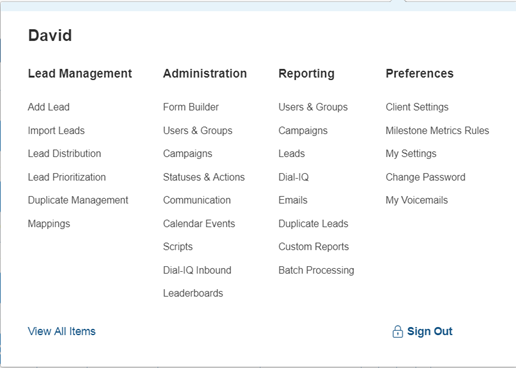
Access the Menu page by clicking your name in the upper right of the header.

Under Preferences, click My Settings.

The values that you put into the fields in the first few fields are your contact information. These may appear in emails that Velocify sends out automatically so be sure that you enter them as you want them to appear in official, external business communication.
Dial-IQ users will also need to put their Dial-IQ phone number here.
The Dial-IQ Phone is the number that Dial-IQ will place most calls to when trying to connect you to leads.
Position: enter your title here. This value may be pulled into emails, so be sure to enter your full, official title.

Use this like a custom field.
Enter any text that you may want to pull into an email signature block.

Enter text in these custom fields that you would like to appear in a users signature block. Often these are left blank, but some companies put their physical address or a tagline here.

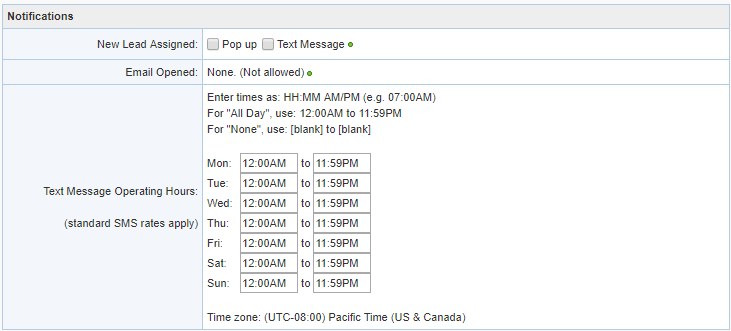
Select the Pop up check box to see a pop up window when new leads are assigned.
Select the Text Message check box if you want to receive an SMS Text Message when you are assigned a new lead.
You must also select a service provider and that standard text message rates will apply.

Select this check box if you want to receive a notification when one of your emails is opened.
Select the hours that comprise your workday. This is important for receiving leads through automatic distribution.

Choose to have your calendars default view include all reminders or only your own.

Select this check box to display highlights in the calendar wherever there are tasks or appointments scheduled.

Choose to have either the Dashboard, Normal Lead View or Priority Lead View load upon log in.

Click Apply to save your changes and stay on the page.
Click Submit to save changes and go to the Dashboard.