Scripting: Detailed Review
TOPICS COVERED IN THIS ARTICLE
- Detailed Review of the Scripting Feature
ENVIRONMENT
LeadManager – Advanced Edition Only
STEP BY STEP INSTRUCTIONS
Scripting allows Administrators to write scripts as a way to guide users through a call and have them update lead data along the way. By default it will be turned on for all Advanced Edition clients.
Access the Menu page by clicking on your name in the upper right of the header.

Click View All Items.
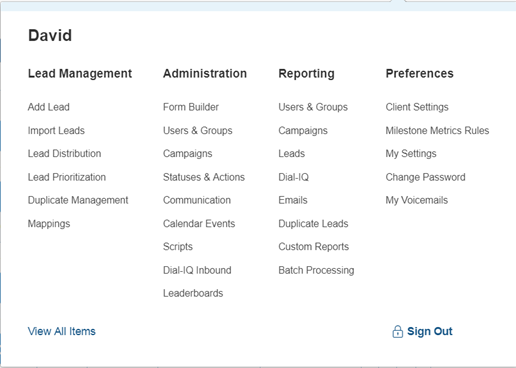
Click the Scripts link (listed under Administration).
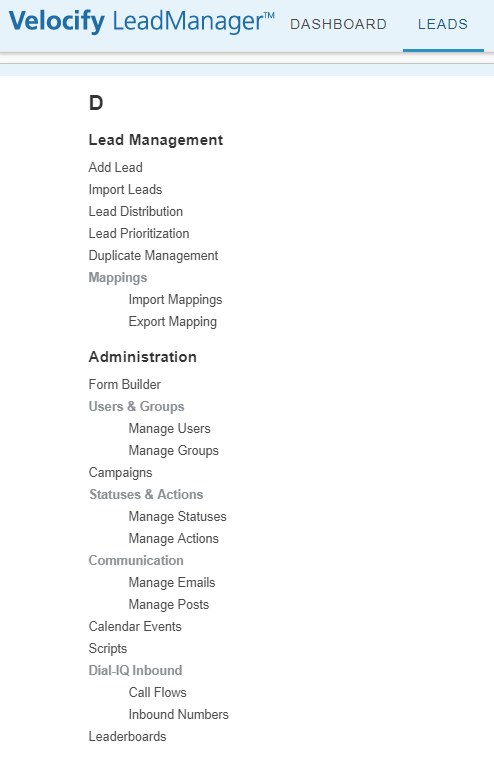
This opens the Manage Scripts page.

Click the Add New Script button to add a script. The Add/Edit Script page will load.

Give the script a Title and click the Save button.
Reveal Script Elements One at a Time - Scripts are made up of a series of questions and/or statements. By default the full script will display to users. It will appear as a list of questions and statements.
Clicking the Reveal Script Elements One at a Time checkbox will make it so questions and statements appear only one at a time. When this option is selected, a user clicks the next button to reveal the next script element.
After saving the script, the Compose Script and Lead Filters: Which leads? tabs will become visible.

Click the Compose Script tab to compose the script. The Compose Script tab will load with no script elements.
In the left hand column, labeled Script Element, enter the text that you would like to appear on the script. Choose a corresponding field that should be populated after the script element is read. Script Elements can also be added to the script without associating a field.

Note: You can use Field Tags in Script Elements. Field tags are placeholders that reference specific fields of information within a lead record. When the user reads the script, the field tags are replaced by the value associated with it from within the lead. For example: {First Name} becomes "John" if the lead record has "John" in the field "First Name".
The first Script Element added to this script does not have a field associated with it. It is a statement that must be read to the lead indicating that the call may be recorded.
Once the Script Element has been typed in, click the Add Script Element button to add the Script Element to the script.

The Script Element appears in the bottom half of the form.

Follow the same steps to adding a Script Element that has a field associated with it but also select a field from the Field dropdown. The example below asks for the lead for their first name. The First Name field is associated with the Script Element.

After clicking the Add Script Element button the script element appears in list below.

Follow these steps to add all of the Script Elements to your script:
The bottom half of the Compose Script tab has the following functionalities:
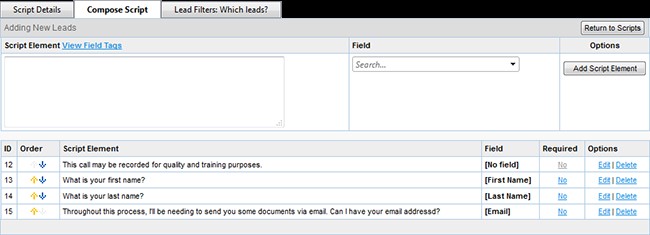
- Click the arrows in the Order column to reorder the Script Elements.
- All Script Elements are not required by default. Click the No value in the Required column to require that the field be populated in order for the User Script to be saved. It is not possible to require a Script Element that does not have an associated field.
- Click the Edit link in the Options column to edit the Script Element.
- Click the Delete link in the Options column to delete the Script Element.
Script Elements can be edited. It is possible to edit the Script Element text or the change the associated field. Click the Edit link in the Options column to edit the Script Element. The Script Element will load in the top half of the form for editing.
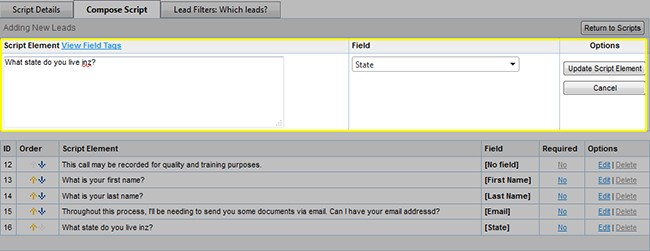
Make any needed changes and click the Update Script Element button. Click the Cancel button to abandon changes.
When the Script is complete, click the Return to Scripts button.
Without filters, any script could potentially be served to any lead.
Filters are applied to target certain leads with appropriate scripts.
Click the Lead Filters: Which leads? tab.

Create a filter by selecting a field from the Column drop-down, an Operator and a Value. Then click the Add Filter button.

When the filter has been added it will appear in the list of Current Filters on the bottom of the form.

With this filter added this script can only be served to leads where the State value equals CA.
The Manage Scripts page has a few different tools for managing scripts.

Script Sort Order
Click the arrows to reorder the scripts. The order of the scripts matters because a lead will only be served one script at a time. More than one script may be eligible to be served to a lead based on the script filters but only the lead with the highest priority.
Title
The title of the script appears here.
Enabled
When scripts are created, they are not enabled by default. Clicking the No in the Enabled column will toggle the value to Yes, enabling the script. Note that a script cannot be enabled if it do not contain at least one Script Element. If a script appears in this list but has a non-editable value of No in the Enabled column, it is because the script does not contain any Script Elements.
For New Leads
Here new does not refer to the status “New.” Instead, new refers to the lead form when it contains no data, and has not been saved. New refers to the lead form as it appears when a user clicks Add New Lead on the Lead Management sub-menu.
Only one script can be designated as the script that should be used when adding a new lead to the system. The script that is for use with new leads will appear at the top of list of scripts. It will not be able to be re-ordered. Selecting a script to be used for new leads is done by clicking the No value in the For New Leads column. This will only be possible if the script is enabled.

Clicking the No value in the For New Leads column will display an alert asking you to confirm that you want to use that script for new leads.
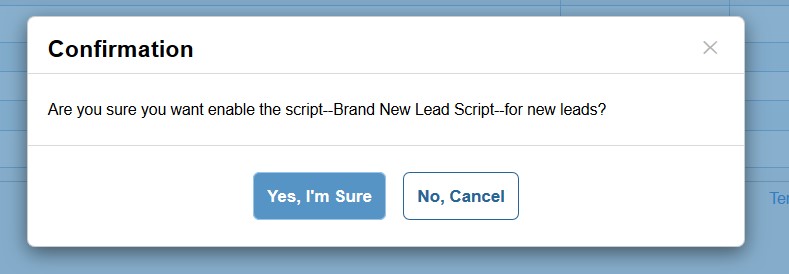
The script now appears at the top of the list. Once it is designated as the script that is For New Leads it cannot be disabled, copied or deleted. If you click the Edit link to edit the script, the Lead Filters: Which leads? tab will not be accessible.

Options Column
The Options column contains three links:
- Edit – Click this link to edit the script. This opens the Add/Edit Script page
- Copy – Click this link to create a copy of the script and open it in the Add/Edit Script page. The copy will have the name “Copy of {script name}, but in every other way will be the same as the copied script.
- Delete – Click this link to delete the script. You will be asked to confirm this action.
In order for users to see the scripts you’ve created, there is a setting must can be applied at the group or user level on user and group settings page respectively. Click the Settings link under the Options column on either the Manage Groups page or the Manage Users page.

- Lead Script Form is Accessible: Select Yes to make the script view of the Add/Edit Lead page accessible to the group or user
- Lead Form is Default View: Select Yes to make the Script view the default view of the Add/Edit lead page for the group or user
Once user scripting is enabled tabs display at the top of the Add/Edit Lead page enabling the user to toggle back and forth between the two views; Script View and Lead Form View.
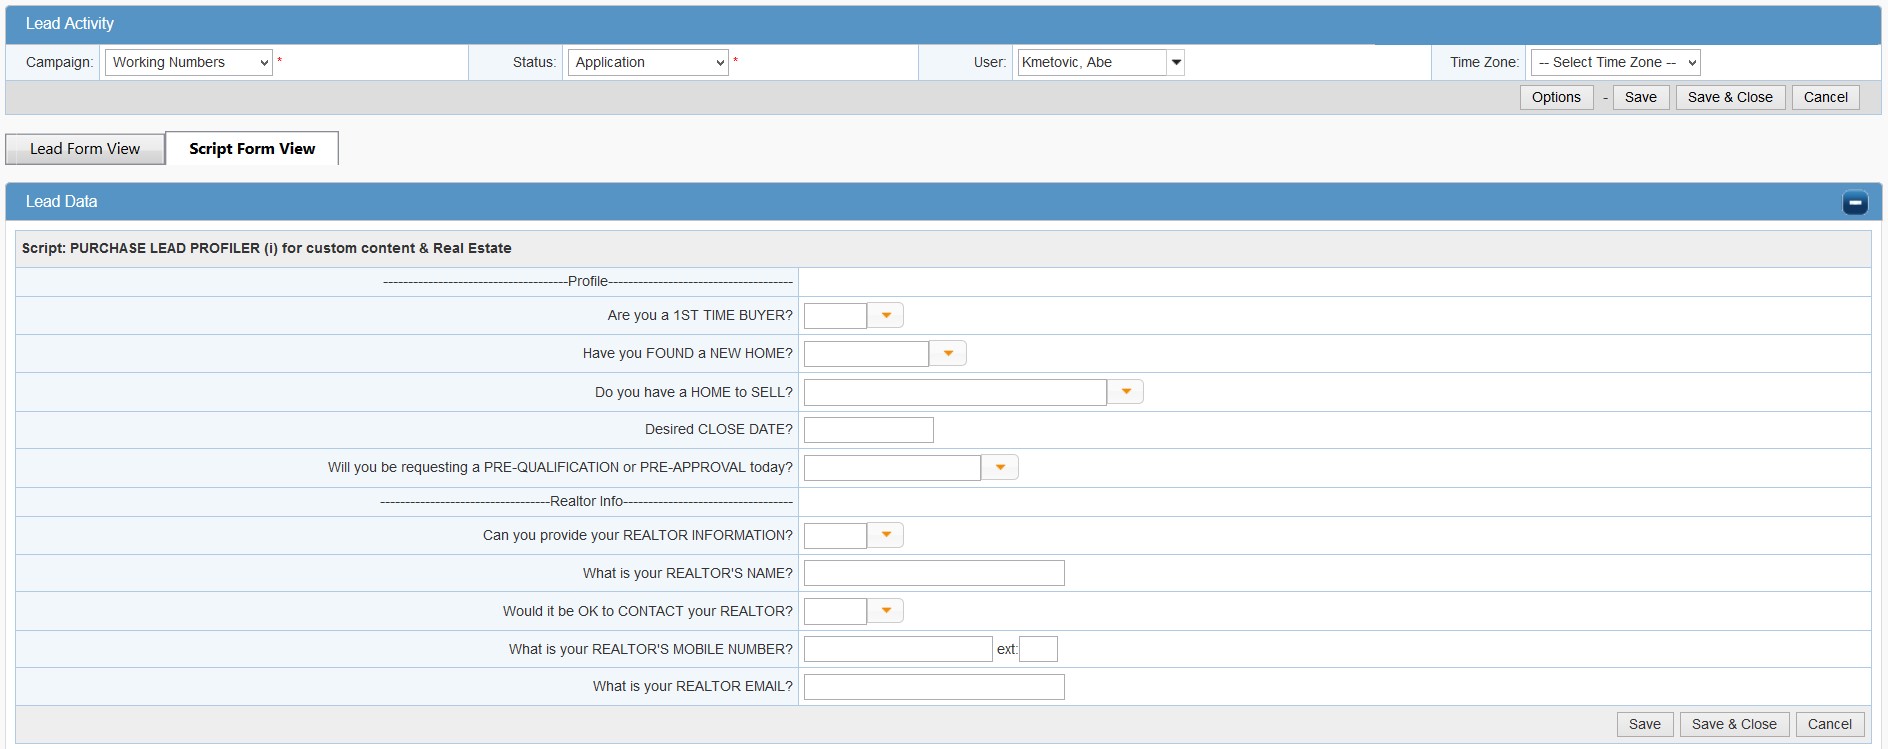
The tabs that enable users to switch back and forth between the Lead Form view and the Script View are only visible if the administrator has enabled script view for the group and/or user. It is also possible for the administrator to stipulate that the Add/Edit Lead page loads in Script View by default.
If a script is not available for a given lead, the Add/Edit Lead page will load in Lead Form View and the Script View tab will be disabled.

Scripts will appear in one of two ways based on the selected settings:
Script Elements Displayed All at Once
This is an image of a lead being added with a script that displays all Script Elements at once.
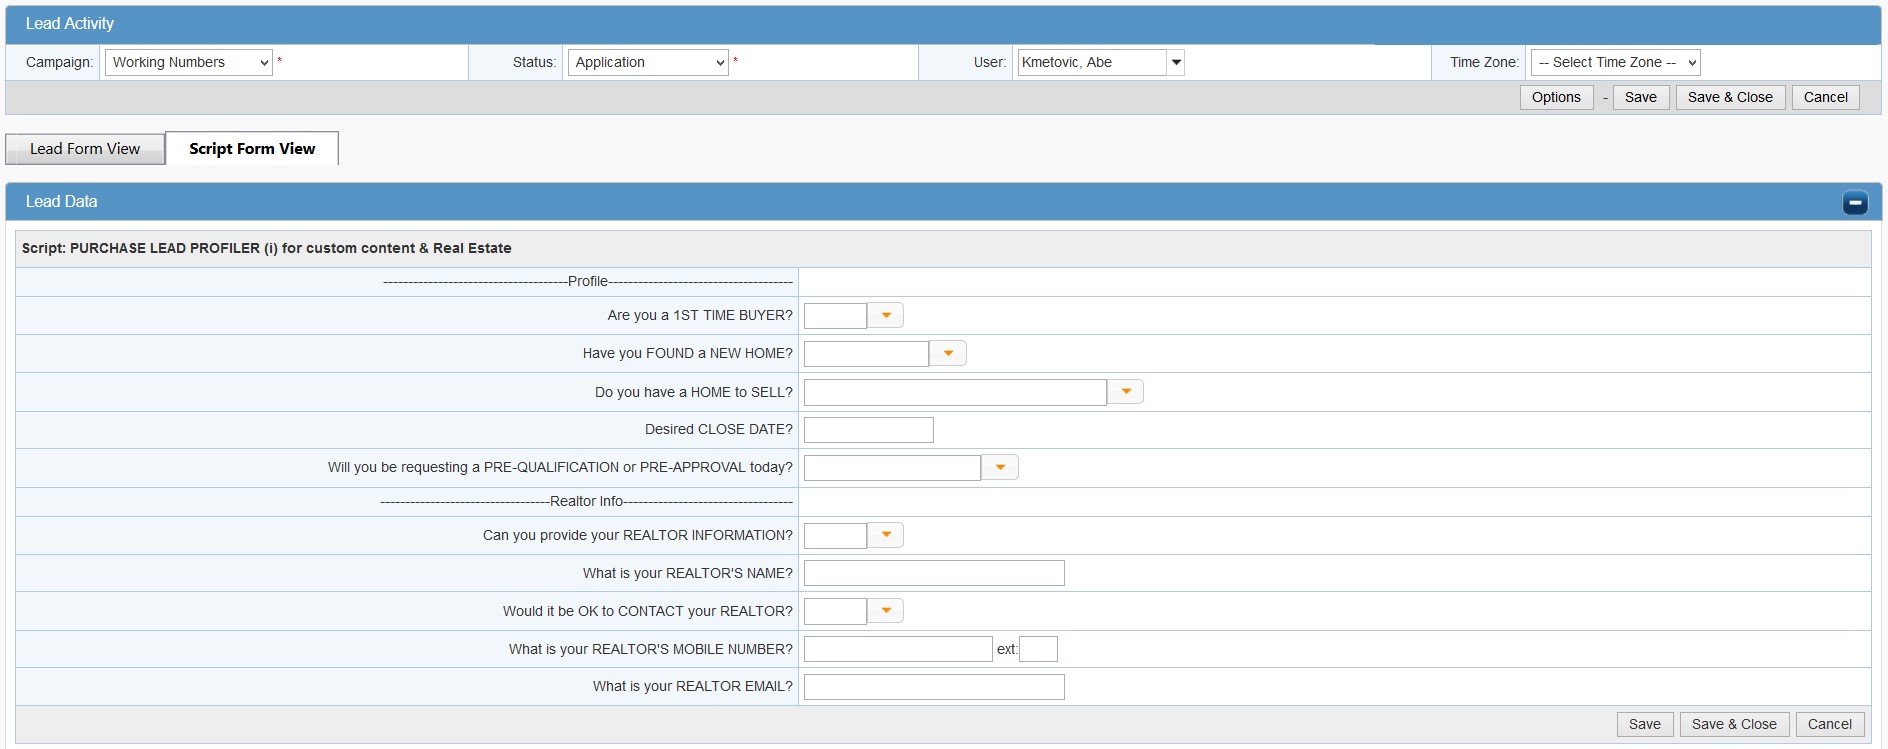
Working the lead from Script View consists of reading the questions and populating fields. It is recommended practice to answer the questions in order and not to save the script until all the questions have been answered. This is because the answer to one question can qualify the lead to be served a different script. For example, once the lead form is saved it could qualify for one of two different scripts based on whether the value in the State field is CA or something else.
Once the script is saved the Actions/Logs section of the form will load. The workflow for taking actions on leads is the same when working leads in script view. Depending on the lead data a new script may appear. If no script is eligible to be served to the lead given the lead data, the Add/Edit Lead page will reload in the Lead Form View.
Script Elements Displayed One at a Time
This is an image of a lead being added with a script that reveals Script Elements one at a time.

Working the lead in this view when Script Elements are revealed one at a time consists of reading the Script Elements, populating fields, and clicking the Next button to reveal the next script element. Continue through the questions until the last one is reached. When the last question is reached, the Save button will appear.
When the script is completed the script should be saved and an action should be taken as needed.