Prioritization: Priority Info Bars
TOPICS COVERED IN THIS ARTICLE
- What Are Priority Info Bars
- How Priority Info Bars Work
- How To Activate and Manage Priority Info Bars
- Priority Queue Settings for Priority Info Bars
- How Priority Info Bars Will Appear When Used with Single Lead View
ENVIRONMENT
LeadManager
DETAILS
What are Priority Info Bars?
Priority Info Bars allow organizations that use LeadManager to add detailed information to their Priority View, so that users can review and understand the reasoning behind the order of leads presented in Priority View. This feature comes about as a result of research by Velocify that has shown that many users will feel more trusting of an organization's priority programs - and thus rely on them more consistently - if they are given information on why specific leads are considered a higher priority for contact attempts than other leads in the Priority View.
How Priority Info Bars Work
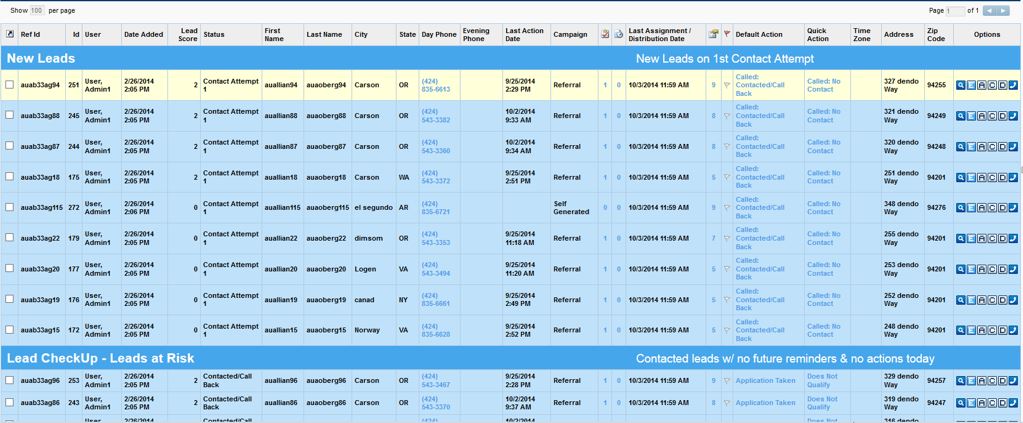
- Once enabled by an administrator for the entire organization, Priority Info Bars appear between groupings of leads within the Priority View page.
- The Priority Lead View is built by grouping leads from Priority Queues - starting with the highest ranking Priority Queue first
- In the image below, the highest ranking Priority Queue with qualifying leads is the New Leads queue, and those leads are added to the list first, in order of newest lead first
- The next highest ranking Priority Queue with qualifying leads is the Leads CheckUp queue, and those leads are added to the list second, in order of newest lead first
- This continues until LeadManager can find no more Priority Leads or a list of 100 has been built
How To Activate and Manage Priority Info Bars
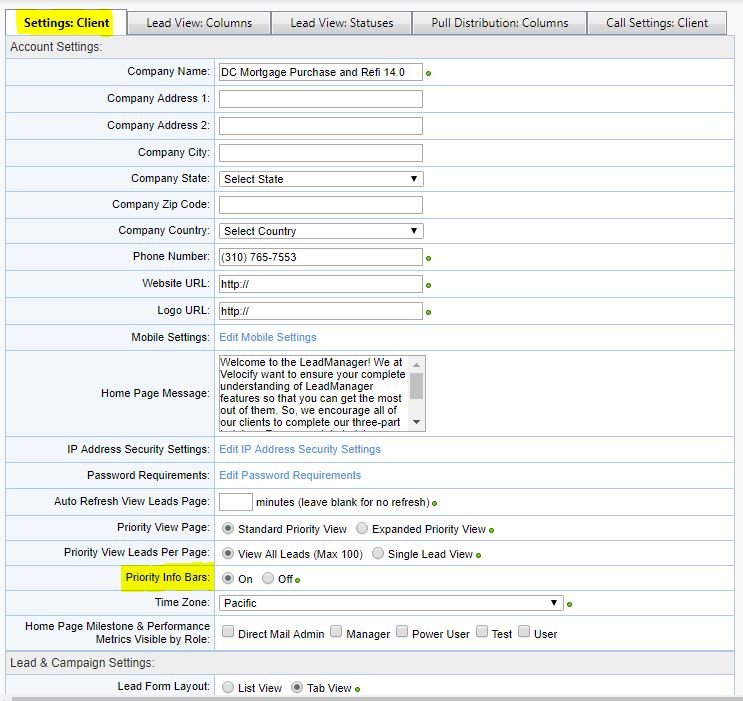
Priority Info Bars are enabled / disabled from the Client Settings screen in LeadManager. (If this option does not appear, please contact Velocify Client Support).
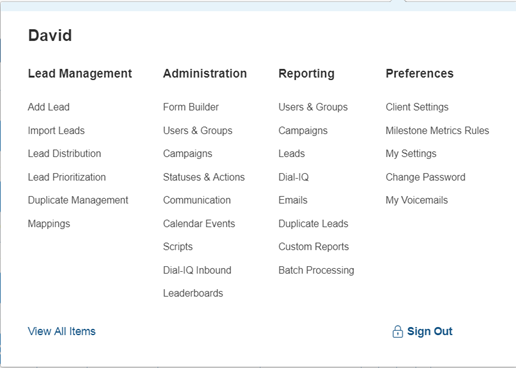
Access the Menu page by clicking your name in the upper right of the header.

Under Preferences, click Client Settings.
- On the Client Setting tab, go to the Priority Info Bars field.
- Select the On button.
- Click the Apply button, and then the Submit button.
Priority Queue Settings for Priority Info Bars
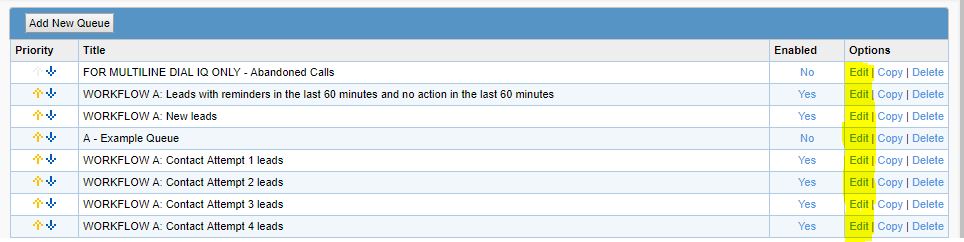
To manage the details and display name that will appear for each Priority Queue when presented as a Priority Info Bar, each Priority Queue provides a series of setting options that assist in this process.
- Access the Menu page by clicking your name in the upper right of the header.
- Under Lead Management, click Lead Prioritization.
- On the Priority Queues page, click the Edit link on the desired queue.
- On the Queue Details tab, give the Priority Info Bar a Display Name and Display Details description.
If Priority Info Bars are turned on, AND, there is no entry in the Display Name - LeadManager will place the Queue Title in the Display Name area of the Priority Info Bar. Display Details defaults to blank until details are added.
- Display Name is limited to a maximum of 30 characters
- Display Details is limited to a maximum of 58 characters
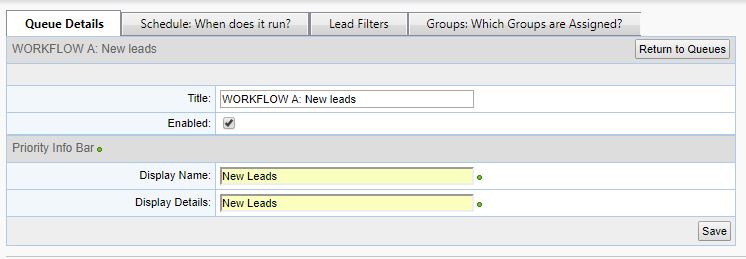
- Click Save.
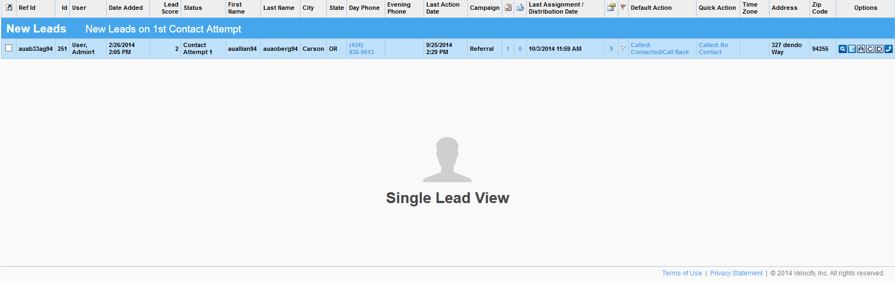
How Priority Info Bars Will Appear When Used with Single Lead View
Priority Info Bars are programmed to operate in conjunction with Single Lead View when in use. An example of how they will appear in Single Lead View is below.