Manage Groups: Detailed Review
TOPICS COVERED IN THIS ARTICLE
- Detailed Review of Manage Groups
ENVIRONMENT
LeadManager – Advanced Edition only
DETAILS
- In LeadManager, Groups can be thought of as branch offices or groups of employees who report to a particular group manager.
- To begin with, all of your users belong to one “Main” group. If you have a large company with many groups of employees and a complicated hierarchy of reporting, it is important to plan out your groups in an org chart before creating groups in LeadManager.
Use the Manage Groups page to add or edit groups of users.
To Create a New Group:
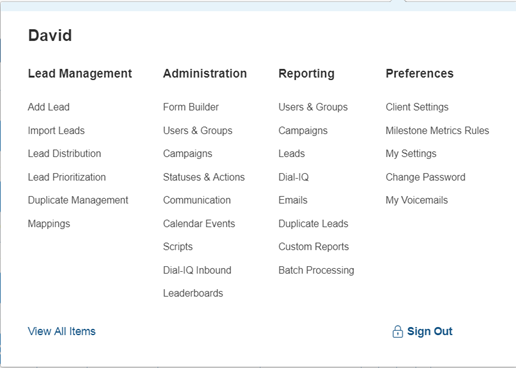
Access the Menu page by clicking your name in the upper right of the header.

Under Administration, click Users & Groups.
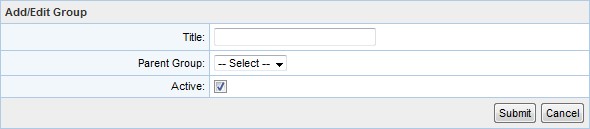
To create a new Group, click the Add New Group button.

Give the group a Title and select a Parent Group.
Click Submit.
You will be taken back to the Manage Groups page, where the new group will now be listed among the groups.
Click the new group’s Users link to add users to the group.
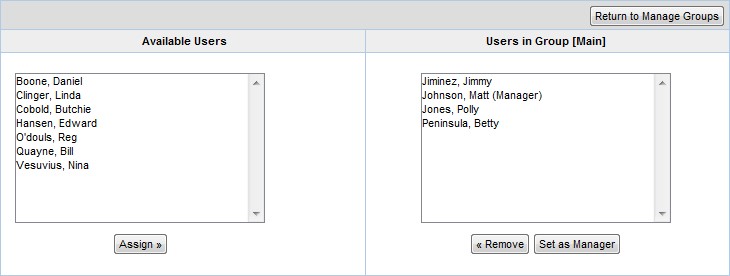
To add users to a group, click on the names of users in the Available Users list on the left.
Click the Assign button.
Click the name of the user in the Users in Group list box on the right who you want to be the Manager of the group.
Click the Set as Manager button.
When you have added all the users to this group and assigned the role of manager, click the Return to Manage Groups button.
The group will inherit settings from its parent group. To change the settings, click the group's Settings.
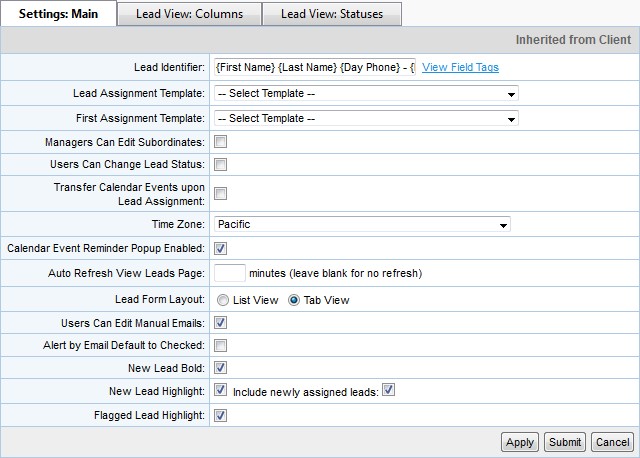
Some of these settings are the same as settings that appear on the Client Settings page, but setting them for groups allows you more granular control over how certain system settings appear for different groups. There are also settings that do not appear on Client Settings page. Click here for more on the Client Settings page.
Lead Identifier
The lead identifier is the lead data that will be displayed in logs, calendar events and other places. Typically this would be the lead name and a phone number.

Lead Assignment Template
Select from the drop-down list the email that you would like to be sent to a lead when it is assigned to a user.

First Assignment Template
Select from the drop-down list the email that you would like to be sent to a lead when it is first assigned to a user.

Managers Can Edit Subordinates
Select this to give Group Managers the permission to edit user settings of the users in their groups

Users Can Change Lead Status
Select this if you want to allow users to change statuses on leads. If this is unchecked, users can only change the status of leads by taking an action that triggers a status change.

Transfer Calendar Events upon Lead Assignment
When a lead gets re-assigned to a different user, you can make sure that any appointment that has been scheduled with that lead goes with the lead to the new user. Select this check box to make sure appointments don’t get dropped when leads get re-assigned.

Time Zone
Set your local time zone. This affects when users can receive leads through automatic lead distribution that may run between certain hours.

Calendar Event Reminder Popup Enabled
Select this to enable the calendar event reminder pop-up.

Auto Refresh View Leads Page
Enter a number of minutes in this field to determine how often the view leads page should auto refresh. New leads are not displayed in real time on the View Leads page so you may want to have the page auto-refresh regularly to display new leads. Leave this field blank for no automatic refreshing.

Lead Form Layout
Choose the layout of the Lead form; either a list view, or a tab view.

Users Can Edit Manual Emails
Select this to allow users to edit manual emails.

Alert by Email Default to Checked
Select this check box if you would like for “Alert by Email” to be default to checked on the Add/Edit Calendar Event dialog.

New Lead Bold
Select this check box if you want new leads to be bolded on the view leads page.

New Lead Highlight
Select this if you want new leads to be highlighted on the view leads page.

Flagged Lead Highlight
Select this if you want flagged leads to be highlighted on the view leads page.

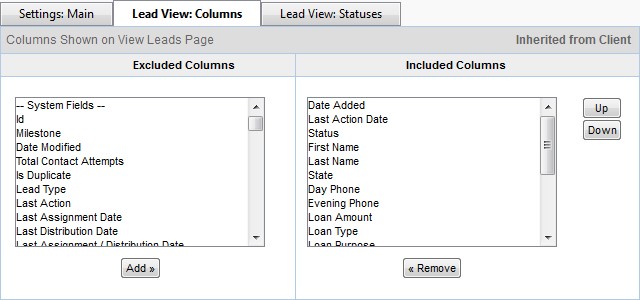
Lead View: Columns Tab
Use the form on this page to include or exclude columns on your view leads page.
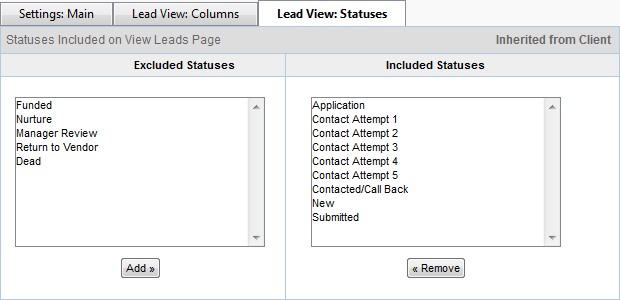
Lead View: Statuses Tab
Use the form on this page to determine by status which leads will appear on your view leads page.
- Click the Edit link to change the group’s name or reassign it to a new parent.
- Clear the Active check box to make the group inactive.