Lead Edit: Change the Status of Multiple Leads in Normal View
TOPICS COVERED IN THIS ARTICLE
- How to Change the Status of Multiple Leads in Normal View
ENVIRONMENT
LeadManager
STEP BY STEP INSTRUCTIONS
Status changes via Normal View supports 100 leads at a time at a time. To change the status of more than 100 leads at once, please use custom reporting and batch processing.
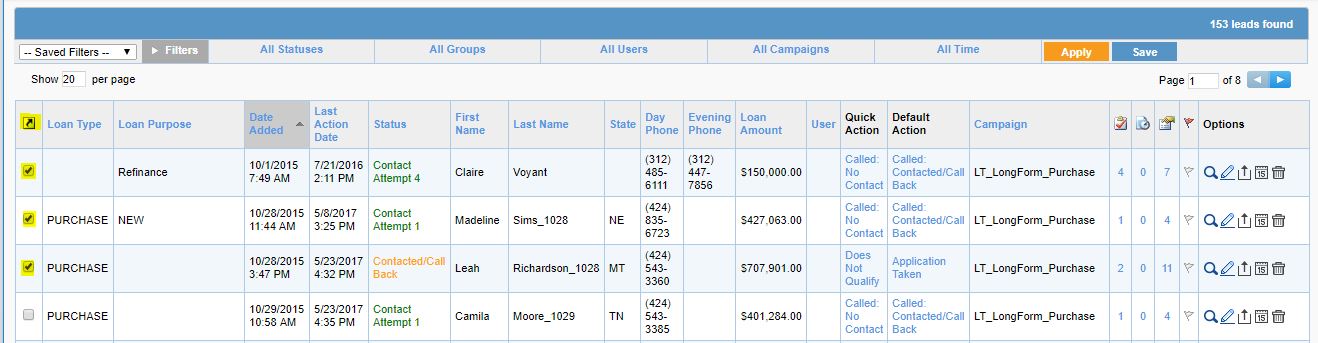
- Go to the Leads tab in and select Normal View.
- Select the leads whose Status you want to change. Selecting a lead is done by clicking the check box in the Selection Column.
- The Selection Column appears at the left side of the View Leads Table.
- Select the leads that you want to change the Status for by checking the box next to each corresponding lead record.
You can select only 100 leads at a time
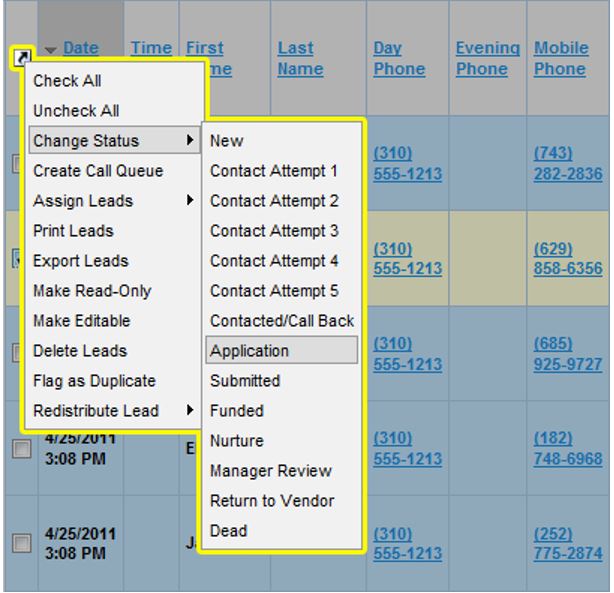
- With the desired leads selected, click the Lead Control Arrow icon which appears at the top of the Selection Column.
- Clicking here will display the Lead Control Menu. Please note that depending on your role, the LeadControl Menu items will vary.
- Move your mouse over Change Status to view a list of the possible Statuses.
- Move your mouse to the Status you would like to change the leads to and click.
- The Normal View page will now reload with the changes you made.