LeadManager: Client Settings Page: IP Address Security Settings
TOPICS COVERED IN THIS ARTICLE
How to navigate to and edit your IP Address settings
ENVIRONMENT
LeadManager
STEP BY STEP INSTRUCTIONS
Your IP Address Security Settings are one of the most valuable tools to protecting your database from being logged into by a user not authorized by the Velocify administrator.
This overview will explain how to get to your IP Address Security Settings and how to enter IP addresses into this Client Settings feature.
-
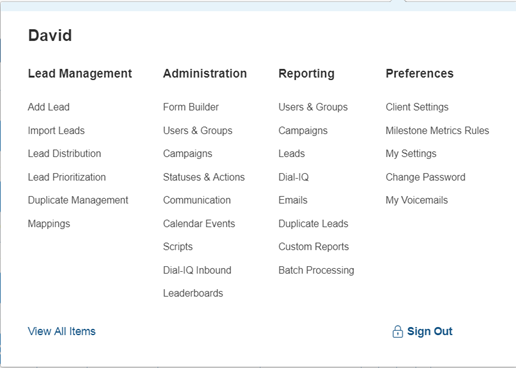
Click your name in the upper right of the header.

-
Under Preferences, click Client Settings.
-
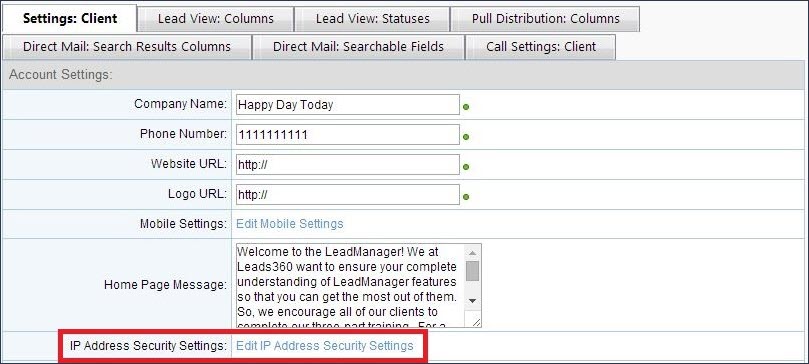
Click the Edit IP Address Security Settings link.
-
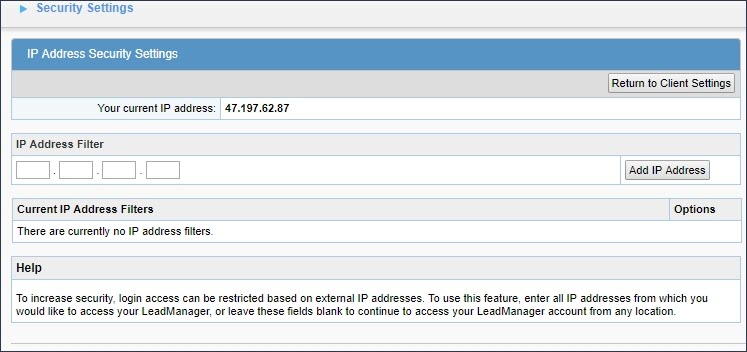
In the IP Address Filter panel, enter the IP address you would like to enable to access to your account.
The moment you input one IP address, IP Security Settings starts working and does not allow any other IP address not specified in the list to access your LeadManager. This will also affect other integrations that utilize Velocify's API. So if you choose to use this setting, make sure you get a complete list of all IP addresses and input them at once.
If you want to enter a range of IP addresses, you will need to input asterisks.
Example 1: If you enter ‘101.181.126.*’, Velocify will filter for everything from 101.181.126.0 to 101.181.126.255
Example 2: If you enter ‘34.192.*.*’, Velocify will filter for everything from 34.192.0.0 to 34.192.255.255
-
Click the Add IP Address button.