Dial-IQ: Inbound Detailed Review
TOPICS COVERED IN THIS ARTICLE:
A Detailed Review of Dial-IQ Inbound
ENVIRONMENT:
Dial-IQ
DETAILS:
Dial-IQ Inbound is for sales and marketing teams that strive to generate more high-quality inbound calls. With Dial‐IQ Inbound, it is possible to create campaign specific phone numbers and manage marketing efforts regardless of channel.
Dial-IQ Inbound Administrator Settings
Client Settings:
There are no Client Settings for Dial-IQ Inbound. Dial-IQ Inbound is enabled by submitting a request to your Account Manager.
How it Works:
This section gives a high level overview of the different pieces of Dial-IQ Inbound.
Provision new phone numbers or port existing numbers – In order for Dial-IQ to be aware of a call, the call must come in on a Dial-IQ Inbound number. New Dial-IQ Inbound numbers are provisioned from within the application. It is also possible to port existing numbers to Dial-IQ so that calls that come in on those numbers are recognized by the application.
Set up call flows – A call flow determines how an inbound call is handled. Examples of what a call flow might look like include:
-
Calls that come in on a certain Dial-IQ Inbound number may get routed to a specific agent automatically
-
Calls that come in on a certain Dial-IQ number may be distributed using a distribution program
-
Calls that come in on a certain Dial-IQ number will hear a recorded menu that prompts the caller to choose options by pressing keys on their phone
-
Calls that come in on a certain Dial-IQ number will hear pre recorded messages
Provisioning new phone numbers
Provisioning phone numbers means getting new Dial-IQ Inbound phone numbers.
- First, access the Menu page by clicking your name in the upper right of the header.

- Under Administration, click Dial-IQ Inbound.
- Click Inbound Numbers.
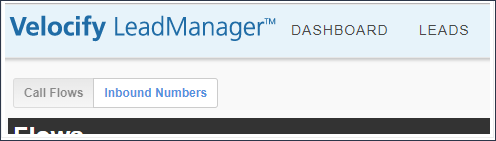
- The Mange Inbound Numbers page will load. When it loads for the first time there will be no numbers listed. Blocks of five local or toll free numbers are automatically purchased when requested within the UI.
- Please contact your Account Manager for costs associated with number provisioning.
- Adding a number is done by clicking the Get a Number button.
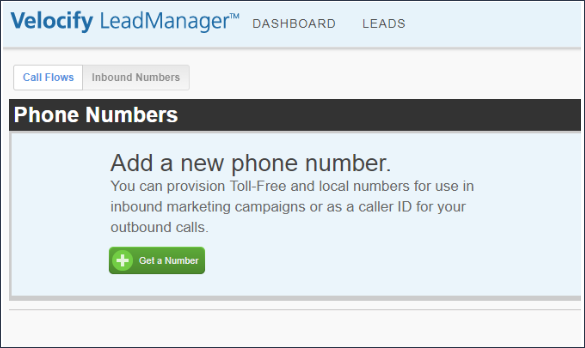
- When a number is provisioned it is randomly selected from a bank of available phone numbers. The process is automatic and blind. It is not possible to select one number from a list of available numbers.
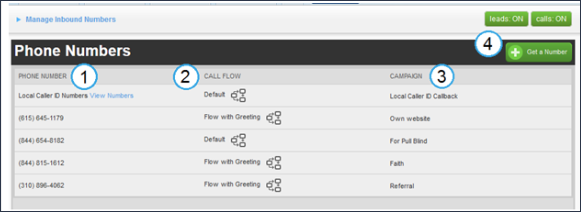
- 1 - Dial-IQ Inbound Numbers are listed in this column.
-
2 - The Call Flows that are connected to the numbers are listed in this column.
-
3 - The Campaigns that are connected to the numbers are listed in this column.
-
4 - Click the Get a Number button to provision a new Dial-IQ Inbound phone number. When this button is clicked, a popup will appear.
Get a new number Popup
When you click the Get a Number button on the Manage Inbound Numbers page, a popup will load. Follow these steps to provision the new number.
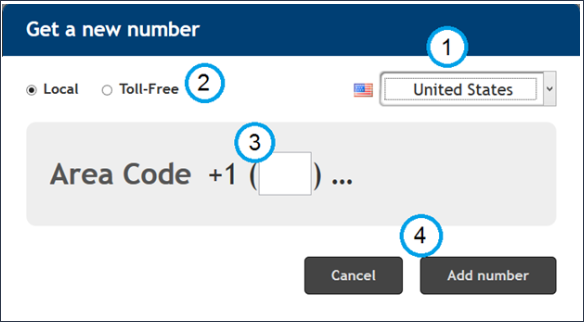
- As of the 11.6 Release, only United States numbers are available.
-
Select either Local or Toll-Free.
-
When provisioning a local number; your desired area code goes here. This field will not be displayed if Toll-Free is selected above.
-
Click the Add number button to add the number, or the Cancel button to cancel. Note that once the Add number button is clicked, the number will be provisioned. One will be subtracted from your total available inbound numbers. This action cannot be undone.
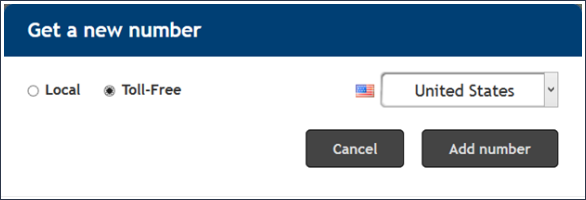
When Toll-Free is selected the popup appears as below. It is not necessary to enter an area code. The Cancel and Add Number buttons are the same.
When the Add Number button is clicked, the number is provisioned and displayed.
It is now possible to connect the new number with a Call Flow and with a Campaign.
The Call Flow that is connected to the number will determine how the call is handled.
The Campaign that is connected to the number will determine what campaign will be associated with new leads that are created by calling this number.
There is more information on Call Flows in a later section of this topic.
Note that if an existing lead calls in on this number it will retain its existing Campaign association. The campaign selected here only assigns a Campaign value to new leads.
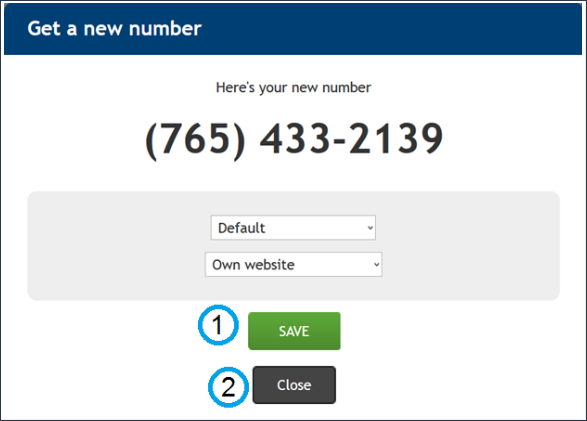
-
Click the drop-down and select a Call Flow to connect to the number.
-
Click the drop-down and select a Campaign to connect to the number.
- Once the Campaign and Call Flow have been selected, click Save.
- Note that it is not necessary to connect a Call Flow and Campaign to the number at this stage. Connecting a Call Flow or Campaign to a Dial-IQ Inbound number can be done from the Manage Inbound Numbers page.
After the number has been provisioned and the popup is closed, the number will appear on the Manage Inbound Numbers page.
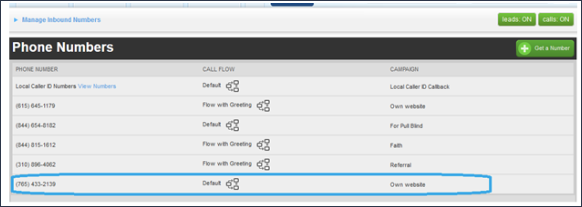
Connecting a Call Flow or Campaign to a Dial-IQ Inbound number on the Manage Inbound Numbers Page
It is possible to connect a Call Flow or a Campaign to a Dial-IQ Inbound number from the Manage Inbound Numbers page.

Clicking the graphic in the Call Flow column will display a drop-down menu in which all of the available Call Flows are listed. Select a Call Flow from the pull down and click the X button to save the selection and hide the drop-down.
Clicking the Campaign names in the Campaign column will display a drop-down menu in which all of the available Campaigns are listed. Select a Campaign from the pull down and click the X button to save the selection and hide the drop-down.

Porting Numbers
If you have an existing phone number that you would like to use as a Dial-IQ Inbound number, contact Velocify Professional Services to find out if it is possible to port the number. Most U.S. Phone numbers can be ported. Porting the number means changing who provides the service for the number. Fees may apply.
Creating Call Flows
A Call Flow determines how the inbound call will be answered. You may want a call placed to a given Dial-IQ Inbound number to be immediately distributed and answered by an available agent, or you may have a prerecorded message that you’d like to play. Or perhaps there is a menu of choices from which the caller will choose by pressing different phone keys.
First, access the Menu page by clicking your name in the upper right of the header.
Under Administration, click Dial-IQ Inbound.
The Manage Call Flows page will load. The first time this page loads, no Call Flows will appear in the list. Adding a Call Flow is done by clicking the New Flow button.
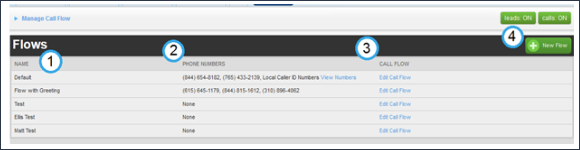
-
1 - The name of the Call Flow appears in this column.
-
2 - The Dial-IQ Inbound number or numbers handled by this call flow appear in this column.
-
3 - A link to either Create or Edit a Call Flow appears in this column.
-
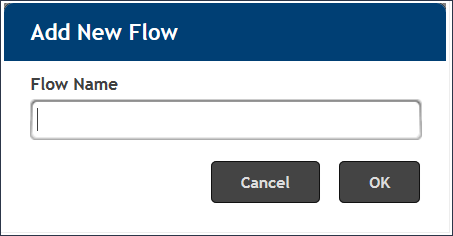
4 - Clicking the New Flow button will load a popup that prompts you for a Flow Name.
Give the Call Flow a descriptive name and click OK. The name cannot exceed 100 characters.
The Add/Edit Call Flow page will load.
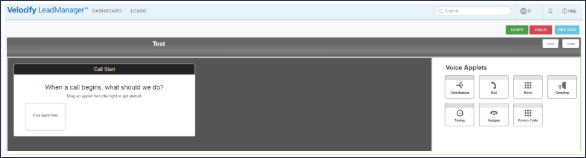
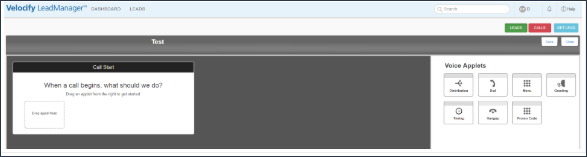
Call Flow Mapping Area – Creating a Call Flow is done by dragging Applets from the Applet Toolbar to the Mapping Area. The Mapping Area contains boxes where you must decide how the call is handled at that point in the call. When a new Call Flow is being created, the first decision that must be made is, “What is the first thing that happens to a call that comes in on this number?”
Voice Applet Toolbar – The Voice Applets that are listed here can be dragged and dropped into the Call Flow Mapping Area to determine how a call is handled at different points in the call. Each applet has its own settings. When an applet is dragged onto the Call Flow Mapping Area, a box will appear where you must configure the settings associated with that Applet.
Voice Applets
There are a total of seven Voice Applets that can be used to control Call Flow. Each applet has its own settings.
Creating a Call Flow consists of dragging and dropping applets into open spaces in the call flow that display the text, “Drop applet here” and configuring their dependent settings. This section of the topic defines each applet and its dependent settings. Creating a sample Call Flow (i.e., adding applets and removing applets) will be covered in this section.
Distribution Applet
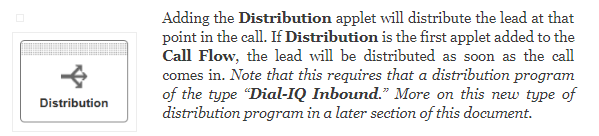

When you add the Distribution applet to a call flow the Distribution Applet Settings Box will appear.
In the case of the Distribution applet there are no further settings that need to be configured. The Call Flow ends when the lead is distributed. When the lead is distributed a popup will appear on the screen of the user who receives the call and their phone will ring.
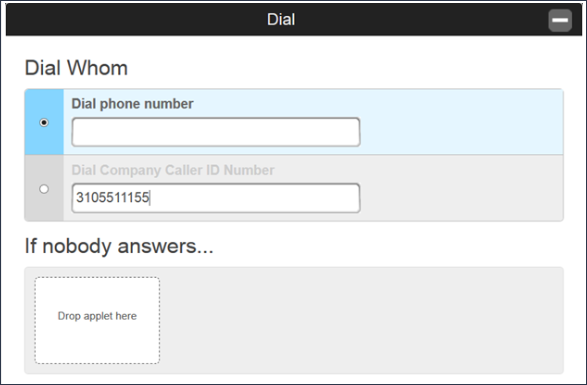
Dial Applet

The settings that are required for the Dial applet are “Dial phone number” and an addition applet that determines what happens to the call if no one answers the number that is dialed. This number must be a U.S. phone number, direct dial, no extension.
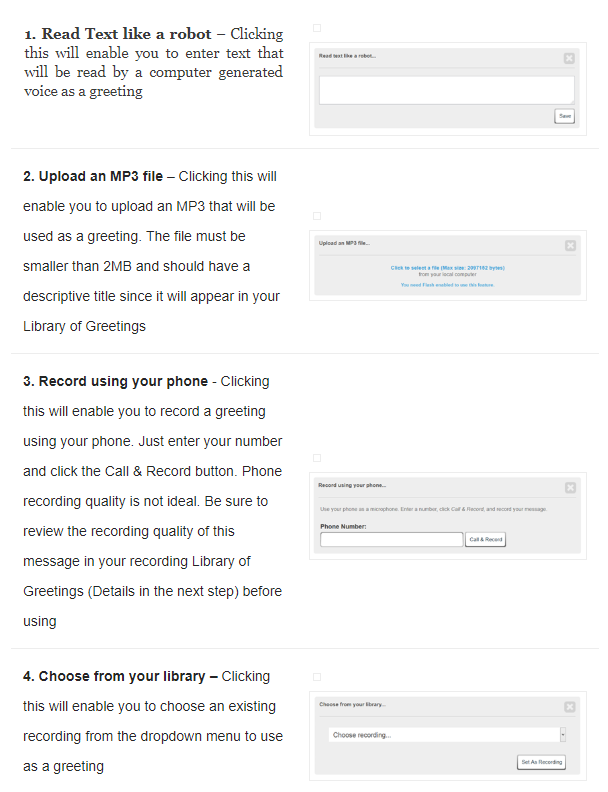
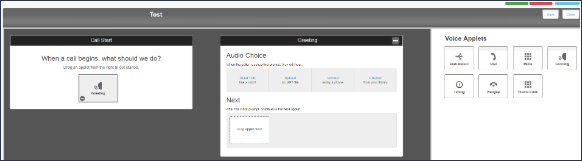
Greeting Applet
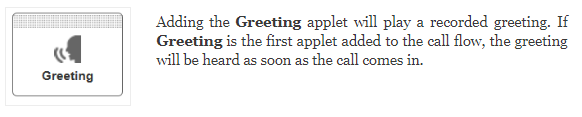
The settings that are required for the Greeting applet enable you to choose different types of recorded greetings (or Audio Choices) and a spot for an additional applet that determines what happens to the call if no one answers the number that is dialed.
Click the X at the top right of the Audio Choice to close it.
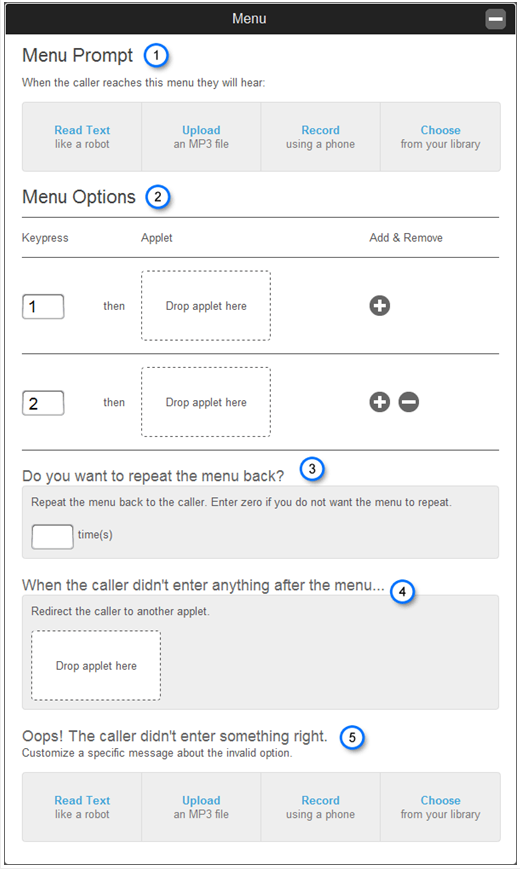
Menu Applet

There are a few settings that are required for the Menu applet. They are explained here:
-
1- Menu Prompt – This section works just like the Greeting applet described in the previous section
-
2 -Menu Options – This section has three columns, Keypress, Applet, and Add & Remove. Enter a number in the Keypress column and drag an applet into the associated slot in the Applet column. Doing this will determine how the call will be handled when the specified key is pressed by the caller. Click the plus (+) icon to add a menu option and click the minus (-) icon to remove a menu option. At this point it becomes necessary to create separate call flows to determine how the call is handled for the remainder of the call
-
3 - Enter a number here to determine how many times the menu should repeat if the caller does not make a selection
-
4 - Drag an applet here to determine what will happen to the call if the caller doesn’t enter anything after the menu
-
5 - It is possible to create a greeting that will be heard if the caller makes an invalid menu selection
Timing Applet
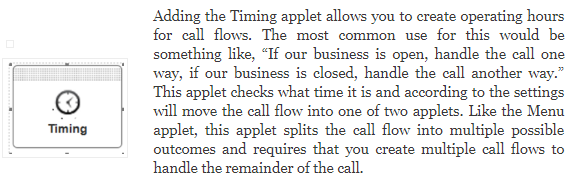
The settings that are required for the Timing applet enable you to set operating hours that determine which applet should become active next.
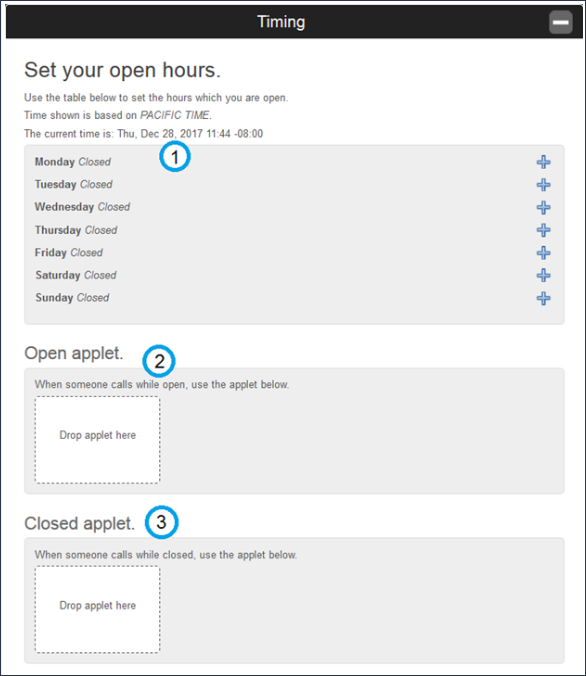
-
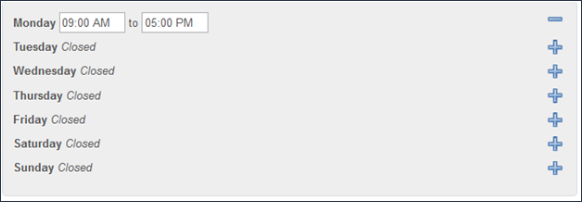
1 - Schedule – Clicking the plus (+) icon associated with a day will display two fields where you can enter the start time and end time that determine the hours of operation.
Enter the times in this format: 9:00 AM and 5:00 PM. The current time as understood is displayed in italics above the scheduling box. If the current time of the server is different than your local time, you will have to adjust the hours in your schedule to reflect the difference between the server timezone and your timezone.
-
2 - Open applet – The applet that is dropped into this space will determine how the call is handled if it is received outside the hours indicated in the scheduling box above
-
3 -Close applet – The applet that is dropped into this space will determine how the call is handled if it is received within the hours indicated in the scheduling box above
Hangup Applet
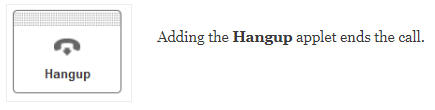
When you add the Hangup applet to a call flow the Hangup Applet Settings Box will appear.
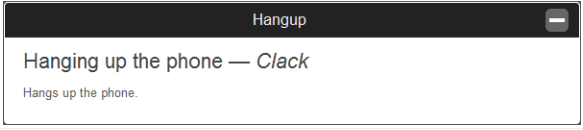
In the case of the Hangup applet there are no further settings that need to be configured. The Call Flow ends with this applet.
Dial-IQ Inbound Promo Code Applet
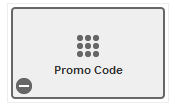
The Promo Code applet can be used when creating Dial-IQ Inbound call flows. The Promo Code applet is used to prompt the caller to key in a code. The code is looked up and the call flow can be configured to handle different lookup results.
IMPORTANT NOTE - The Promo Code Applet does not work with the Direct Mail Warehouse Feature. If you need to utilize promo codes with the Direct Mail Warehouse feature this will need to be reviewed with Velocify's Professional Services Division.
Promo Code Applet Settings
As with other applets, adding the Promo Code applet to a call flow will cause a settings module to appear. The settings of the Promo Code applet are as follows:
Promotional Code Prompt
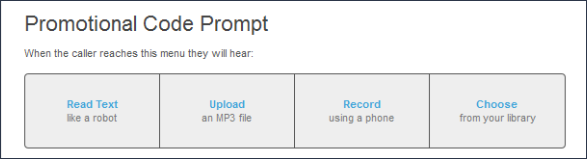
This is a recorded message that the caller will hear that should prompt them for a promo code. Recording this prompt is the same as recording a greeting with the greeting applet
Options
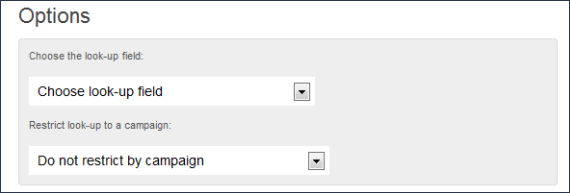
The Options setting consists of two drop-downs:
-
Choose look-up field – This is the field in the lead record that will be searched to find the promo code
-
Do not restrict by campaign – This field defaults to “Do not restrict by campaign.” If you would like to restrict the lookup by campaign, select the campaign from this dropdown. If a campaign is selected here, only leads associated with the selected campaign will be searched.
When the lead has been successfully looked up
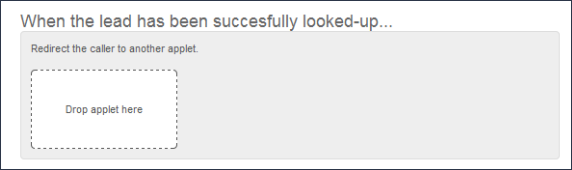
This allows you to add an applet to handle the call flow after the lead has been successfully looked up.
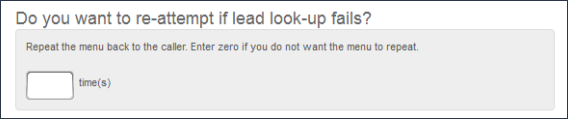
This setting allows you to set an additional number of times that the call flow will re-start if the lookup fails.
Prompt to play when the lead was not found
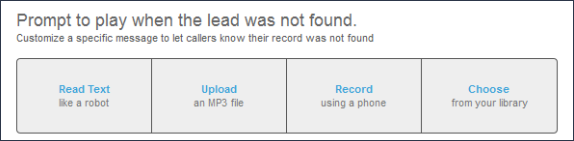
This setting allows you to create message to play when the lead cannot be found.
When the led was not found after maximum number of re-attempts…
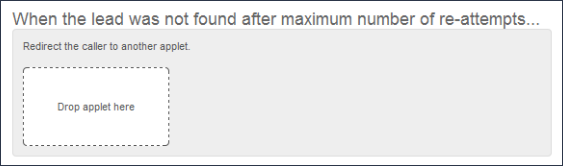
This setting allows you to add an applet to handle the call flow after a maximum number of re-attempts has been reached.
Creating a Simple Call Flow
Creating a Call Flow is done by dragging and dropping applets from the Voice Applet Toolbar to the Call Flow Mapping Area.
This example shows how to create a call flow that plays a recorded greeting for the caller and then distributes the lead to an available agent.
Click the Create Flow button on the Manage Call Flows page.
Greeting
Click the Greeting applet and drag it to the space in the Call Flow that displays the text “Drop applet here". This is where the Greeting applet should be dropped
Greeting Settings
-
When the Greeting applet is added the Greeting Applet Settings Box will appear. Configure the message as desired. All settings boxes have a minus (-) icon in the top right corner. Click this icon to hide the settings box. Once hidden, click the applet to display it again
-
The Greeting applet now appears in this part of the call flow. It has a minus (-) icon in the lower left hand corner. Click this icon to remove the applet from the call flow. You will be asked to confirm this action
-
Drag the Distribution applet into the area that displays the text “Drop applet here”
Distribution
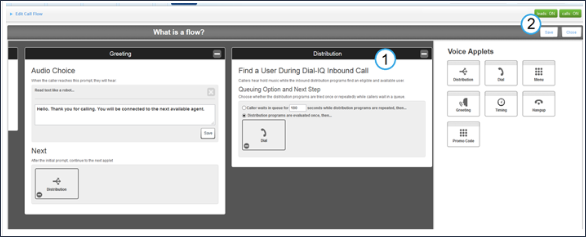
- 1 - The Distribution Applet Settings Box – There are no settings associated with the distribution applet so the text in this settings box is informational
- 2 - The Call Flow is now fully configured. Click the Save button to save it
Once saved it will appear in the list on the Manage Call Flows page. It will also be available in the drop-downs on the Manage Inbound Numbers page and on the popup that appears when provisioning new numbers.
Dial-IQ: Inbound Distribution Program
There is a new type of distribution program that is used for leads that come in through Dial-IQ Inbound calls. Distribution programs of the “Dial-IQ: Inbound” type will distribute brand new leads that are captured from inbound calls as well as existing leads that are unassigned. Leads that are already assigned to a user will not be automatically redistributed.
Follow the same steps to create a Dial-IQ: Inbound distribution program that you would take to create any other type of distribution program.
When selecting the Distribution Method, choose Dial-IQ: Inbound.
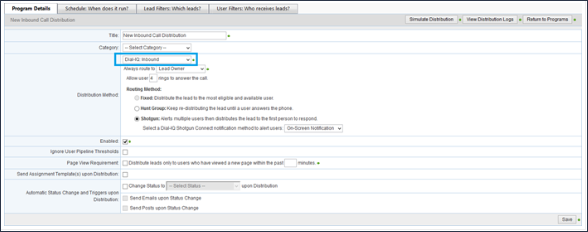
The remaining settings are the same as for other types of distribution programs.
In order for a user to receive a lead through a Dial-IQ: Inbound distribution program the following conditions must be met:
-
The user must be an active Dial-IQ user.
-
The users Calls and Leads buttons must both be in the “On” position.

-
The user must not be already on a Dial-IQ call.
-
The user must not be ineligible to receive a lead based on User Max settings in Distribution > User Settings > Pipeline Thresholds.