Organizations and user roles (for users)
Overview
You can view information about the employees of each organization you are affiliated with who use Simplifile. For each employee, you can see the contact information and Simplifile access roles. This information is organized and accessible in multiple ways to help you find what you need as quickly as possible.
Several pages in Simplifile give you access to the user and role information for the organizations you belong to that use Simplifile. You can send email messages to contact persons and users from some of these pages. If you have the necessary permission, you can also add users and manage each user’s roles. On all pages, you can filter the list to display only entries that include the text and numbers you enter in the filter field.
Each organization has its own Organization User & Roles page. This page includes the following tabs:
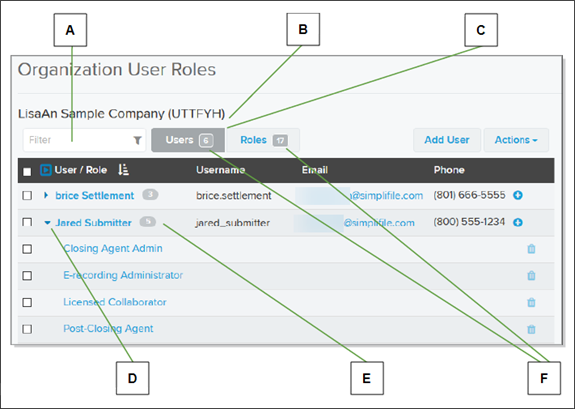
- The Organization User & Roles page Users tab displays all Simplifile users at that organization and their roles. Below is an example of the Users tab. The username displays first, with one person’s roles displayed beneath.
| Letter | Description |
|---|---|
| A | Filter the list using characters you enter in this field. |
| B | If you are affiliated with more than one organization, you can select an arrow here and choose the organization you want from the dropdown list. |
| C | Choose to display the list sorted by roles or by users. |
| D | Select the arrow beside a person’s name to show or hide that person’s roles. The arrow points right if roles are hidden. |
| E | The number beside each name indicates how many roles a person has. |
| F | These numbers indicate how many Users and Roles there are in the organization. |
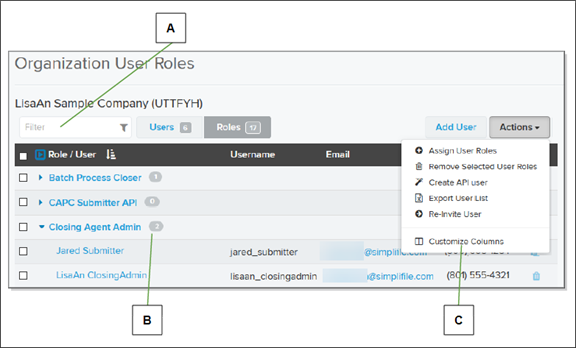
- The Organization User & Roles page Roles tab displays all roles and the users at the organization who hold them. Below is an example of the Roles tab. The roles display first, with the names of the people who hold the role displayed beneath
| Letter | Description |
|---|---|
| A | When you type in the Filter field, Simplifile displays only those users whose name, username, or email address contain the characters you enter. |
| B | When sorted by role, the number beside each role indicates how many users have been assigned to the role. |
| C | Select the Actions |
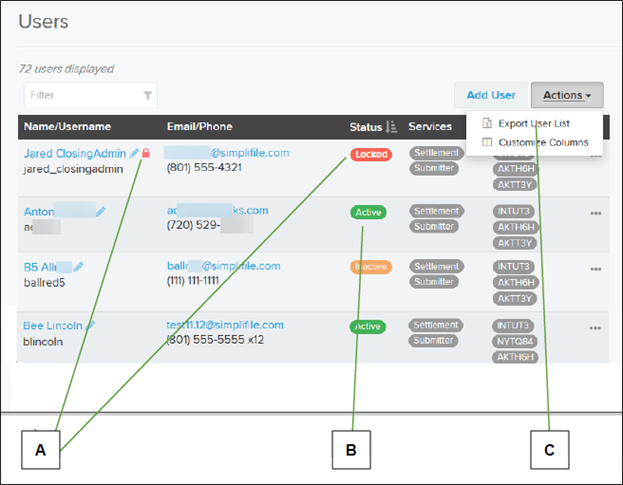
The Users page displays all the Simplifile users from the organizations affiliated with both your company and Simplifile. Below is an example.
| Letter | Description |
|---|---|
| A | Administrators can unlock a locked user account from this page. For more information, see Unlocking a locked user account. |
| B | The status of each user account displays to administrators. |
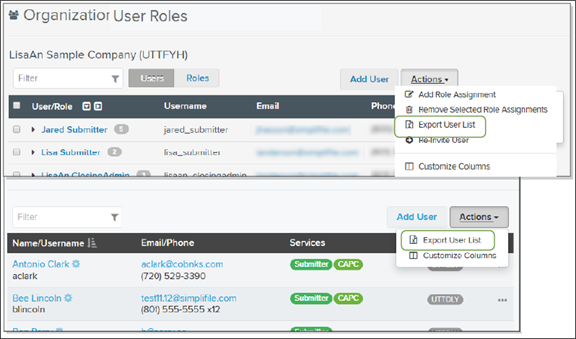
| C | You can export the user list. For more information, see Exporting a user list. |
You can choose the columns that display on the page. Account statuses display only to administrators. A pending status indicates that someone has been invited to Simplifile but has not yet signed up. Inactive indicates that the person has not logged in to Simplifile during the past six months.
Each person who uses Simplifile has his or her own User Roles page that includes the following tabs:
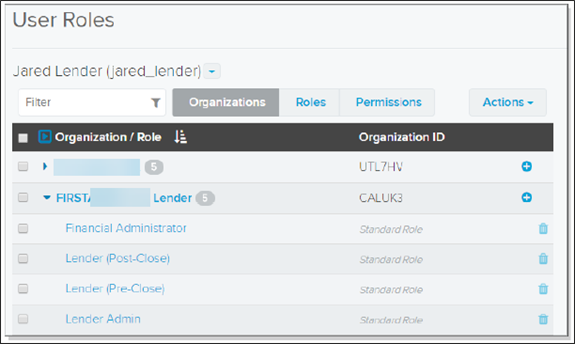
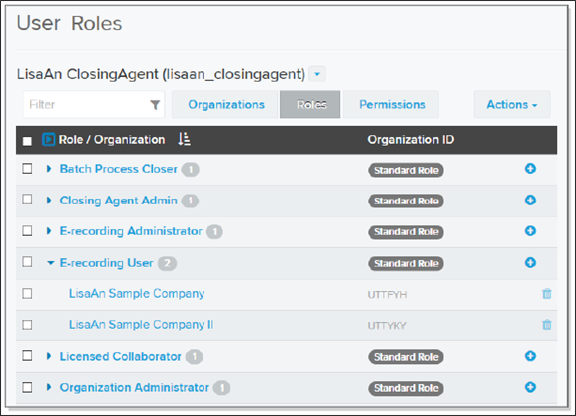
- The User Roles page Organizations tab displays, for each user, all organizations the user is affiliated with and the Simplifile access roles that user has been assigned at each organization. Below is an example of the Organizations tab. The organizations display first, with the roles beneath.
- The User Roles page Roles tab displays all of the user’s Simplifile access roles and the organizations where the role is held. Below is an example of the Roles tab. The roles display first, with the organizations beneath.
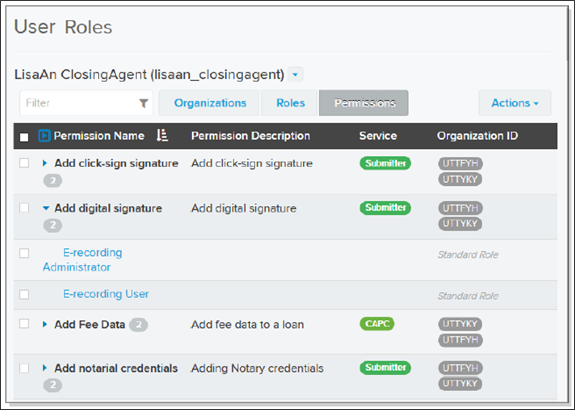
- The User Roles page Permissions tab displays the permissions a specific user has. Below is an example of the Permissions tab. The permissions display first, with the roles beneath.
Inviting users to join you at Simplifile
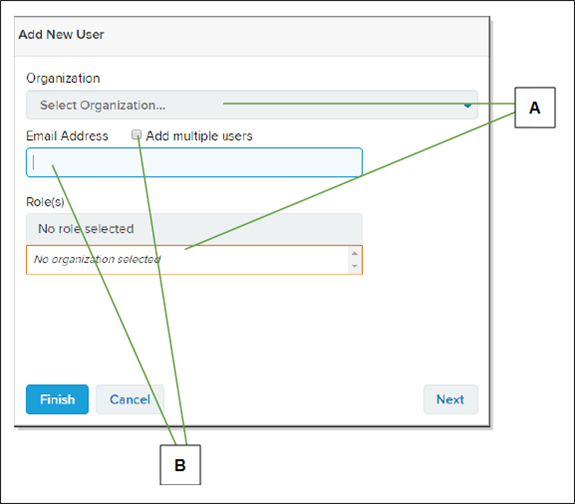
You can add users to an organization roster. You can add a single user or multiple users at the same time. To do this, you provide the email addresses of the people you want to add and choose the roles you want the people to have. Simplifile then sends an invitation to each email address.
When someone receives an email invitation to join you at Simplifile, the person logs in to Simplifile. A new user signs up for a Simplifile account to accept the invitation. An existing user is taken to a specific page upon log‑in where they can accept or reject their proposed new roles.
| Letter | Description |
|---|---|
| A | Roles you can assign display after you choose an organization. |
| B | To invite more than one person at a time, mark Add multiple users. Then add email addresses in the box. Separate the email addresses with commas. |
How to invite users to Simplifile
QUICK TIP: You can re‑invite people or cancel invitations for people who have not responded. To do this, first access either the Users page or the Organization Users & Roles page. Then select the Menu ![]() (ellipsis) button at end of a record with a pending status and choose the option you want.
(ellipsis) button at end of a record with a pending status and choose the option you want.
- In the left navigation menu, select the Users item.
- Above the Users table, select the Add User
 button.
 - In the window that displays, choose the organization where you want to add the user.
- Do one of the following:
- To add a single user, enter the email address for the user.
- To add multiple users, mark Add multiple users. Then add the email address for each user you want to add. Separate the email addresses with a comma ( , ).
- In the Role(s) dropdown list, mark the roles you want to assign to the users whose email addresses you added in the Email Address field.
- When you finish, select the Finish button.
Simplifile sends an email to each address you entered. The email invites the person to sign up for a Simplifile account or log in to an existing account to accept new roles.
Exporting a user list
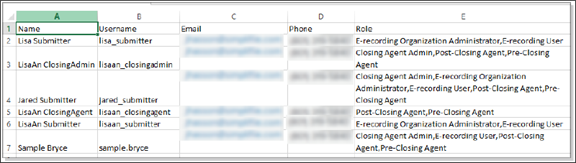
If desired, you can download a comma‑separated values (CSV) file of the users in an organization.
You can view the file as a spreadsheet. Below is an example.
How to export a user list
From the Organization User & Roles page
- In the left navigation menu, select the Organizations item.
- In the Organizations table, select the name of the organization whose user list you want to export.
- In the left navigation menu, select the Users & Roles item.
- From the Actions dropdown list, choose Export User List.
- Open, print, or save the file based on your browser’s settings.
From the Users page
- In the left navigation menu, select the Users item.
- From the Actions dropdown list, choose Export User List.
- Open, print, or save the file based on your browser’s settings.
Adding and removing roles from a user
Simplifile includes role assignment pages for both organizations and users. You can add roles to individuals or groups of users. When you select an add icon (  ) on either role assignment page or mark boxes and use the Actions options to add or remove roles, a window displays. Which version of the box you see depends on whether you start from the organization page or the user page. Below are examples.
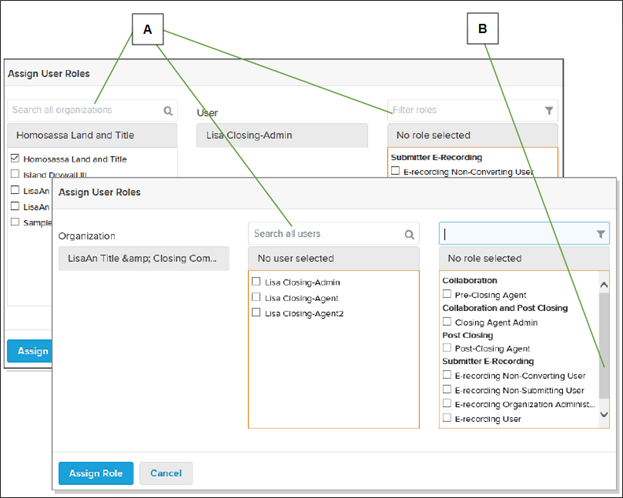
| Letter | Description |
|---|---|
| A | You can use the search fields above the lists to find specific organizations, users, or roles. Each list lets you choose one or more items. |
| B | If necessary, use a scroll bar to find the user names and roles you want to assign. |
If you select an add icon or mark boxes and use the Actions options to open the role assignment window, the people or roles whose icon you select or whose boxes you mark are automatically marked when the window opens. You can change the marked boxes as desired.
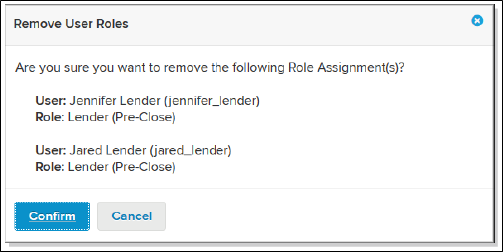
You can remove a role from a user record. This removes the permissions for that role. In other words, the person from whom you remove the role will no longer be able to perform the tasks related to that role.
When you choose to remove roles, a window displays. This lets you review the information and confirm that you want to remove the roles. Below is an example.
NOTE: If you remove all roles from a user record in a specific organization, that person will no longer be able to perform tasks in Simplifile for that organization. To remove all roles from a user at once, select the Menu ![]() (ellipsis) button at the far right of a username and choose Remove User.
(ellipsis) button at the far right of a username and choose Remove User.