Persona Access to Loan Actions
This feature is not available in Encompass Broker Edition.
View the "Creating and Using Business Rules" Quick Reference Guide
Use the Persona Access to Loan Actions business rules setting to define persona-based access level for Encompass TPO Connect site loan actions. For example, rules can be set up to enable the Submit Loan loan action only after Order/Reissue Credit loan action is complete. Or they can set up a rule that allows the persona to submit a new rate lock after the rate has already been locked.
To Create a Persona Access to Loan Actions Rule
-
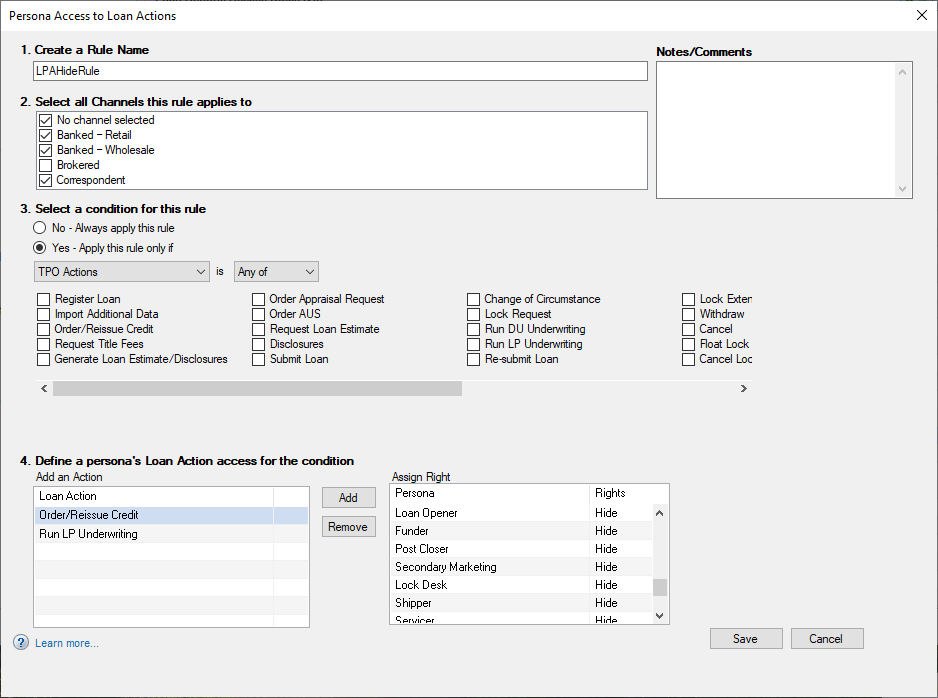
On the left panel, click Business Rules, and then click Persona Access to Loan Actions.
-
On the Persona Access to Loan Actions tool, click the New icon.
-
In the Create a Rule Name field, type the name of the rule, such as Loan submission after credit order.
-
In the Select all Channels this rule applies to section, select the checkboxes corresponding to the channels for which the rule will be applied, such as Correspondent.
-
In the Select a condition for this rule section:
-
If you want to apply additional conditions to the rule, select Yes, and then select TPO Actions from the dropdown list.
- In addition, select Any of or All of from the dropdown list to specify that the rule should be enforced if any of the selected TPO Actions are completed or if all the selected TPO Actions are completed.
-
Select one or more of the following checkboxes to configure the rule to be applied at the selected TPO action:
-
Register Loan
-
Import Additional Data
-
Order/Reissue Credit
-
Request Loan Estimate (new in Encompass 19.1)
- Disclosures
-
Submit Loan
-
Change of Circumstance
-
Lock Request
-
Run DU Underwriting
-
Run LP Underwriting
-
Re-submit Loan
-
Lock Extension
- Withdrawl
- Cancel
- Float Lock
- Cancel Lock
- RePrice Lock
- ReLock Lock
- Change Request - OB
- Save Loan
-
If you do not want to apply additional conditions to the rule, then select No - Always apply this rule.
-
If you want to apply Advanced Conditions where you can create expressions to define custom conditions, select Advanced Conditions from the dropdown list.
If you select the Advanced Conditions option, click theFind icon (magnifying glass) to select filters for the Advanced Conditions option. For detailed instructions on how to create your own code, refer to the "Advanced Coding for Business Rules" document.
-
-
In the Define persona's loan action access for the condition section:
-
Click the Add button.
-
In the Add Loan Actions window, select the loan action to which you want to apply this rule.
-
In the Assign Right section, click to select the persona(s) assigned to this business rule.
-
Double-click in the Rights column to display the dropdown list and then select Enable to activate the business rule for this persona.
-
-
In the Notes/Comments field, type details and helpful notes about the rule as needed.
-
When finished, click Save.