Property Information
View "The Closing Process" Quick Reference Guide
Use the Property Information form to enter basic and preliminary property information prior to ordering closing documents.
Subject Property
Most of the information in the Subject Property section will already be completed using data from the loan application.
-
Select a Flood Zone designation from the list, as indicated on the FEMA Flood Insurance Rate Map for the subject property.
-
If required, type a Condo/PUD Name.
-
In the # of Stories field, type the number stories in the condominium unit.
-
In the Flood Cert Number field, enter the certification number listed on the report from the flood certification provider for the property.
-
Select the Subject Property is in a Rural/Underserved Area checkbox to indicate the subject property is in either a rural
 or underserved area. This field is mapped to its corresponding field on the Basic Information form in the ATR/QM Management tool to help determine the consumer’s ability-to-repay the loan and to help small creditors document if the loan meets Small Creditor Qualified Mortgage standards.
 -
Select the Subject Property was previously converted to Real Property checkbox to confirm if the subject property was previously converted to real property when the subject property is a manufactured home. Fannie Mae will no longer require the Affidavit of Affixture (GMANARDU/GMANARLU) form if the manufactured home was previously converted to real property.
-
If this checkbox is not selected, the Affidavit of Affixture will be included in the package when the subject property is a manufactured home. If the checkbox is selected, the Affidavit of Affixture will not be included in the package when the subject property is a manufactured home.
-
Flood Information
The Flood Information section records additional information related to the documentation of LOMA/LOMR on the flood certificate. This information is typically imported from a flood certification provider, but it can be entered manually.
Title Information
-
Enter the book number and page number of the county records in which the prior mortgage is recorded.
-
Complete the Subdivision and Square fields if the subject property is in Washington D.C. These fields are required for the Washington D.C. Deed of Trust.
-
Enter the Original Principal and Current Principal (any outstanding unpaid principal balance) for the prior mortgage.
-
From the title report, enter the property's identification information in the Parcel Number, Lot, Block, and Section fields.
-
In the Title Report Date field, enter the date the title report was issued.
-
In the Approved Items field, enter the item numbers (separated by commas) associated with the approved items on the title report.
-
In the Tax Message field, enter notes related to taxes. This information is often related to property tax installments that are due.
-
In the Special Endorsements field, type any specific title endorsements.
Property Disaster Declarations
Use this section to to create multiple records of disasters affecting a property on different dates if needed. Select the Disaster Declared checkbox (field ID 4953) at the top of the section to indicate that the property has been affected by a disaster.
-
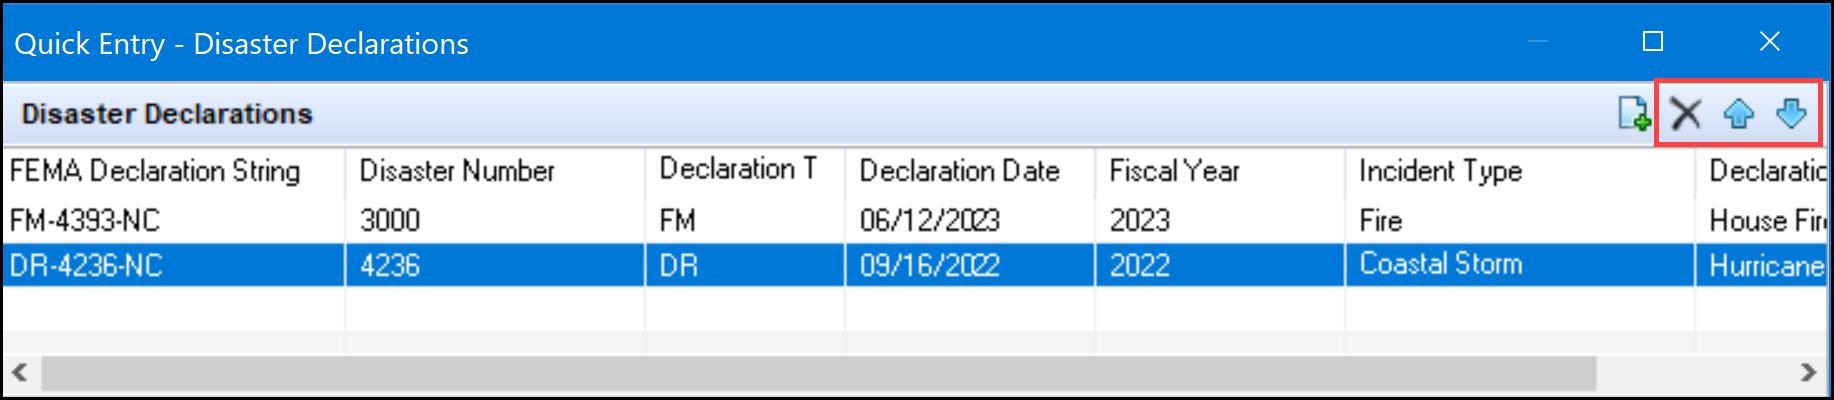
Multiple records can be created for disasters in a manner similar to the records created for the Verification of Employment (VOE) or Verification of Liabilities (VOL) verification forms. To add records for disasters, click the Disaster Declarations button at the top of the section to open the Quick Entry - Disaster Declarations pop-up window.

-
On the pop-up window, click the Add icon to open a new record in the panel below the table. Each time you add an entry, it displays in a new table row at the top of the window. Each record includes a new collection of fields that are editable and do not have any logic or validations. The fields in the panel below the table are based on the FEMA Web Declaration Areas defined at: https://www.fema.gov/openfema-data-page/disaster-declarations-summaries-v2.
-
The top three entries on the pop-up window are copied to the Property Information form. Use the icons provided at the top of the pop-up window to delete and reposition the entries.
There is no printed output form associated with the new Property Disaster Declarations section and the Disaster Declarations quick entry window fields. This information is available on the Property Information input form only.
Legal Description and Mineral Rights
-
In the Legal Description field, type a legal description, or click From Page 1 of 1003 to copy the description from the 1003.
-
Or you can select the Attach legal description checkbox to indicate that the legal description will be included as a separate attachment.
-
-
In the Mineral Rights/Abbreviated Legal Description area, type mineral rights information from the title report, if applicable. This area is also used to type an abbreviated legal description if required.
Manufactured Housing Details
If the property includes a manufactured home, enter information to describe and identify the home.
-
Enter details such as the Make, Year, Manufacturer, and dimensions. This information is typically obtained from the seller of the manufactured home.
-
In the Serial # field, enter the number found on the front steel cross-member of the chassis or on the data plate (a document attached in the interior of the home).
-
In the HUD Label # field, enter the number on the HUD Label, a red metal plate attached to the exterior of the home.
Coop Loans
If the property is part of a cooperative, enter details that describe the coop and the share of the coop being purchased with the loan. Most of this information can be found in the occupancy agreement for the coop.
-
Enter the name of the coop company and coop building.
-
In the Vacancy Percentage Notification field, enter the percentage of vacant units in the coop building.
-
Provide legal information including the state whose laws apply to the coop and the name of the individual with power of attorney for the coop.
-
Enter share-holder information such as the number of coop shares being purchased with the loan, the stock certification number for the coop shares, and the number of the apartment associated with the coop shares.
-
Enter the Proprietary Lease Date (the closing date of the lease agreement) and the Assignment of Lease Date (transfer date of the lessor's or the lessee's interest in the coop).