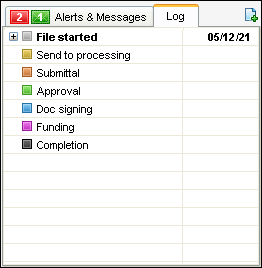
The Loan Log
The Loan Log communicates historic, current, and future loan-related activities
and events. Log entries display information such as completed
and future milestones, email and phone communications, reminders of required
actions (alerts) and actions
initiated from the eFolder.
When you add an entry, or select an existing entry, a worksheet opens with detailed information corresponding
to each type of entry.
Some entries are automatically added to the Log. These include future
milestones and activities initiated using the eFolder and Status Online
features.
Alerts & Messages Tab
The Alerts & Messages tab displays the active alerts and unread messages for a loan (as also indicated on your Pipeline). Alerts notify you that an event has occurred, is pending, or is due. Compliance alerts notify you when a violation of Real Estate Settlement Procedures Act (RESPA) or Mortgage Disclosure Improvement Act (MDIA) regulations has occurred or when an action is required to stay compliant with these regulations. Message entries inform you when requested documents have been returned via fax from a borrower. When you clear an alert or read a message, the entry is removed from both your Pipeline and the Alerts & Messages tab.


 Description of Log Entries
The most commonly-used entries are briefly
described below. For detailed procedures, click the See
Also links.
-
Milestone
- Loan processing tasks are divided into stages by milestones. Milestone
entries in the Log show the milestones that have been reached and those that are not yet finished.
A plus sign (+) next to a milestone entry indicates it can be expanded to show more entries related to it. Click the plus sign to expand the entry. Click the minus sign (-) to collapse the entries.
-
Conversation
Log - These entries track interactions with the borrower, service
providers, and other contacts related to the loan. When you create a Conversation
Log entry, you can select options to send follow-up alerts to other loan team members.
-
eFolder Entries - These entries track the ordering, expected receipt,
actual receipt, and reordering of reports, verifications, conditions,
and other documents needed at each processing stage.
-
eDisclosures Ordered and Closing Documents Ordered - An entry is added each time you generate disclosures (i.e., eDisclosures) or order closing documents. Click an entry to view each document included in the eDisclosure or closing document package. Note that if you generate initial disclosures to send, but then cancel the process and/or do not actually send the disclosures, the eDisclosures Ordered entry will remain in the Loan Log.
Note that a Disclosure History entry is added within the Disclosure Tracking Tool only when a disclosure is sent.
-
Tasks - These entries track the creation and completion of tasks.
-
Status
Online Update - These entries are created when you publish loan
status updates using the Status Online feature.
-
Compliance Review - These entries are created after a Compliance Review loan check is performed. Click the entry to view the most recent results.
-
Printed Documents - These entries are created when you preview or print loan documents.
Add Log Entries
Use the New icon to quickly add a conversation log or task entry to the Log. 
Conversation Log
-
Click the New icon , select Conversation Log, and then click OK.
-
On the Conversation Log worksheet, add or change the Name and Company with whom the conversation took place, or click the Address Book icon to select a name from the file contacts for the loan.
-
Type or change the phone number or email address as needed, and then select Phone or Email to indicate the type of conversation.
-
If you select Email, a new Microsoft Outlook email message window opens with the contact's email address already populated. If you want the content of the email message to become part of the loan file, simply copy and paste the message from Outlook to the Conversation Log worksheet.
-
In the Comments section, type information related to the conversation.
-
If you do not want the Conversation Log entry to display in the Log, clear the Show entry in the loan Log checkbox.
-
To request follow-up by a loan team member, in the Follow Up section, select a role, and then set the due date.
Task
-
Click the New icon , select Task, and then click OK.
-
On the Task worksheet, type or select a task Name and Description.
-
Select the milestone with which the task is associated, and (optionally) select a priority.
-
As needed, in the Contacts section, click the New icon to add business contacts that are associated with the task.
-
In the Comments section, type information related to the task.
-
Change the date and time needed.
-
If you click the Date Stamp button, the current date and time is added to the next blank line in the Comments section.
-
To request follow-up by a loan team member, in the Follow-Up section, select a role, and then set the due date.
-
Click OK.
Print Log Entries
To print Log entries, click the Print
icon from an open loan, click the Standard
Forms tab, click the Tools
category, and then click Loan Log Entries.
Refer to the Printing Forms topic for detailed instructions.
See Also:
Alerts
Milestones
Conversation Log
Tasks
Disclosure Tracking Tool