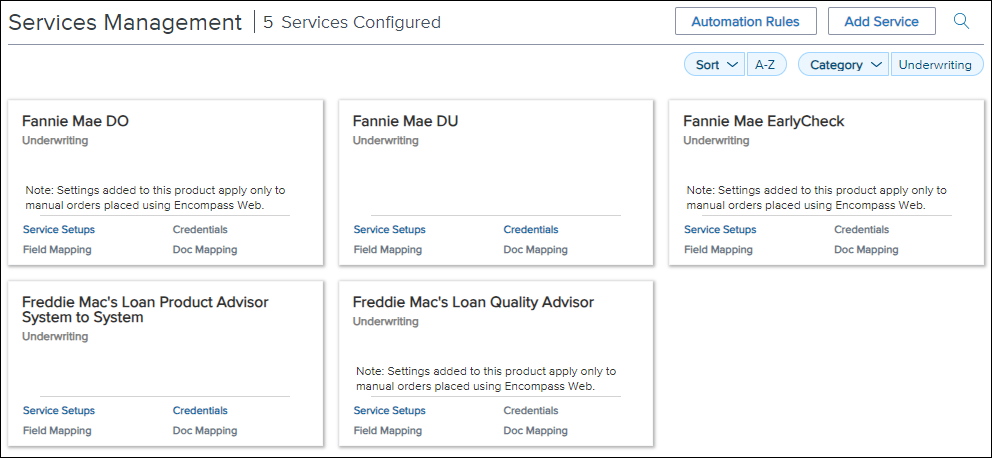
Services Management Page
The Services Management page displays all existing service setups for Manual and Easy Order as cards, organized by partner. From this page, administrators can sort the list of vendors in ascending or descending order alphabetically. The list of partners can also be filtered by category. Each partner card provides access to existing service setups, credential configurations, field mapping, and document mapping. Administrators can also add new services.
Quick Navigation Option
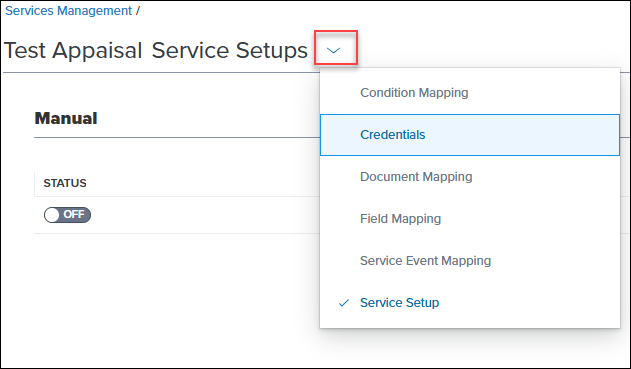
A dropdown navigation menu is available on several Services Management pages. This option enables users to easily navigate between pages for each partner product. Users can move between the different configuration pieces for a partner configuration without needing to return to the main services management page. To change to another page, you can now select to Arrow next to the page title and then select the location you want to navigate to.
Automation Ordering Templates
The Automation Ordering Templates page enables administrators to define conditions which trigger an automated service orderng attempt for loans that meet the criteria.
-
Rule Name
-
Conditions
-
Evaluation
-
Modified By
-
Modified Date
-
Active
For information on adding Automated Ordering Templates, click here.
Configuring Service Order Setups
The Services Management feature provides two types of configurations for service orders:
-
Manual - Administrators define a list of approved partners that users can place orders with.
-
Easy Order - Administrators define conditions which indicate when a loan is ready for easy ordering. Administrators can also configure the conditions and require that specific fields contain data before the loan is ready for easy ordering.
Manual Service Order
To Add a New Manual Service Setup:
- Log into the Encompass web interface as an Administrator.
- From the Encompass Admin Portal, select Services.
- Select Services Management.
- Select Add Service.
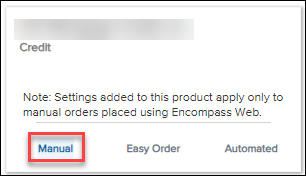
- Navigate to the card for the partner you want to start a service setup for, and then select the Manual link.
-
On the Add Manual Setup window, enter a unique name for this setup in the Service Setup Name field.
- Enter a description in the Service Setup Description field.
- In the Readiness Conditions section, define the conditions that, when met, will result in the authorized users seeing this service in their order options. You can also use the query builder to assist in building readiness conditions. See the Query Builder section below.
- The conditions syntax utilizes the Visual Basic .NET programming language. For information on how this syntax works, see the Conditions section in the Advanced Coding for Business Rules guide.
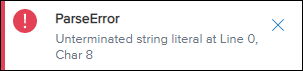
To ensure that the syntax does not result in an error, select Validate to verify your readiness conditions.
Note: A message displays on a successful or failed validation. If the validation fails, the error message indicates where the error occurred.
-
To evaluate your readiness conditions by testing them against a specific loan, select Evaluate. For additional steps on how to use the Evaluate feature, click here.
- In the Authorized Users section, select Add.
-
On the Add Entities window, navigate through the Category options to select the Users who will use this setup. To move to a category, select the Down Arrow
 icon. To move an individual user to the Selected Users column, select the Move Arrow
 icon. To search for a specific user, select the Search
  icon.
icon.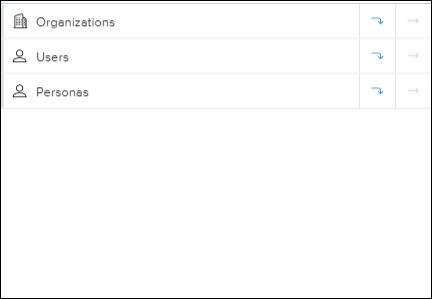
-
Once your users or organizations are listed in the Selected Users column, select Add.
-
Once you have selected the users who will use this service setup, select Save.

-
To activate the new services setup, select the Active toggle.

Note: Only one manual service setup can be activated for each service provider. If you try to activate a second manual service setup for the same provider, an error message displays. All users for that service provider must be included in one manual service setup

The Encompass Product and Pricing Service (EPPS) is configured in Encompass (desktop version) under Encompass > Settings > Secondary Setup > Product and Pricing.
You must have Optimal Blue - Enhanced selected as the product and pricing provider on the Encompass > Settings >Secondary Setup > Product and Pricing screen in Encompass when creating a service setup for Optimal Blue scenarios.
Once a manual order setup has been configured, administrators can configure credentials that should be used for the orders placed through some providers. See the Credentials section below for instructions on how to configure credentials for a manual order.
Easy Order
Easy Order options are available for several service categories. Administrators can define conditions which indicate when a loan is ready for an easy order. Administrators can configure the conditions using syntax built on top of the Microsoft Visual Basic .NET programming language in the same way that business rules are defined. Administrators can also require that specific fields contain data before the loan is ready for easy ordering.
In addition to this, the Encompass web interface also verifies that the minimum data that the service provider requires for a successful order is present before placing an easy order.
To Add a New Easy Order Service Setup:
- Log into the Encompass web interface as an Administrator.
- From the Encompass Admin Portal, select Services.
- Select Services Management.
- Select Add Service.
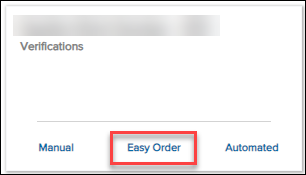
- Navigate to the card for the vendor you want to start a service setup for, and then select the Easy Order link.
-
On the Add Easy Order Setup window, enter a unique name for this setup in the Service Setup Name field.
- Enter a description in the Service Setup Description field.
- In the Readiness Conditions section, define the conditions that, when met, enables users to see the Easy Order option for this service. You can also use the query builder to assist in building readiness conditions. See the Query Builder section below.
- The conditions syntax utilizes the Microsoft Visual Basic .NET programming language. For information on how this syntax works, see the Conditions section in the Advanced Coding for Business Rules guide.
To ensure that the syntax does not result in an error, select Validate to verify your automated readiness conditions.
Note: A message displays on a successful or failed validation. If the validation fails, the error message indicates where the error occurred.
-
To evaluate your readiness conditions by testing them against a specific loan, select Evaluate. For additional steps on how to use the Evaluate feature, click here.
-
In the Additional Required Fields section, select +Add and then enter any Encompass field IDs that are required before ordering.
-
To add additional fields, select +Add Another.
-
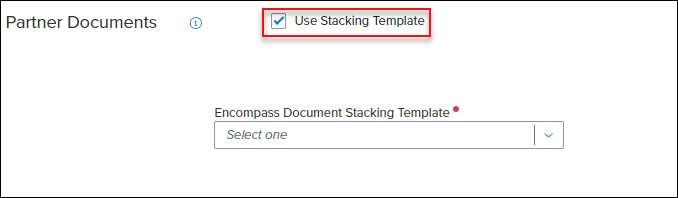
You can define documents to be sent in the Partner Documents section. To add a Document, select +. This feature is available for appraisal, MI, and Title orders only.
-
Note: You can use a stacking template in the Partner Documents section to select a predefined stacking template to send to a partner as part of the order.
-
-
Select the checkbox in front of the required documents to send, and then select Apply.
-
To indicate that the attachment is required, select the toggle in the Attachment Required column.
-
In the Easy Order Options section, select Add
-
On the partner specific order template page, enter the vendor required information, and then select Save.
-
- In the Authorized Users section, select Add.
-
On the Add Entities window, navigate through the Category options to select the Users who will use this setup. To move to a category, select the Down Arrow
icon. To move an individual user to the Selected Users column, select the Move Arrow icon. To search for a specific user, select the Search icon.
-
Once your users or organizations are listed in the Selected Users column, select Add.
-
To activate the new services setup, select the Active toggle.
-
Select Save.
Once an Easy Order setup has been configured, administrators can configure credentials that should be used for the orders placed through that provider. See the Credentials section below for instructions on how to configure credentials for a manual order.
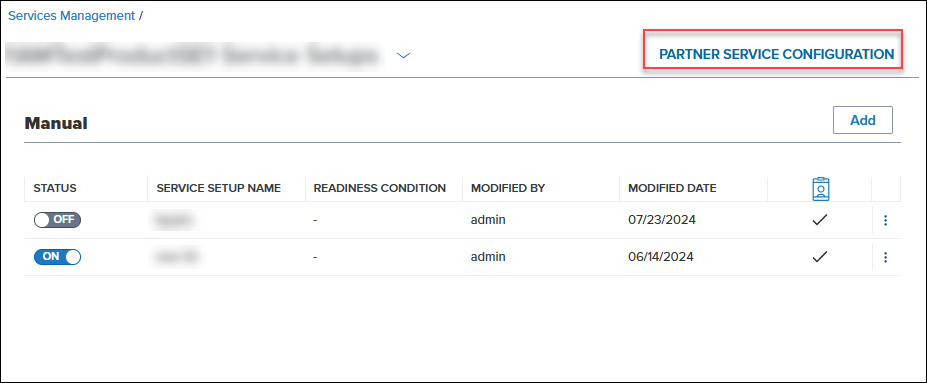
Partner Service Configuration
The Partner Service Configuration feature enables administrators to define the company information that is used for all partner orders. The configuration options on this page differ from Partner to Partner, but this enables administrators to define default settings or other partner specific requirements to ensure that orders are successful.
To Access Partner Service Configuration
-
From the Encompass Admin Portal, select Services Management.
-
Locate the service card for the partner you want to configure, and then select Service Setup.
-
Select Partner Service Configuration.
Query Builder
The query builder enables administrators to create readiness conditions using a point and click interface to build conditions. With the Query Builder, users can build conditions without extensive knowledge of the .NET programming language.
Using the Query Builder
-
On a service order setup, navigate to the Readiness Conditions section.
-
Select Query Builder.
-
Enter or search for a field. For this initial release, users can only search for an exact match of a field ID. Partial field search support will be added in a future release.
-
Select an operator for your query from the list. The available options are based on the format of the field you entered/selected.
-
Enter the value to complete this query.
-
Once the query is completed, select Apply to apply the query to the rule. The code is copied to the Code Editor.
As you build the query, the related code is displayed in the Output section.
To add additional lines to the query:
-
Select the first Menu
 icon, and then the middle icon (
 ) to add another query.
 -
Repeat the process starting with step 5 above to configure the query.
-
If there is more than one query, select the second Menu
option to indicate whether to use the AND condition or the OR condition with your queries. -
If you need to delete a query, you can select the first Menu
icon , and then the left icon ( ) to remove the query line.
 -
To change the order of the queries, select the Handle
 at the front of the row.
To create nested queries, select the first menu and then select the right icon ( )
)
Evaluate Readiness Conditions
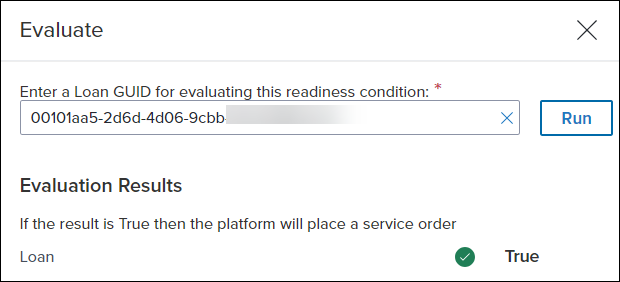
A new feature has been added which enables administrators to test readiness conditions against a specific loan. This feature is available in Services Setups, including those associated with Automated Ordering Templates and Vendor allocation. When an administrator enters readiness conditions on an Add/Edit service Setup page, the new Evaluate button is enabled. Selecting this button displays an Evaluate window, where the administrator can enter a GUID for a loan and then run the readiness conditions against the loan. The Evaluation Results section displays True if the loan meets the readiness conditions, or False if the loan doesn't meet the readiness conditions. For information on locating a loan's GUID, click here.
To Evaluate Readiness Conditions
-
From an Add/Edit Service Setup page, verify that information has been entered in the Readiness Conditions section.
-
Select Evaluate.
-
On the Evaluate window, enter the Loan GUID and then select Run.
-
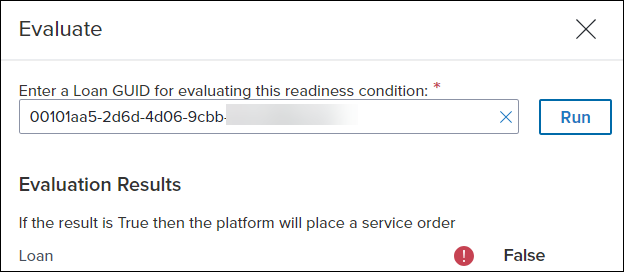
The results of the evaluation displays in the Evaluation Results section. To close the Evaluate window, select the X in the top right corner.
Example of Evaluation Results Where the Readiness Conditions Were Met:
Example of Evaluation Results Where the Readiness Conditions Were Not Met:
Credential Management
Some provider categories require that credentials be set up in the Encompass Admin Portal. The Credentials section enables administrators to specify credentials for specific vendors to be used by authorized Encompass users. The page displays Company, User, and Automation Credentials in separate categories.
When setting up credentials, each credential setting provides a single credential set that all users in that credential setting will share. Credentials that are different for each user are set up using a separate credential setting for each user. Credentials for the Automated Underwriting System and Encompass Product and Pricing Service (EPPS) categories are configured in the desktop version of Encompass.
To Add New Company Credentials for a Service Setup:
- Log into the Encompass web interface as an Administrator.
- From the Encompass Admin Portal, select Services.
- Select Services Management.
- Locate the partner card for the service you want to configure, select the Menu , and then select Credentials.
- Select Add in the Company Credentials section.
- On the Add Company Credentials, provide the credentials required by the partner. The required information is partner specific and will change from partner to partner.
-
To save the new credential configuration, select Save.
To Add New User Credentials for a Service Setup:
- Log into the Encompass web interface as an Administrator.
- From the Encompass Admin Portal, select Services.
- Select Services Management.
- Locate the partner card for the service you want to configure, select the Menu , and then select Credentials.
- Select Add in the User Credentials section.
- On the Add User Credentials screen, enter a unique name for the credentials setup in the Name field, and then enter a description in the Description field.
- Enter the user name and password in the Username and Password fields.
- To designate which users will use these credentials, select Add in the Users section.
-
On the Add Entities screen, navigate through the Category options to select the Users who will use this setup. To move to a category, select the Down Arrow
icon. To move an individual user to the Selected Users column, select the Move Arrow icon. To search for a specific user, select the Search icon.
-
To remove users from the Users section, select the check box in front of the user and then select Delete. Alternatively you can select the Delete
 icon in the Action column for the user.
 -
To export a list of all users assigned in the Users section, select the Export to .csv
 icon.
icon.
-
-
To save the new credential configuration, select Save.
To Add New Automated Credentials for a Service Setup:
Automated credentials can be configured for Automated Ordering Templates. For information on how to define Automated Ordering Templates, click here.
- Log into the Encompass web interface as an Administrator.
- From the Encompass Admin Portal, select Services.
- Select Services Management.
- Locate the partner card for the service you want to configure, select the Menu , and then select Credentials.
- Select Add in the Automation Credentials section.
- Provide a name for this configuration and an option description
- The ordID is defaulted to the orgID defined in the company credentials. To use a different orgID, uncheck the Use default Company Credentials checkbox and enter an orgID in the orgID field.
- Enter the credentials to use for automation in the User Credentials section
-
To save the new credential configuration, select Save.
Override Credentials
Administrators are able to define organization override credentials for service management setups. This is particularly helpful for lenders who need to define different credentials for specific branches. Before you can add override credentials, ensure that the default credentials for the company and automation categories are set up. When a lender adds a subsequent company or automation credential configuration, an Override Credentials page displays.
To Create Company Override Credentials
-
From the Credentials page for a service setup that has an existing credential configuration, select ADD in the Company Credentials section.
-
On the Add Company Override Credentials screen, enter a unique name for the credential setup in the Name field, and then enter a description in the Description field.
-
Enter the credentials for this provider in the Credentials section.
-
To designate which users will use these credentials, select Add in the Users section.
-
On theAdd Entities window, navigate through the Category options to select the Users who will use this setup. To move to a category, select the Down Arrow
icon. To move an individual user to the Selected Users column, select the Move Arrow icon. To search for a specific user, select the Search icon.
-
To remove users from the Users section, select the check box in front of the user and then select Delete. Alternatively, you can select the Delete
icon in the Action column for the user. -
To export a list of all users assigned in the Users section, select the Export to .csv
icon.
-
-
To save the new company override credentials, select Save.
To Add Automation Override Credentials
Automated override credentials can be configured for Automated Ordering Templates. For information on how to define Automated Ordering Templates, click here.
-
From the Credentials page for a service setup that has an existing credential configuration, select ADD in the Automation Credentials section.
-
On the Add Automation Override Credentials screen, enter a unique name for the credential setup in the Name field, and then enter a description in the Description field.
-
To use credentials other than the default company credentials, unselect the Use default Company Credentials checkbox.
-
If you unselect the Use default Company Credentials checkbox, enter the company credentials.
-
-
Enter the user credentials in the User Credentials section.
-
In the Entities section, select the organization(s) that this configuration applies to and then select the Move
arrow.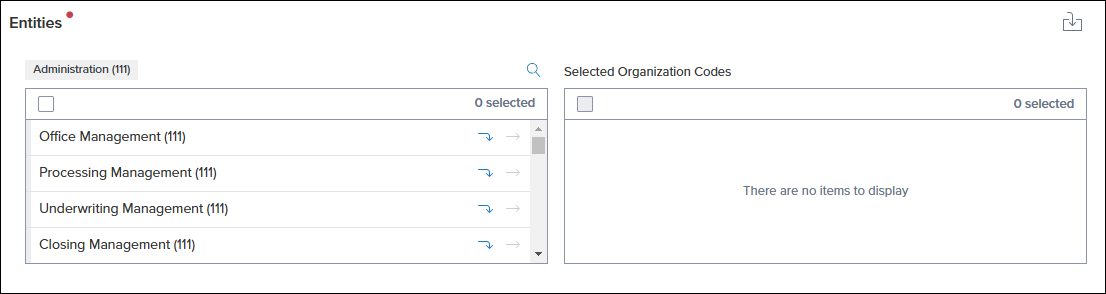
-
To remove an organization from the Selected Organization Codes section, select Remove
 .
. -
To save the Automation Override Credentials, select Save.
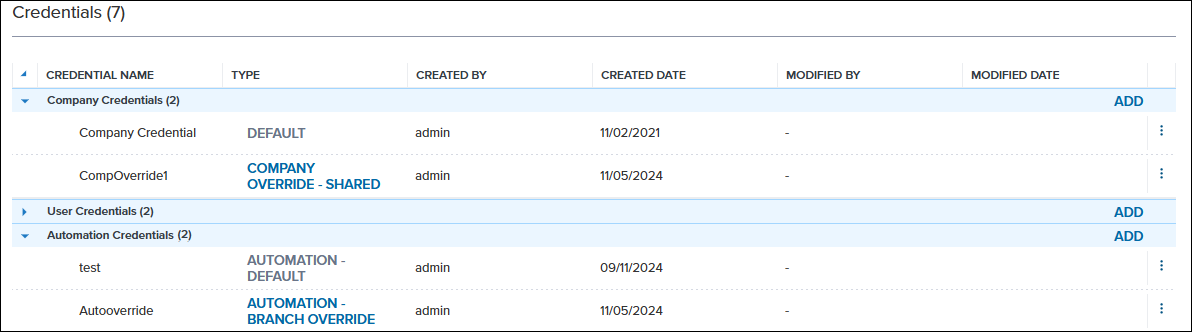
The new credentials are listed on the service setup Credentials page and the type indicates that the credentials are override credentials as displayed below
Condition Mapping
The Condition Mapping feature enables administrators to map service order findings to conditions or tasks on a loan for partner integrations that support this feature. You can map findings to a condition template, a blank/ad-hoc condition, or a task template.
To Add Condition Mapping to a Provider:
-
Log into the Encompass web interface as an administrator.
-
From the Encompass Admin Portal, select Services Management.
-
Locate the service card for the partner you want to configure, select the Menu
, and then select Condition Mapping. -
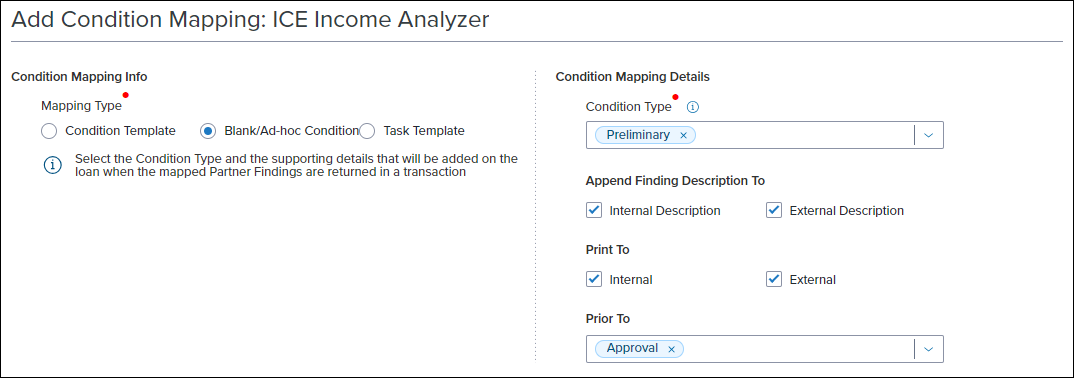
Select Add Condition Mapping to open the Add Condition Mapping page.
-
Select the condition type or task that will be added on the loan when the mapped findings are returned in the Mapping Type field.
-
In the Condition Mapping Details selection, select the specific details for the selection made in the previous step. This section is populated dynamically to support the three options in the Condition Mapping Info section.
-
When Condition Template is selected, you must select a Condition Template for the mapping. Additionally you can select to append the findings description to the internal and external description on the condition.
-
When Blank/Ad-hoc Condition is selected, you must select the Condition Type. Additionally you can select to append the findings description to the internal and external description, select to print to internal or external documents, and select the milestone before which the conditions must be resolved in the Prior To field.
-
When Task Template is selected, you must select a Task Template for mapping. Additionally you can select to append the findings description to the task description.
-
-
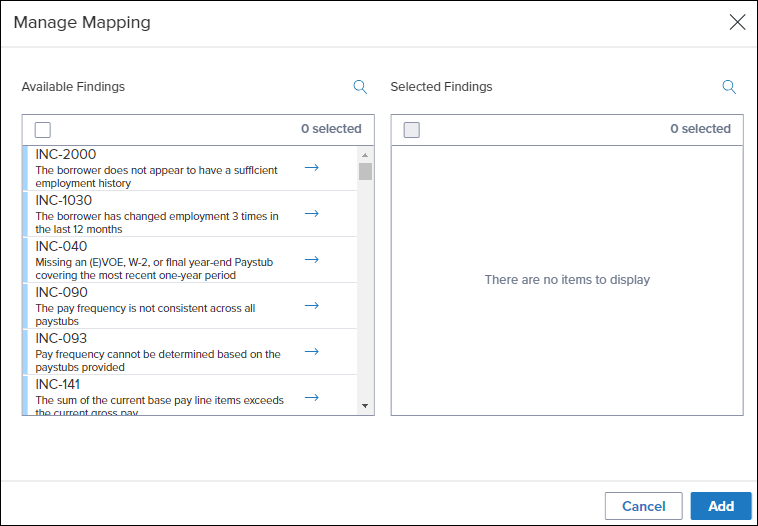
In the Provider Findings section, select Manage Mapping.
-
Select the findings to map to the condition or task from the list of available findings. To map the findings to the condition or task, select the Arrow
 .
. -
If you want to add more than one finding to a condition or task, select the name of each finding that you want to add, and then select the Arrow
-
-
Select Add.
-
Select Save.
The available findings listed in the Manage Mapping window originate from the provider. If you need assistance with understanding which findings to use for your mapping, contact the provider.
Once a condition mapping has been added, the details of the condition mapping are displayed on the main Conditions Mapping page. This page displays the Encompass Condition name, Provider Findings mapped to the condition, and the condition mapping type.
-
To edit an existing mapping, select the Menu
to the right side of the entry you want to edit, and select Edit .
. -
To delete an existing mapping select the Menu
to the right side of the entry you want to edit, and select Delete.
Condition Template Filtering
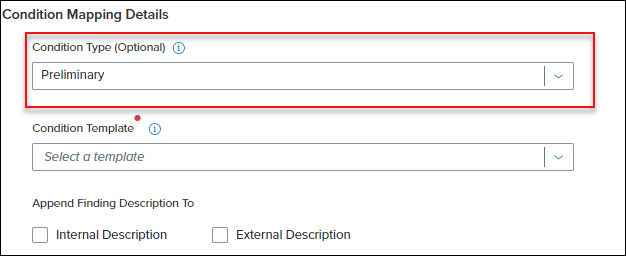
When an admin selects Condition Template as the mapping type, they can select a condition type in the Condition Type field. Once a condition type has been selected, the list of conditions available in the Condition Template field is filtered to only display those with the selected condition type.
To Filter Condition Mapping by Condition Type:
-
From the Services Management page, select the Menu
on the partner card you want to configure, and select Condition Mapping. -
On the Condition Mapping page, select Condition Template in the Mapping Type section.
-
In the Condition Mapping Details section, select a condition type in the Condition Type (Optional) field.
-
In the Condition Template field, select one of the templates in the filtered list.
Field Mapping
The Field Mapping feature enables administrators to send additional information from Encompass to the provider when submitting a service order. Additionally, administrators can also receive additional information from the provider and store that data in a custom field in Encompass. These features require information from the service provider. You will need to work with the provider to configure these successfully.
To Map a Field from Encompass to a Service Provider:
-
Log into the Encompass web interface as an Administrator.
-
From the Encompass Admin Portal, select Services Management.
-
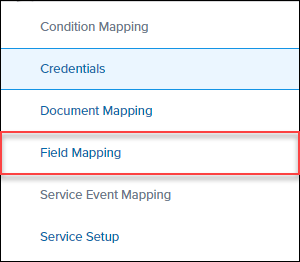
Locate the service card for the partner you want to configure, and then select Field Mapping.
-
To add a new field mapping entry, select Add.
-
In the Encompass Field ID (Standard, Custom, LR) field, enter the Encompass field ID that you want to use for mapping.
-
In the Mapping Type field, indicate how the data should be transmitted.
-
Maps To indicates that the data from this field is sent to the provider field in the Provider Field Name field.
-
Maps From indicates that data from the Provider Field Name field is sent to the specified Encompass field ID.
-
Maps Between indicates that data can be sent back and forth between the two indicated fields.
-
-
Enter the field name provided by the partner in the Provider Field Name field. This field name is obtained from the service partner you are ordering from.
-
To add another field mapping, select +Add Another and then repeat steps 6 and 7.
-
Select Save.
The following features are also available from the Field Mapping screen:
-
Lenders can export their field mapping template as a .CSV file by selecting the Export
 icon.
icon. -
Lenders can import an existing field mapping template by selecting the Import
icon and then navigating to the .csv file on their local system.
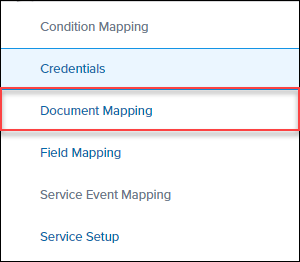
Note that not all providers support the field mapping feature. If field mapping is available, the Field Mapping option is available in blue as pictured below:
Document Mapping
The Document Mapping feature enables administrators to automatically move documents from a partner to specific folders in the eFolder. You are also able to map documents that are intended to be sent from specific folders in the eFolder to the partner as well. The Document Mapping feature is only available for some categories and is not supported by every partner. Check with your service partner to see if they support this feature.
To Configure an Inbound Document Mapping:
-
Log into the Encompass web interface as an Administrator.
-
From the Encompass Admin Portal, select Services Management.
-
Locate the service card for the partner you want to configure, and then select Doc Mapping.
-
Enter the document name in the Document Types field. If you don’t know the document name, contact the partner for more information.
-
Select the eFolder document that the document should be moved to in the eFolder Document Folder field.
-
To add another field mapping, select +Add Another and then repeat steps 6 and 7.
-
Select Save.
To Map an Outbound Document
-
From the Encompass Admin Portal, select Services Management.
-
Locate the service card for the partner you want to configure, and then select Document Mapping.
-
In the Outbound (From Encompass To Provider) section, select the eFolder Document Folder to send documents from.
-
Select the document type from the Document Types dropdown. If the document type isn’t listed, enter the document type name. If you don’t know the document name, contact the partner for more information.
-
To add another field mapping, select +Add Another and then repeat steps 3 and 4.
-
Select Save.
The following features are also available from the Document Mapping screen:
-
Lenders can export their field mapping template as a .CSV file by selecting the Export
icon. -
Lenders can import an existing field mapping template by selecting the Import
icon and then navigating to the .csv file on their local system.
Note that not all providers support the field mapping feature. If field mapping is available, the Field Mapping option is available in blue as pictured below:
Service Event Mapping
The Service Event Mapping feature enables administrators to receive events from partners as part of transaction responses to create tasks or send notifications when further action is required for a service order. This feature is not available unless a Partner has added support for this feature.
To Configure Service Event Mapping
-
From the Encompass Admin Portal, select Services Management.
-
Locate the service card for the partner you want to configure, and then select Service Event Mapping.
-
Select Add Service Event Mapping.
-
Enter a name for the configuration in the Service Event Mapping Name field.
-
Select one or more services events from the Available Partner Service Events list, and then select the Move
icon to move these events to the Selected Partner Service Events list.-
To remove an event from the Selected Partner Service Events list, select Remove
 .
.
-
-
Select a task template to create from the Task Template field and/or select a notification template to use to send a notification in the Notification Template field. These will be created or sent when the selected partner service events are received.
-
Select Save.
Deprecated Service Setups
When a partner deprecates a product, any service setups for that product are moved to a "deprecated" status. The Product Status drop down on the Services Management page enables user to view these deprecated setups. By default, the Product Status filter is set to Active, hiding products that have been deprecated by partners from the main view. To view the deprecated products, you can select the Product Status filter and then select Deprecated. When this option is selected, users can browse through any existing configurations, including service setups, credentials, condition and service events mapping, field and document mapping for deprecated products.
To View Deprecated Service Management Setups:
-
From the Encompass Admin Portal, select Services
-
Select Services Management
-
Select the Product Status dropdown field, and then select Deprecated.

-
Navigate to the different pages to view the Service Management setups for deprecated products.