Pending Payments page
Overview
This topic provides information on how to use the Pending Payments page. This page can be opened from several Simplifile pages.
Any transactions ready for approval display on the Pending Payments page.
You can choose from several account types when you set up a payment account. You can use any of the accounts you set up to pay any of the fees or taxes you need to pay when you eRecord.
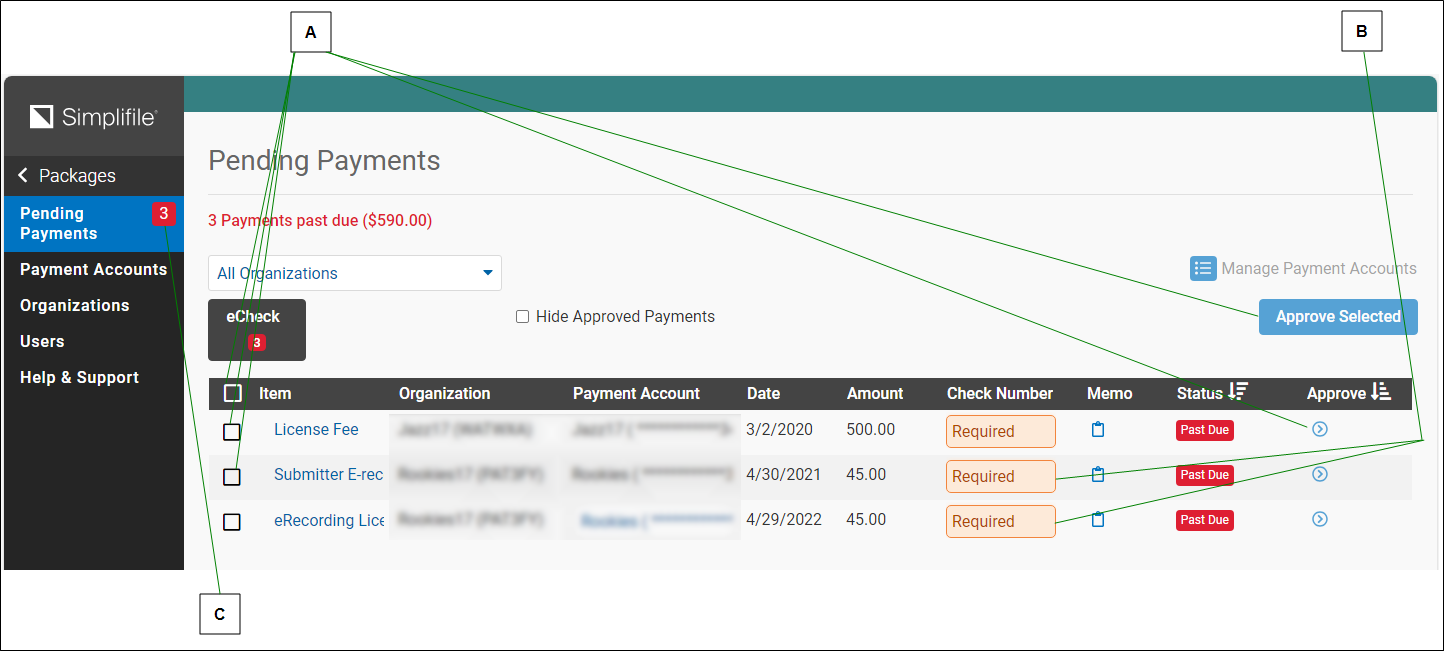
Choose the organization whose payments you want to approve from the dropdown list to display that organization’s payment list. You send e‑check payments from this page. Below is an example of the page.

| Letter | Description |
|---|---|
|
A |
Mark the transactions you want to approve and select the Approve Selected |
|
B |
You must add an identifying number for an item before you can approve that item and send payment. |
|
C |
The number following the words Pending Payments indicates how many pending payments you have in the system. |
I want to ...
Open the Pending Payments page
Do one of the following:
- In the navigation menu, select the Payments item. The Pending Payments page opens in the right panel.
- From the Packages page, do one of the following:
- Find the payment approval queue notice.
- Select the Open [your account name] Queue button.
Do one of the following:
- In the navigation menu, select the Payments item. The Pending Payments page opens in the right panel.
- From the Packages page, do one of the following:
- Find the payment approval queue notice.
- Select the Open [your account name] Queue button.
Display approved eCheck payments
- Open the Pending Payments page.
-
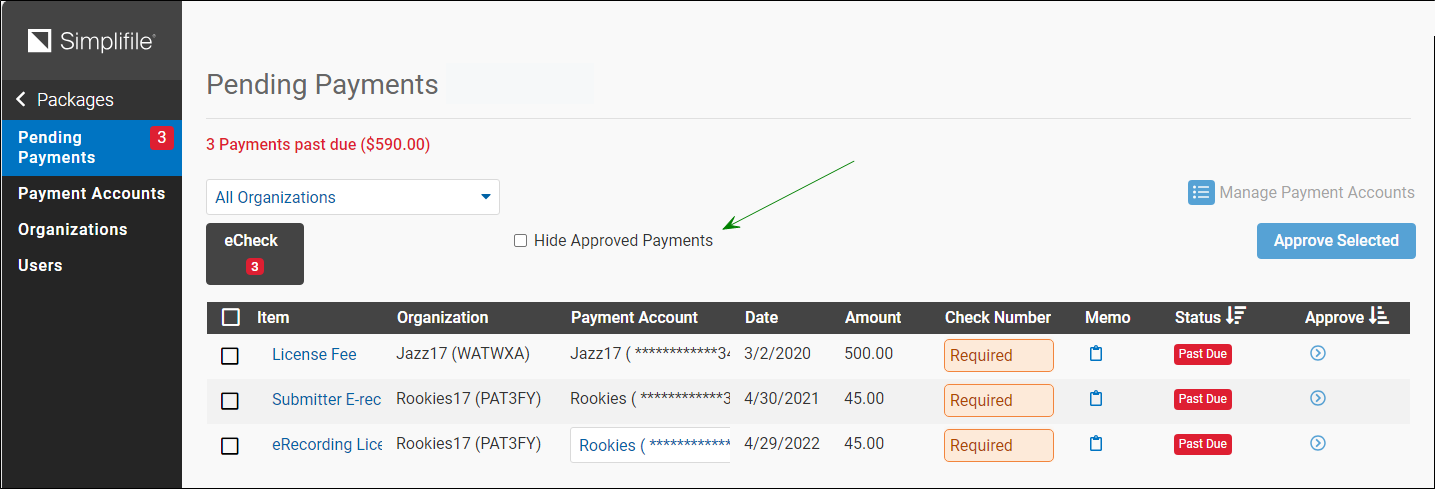
Clear the checkbox to the left of the Hide Approved Payments field.

Approved payments stay on the Pending Payments page.
Edit an approved eCheck payment until the payment has been processed (printed)
eCheck users have the ability to edit an approved eCheck payment until the payment has been processed (printed) by Simplifile.
Approved eCheck payments are editable until Simplifile Accounting prints the approved eChecks in preparation for batch processing.
- Open the Pending Payments page.
- I want to ....
When the eCheck transaction is in the Approved status, an Edit icon is available to select.

- Select the Edit icon. Both the Check Number and Memo fields become editable.

- Make the wanted changes.
- Select the Save icon.
Hide approved eCheck payments
- Open the Pending Payments page.
-
Mark the checkbox to the left of the Hide Approved Payments field.

Approved payments stay on the Pending Payments page until they are processed by Simplifile each day.
Process an e‑check payment
You can choose from several account types when you set up a payment account. You can use any of the accounts you set up to pay any of the fees or taxes you need to pay when you eRecord.
After a package with an e‑check payment type has been eRecorded and returned, a payment approval queue notice may display on the Packages page. The number of transactions ready for approval displays on the notice.
Choose the organization whose payments you want to approve from the dropdown list to display that organization’s payment list. You send e‑check payments from this page. Below is an example of the page.

| Letter | Description |
|---|---|
|
A |
Mark the transactions you want to approve and select the Approve Selected |
|
B |
You must add an identifying number for an item before you can approve that item and send payment. |
|
C |
The number following the words Pending Payments indicates how many pending payments you have in the system. |
- Open the Pending Payments page.
- If the top‑left dropdown field (the Organization field) does not display the name of the organization whose payments you want to process, choose the name from the dropdown list.
- In the second dropdown field, mark the box for each transaction type you want included in the table.
- In table, mark the box for each transaction type you want to pay.
To mark all of the transactions for payment, select the box in the upper‑left corner of the header.
- Select in the Check Number box for each payment you will send and add an identifying number for the payment.
- Optional: Select in the Memo field for any payment you are making and add a comment about the payment.
- Do one of the following:
To pay for a single transaction, select the Approve and Send
 button for that transaction.
To approve and send payments for the transactions you marked, select the Approve Selected
 button.