Manage Payment Accounts page
Overview
This topic provides information on how to use the Manage Payment Accounts page.
This page is only visible if you have the Administrator role. It may be opened from several Simplifile pages.
You add payment account information to Simplifile to grant Simplifile the right to withdraw funds from that account. The funds are used to pay all fees accrued during the eRecording process. You must have at least one payment account enabled before you can use Simplifile to eRecord.
You can add multiple accounts. This lets you assign a different account to each type of fee. You can set a specific account to be the default from which all fees of a specific type are taken. However, you can override the default at any time. This means that you can designate any payment account in Simplifile to pay any fee for any package.
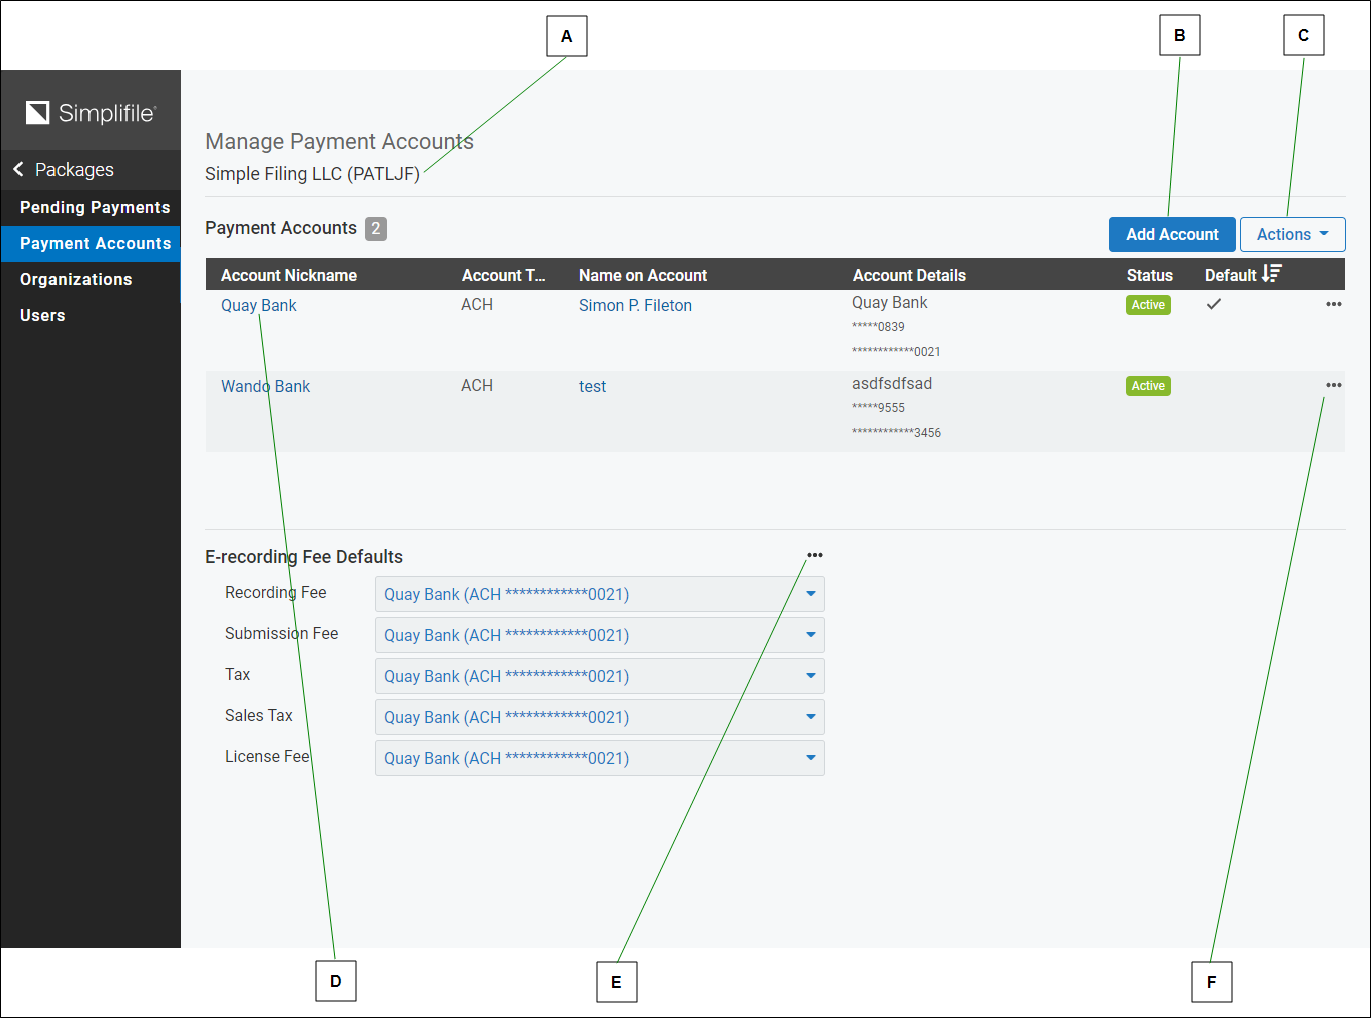
You set up and manage all accounts you want to make accessible to Simplifile for the payment of fees from the Manage Payment Accounts page. You can edit the display name (account nickname) of a payment account at any time. Below is an example of the Manage Payment Accounts page.

| Letter | Description |
|---|---|
| A | If necessary, choose the organization whose payment accounts you want to manage. |
| B | Select here to open the Add Payment Account wizard to add an account to the organization whose name displays above the table. |
| C | Select here to import payment accounts and find out about payment accounts. |
| D | Select here to open the Edit Payment Account window. |
| E | Select here to display the View/Edit Payment Account link and the Remove Payment Account link. |
| F | Select here to display the Sales Tax Settings link and the About eRecording Fees link. |
If you have the necessary permission, you can open the Manage Payment Accounts page in the following ways:
- From the Payments option in the navigation menu.
- From the Organizations page.
- If you have set up multiple payment accounts, from a Payment Account dropdown list in the Fees table of a Package Details page.
The access method you use may depend on the task you are doing when you need to access the Manage Payment Accounts page.
I want to ...
Open the Manage Payments Account page
- From the navigation menu, select the Payments item. The Pending Payments page opens in the right panel and the navigation menu changes with Pending Payments selected.
- In the navigation menu, select the Payment Accounts item. The Manage Payment Accounts page opens in the right panel.
Add or import a single payment account
The access method you use may depend on the task you are doing when you need to access the Manage Payment Accounts page.
- Select the Add Account
 button near the top‑right corner. The Add Payment Account window opens.
 - Under the Payment Account Details heading, enter an option [Checking (Recommended) or Savings].
- In the Bank Name field, enter the bank name.
- In the ACH Routing Number field, enter the bank’s 9‑digit ACH routing number. For more information about the field, select the Information
 button.
 - In the Verify ACH Routing Number field, reenter the ACH routing number.
- In the Account Number field, enter the account number. For more information about the field, place your cursor (pointer) on the Information
 button.
 - In the Verify Account Number field, reenter the account number.
- In the Name of Individual on the Account field, enter the name of the name of the person on the account.
- In the Account Nickname field, enter a nick name that can be used by Simplifile to identify the account. For more information about the field, place your cursor (pointer) on the Information
 button.
 - Select the Next
 button.
Edit a payment account
- Open the Manage Payments Account page.
- If applicable, make sure that the correct organization is displayed in the organization dropdown field.
- In the Account Nickname column, select the account nickname. The Edit Payment Account window opens.
- Make the wanted changes.
- Select the Save Account button. The window closes and the changes are made.
Designate a default payment account
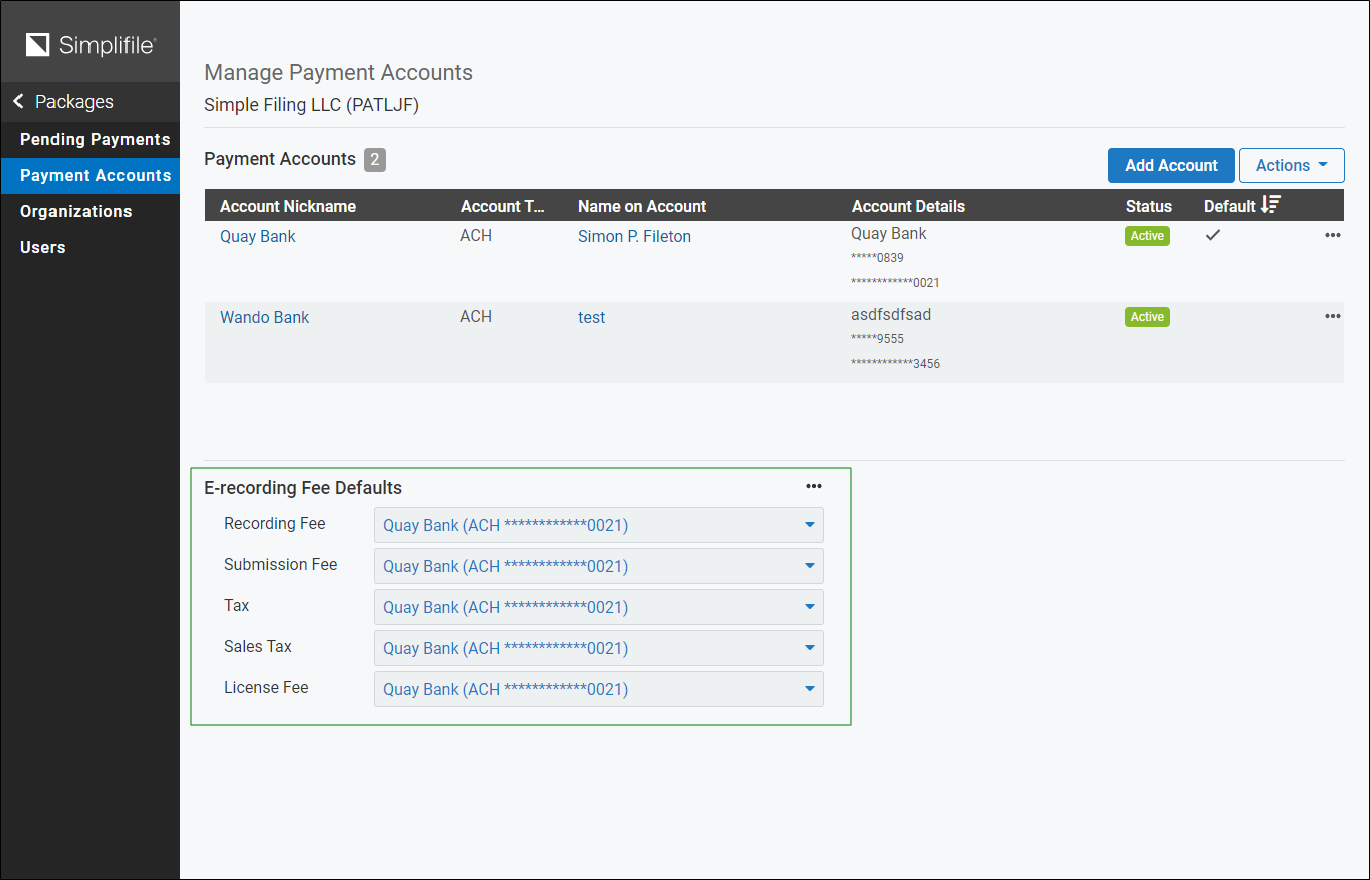
If you have more than one verified payment account in Simplifile, you can set default accounts for each type of fee or tax you need to pay when you eRecord. Simplifile takes payment from the account you designate.

| Description |
|---|
| In the eRecording Fee Defaults section, use the dropdown arrow for each item to choose the default account to have Simplifile automatically debit the account . When someone creates a package, that person can choose an account other than the default, if desired. |
- Open the Manage Payments Account page.
- Go down to the eRecording Fee Defaults section.
- In each dropdown field, use the dropdown arrow to select the payment account you want to use as the default payment account or choose No Default.
Remove a payment account from Simplifile
- Open the Manage Payments Account page.
- in the Payment Accounts section table at the right side of the payment account you want to remove, select the Menu
 (ellipsis) button. A menu opens.
 - Select the Remove Payment Accounts link. The Confirm Remove window opens.
- Select the Remove Account button. The account is removed from the Payment Accounts section.
Import payment accounts already created for other organizations
You can import payment account information from one organization to another. To do this, you must be affiliated with at least two organizations, and have set up a payment account for at least two organizations.
- Open the Manage Payments Account page.
- Select the Actions
 dropdown button at the top right corner. A menu opens.
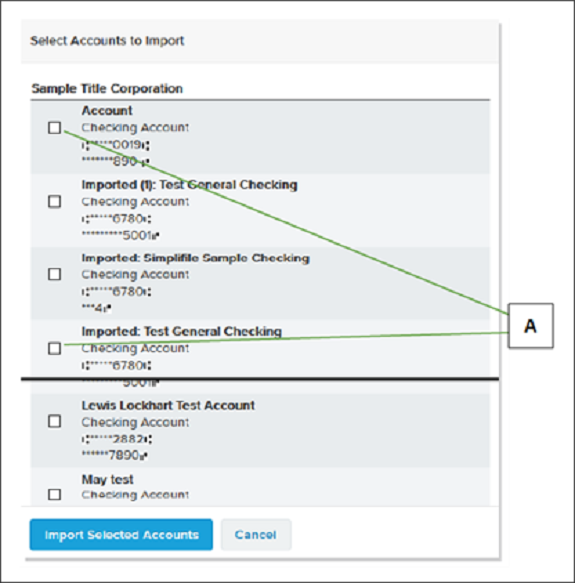
 - Select the Import Payment Accounts item. If you have multiple organizations, a page similar to the one below displays when you begin the import process. The Import Payment Accounts window opens.

Letter Description A Mark the boxes of the payment accounts whose information you want to import. On the Manage Payment Accounts page, imported accounts display the word Imported before the name. - Mark the accounts you want to import.
- When finished, select the Import Selected Accounts button.
On the Manage Payment Accounts page, imported accounts display the word "Imported" before their names