The State of Georgia’s GSCCCA PT‑61 Form Helper Document tip sheet
The GSCCCA PT‑61 form applies only to the State of Georgia. It must be included in the Simplifile package with the warranty deed to be recorded as a “helper” document.
Register with the State of Georgia's GSCCCA e‑file registry
- Go to the GSCCCA e‑file Registry website: https://www.efileregistry.org/Registry/Register.aspx and register.
- Record the unique account number assigned to you by the GSCCCA that identifies your company as a submitter in their system. This number will be used when you register the Georgia county as a county (or jurisdiction) in Simplifile.
Register the specific Georgia county as a county (or jurisdiction) in Simplifile
Open the Counties page
- Do one of the following:
- Option 1: In the navigation menu, select the Counties item. The Counties pages opens in the right panel.
- Option 2: In the navigation menu:
- Select the Organizations item. The Organizations page open in the right panel.
- Select the name of the organization you want. The Organization Contact Information page opens in the right panel and the navigation menu display the organizations menu options.
- In the navigation menu, select the Counties item. The Counties page opens with the wanted county selected.
- Option 1: In the navigation menu, select the Counties item. The Counties pages opens in the right panel.
Register the county as a county (or jurisdiction) in Simplifile
- Open the Counties page. A table of states that have registered counties is displays in the page.
- If you are associated with multiple organizations and the wanted organization is not displayed the top left field:
- If the top left field is a dropdown field, select the dropdown arrow and choose the organization whose counties you want to manage.
- If the top left field is not a dropdown field, open the Counties page for the wanted organization.
- Near the top right corner, select the Actions
 dropdown button and the +Register More Counties link . The Register Counties window opens.
- Scroll down to and select the Georgia item. The table expands to display the Georgia counties that are not currently registered in Simplifile by your organization.
- In the row for the county you want to register, select the Start Registration Process link. The Register Counties window similar to the following sample opens.
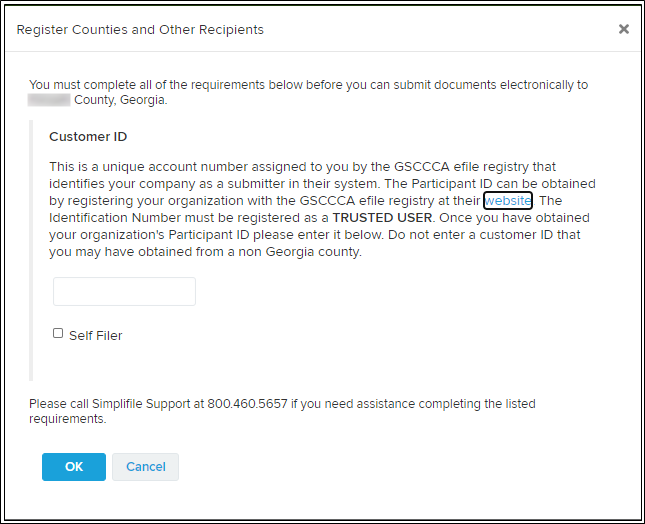
- Enter the unique account number assigned to you by the GSCCCA that identifies your company as a submitter in their system in the field.
- Select the OK
 button. The Register Counties window closes and the county is registered as a county (or jurisdiction) with Simplifile.
Upload the PT‑61 form as a helper document to a warranty deed
-
When applicable, create and complete the State of Georgia’s PT‑61 transfer tax form using the state's online platform at https://apps.gsccca.org/PT61eFiling/default.asp.
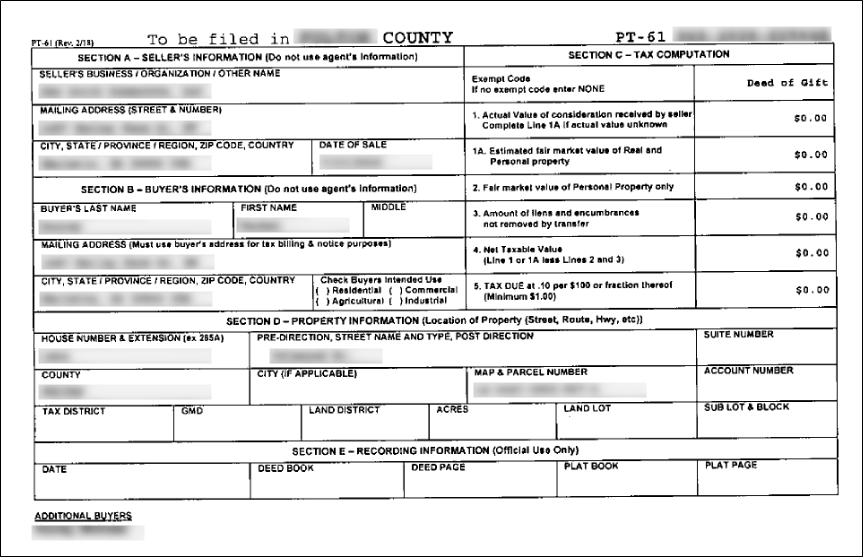
Sample PT‑61 Form
- When the PT‑61 form is completed, save it in an accessible location as a PDF file.
- Log in to Simplifile.
- Go to the Packages page.
- Open or create the package. The Package Details page opens.
- In the Documents section, open or create the warranty deed.
If you need to create the warranty deed document, select the Add another document dropdown field, select the DEED option and select the Add Document To Package
 button.
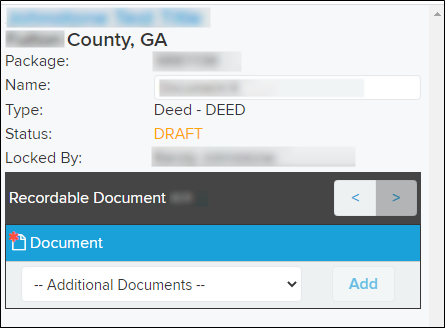
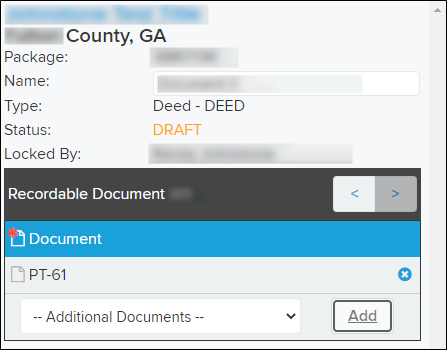
The Document Editor opens with the upper‑left corner displaying similar to the following:
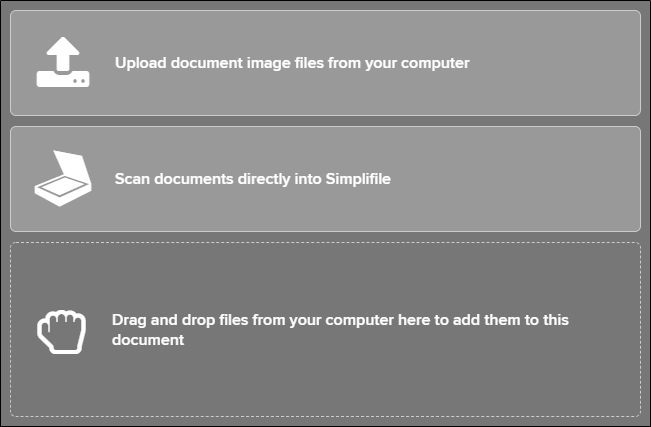
- In the right panel, upload or scan the warranty deed document.
- When the warranty deed document is uploaded, it is viewable by selecting Document in the right panel.
- In the left panel under the selected Document item,
- Select the Additional Documents dropdown field.
- Select PT 61.
- Select the Add button

The PT‑61 item is added as a “helper” document under the selected Document item.
-
Select the PT‑61 item. It turns to the selected PT‑61 item.

- In the right panel, upload or scan the PT‑61 document (which was saved in Step 2).
When the PT‑61 document is uploaded or scanned, it is viewable by selecting PT‑61 item in the right panel.
The PT‑61 form is now available as a helper document to the warranty deed in the package.
REV‑D