Tip sheet for the ink‑sign workflow
Overview
Who should use this tip sheet? Simplifile users preparing packages requiring "ink‑sign" (or "wet sign") documents using Simplifile Document Builder.
There are several counties across the United States that do not accept eSignatures, or more particularly an electronically notarized documents; however, they do accept eRecorded documents. To accommodate these counties, Simplifile Document Builder has an "Ink‑Sign Workflow" which provides a process to prepare and print the documents in Simplifile, ink‑sign (or wet sign) the printed documents, and then upload images of the ink‑signed documents back into the Simplifile system for eRecording.
Status definitions used in the Ink‑Sign workflow
- Data Entry: The document is being prepared and has not yet been generated.
- Sign: The document has been generated and is awaiting the signature (printing in the ink‑sign or paper workflows)
- Draft: The package is waiting for the ink‑signed document to be uploaded.
- Ready: The package has met all county requirements and is ready to submit to the county.
Ink‑Sign workflow
Step 1 ‑ Add a template document for the ink‑signed document
- Create the package as usual with the State and County fields.
- If the county doesn't accept eSignature but does accept eRecording, use this Ink Sign Workflow.
- If the county doesn't accept eSignatures or eRecording, use a Paper (or mail in) Workflow.
- If the county does accept eSignatures and eRecording, use the standard eRecording workflow.
- Enter the information as needed.
- When ready, go to the bottom of the Data Entry page and select the Generate Document
 button.
 When the document generation is completed, the generated page is displayed in the right panel.
Step 2 ‑ Print the documents to be ink‑signed
- From the navigation menu, select the Signing > Print item. The Print Documents page opens in the right panel.
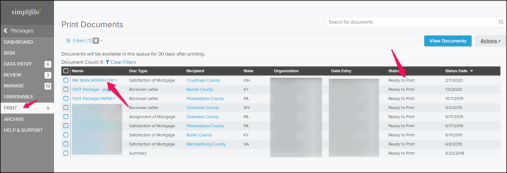
- Print the document or documents.
To print an individual document
In the Name column, select the document name you want to print.
The document opens and displays icons to download or print the document.
- Select the Print icon.
To print multiple documents
- Mark the checkbox of each document you want to print. To mark all the documents, select the checkbox in the header row.
- Select the Actions
 dropdown button. A menu opens.
 - Select the Print Documents option.
- When a county eRecords with images of paper, ink‑signed documents, the documents are printed with a scanner icon (
 ) in the lower‑right corner of each page. The scanner icon means that the document must be scanned back into the package for eRecording.
 - A billing transaction incurred.
- The document is now in the PRINTED status.
Step 3 ‑ Ink‑sign the printed documents
- After printing the document or documents, ink‑sign it or them as required.
Step 4 ‑ Upload the ink‑signed documents with a scanner icon in the lower right‑corner back into the Simplifile package
IMPORTANT: When a county allows eRecording with images of paper, ink‑signed documents, the documents are printed with a scanner icon (![]() ) in the lower‑right corner of each page. The scanner icon means that the document must be scanned back into the package for eRecording.
) in the lower‑right corner of each page. The scanner icon means that the document must be scanned back into the package for eRecording.
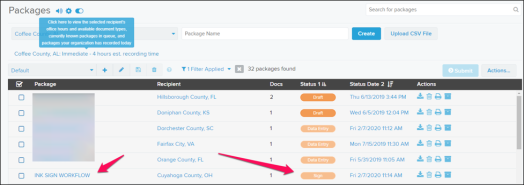
- In the Packages page, on the wanted row with the package name, make sure the status is Draft.
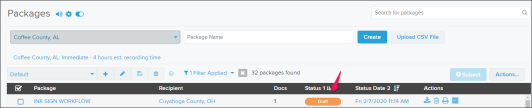
- Select the package name to open the package's Package Details page in the right panel.
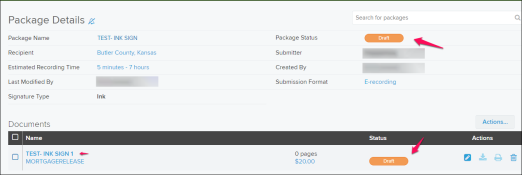
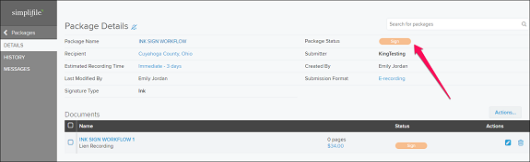
- In the Package Details page:
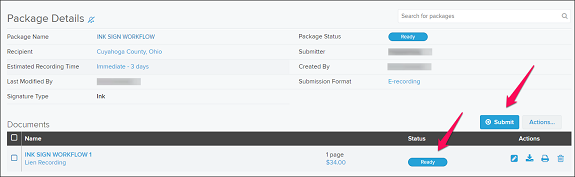
- Verify the Package Status field displays Draft .
- In the Documents table, select the document name to which you will upload an image of the ink‑signed document that has the scanner icon in the lower‑right corner.
The document opens.
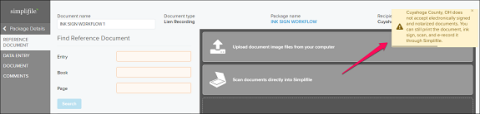
-
Use one of the methods provided to upload the image of the ink‑signed document (that contains the scanner icon in the lower‑right corner) into the document.
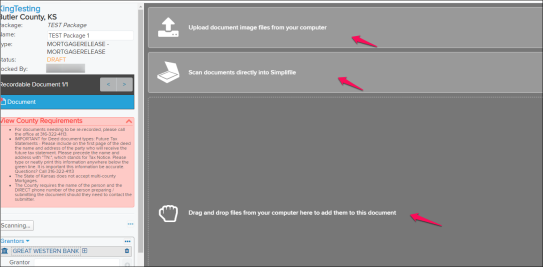
-
When the upload is complete, the ink‑signed document is displayed.
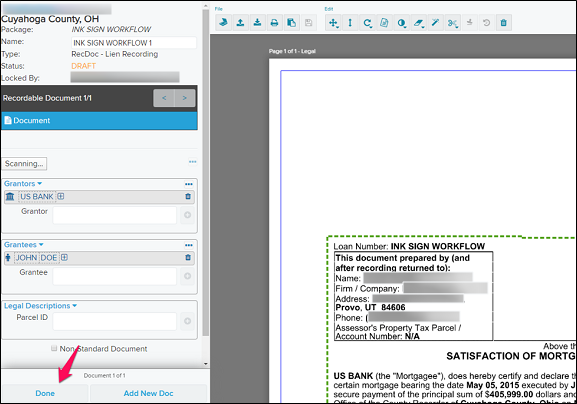
- If additional indexing is required in the document, complete it.
- When the document is updated and complete, select the Done
 button. The Packages Details page opens in the right panel.
 - Repeat steps 2 through 6 to upload all of the needed ink‑signed documents in the package.
Step 5 ‑ Submit the package
When the county requirements have been met for all of the documents in the package, the package is set to the Ready status and the Submit button is enabled so the package may be submitted to the county.
- Go to the Packages page table.
- Submit the package in one of the following ways:
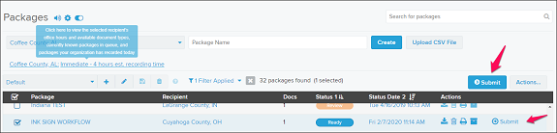
- Method 1 ‑ Single Package: In the package row, verify that the package status is Ready and select the Submit link.
- Method 2 ‑ Multiple Packages: Mark the checkbox for each package that has the Ready status and select the Submit button at the top right‑corner of the table.