Simplifile release notes for 2019.02.19
for Document Builder users
Published July 14, 2026.
These features released Tuesday, February ,19 2019.
Document Builder
New feature summary
| Who is affected? | What is it? | Why did it happen? |
|---|---|---|
| Document Builder users | We flag loans that are not paid in full | to change the verbiage of the release to allow for further collection of funds in the future. |
| Document Builder users | We updated the Common Party Names feature | to better serve Document Builder customers. |
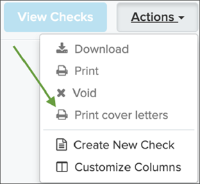
| Document Builder users | We generate a cover letter for each paper county | to produce a cover letter to the county for paper packages. |
| Document Builder users | We no longer create checks for $0 fees | so that the customer does not end up with $0 checks that they will never print. |
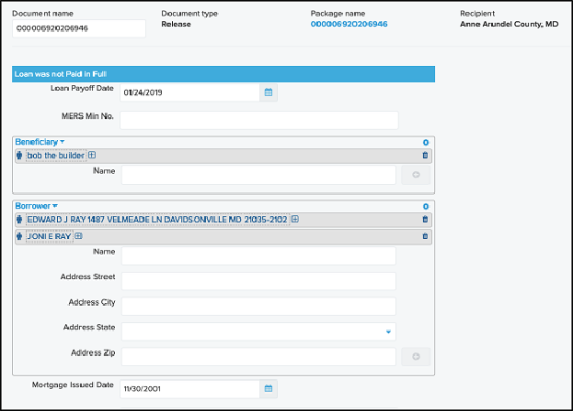
We flag loans that are not paid in full
When a loan is not paid in full, such as a short sale, the user is alerted. Also, the document language has been changed, so that it does not refer to the loan being satisfied (because it wasn't). This allows the mortgage servicer recourse in the future to be able to collect the remaining balance.
We updated Common Party Names feature
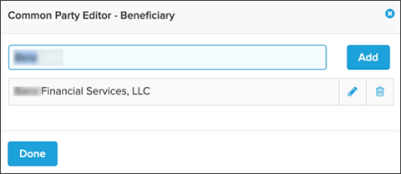
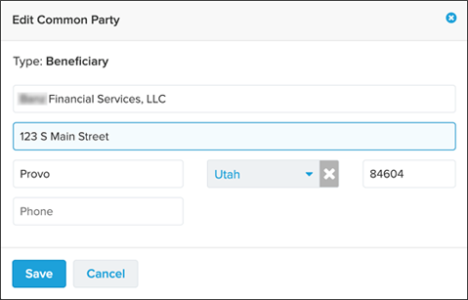
We overhauled the Common Party Name feature to better serve Document Builder customers. The following was added:
- Common Party Names now also contain an address and phone number. This limits the number of keystrokes required to complete data entry. When a user selects a name, the address and phone number are automatically entered.
- Separate Common Party Values: the same name will never be used for both a borrower and a beneficiary. These fields can now store separate names instead of sharing names.
- Original Trustee and Original Beneficiary can now store and use Common Party Names.
- Common Party Names can now be managed by selecting a link at the bottom of the list.

Platform Services
We added a invitation rejection workflow
We added the ability for an invitee to cancel a new organization or new user invitation on their own. This new workflow is only for invitees that are invited as a brand new organization or user in Simplifile. The primary reasoning for this is so we can abide by CAN‑SPAM laws.
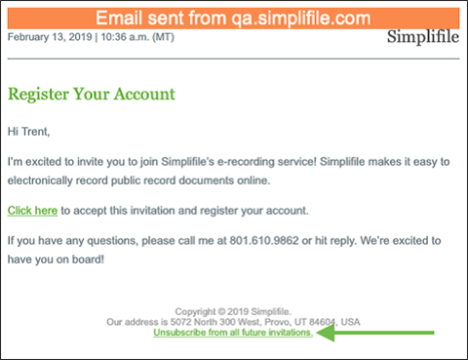
There are two paths an invitee can take to cancel a new invitation or unsubscribe from all future invitations. The first is by selecting the invitation link in the email. Below is an example of a new organization sign‑up workflow:
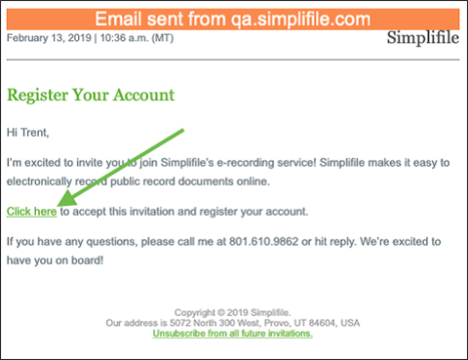
Selecting Click here takes the invitee to the New Organization Registration page which has a new Cancel Invitation link next to the primary Continue  button.
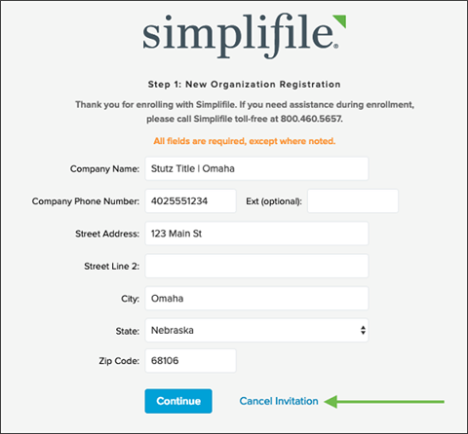
Selecting Cancel Invitation goes to a new Cancel Invitation page where the invitee has the option to cancel Just this Invite or Unsubscribe me from future invites. There is also a link that will take the invitee back to the sign‑up page.
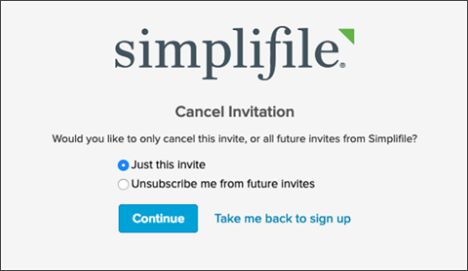
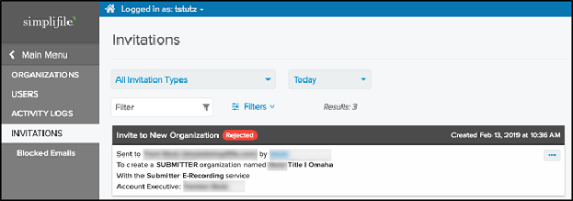
If the invitee chooses to cancel the current invitation, that invitation will be canceled and the sales executive will be notified. If the invitee chooses to unsubscribe from all future invitations, they will no longer receive invitations from Simplifile and will be added to the Blocked Emails page and will display as Rejected on the Invitations page.
Alternatively, if an invitee wants to simply unsubscribe from all future invitations from Simplifile, they can select the link in the email footer. This will take the invitee to the same Cancel Invitation page shown above.
Below is what a rejected invitation looks like on the Invitations page:
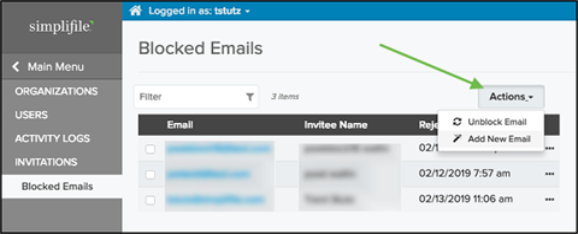
Blocked Emails page
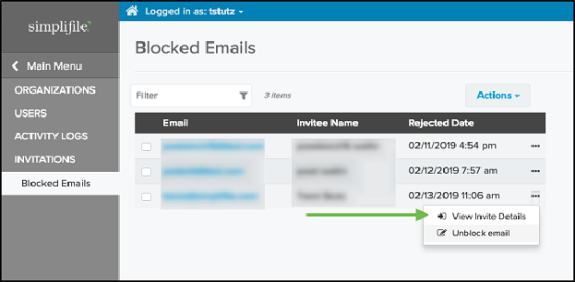
The Blocked Emails page is where emails from unsubscribed invitations can be found and managed. If an email address is in this list, it means they will not receive invitations from Simplifile. From this page, internal users can unblock emails, add a new email to the list, or view invitation details for a specific email address.
My Notifications page
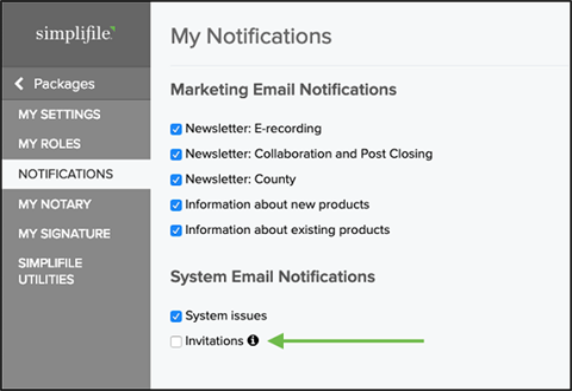
To help with the management of invitation notifications, the My Notifications page has a new Invitations notification that will be automatically turned off when an existing user unsubscribes from all notifications. The user can also go to this page and turn off invitation notifications along with other notification types.
We added an optional Service Level Indicators report for users
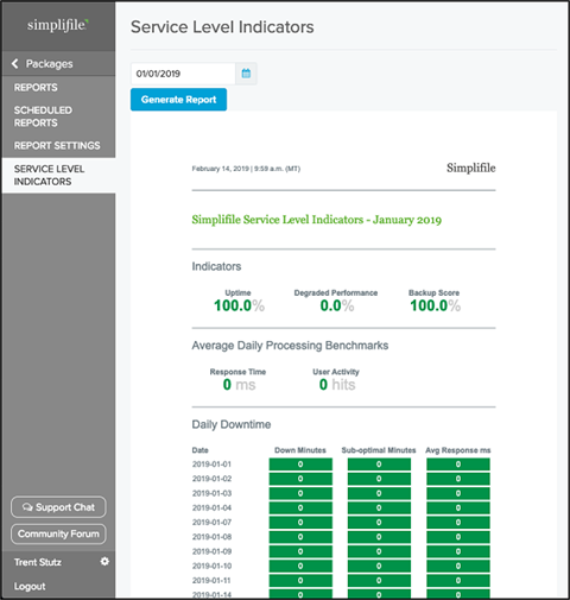
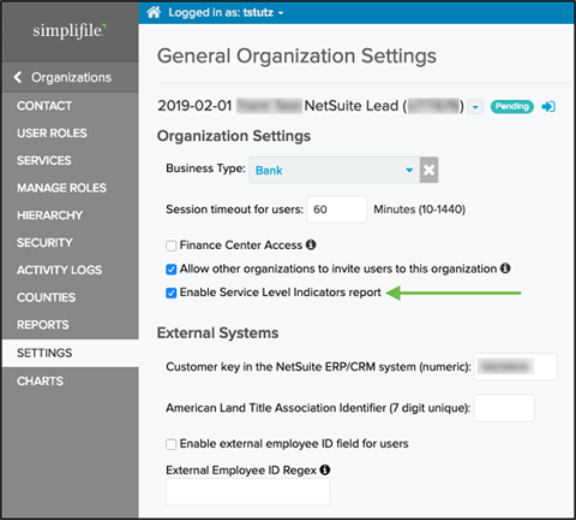
An optional Service Level Indicators report can now be enabled for certain organizations as needed. By default, organizations will not have the Service Level Indicators report enabled. Any internal user can go to the General Organization Settings page to enable this report.
When enabled, users in the organization will be able to see a new Report menu option called Service Level Indicators. Inputting a date will display service level indicator results for that month. Please note, the example below is from the QA environment which, as expected, shows perfect metrics.