Feature Enhancements in Version 22.1 (Banker Edition)
This section discusses the updates and enhancements to existing forms, features, services, or settings that are provided in this release.
Update to Microsoft Windows and Office Support
Watch the Release Rundown Video
The following Windows Operating Systems are now supported for use with Encompass:
-
Windows 10, Version 21H2 (Build 19044.1415)
-
Windows 11, Version 21H2 (Build 22000.496)
-
Microsoft Office, Version 2202 (Build 14931.20010) (Encompass Client Machines)
For more information about Encompass system requirements and compatibility with third-party applications, refer to the System Requirements and Compatibility Matrix.
Support for iLAD Imports
Updates are being made in Encompass to support iLAD loan file imports. At the time the GSEs announced the introduction of the 2020 URLA updates, both Fannie Mae and Freddie Mac published their own versions of ULAD specifications for ordering AUS. Both GSEs have different implementations that replaced the role previously held by the FNMA 3.2 format. An industry group working within MISMO has defined a new iLAD format, which is the new industry-wide standard that will replace the temporary ULAD format within the secondary market. Details of the iLAD import features implemented in the Encompass 22.1 Major Release are listed below.
CBIZ-42026
(Updated on 2/25/2022)
Watch the Release Rundown Video
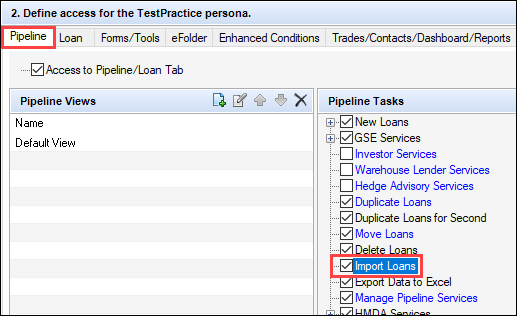
Administrators can select the ULAD/iLAD (MISMO 3.4) checkbox in the Personas setting (Encompass > Company/User Setup > Personas) to give personas permission to import iLAD loan files. The checkbox is accessed by clicking the Import Loans option in the Pipeline Tasks section on the Pipeline tab.
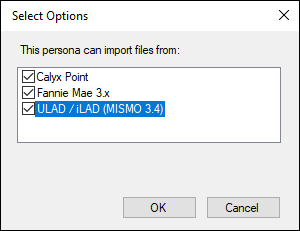
The checkbox displays on the Select Options pop-up window.
CBIZ-36749
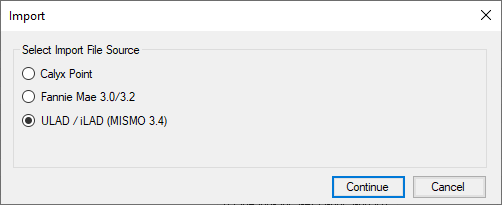
Functionality for importing iLAD files has been added to the Encompass Pipeline. When importing loan files from the Encompass Pipeline dropdown menu (Pipeline>Import), the option on the Import window for selecting ULAD (MISMO 3.4) files has been reworded to indicate that the option is now for ULAD / iLAD (MISMO 3.4) files. Updates to the subsequent windows in the import process also reflect the new iLAD import functionality.
CBIZ-39946, CBIZ-41861
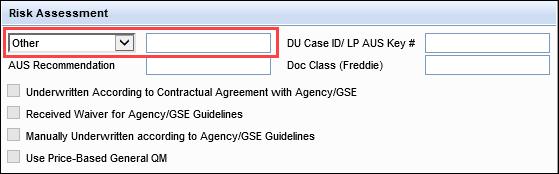
When an underwriting risk assessment type (AutomatedUnderwritingSystemType) in an iLAD file is imported into Encompass, if the type does not match one of the options available on the dropdown list (field ID 1543) in the Risk Assessment section on the ATR/QM Management, Transmittal Summary, and ULDD/PDD input forms, the following logic applies:
-
A value of Other is populated in the dropdown list field.
-
The name of the iLAD underwriting risk assessment type from the iLAD file is populated in the description field (field ID 1556) next to the dropdown list.
CBIZ-41238
A MERS ID number imported from an iLAD loan file is now populated to the MERS/MIN field (field ID 1051), overriding the logic Encompass uses to generate the MERS/MIN number.
CBIZ-42540
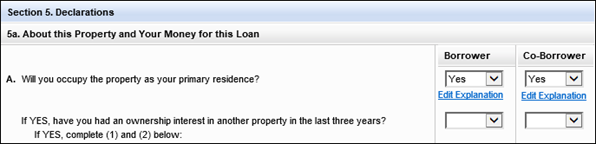
In Section 5. Declarations on the 1003 URLA Part 4, when Yes is selected for a Co-Borrower field, an Add Explanation link now displays below the Co-Borrower dropdown list. Users can click the link to open a pop-up window where they can enter a separate explanation for the co-borrower. This update supports the import of separate borrower and co-borrower explanations from iLAD loan files. Previously, when Yes was selected for borrower, co-borrower, or both, only one Add Explanation link displayed below the Borrower dropdown and all relevant comments for borrower and co-borrower were entered in the same pop-up window.
CBIZ-41236
If the FMNA Loan Import option in the Admin Tools has been set to retain imported values for calculated fields (Keep Calculated Values) and the iLAD file contains valid data for the field, the data is imported into Encompass and the field displays exactly as imported. If the iLAD file data is empty or null for the field, the Encompass calculation is triggered for the field.
CBIZ-43088
For cash-out refinance loans, the following logic is being used to ensure that total values are correctly populated in Encompass when importing and exporting iLAD files:
-
When importing an iLAD loan file into Encompass, the Total Other Income Amount (field ID URLA.X44) is not imported directly but is calculated using the total of the Borrower Other Incomes (field ID URLA.X42) and Co-Borrower Other Incomes (field ID URLA.X43).
-
A Lock icon has been added to the ULAD Refinance Cash Out Amount (field ID ULDD.RefinanceCashOutAmount).
-
When importing an iLAD loan file into Encompass, the ULAD Refinance Cash Out Amount (field ID ULDD.RefinanceCashOutAmount) is not imported directly but is populated with the total of the Existing Liens to be Paid Off (field ID 26) and the Credit Cards and Other Debts Paid Off (field ID URLA.X145).
-
When exporting an Encompass loan file to an iLAD file, the refinance paid-off amount is populated with the combined total of the Existing Liens to be Paid Off (field ID 26) and the Credit Cards and Other Debts Paid Off (field ID URLA.X145). Formerly, it exported from the Refinance amount (field ID 1092).
These updates do not apply to refinance debt consolidation loans because they cannot be associated with the appropriate debt to be paid off. Total values for debt consolidation loans are not imported and must be entered manually.
CBIZ-41511
When the following values are imported from an iLAD file, the values are retained and are not overwritten by the calculated values that Encompass typically populates to the fields.
This behavior is dependent on the FMNA Loan Import option in the Encompass Admin Tools. If the option has been set to Keep Calculated Values, the behavior described above is applied. If the option has been set to Use Encompass Calcs, the imported values are overwritten by the Encompass calculations.
Additionally, Lock icons have been added (as indicated below) for any fields that previously did not have a Lock icon. Encompass users can click the Lock icons to trigger a calculation that replaces the imported value.
-
Borrower Other Incomes (field ID URLA.X42)
-
Co-Borrower Other Incomes (field ID URLA.X43)
-
Total Proposed Monthly Housing Expenses (field ID 912) – Lock icon added
-
Total Mortgage Loans (I + J) (field ID URLA.X148) – Lock icon added
-
Other Credits (field ID URLA.X149) – Lock icon added
-
Total Credits (Total of L and M) (field ID URLA.X152) – Lock icon added
-
Total Due from Borrower(s) (Line H) (field ID 1073) – Lock icon added
-
Borrower FHA Closing Costs (field ID 1132)
-
Residual Income (field ID 1325)
-
Projected Reserves (field ID CASASRN.X78)
-
Total Subordinate Financing (field ID URLA.X230)
CBIZ-40302
When importing information for gifts and grants, the full name of the depository is now imported into the Name field on the Verification of Gifts and Grants input form.

CBIZ-41240
Values for the Energy Improvement Amount and the PACE Loan Payoff Amount are populated to the Existing Energy Improvements section of the Fannie Mae Additional data input form when importing a PACE loan or Energy Efficient loan that is a liability for the subject property and is marked as Paid Off.

Because iLAD loan files do not designate a liability as a PACE or Energy Improvement loan, Encompass users must perform the following steps after the import to have the PACE or Energy Improvement amounts populate correctly: open the VOL record for the liability, select the Subject Property and Will be paid off checkboxes, and then select the PACE or Energy Improvement checkbox.
CBIZ-42032
Encompass Forms & Tools
For loans using the new URLA forms, the Net Income / Loss (field ID FM0132) on a Verification of Mortgage record is no longer calculated for a property that is a pending sale under specific scenarios. Details about the logic used to calculate the Net Income / Loss under these scenarios is described in the table below.
To support the new calculation logic, a new Pending Sale Date (field ID FM0159) field has been added to the Verification of Mortgage input form.
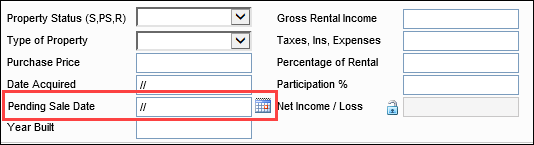
The Net Income/Loss (field ID FM0132) is now populated with a blank value unless one of the scenarios listed in the table below occurs.
| Property Status (field ID FM0124) | Property will be used as (field ID FM0155) | Type of Property (field ID FM0118) | Impact on Calculation of Net Income / Loss |
|---|---|---|---|
| PS | Any option except Primary | If the sale closes prior to Closing/Disbursement, the Net Income / Loss is blank. If the sale closes after Closing/Disbursement, the Net Income / Loss is calculated if it would otherwise be calculated. | |
| PS | Primary | 2 to 4 Units |
The Net Income / Loss is calculated when Gross Rental Income (Field FM0X20) is completed.* However, it is populated with a blank value if the Mortgage Origination Date (field ID 2553) or the Closing Date (field ID 748) is later than the Pending Sale Date (field ID FM0159). |
| R or H | Any option except Primary | The Net Income / Loss is calculated. | |
| R or H | Any option except Primary | 2 to 4 Units |
The Net Income / Loss is calculated.* NOTE: Currently Primary Residence is suppressed for the calculation of rental income, however, it is allowed for 2-4-unit properties. |
*As with previous versions of Encompass, the calculation of Net Income / Loss for a 2-4 Unit primary residence does not net out the payment and expenses from the rental income, per the FNMA selling guide.
CBIZ-38236
An option for of any installment has been added to the dropdown list used to define the basis for a late payment (field ID 1719) on the Loan Estimate Page 3, Closing Disclosure Page 4, RegZ - LE, and RegZ -CD input forms.
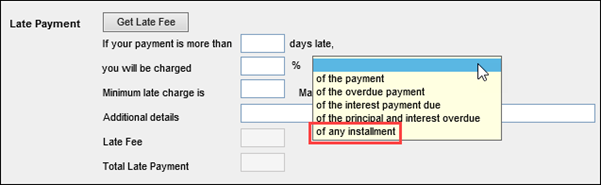
This option has been added to support the Of any Installment late fee language for VA loans. The default verbiage for VA loans is: 4% of the payment, with a 15 day grace period.
CBIZ-42138
The Closing Costs Estimate Expiration Time Zone (field ID LE1.XG9) field has been removed from the Loan Estimate Page 1 and from the Loan Estimate snapshot in the Disclosure Tracking tool.
This field is still associated with disclosure tracking records but is no longer visible on any Encompass forms or tools. To override the value in the field, add it to a custom form as an editable field. Customers who have updated this field on a data template will need to create a new version of the data template.
This field was added with the Encompass 21.3 release to provide a generic time zone for an expiration date that occurs near a daylight savings time change. The Closing Costs Estimate Expiration Time Zone is being removed from the Encompass user interface because the actual time zone displayed (field ID LE1.X9) for the Closing Costs Estimated Expiration Date is now computed based on the date displayed and the value in field LE1.XG9.
CBIZ-42320
(Updated on 3/4/2022)
Release Rundown 22.1: Updates to the Proposed Housing Expenses Popup Windows
Updates have been made to the pop-up windows accessed by clicking the Edit icons for Other and Real Estate Taxes on the Monthly Housing Expenses pop-up window.
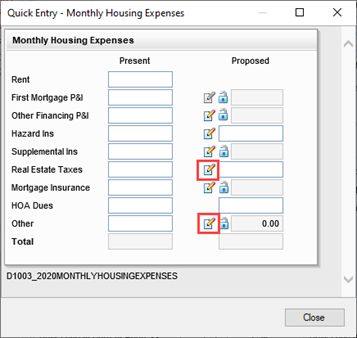
Proposed Other Expense
On the Proposed Other Expense pop-up window for loans using the 2009 and 2020 URLA forms, the calculation logic has been removed from the Other amount (field ID 1799). Previously the field was a free entry field, but a calculation would update the value in the field when adjustments were made to any other component expenses included in the proposed Other amount (field ID 234) on the Monthly Housing Expenses pop-up window. The calculation would offset the amount in field 1799 to make the total of all Proposed Other Expenses matched the value in field 234. Data in field 1799 is now updated manually. The calculation for field 234 remains unchanged.
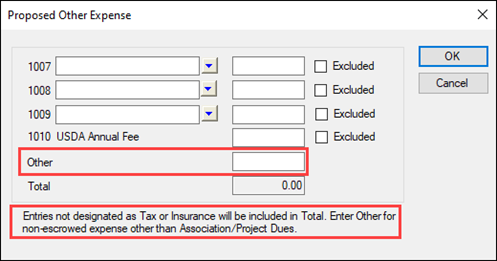
Additionally, the following text has been added to the bottom of the Proposed Other Expenses window:
Entries not designated as Tax or Insurance will be included in total. Enter Other for non escrowed expense other than Association/Project Dues.
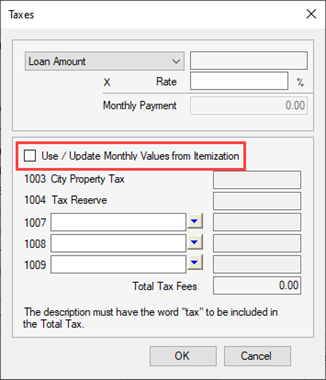
Taxes
On the Taxes pop-up window for entering or editing real estate values for proposed other expenses, the on-screen text for Override with Taxes from Itemization has been changed to Use / Update Monthly Values from Itemization.
CBIZ-32041
(Added on 3/4/2022)
The First Payment Due Date calculation has been updated to honor the Paid to Date (field ID 3569) on the Correspondent Purchase Advice Form.
-
A new Paid to Date validation has been added to ensure the date falls on the 1st of the month.
-
If the date entered in the Paid to Date field is not the 1st of a month, an error message “Date entered must be the 1st of the month for which the last payment from the Borrower was applied. The date entry was not accepted.” will be displayed.
-
When OK is selected, the Paid to Date field will be cleared.
-
When the Paid to Date field has a valid value, the First Payment Due Date calculation will ensure the following:
-
The First Payment Due Date is at least one month past the Paid to Date.
-
The Calculated Purchase Principal will be set to the Beg Balance of the matching Payment Date row on the Payment Amortization Table.
VA Loans
The logic used to populate the discount rate percentage (field ID VARRRWS.X9) on VA Rate Reduction Worksheet has been updated. This percentage rate is used for the final computation of the maximum loan amount for a VA Interest Rate Reduction Refinancing Loan (IRRRL).
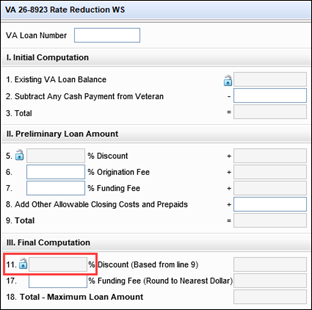
The following logic is now used to populate the discount rate percentage (field ID VARRRWS.X9): The total borrower-paid and seller-paid origination fee (field ID NEWHUD2.X927) minus the seller-obligated amount for the origination fee (field ID NEWHUD2.X956). This number is divided by the Total Loan Amount (field ID 2) and then multiplied by 100.
Any changes to NEWHUD2.X927 or NEWHUD2.X956 trigger an update to the discount rate percentage (field ID VARRRWS.X9) unless a user has click the Lock icon to prevent additional calculation updates to the discount percentage.
CBIZ-39318
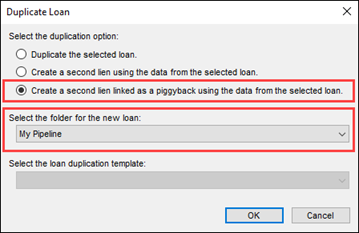
Piggyback Loans
Updates have been made to the Encompass Pipeline and the Loan Folder Business Rule (Encompass > Settings > Business Rules > Loan Folder Business Rules) to enable administrators to configure whether the Piggyback loans tool can be used to add a piggyback loan to the folder when users do not have origination or duplication permissions for the folder.
A new Can Piggyback loans be added to the loan folder? option has been added to the Set Up Origination Rule section of the Loan Folder Business Rule setting. When Yes is selected for the options, users can add piggyback loans to the folder regardless of the origination or duplication options. By default, the option is set to Yes.
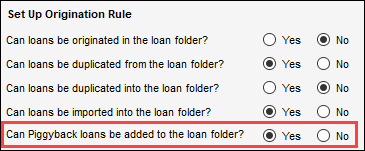
When creating a piggyback as a second lien from the Encompass Pipeline menu, the Select the folder for the new loan dropdown list on the Duplicate Loan window only displays folders in which users are allowed to create piggyback loans.
CBIZ-36257
Electronic Document Management
Watch the Release Rundown Video
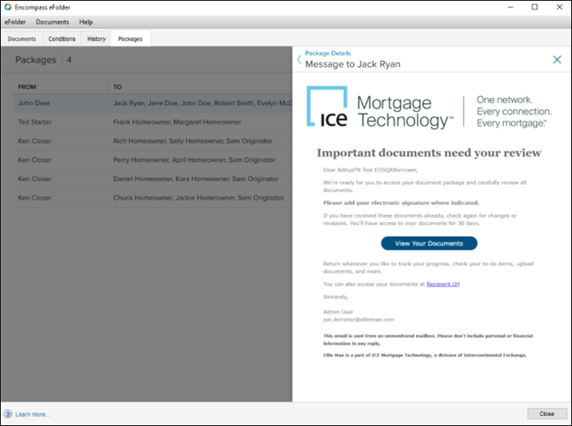
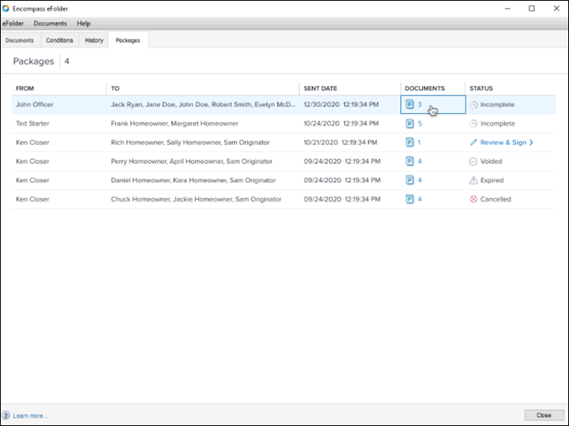
Updates have been made to the Packages tab in the eFolder to provide access to the following information:
-
Details about the package sender, including the sender’s name, role, and email address, as well as the date and time when the package was sent.
-
Details about the package recipients, including the recipient’s name and email address, a link to view the email sent to each recipient, and a list of tasks for each recipient. This information displays in separate sections for each recipient.
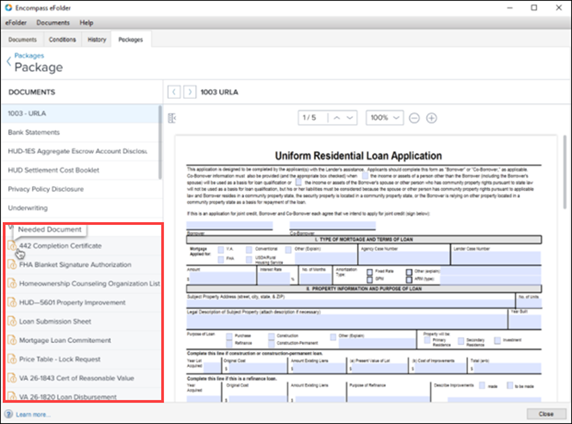
Additionally, when lenders view the documents included in a package, they can now see a list the Needed documents that were requested as part of a package.
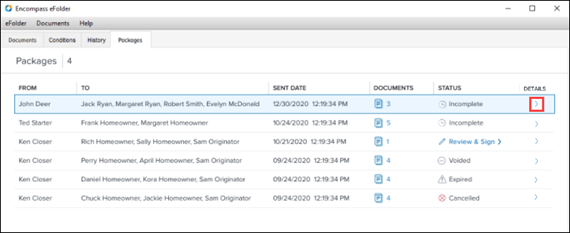
To View Package Details:
-
On the Packages tab in the eFolder, click the Arrow link in the details column for an entry to view the details for a package.
-
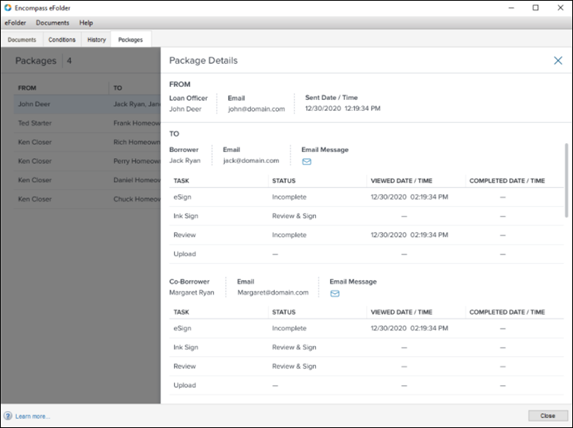
The Package Details window opens in a slide-out window that displays details for the package.
-
The From section provides the sender’s role in the loan, name, and email address, and the date and time when the package was sent.

-
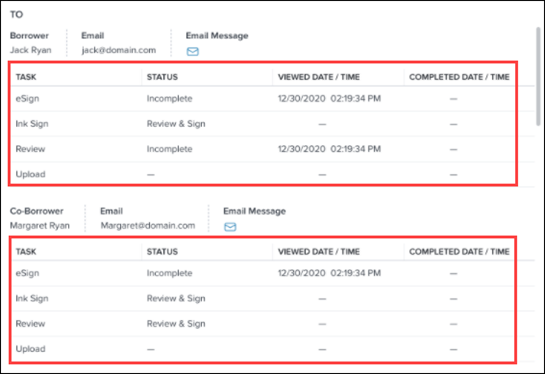
The To section includes a subsection for each recipient. includes the recipients’ status, name, and email address, and an Email Message link that opens a window where you can view the email that was sent to the recipient. The recipient’s contact information is populated from the File Contacts tool for the loan.

-
Each recipient section also includes a Task section that lists both completed and pending tasks. Statuses for the tasks include: Incomplete, Complete, Review & Sign (for the sender only), and two additional statuses for eClose packages: Expired and Voided. The date and time displays when a task has been viewed or completed.
-
-
Click the Email Message link to view the email in a slide-out window.

To View Needed Documents:
-
On the Packages tab, click the Document icon for an entry.
-
When the document viewer opens, needed documents display in the Documents panel on the left. Entries for needed documents are grayed-out and cannot be opened in the document viewer. An orange Document icon displays next to these documents. Placing your mouse pointer over the entry results in pop-up text displaying to indicate that a document is a Needed Document.
DOCP-31564
(Added on 2/25/2022)
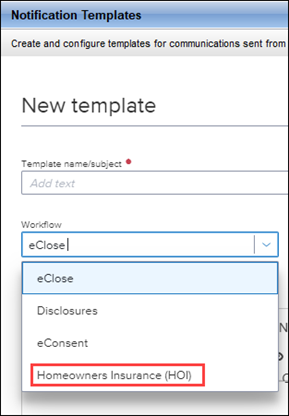
A new Homeowners Insurance (HOI) option has been added to the Workflow dropdown list in the Notification Templates setting (Encompass > Setting > eFolder Setup > Notification Templates). This option enables administrators to create notification templates for requesting proof of homeowner’s insurance for Encompass Consumer Connect loans. The templates will be used with task-based workflow automation rules scheduled to be introduced in a future release of Encompass.
DOCP-31847
eClose
Updates to eNote Servicing Options
(Added on 2/18/2022)
Lenders using Encompass eClose can now complete life of loan tasks for their eNotes in two ways:
-
Users who are logged into Encompass can access an eNote related to that loan and perform servicing related functions from the eNotes tab in the eFolder.
-
Clients with separate servicing departments will be able to login to our new web-based eVault Portal to perform similar tasks on their existing eNotes. This option is for users that do not have access to Encompass.
The life of loan tasks available on the eNotes tab and in the eVault Portal include:
-
An option to deactivate an eNote when it is paid off, charged off, or converted to paper.
-
An option to reverse the deactivate of an eNote.
Prior to the Encompass 22.1 release, lenders who wanted to deactivate or reactivate an eNote had to submit a request to the ICE Mortgage Technology support team. With the addition of these new features clients have the ability to perform these functions themselves.
Watch the Release Rundown Video
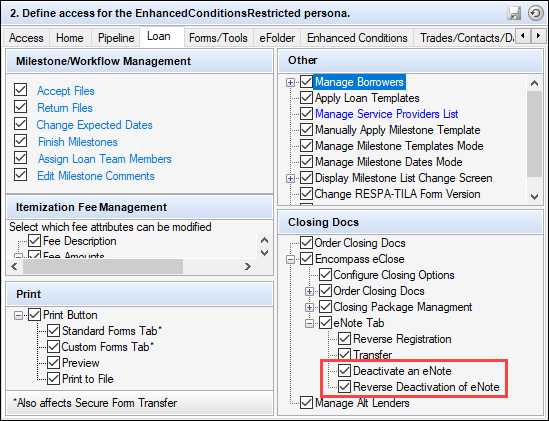
Two additional options have been added to the eNotes tab to enable users to deactivate an eNote and to reactivate an eNote that was previously deactivated. Access to the new options is controlled in the Closing Docs section of the Personas setting (Encompass > Settings > Company/User Setup > Personas). All actions taken on an eNote will be logged in the Transaction History of the eNote.
To Enable Access to the New Options on the eNotes Tab:
-
On the menu bar, click Encompass, and then click Settings.
-
On the left panel, click Company/User Setup, and then click Personas.
-
Select a persona, and then click the Loan tab in the right panel.
-
In the Closing Docs section, under the Encompass eClose options, in the eNote Tab options, select or clear the checkboxes for Deactivate an eNote and Reverse the Deactivation of eNote.
To Deactivate and Reactivate an eNote from the eNotes Tab:
-
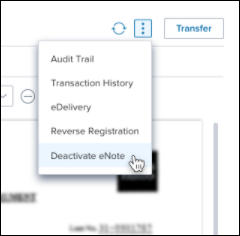
Open a loan file, click the eFolder button on the upper-right, and then click the eNotes tab.
-
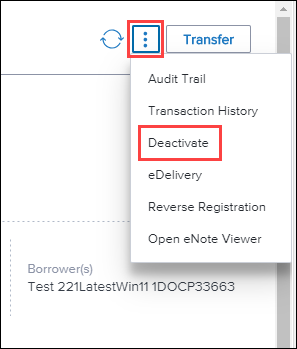
Click the Menu icon (three dots) and then click Deactivate.
-
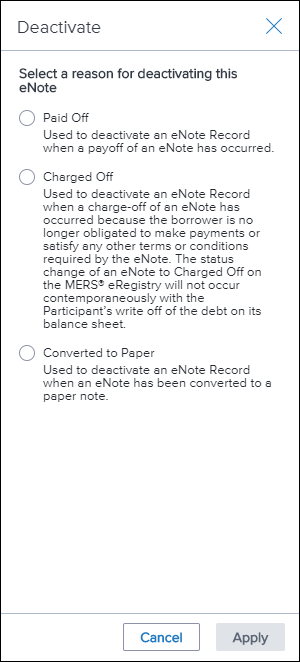
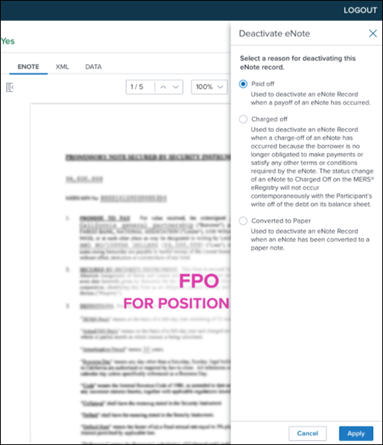
When the Deactivate slide-out window opens, select one of the options for Paid Off, Charged Off, or Converted to Paper, and then click Apply.
-
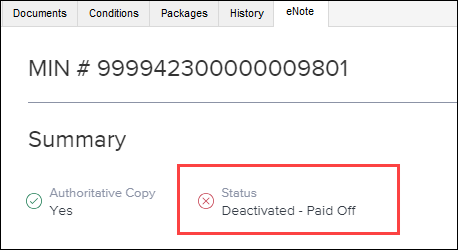
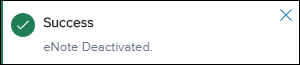
A text window displays confirming that the eNote is deactivated.

After deactivating the eNote, the status changes on the eNote tab.
-
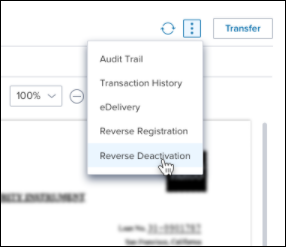
To reactivate the eNote, click the Menu icon (three dots) and then click Reverse Deactivation.
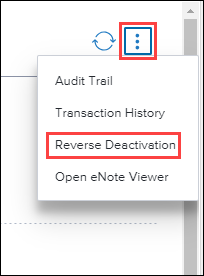
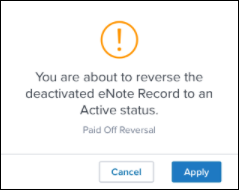
-
Click Apply when the confirmation window displays.
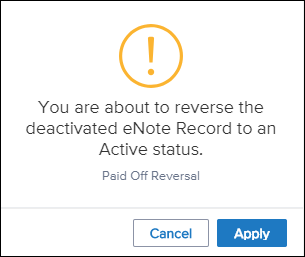
-
A text window displays confirming that the eNote deactivation has been reversed.

-
After reversing the deactivation, the status changes to Active on the eNote tab.
DOCP-28866
A new Encompass eVault portal is now available to enable specified users to search for eNotes, view eNote details, and perform the same eNote life of loan tasks available on the eNote tab in the Encompass eFolder. This option is designed to enable users to perform actions on eNotes for loans that have been completed. These users typically do not work in Encompass and are servicing the eNotes well after the loan has closed. For example, lenders can provide access to the portal for members of their servicing team.
The actions that can be executed from the Encompass eVault portal include:
-
eDeliver an eNote
-
Transfer an eNote
-
Reverse an eNote registration
-
Deactivate an eNote
-
Reverse the deactivation of an eNote
Administrators configure access to the Encompass eVault portal in the Encompass settings:
-
In the Encompass Personas setting, an Encompass administrator creates a persona with access to the portal and specifies the servicing options available to the persona.
-
The administrator then creates a user profile in Encompass for each user who needs access to the eVault, assigning a persona with eVault access to each user.
Although the administrator creates an Encompass user profile for each Encompass eVault user, these users may never actually log in to Encompass. These user profiles provide Encompass login credentials that can be used to access the Encompass eVault portal.
New Options in the Personas Setting for the eVault Portal
New Encompass eVault portal access options have been added to the Personas setting to enable administrators to provide Encompass eClose/eNote users who are servicing their loans a way to execute life of loan servicing functions. Using the options below, the administrator can configure persona rights for these users, so they can access the Encompass eVault portal and perform specific responsibilities. All actions taken will be logged in the Transaction History of the eNote.
To Provide a Persona with Access to the eVault Portal:
-
On the menu bar, click Encompass, and then click Settings.
-
On the left panel, click Company/User Setup, and then click Personas.
-
Select an existing persona or create a new persona.
-
In the right panel, click the eVault tab.
-
Select the eVault Portal checkbox to give the persona access to the portal.
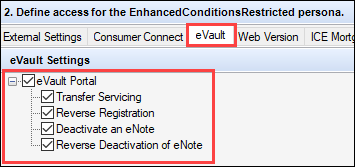
-
Select or clear the checkboxes to enable or disable the personas' ability to transfer an eNote, reverse an eNote registration, deactivate an eNote, or reverse the deactivation of an eNote.
The persona settings on the Loan tab and on the new eVault tab are independent. The settings on the Loan tab provide access to the eNotes tab in the Encompass eFolder. The settings on the eVault tab provide access to the new Encompass eVault portal.
Using the Encompass eVault Portal
Users access the Encompass eVault Portal via the following URL:
-
https://evault.ellieservices.com
Access to the Encompass eVault Portal is available for all lender’s using Encompass eClose.
To Use the Encompass eVault:
-
Users access the Encompass eVault Portal via a URL.
-
If a lender uses SSO (Single Sign On), the user is directed to an OKTA sign-in website.
-
The first time the user opens the OKTA site, they are prompted to create an account with OKTA to enable multifactor authentication.
-
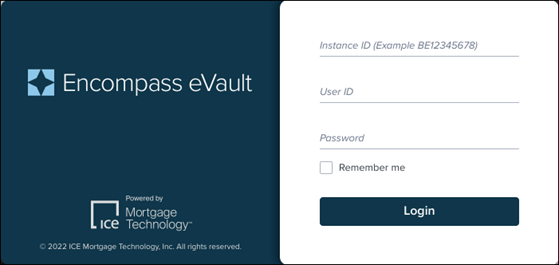
If an OKTA account has already been set up, the user completes the OKTA authentication process and is directed to the Encompass eVault login window.
-
-
If a lender does not use SSO, the user is sent directly to the Encompass eVault login window.
-
If a lender has only one organization set up the company, the name displays on the left.

-
If multiple organizations are available, they can be selected from a dropdown list on the left.
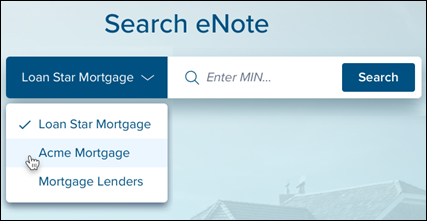
-
Use the search field to find eNotes based on the MIN number.

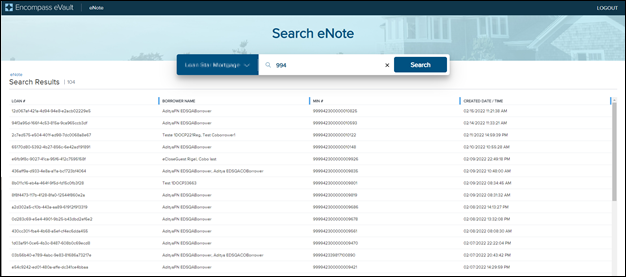
-
If you search by a partial number MIN #, a list of eNotes with MIN #s that contain the partial terms displays on the Search Results window. Click an entry to open the eNote window opens.
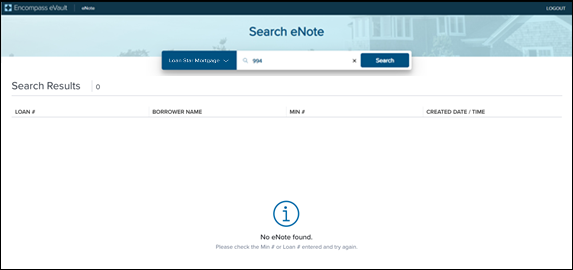
-
If no matches are found, the Search Results window is blank and a “No eNote found” message displays at the bottom.
-
If a match is found when searching for a full MIN #, the eNote window opens.

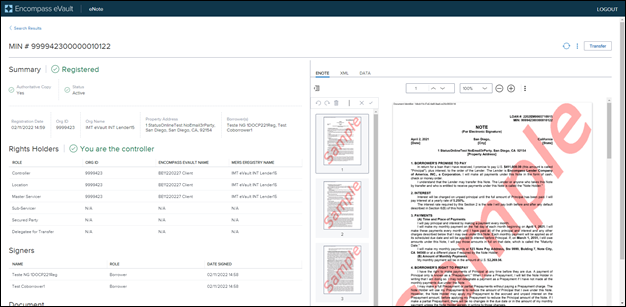
-
Click the Menu icon (three dots) to view the eNote options that are available, based on the options enabled on eVault tab in the Personas setting. Except for the new options for Deactivate eNote and Reverse Deactivation, these are existing options that function just as they do in the eNotes tab in the eFolder.
-
To deactivate an eNote, click the Menu icon and then click Deactivate eNote.
-
When the Deactivate eNote slide-out window opens, select one of the options for Paid Off, Charged Off, or Converted to Paper, and then click Apply.
-
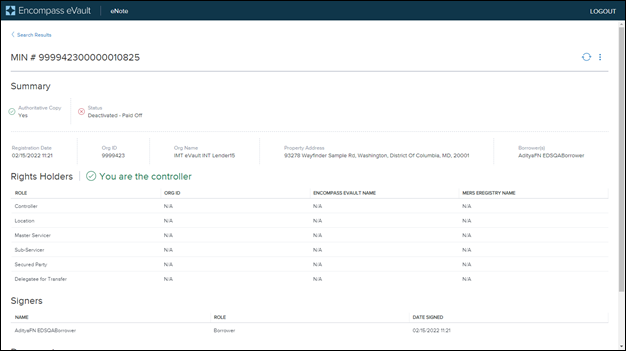
A text window displays confirming that the eNote is deactivated.
-
The header at the top of the window indicates that the eNote is now deactivated and lists the reason for the deactivation.

-
To reactivate an eNote, click the Menu icon (three dots) on the upper-right and then click Reverse Deactivation.
-
A confirmation window asks you to confirm the reactivation.
-
The header at the top of the window indicates that the eNote is now active.
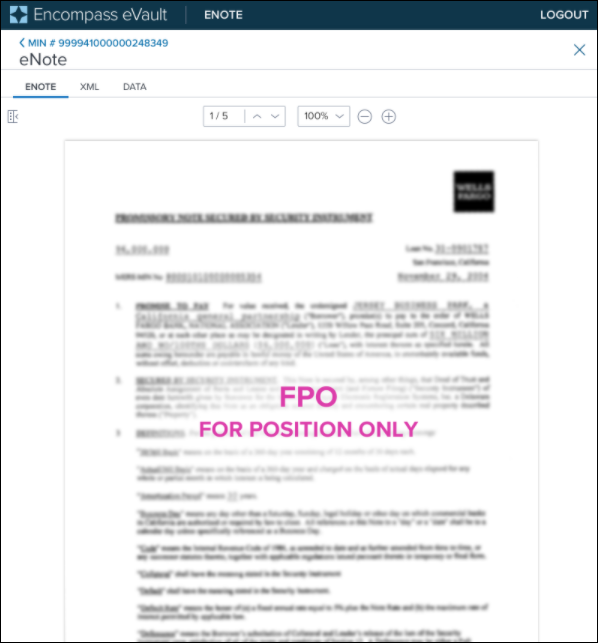
Viewing the Encompass eVault eNote Window on Smaller Screens
When the Encompass eVault eNote window is viewed on smaller screens, the following differences display in the user interface features.
The eNote viewing area no longer displays.
The a new Open eNote Viewer option displays in the dropdown menu.
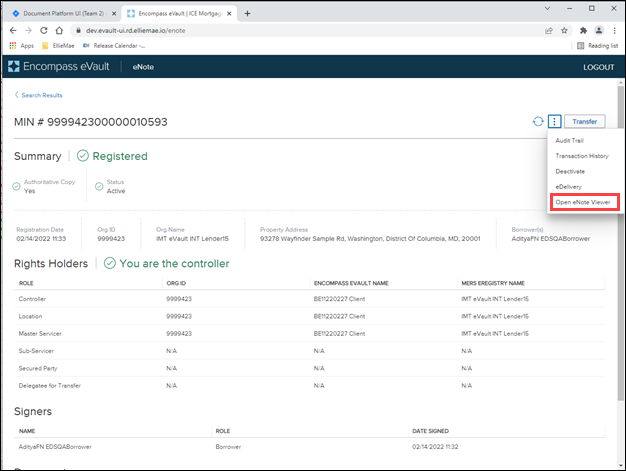
When you click the Open eNote Viewer option, the eNote opens in a slide-out window.
DOCP-28866, NICE-38390
Enhanced Conditions
(Updated on 3/4/2022)
Release Rundown 22.1: Additional Options for Printing Enhanced Conditions on Custom Print Forms
Administrators can use new options in the Customs Print Forms setting to configure custom forms that list the condition name and the condition description for Enhanced Conditions that are open, closed, or both. When an enhanced condition has both external and internal condition descriptions, only the external description is printed. The new options display in the Customs Print Forms setting when you create a custom form in the category.
To Configure the New Options
-
On the menu bar, click Encompass, and then click Settings.
-
On the left panel, click Loan Setup, and then click Custom Print Forms.
-
On the Custom Print Forms setting, select the Public or Personal folder in which you want to add or edit the custom form.
-
If you are creating a new form, click the New icon, and then type the name of the custom form.
-
Select the form on the Custom Print forms list, and then click the Edit icon.
Microsoft Word and the Insert Fields window open.
-
If you are creating a new form, add and format the content in Microsoft Word.
-
Click the location in the form where you want to insert the Enhanced Conditions data.
-
On the Insert Fields window, select Enhanced Conditions (By Options) from the Category dropdown list, and then select an option from the Field Name list.
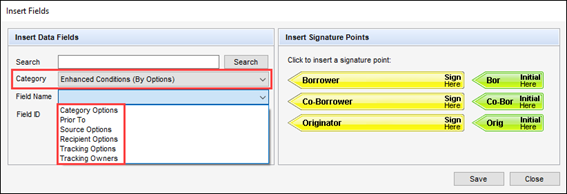
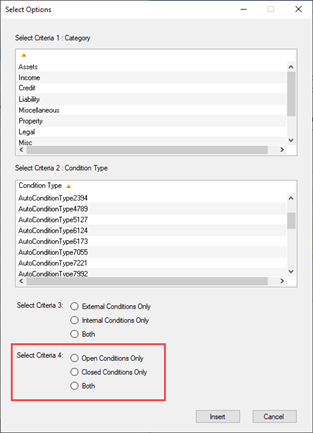
-
On the Select Options window, configure the options for the first three criteria as needed. The new options display in the Select Criteria 4 section.
CBIZ-39219
Release Rundown 22.1 Video: Enhanced Conditions Updates
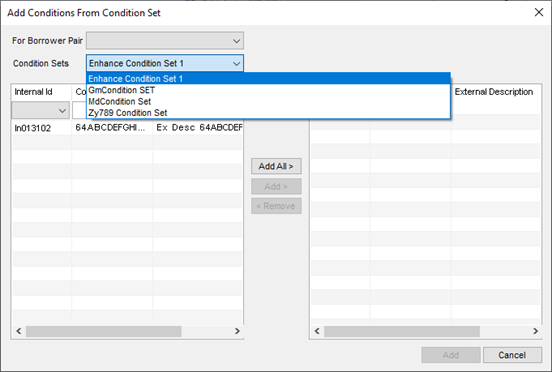
When adding enhanced condition sets to the Encompass eFolder, condition sets are now listed in alphabetical order on the Conditions Sets dropdown list on the Add Conditions Sets window.
To View the Conditions Sets List
-
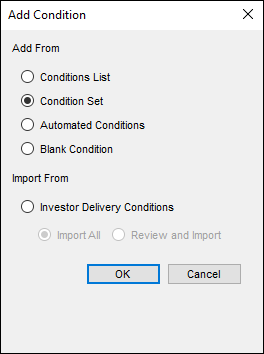
If your company uses Enhanced Conditions, click the Conditions tab in the eFolder and then click the Add icon.
-
On the Add Conditions window, select the Condition Set option, and then click OK.
-
On the Add Conditions from Condition Sets window, click the Condition Sets dropdown list.
DOCP-33178
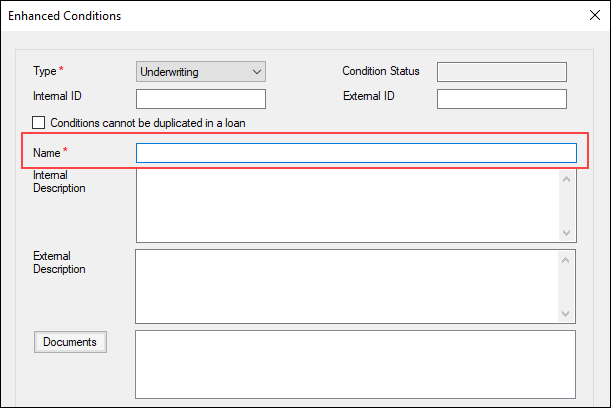
Release Rundown 22.1: Enhanced Conditions Updates
When using the Enhanced Conditions settings tool to create conditions, enhanced conditions can now have names that are up to 128-characters in length. Previously, the condition name was limited to 64 characters. This update supports the retention of existing names that are up to 128-characters long when converting a standard condition to an enhanced condition.
DOCP-31834, NICE-37912
(Updated on 2/18/2022)
Release Rundown 22.1: Enhanced Conditions Updates
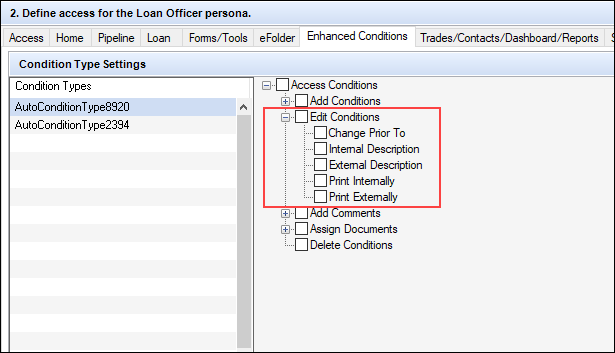
The Persona setting has been updated to provide additional options for Enhanced Conditions. When managing persona access to edit options for Enhanced Conditions, administrators can now control if the persona can edit the internal and external descriptions for the condition and if they can print the condition details internally and externally.
Please note, these settings will be enforced in the web version of Encompass 22.1, however, they will not be enforced in the desktop version of Encompass 22.1. Enforcement in the desktop version will start in Encompass 22.2.
File Imports
When importing a ULAD or iLAD MISMO 3.4 loan file, the value for the file’s TotalMortgagedPropertiesCount is now populated to the Encompass field for the Total Mortgaged Properties (field ID ULDD.TotalMortgagedPropertiesCount). If no value exists in the imported file, the Total Mortgaged Properties field in Encompass is left blank.
CBIZ-42334
Encompass Settings
A new Redisclose Closing Disclosure (NBO Updated) alert has been added to Encompass to prompt users to redisclose the closing disclosure when a non-borrowing owner is added to a loan after the Closing Disclosure has been disclosed.
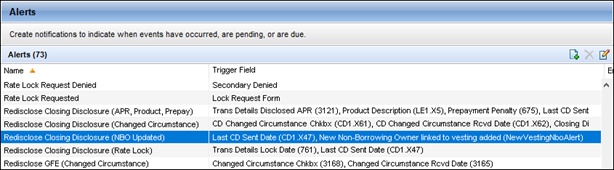
The new alert has been added to the Alerts Setting (Encompass > Settings > Loan Setup > Alerts) and is similar to the alert for redisclosing when a prepayment penalty is added, a loan product is changed, or when the Current APR differs from the Disclosed APR by more than the allowed amount. The alert applies to both standard and custom milestones.
The alert is triggered when a non-borrowing owner file contact or non-borrowing owner vesting is added after the initial Closing Disclosure is issued. The following message displays on the alert:
A non-borrowing owner has been added after the CD was issued. Please redisclose the CD, allowing at least 3 business days after presumed receipt for closing.
The alert is cleared when the user manually clears the alert or when a new Closing Disclosure with the NBO is issued.
CBIZ-42309
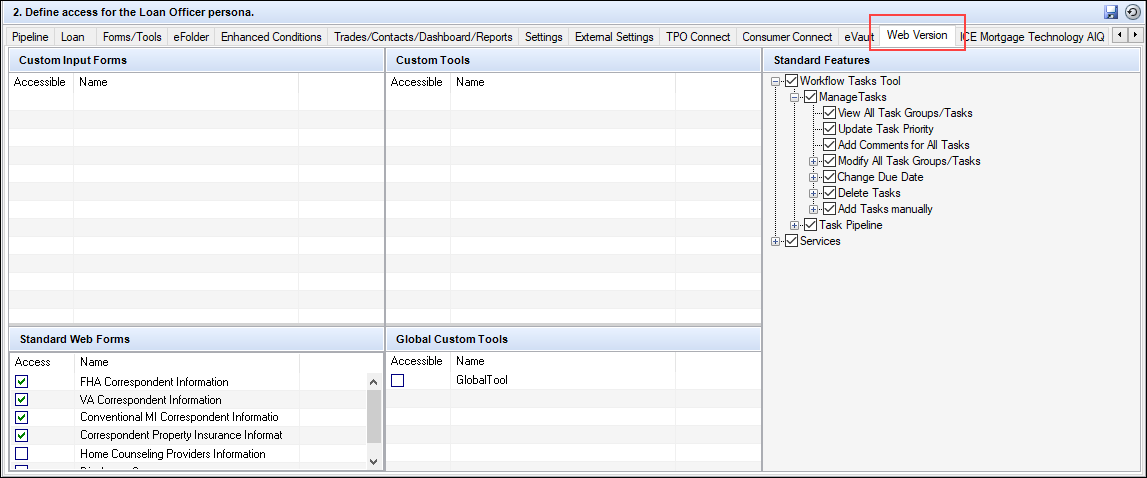
As a result of the new branding introduced in Encompass 22.1 for the web version of Encompass (formerly known as Encompass LO Connect), the references on the Access tab in the Persona setting have been updated to differentiate between the desktop of version of Encompass and the web version of Encompass. Administrators can use this setting to indicate which versions of Encompass the persona can access.
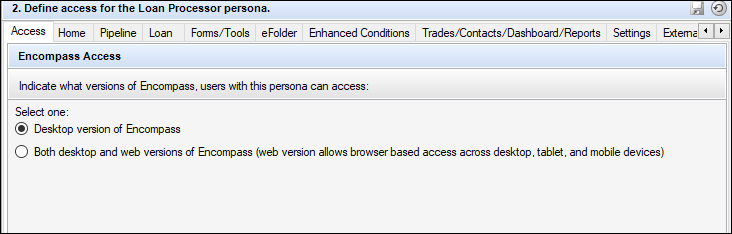
In addition, the LO Connect tab in the Personas settings has been renamed to Web Version. Administrators can use this tab to configure user access to custom forms, custom tools, standard input forms, Global Custom Tools, and task-based workflow features in the web version of Encompass.
NICE-38844
To help ensure administrators do not inadvertently add a new group or users to the All Users group in the User Groups setting, a new confirmation message is triggered when the New icon is clicked:
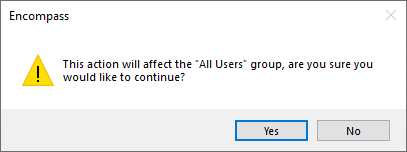
In addition, performance enhancements have been made to help ensure the successful removal of user groups and users from the All Users group and avoid timeouts during this process.
NICE-38999
Watch the Release Rundown Video
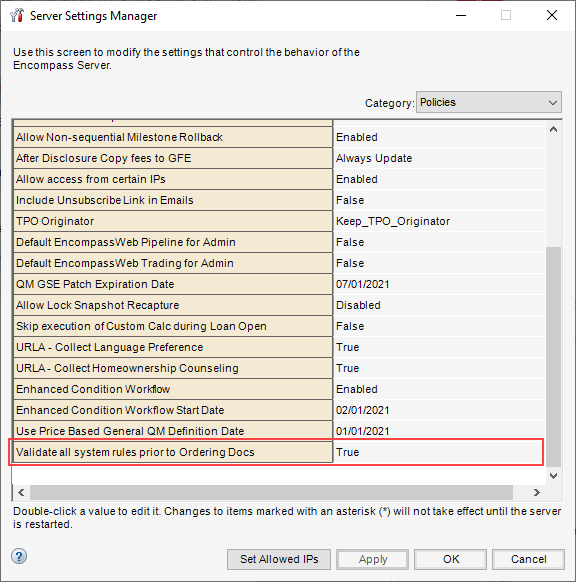
A new Admin Tools policy, Validate all system rules prior to Ordering Docs, is now available to enable Encompass to validate business rules and Dynamic Data Management (DDM) rules when a loan team member is sending an eDisclosure request or ordering closing documents. This setting helps ensure that users cannot proceed with sending eDisclosures or ordering closing documents when a DDM rule or business rule should be restricting the user from proceeding. By default, the setting is turned off.
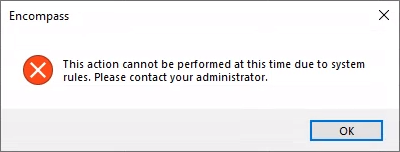
When this setting is turned on, the loan team member is presented with this pop-up window each time they click the eDisclosures, Order Docs, Audit, View, or eClose button in the loan file:
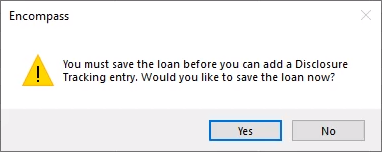
When the loan team member clicks Yes to proceed with the loan save, the following message displays and the rule validation begins:
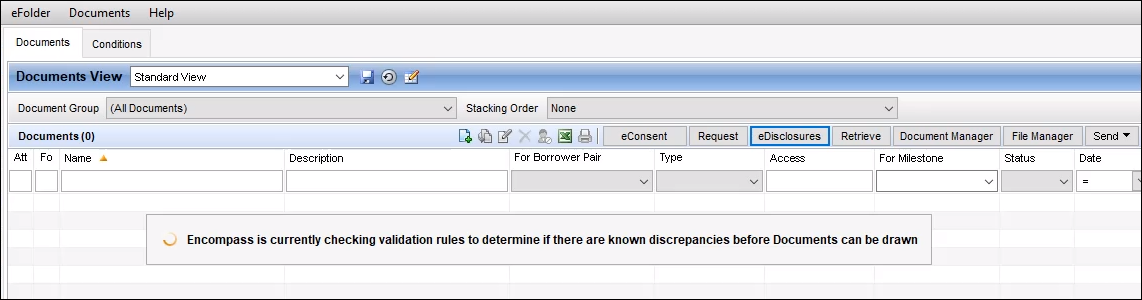
During this validation, Encompass saves the current loan data, validates the DDM rules, and then validates applicable business rules. Once the validation is complete, the loan team member can click the eDisclosures, Order Docs, Audit, View, or eClose button again to proceed. However, if there is a rule applied during the validation that results in a restriction of the eDisclosures, Order Docs, Audit, View, or eClose button, then the button is disabled (grayed out) and the user will not be able to proceed with the sending or ordering of documents. The following message is also provided:
Please note that when this policy is enabled, the loan save that is performed may take longer than a typical loan save due to the evaluation of DDM and business rules that is performed during the loan save. When enabling this policy, a pop-up message informing the administrator of this potential performance impact is provided.
NICE-38743
(Added on 3/11/2022)
A new "Lock Comparison Tool" persona option is displayed on the Forms/Tools and Settings tabs in the Personas setting. While these options are accessible in Encompass 22.1, it is not available for use and will not be applied to personas if selected. This option will be available for use in a future Encompass release.
Corporate and Branch Price Concessions
(Added on 3/4/2022)
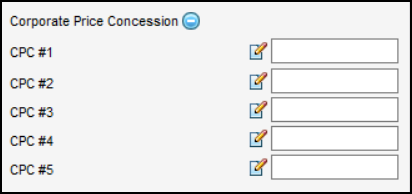
Prior to this release, the Corporate Price Concession and Branch Price Concession fields on the Secondary Lock Tool were summary fields. When the Edit icon was selected, users would manually enter the sum of all the corporate or branch price concessions, as well as summarize text and other fields in the Price Concession pop up window. In this release, 8 price concession fields (4 corporate and 4 branch) have been added and each section has been expanded to capture price concessions and eliminate the need to manually summarize the price data.
Corporate and Branch Price Concession Fields – Collapsed

Corporate Price Concession Fields – Expanded
Click the Plus icon to expand the section and display all five fields
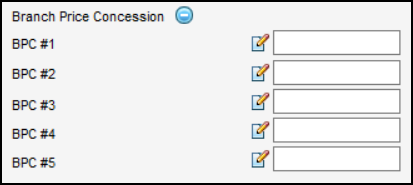
Branch Price Concession Fields – Expanded
Click the Plus icon to expand the section and display all five fields
The price concession fields can be completed either directly in the Buy Side Lock and Pricing column or by clicking the Edit icon next to a field and using the Price Concession pop up window.
The behavior of the pop up window has not changed. The value entered in the pop up window will populate the corresponding field in the Buy Side Lock and Pricing column. In addition, additional information can be captured, including the approval date, the user who approved it, and any relevant comments.

Any amounts in the 10 price concession fields will be summed and added to field ID 3379. The total price concession amount in field ID 3379 will be added to the Total Price Adjustments (field ID 2202) field in the Buy Side Lock and Pricing column.
(Added on 3/4/2022)
The behavior of the price concession fields has been modified to enable the fields and the pop up window to be edited when a lock is revised. This change aligns the behavior of these fields with the behavior of the other price fields (e.g., Adjustments and Extensions) in the Buy Side Lock and Pricing column.
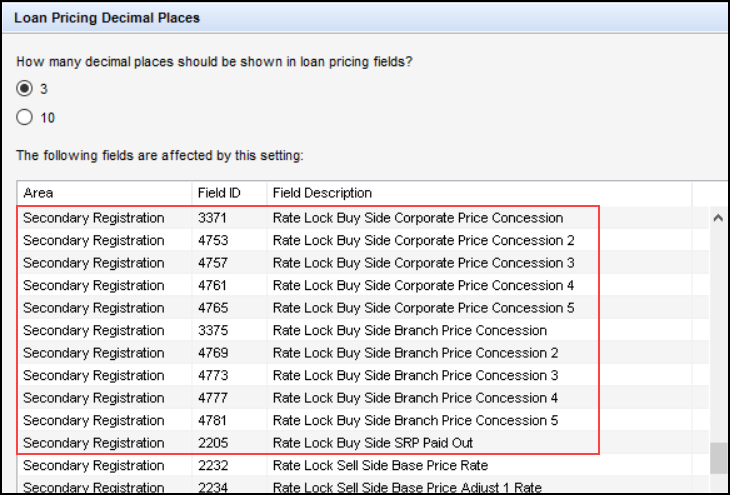
The five new Corporate Price Concession fields, the five new Branch Price Concession fields, and the SRP Paid Out field in the Buy Side Lock and Pricing column of the Secondary Lock Tool have been added to the Loan Pricing Decimal Places setting ( Encompass > Settings > Secondary Setup > Loan Pricing Decimal Places) to ensure the decimal places displayed (3 or 10) match other loan pricing fields in Encompass.
The Encompass Product & Pricing Service (EPPS) only supports 3 decimal places. If 10 decimal places is selected and any price concession fields are processed by EPPS, only 3 decimal places will be returned and Encompass will add zeros for the remaining decimal places.
The following fields for secondary corporate price concessions and secondary branch price concessions have been added to the Lock tab in the Encompass Reporting Database. These fields can be added to Encompass field reports.
Corporate Price Concessions
| Field ID | Field Name | Field Type |
|---|---|---|
| LOCKRATE3.4753 | Rate Lock Buy Side Corporate Price Concession 2 | Decimal_10 |
|
LOCKRATE3.4754 |
Rate Lock Buy Side Corporate Concession Approval Date 2 | Date |
|
LOCKRATE3.4755 |
Rate Lock Buy Side Corporate Concession Approved by 2 | String - 255 |
|
LOCKRATE3.4756 |
Rate Lock Buy Side Reason for Corporate Concession Approval 2 | String – Max |
| LOCKRATE3.4757 | Rate Lock Buy Side Corporate Price Concession 3 | Decimal_10 |
| LOCKRATE3.4758 | Rate Lock Buy Side Corporate Concession Approval Date 3 | Date |
| LOCKRATE3.4759 | Rate Lock Buy Side Corporate Concession Approved by 3 | String - 255 |
| LOCKRATE3.4760 | Rate Lock Buy Side Reason for Corporate Concession Approval 3 | String – Max |
| LOCKRATE3.4761 | Rate Lock Buy Side Corporate Price Concession 4 | Decimal_10 |
| LOCKRATE3.4762 | Rate Lock Buy Side Corporate Concession Approval Date 4 | Date |
| LOCKRATE3.4763 | Rate Lock Buy Side Corporate Concession Approved by 4 | String - 255 |
| LOCKRATE3.4764 | Rate Lock Buy Side Reason for Corporate Concession Approval 4 | String – Max |
| LOCKRATE3.4765 | Rate Lock Buy Side Corporate Price Concession 5 | Decimal_10 |
| LOCKRATE3.4766 | Rate Lock Buy Side Corporate Concession Approval Date 5 | Date |
| LOCKRATE3.4767 | Rate Lock Buy Side Corporate Concession Approved by 5 | String - 255 |
| LOCKRATE3.4768 | Rate Lock Buy Side Reason for Corporate Concession Approval 5 | String – Max |
Branch Price Concessions
| Field ID | Field Name | Field Type |
|---|---|---|
|
LOCKRATE3.4769 |
Rate Lock Buy Side Branch Price Concession 2 | Decimal_10 |
|
LOCKRATE3.4770 |
Rate Lock Buy Side Branch Concession Approval Date 2 | Date |
|
LOCKRATE3.4771 |
Rate Lock Buy Side Branch Concession Approved by 2 | String - 255 |
|
LOCKRATE3.4772 |
Rate Lock Buy Side Reason for Branch Concession Approval 2 |
String – Max |
|
LOCKRATE3.4773 |
Rate Lock Buy Side Branch Price Concession 3 | Decimal_10 |
|
LOCKRATE3.4774 |
Rate Lock Buy Side Branch Concession Approval Date 3 | Date |
|
LOCKRATE3.4775 |
Rate Lock Buy Side Branch Concession Approved by 3 | String - 255 |
|
LOCKRATE3.4776 |
Rate Lock Buy Side Reason for Branch Concession Approval 3 | String – Max |
|
LOCKRATE3.4777 |
Rate Lock Buy Side Branch Price Concession 4 | Decimal_10 |
|
LOCKRATE3.4778 |
Rate Lock Buy Side Branch Concession Approval Date 4 | Date |
|
LOCKRATE3.4779 |
Rate Lock Buy Side Branch Concession Approved by 4 | String - 255 |
|
LOCKRATE3.4780 |
Rate Lock Buy Side Reason for Branch Concession Approval 4 | String – Max |
|
LOCKRATE3.4781 |
Rate Lock Buy Side Branch Price Concession 5 | Decimal_10 |
|
LOCKRATE3.4782 |
Rate Lock Buy Side Branch Concession Approval Date 5 | Date |
|
LOCKRATE3.4783 |
Rate Lock Buy Side Branch Concession Approved by 5 | String - 255 |
|
LOCKRATE3.4784 |
Rate Lock Buy Side Reason for Branch Concession Approval 5 | String – Max |
Price concessions are rounded to either 3 or 10 decimals, based on the options configured in the Loan Pricing Decimal Places setting ( Encompass > Settings > Secondary Setup > Loan Pricing Decimal Places).
CBIZ-40677
Bid Tape Upload Process
Watch the Release Rundown Video
The bid tape upload process has been updated to enable an Encompass TPO Connect user to view their bid tape loans in their Encompass TPO Connect pipeline. To display bid tape loans, the following data will be required:
-
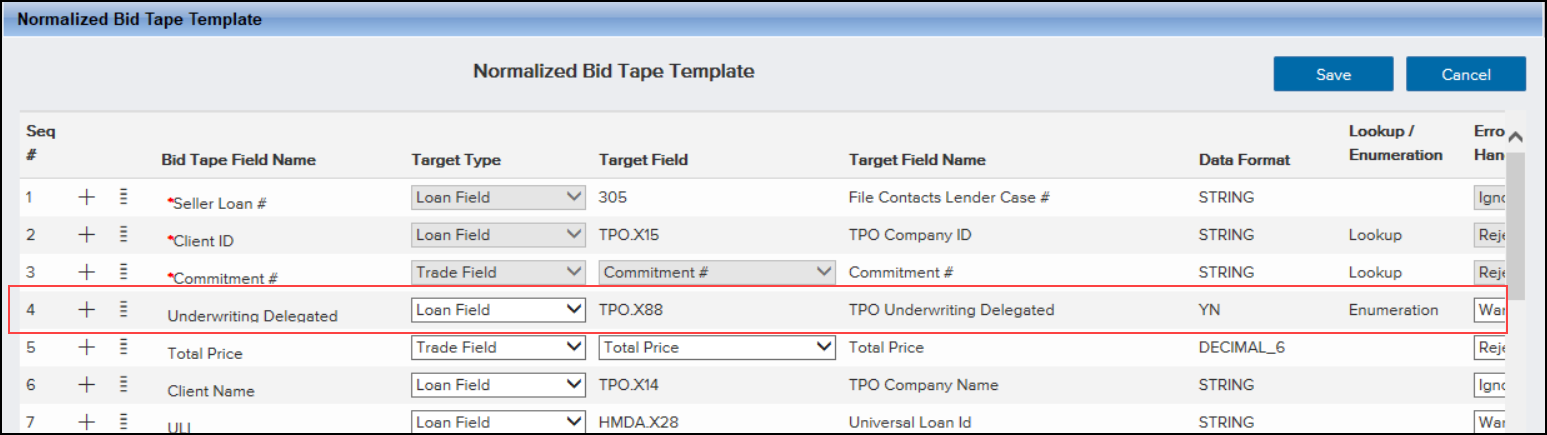
The Underwriting Delegated (field ID TPO.X88) field must be added to the Normalized Bid Tape Template setting.
-
The bid tape loan’s Site ID (field ID TPO.X1) field on the TPO Information screen must be populated with the value from the TPO ID (field ID TPO.X15) field.
-
A Production loan folder must be designated in Encompass TPO Connect by the administrator under Additional Settings>Loan Folders.
-
A unique external user with the EA/Sales Rep role will be automatically created for the external TPO company and assigned to the bid tape loans.
In addition, several new validations, error log messages, and modifications have been added to the upload process.
(Added on 3/4/2022)
A new Underwriting Delegated field has been added to the Normalized Bid Tape Template setting.
For new Encompass clients, this field will be displayed as part of the Normalized Bid Tape Template setting. For existing Encompass clients, the field must be added.
To Access the Normalized Bid Tape Template Setting:
-
On the menu bar, click Encompass, and then click Settings.
-
On the left panel, click Secondary Setup, and then click Normalized Bid Tape Template.
(Added on 3/4/2022)
A new TPO Site ID validation has been added to the bid tape upload process.
-
If a TPO ID (field ID TPO.X15) is found, that value will populate the Site ID (field ID TPO.X1) field for each loan in the bid tape.
-
If no TPO ID is found, an error message “TPO Site ID not present, loans will not be part of a TPO Connect Pipeline.” will be added to the error log and the error type set to “Invalid”.
(Added on 3/4/2022)
A new Production loan folder validation has been added to the bid tape upload process.
-
If a Production loan folder is designated in Encompass TPO Connect, the Output Folder destination will be changed from “My Pipeline” to the Production loan folder.
-
If a Production loan folder is not designated, an error message “TPO Production Loans Folder not present, loans will not be part of a TPO Connect Pipeline.” will be added to the bid tape error log and the error type set to “Warning”.
(Added on 3/4/2022)
A unique external user, First Name - 'BidTapeUser', Last Name - 'DoNotDelete', with an EA/Sales Rep role will be automatically added to the external TPO company used for the bid tape and assigned to the bid tape loans.
This user must not be deleted, otherwise non-admin users will not be able to view the loans in Encompass TPO Connect.
-
If a unique external user already exists for the external TPO company, a new user will not be added.
-
If no unique external user exists, a new TPO Contact Details record will be created.
-
If the bid tape row validation is successful, the unique external user will be assigned to the bid tape loan.
(Added on 3/4/2022)
Prior to this release, the delivery type was not validated during the bid tape upload process. In this release, a Delivery Type validation has been added as part of the Commitment Number validation to ensure an acceptable value of either “Bulk” or “Bulk AOT” is entered.
-
If the delivery type value is not acceptable, an error message “The Commitment must have a Delivery Type of "Bulk" or "Bulk AOT". Bid Tape row rejected.” will be added to the bid tape error log and the error type set to “Invalid”.
(Added on 3/4/2022)
Prior to this release, fields with enumeration types (e.g., field ID 1811, 608, and 420) included in the normalized bid tape template were not validated during the bid tape upload process. In this release, an enumeration validation has been added to ensure a valid value is entered.
-
If the input value does not match a valid enumeration value, the action selected in the Error Handling column of the Normalized Bid Tape Template setting will be executed and an error message “<Bid Tape Field Name> is not a legal value for field <Target Field>, field not mapped.” will be added to the error log and the error type set to “Enumeration”.
In addition, an Underwriting Delegated field validation has been added. This validation will be performed on every row of the bid tape, when the Underwriting Delegated field is included on the normalized bid tape template.
(Added on 3/4/2022)
Prior to this release, users were not provided the reason a bid tape was rejected during the bid tape upload process. In this release, new error log messages have been added to indicate to users why a bid tape is rejected.
-
When a bid tape’s TPO ID does not match an existing TPO ID in Encompass, an error message “TPO ID [nnn] does not exist in Encompass, Bid Tape Rejected.” will be added to the bid tape error log and the error type set to “Invalid”.
-
When multiple TPO IDs are on the same bid tape, an error message “Multiple TPO IDs are presented, Bid Tape Rejected.” will be added to the bid tape error log and the error type set to “Invalid”.
-
When the number of bid tape columns does not match the normalized bid tape template, an error message “.Number of Input Bid Tape columns [nn] do not match Bid Tape Template [nn], Row Rejected” will be added to the bid tape error log and the error type set to “Invalid”.
-
When no role is found for the unique external user, an error message “The Unique External User for Bid Tape processing was not successfully created. The 'milestonefreerole' was not found. The generated loans will not appear in a TPO Connect Pipeline for TPO ID <TpoID>.” will be added to the bid tape error log and the error type set to “Warning”.
-
When the Get External User call fails, an error message “The Unique External User for Bid Tape processing was not successfully created. The Get External User call has failed. The generated loans will not appear in a TPO Connect Pipeline for TPO ID <TpoID>." will be added to the bid tape error log and the error type set to “Warning”.
-
When the Create External user API fails, an error message “The Unique External User for Bid Tape processing was not successfully created. The create External User API has failed. The generated loans will not appear in a TPO Connect Pipeline for TPO ID <TpoID>.” will be added to the bid tape error log and the error type set to “Warning”.
-
When the File Contact assignment of the unique external user fails, an error message “The Unique External User - File Contact was not successfully updated for TPO ID <TpoID>, loan <LoanID>. The generated loan will not appear in a TPO Connect Pipeline.” will be added to the bid tape error log and the error type set to “Warning”.
(Added on 3/4/2022)
Prior to this release, errors were generated, and loans were not created if a bid tape included YN (Yes/No) fields. In this release, a YN field process has been added to ensure the YN fields are handled correctly during the bid tape upload process.
In addition, the data format for TPO.X88 has been changed from “string” to “YN” in the Normalized Bid Tape Template setting.
(Added on 3/4/2022)
Prior to this release, the bid tape Seller Number character length was capped and did not match the character length of the Seller Loan Number field. In this release, the bid tape schema has been updated to match the Encompass character length for seller loan numbers to ensure the bid tape supports the same character length as the target field.
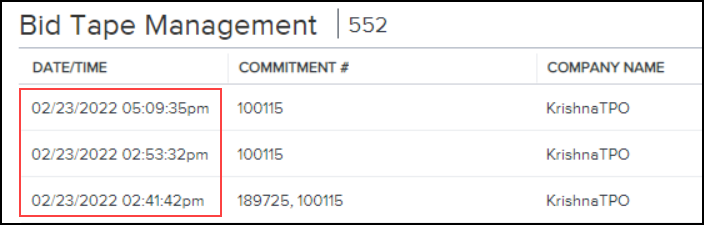
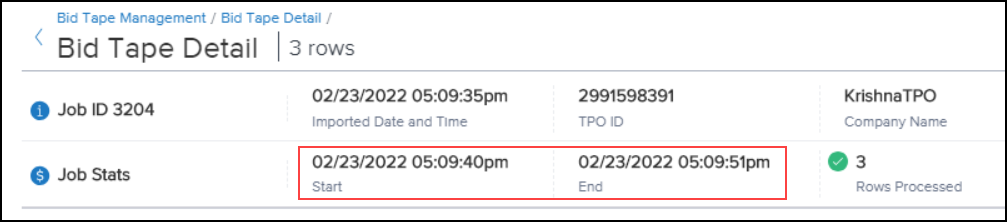
(Updated on 3/11/2022)
Prior to this release, a time zone (EST) was displayed on the Bid Tape Pipeline and for the Start and End times on the Bid Tape Detail page. In this release:
-
The time zone has been removed.
-
The time/date displayed matches the local time/date of the user's browser.
Bid Tape Pipeline
Bid Tape Detail Page
SEC-21921
Encompass Developer Connect
When an Early Check AUS tracking log ID is added to a loan via APIs, the risk assessment dropdown list (field ID 1543) in the Risk Assessment section on the ATR/QM Management, Transmittal Summary, and ULDD/PDD input forms is populated with EarlyCheck
CBIZ-43082
For Construction or Construction-to-Perm refinance loans updated via APIs, when the loans are locked and confirmed, the Purchase Price (field ID 3038) on the Lock Request Form is no longer incorrectly mapped to the Purchase Price (field ID 136).
-
If Lot/Land Status on the Construction Management Form is blank, field ID 136 is mapped to field ID 3038.
-
If Initial Acquisition (field ID 1964) is selected for Lot/Land Status, field ID 136 is mapped to field ID 3038.
-
If Refinance (field ID Constr.Refi) is selected for Lot/Land Status, field ID 3038 is blank.
-
The mapping from the As Purchased Price (field ID CONST.X58) on the Construction Management form to field ID 3038 has been removed.
-
CBIZ-23867
Miscellaneous Enhancements
(Added on 3/11/2022)
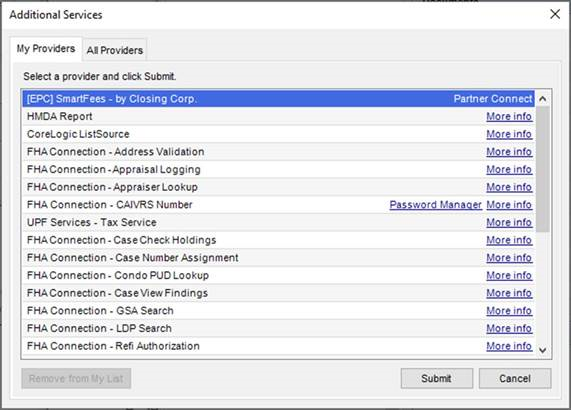
As service providers continue building new integrations with Encompass, these integrations can limit which users have access to order the provider’s service. To utilize the new integrations in Encompass, an administrator configures a “manual” service setup for the provider in the web version of Encompass. (Encompass users do not need to be using the web version of Encompass in order to utilize this functionality). Service setups are used to control who can order the service (authorized users) and when the loan is eligible for the service (based on readiness conditions). Once a manual service setup is complete, the Encompass user can access the new Partner Connect integration listed on the My Providers tab in the Additional Services pop-up window.
Watch the Release Rundown Video
The Encompass ZIP Code database has been updated with the latest available ZIP Code data.
CBIZ-42162
Watch the Release Rundown Video
An update is being delivered in Encompass 22.1 to improve Encompass loan save performance by streamlining the process for identifying reporting fields that have been updated in the loan. This update helps ensure that users can save loans in less time.
CBIZ-41620
| Next Section: Fixed Issues | ||
| Previous Section: New Features & Forms |