New Features & Forms in Version 18.4

The new features and forms being introduced in Encompass 18.4 are not available in Encompass Broker Edition.
Introducing Dynamic Data Management (DDM)
Why we made these updates: Dynamic Data Management is being introduced to assist lenders in writing rules that will automate conditional loan data population in loan files.
Encompass 18.4 Dynamic Data Management Demo
Dynamic Data Management User Guide
Top Use Cases for Dynamic Data Management
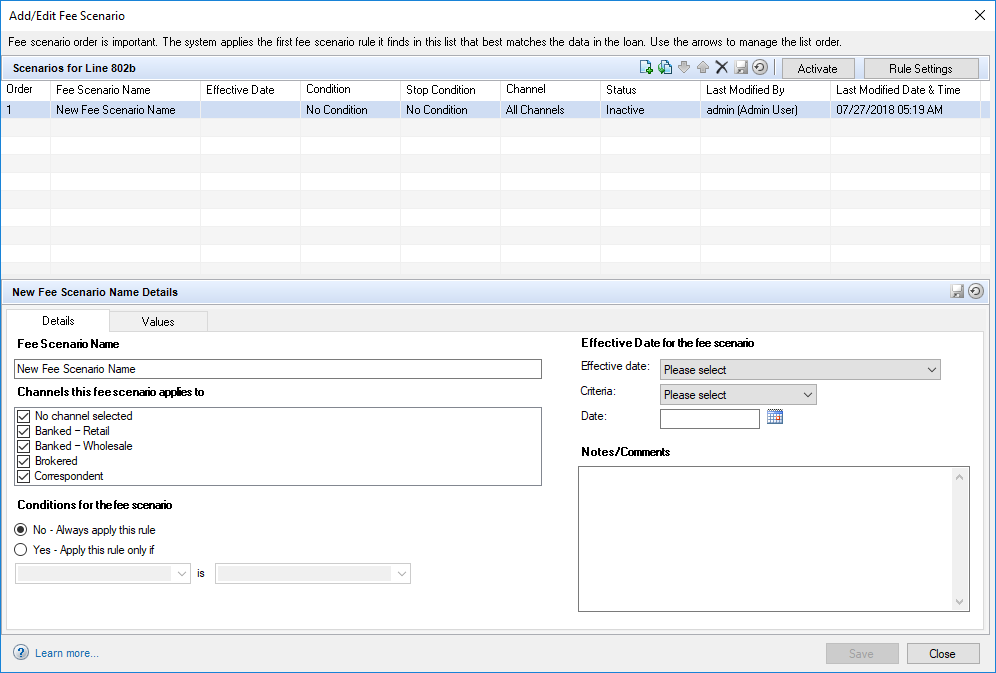
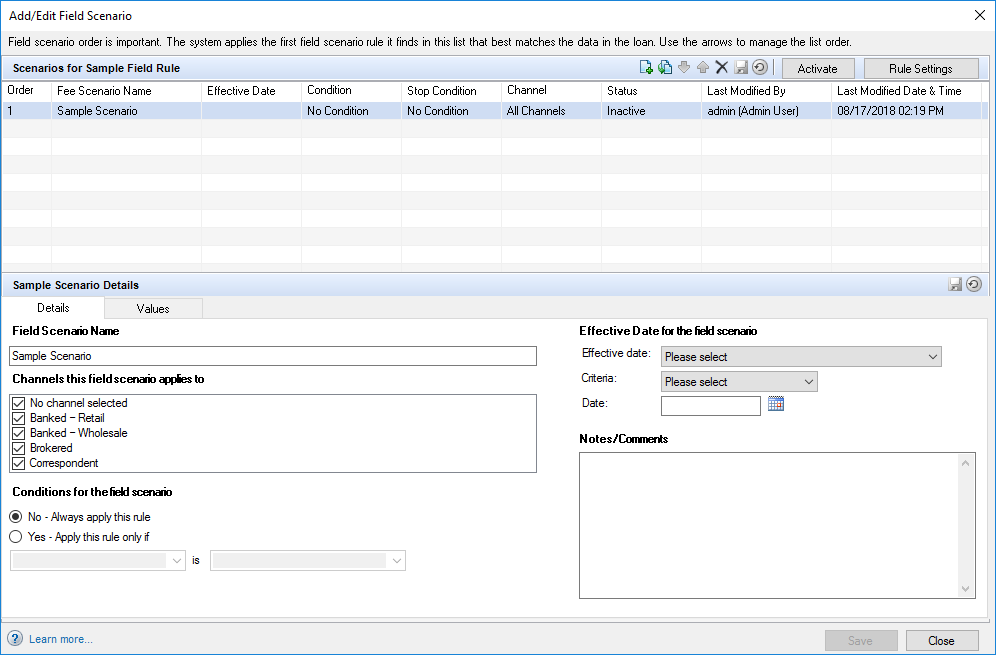
Dynamic Data Management (DDM) is a scenarios-based rule engine that ensures that the values for any fee or field is automatically populated for various loan scenarios as defined by the Encompass administrator. Automating fee and field data is critical to automating disclosures as it increases productivity and enhances accuracy, thereby reducing the time and the cost to close a loan.
DDM also offers other productivity gain opportunities – a more efficient way to automate fee data population rather than templates (especially when the number of templates grow) and a simpler way to set field values rather than field triggers. The look-up table option in DDM provides significant opportunities for simplifying advanced code and reducing change management time and overhead.
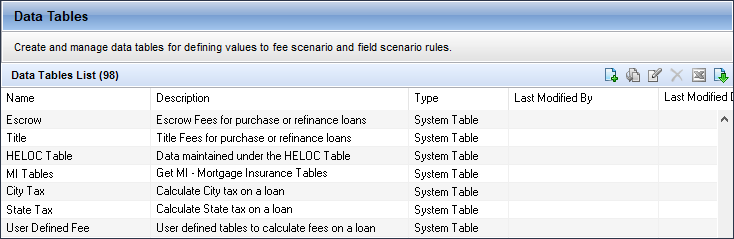
To access the Dynamic Data Management settings, go to Encompass > Settings > Dynamic Data Management.
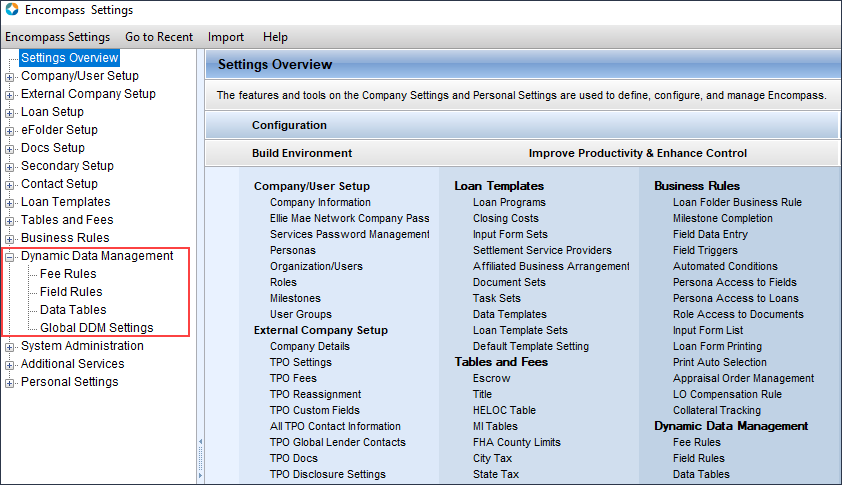
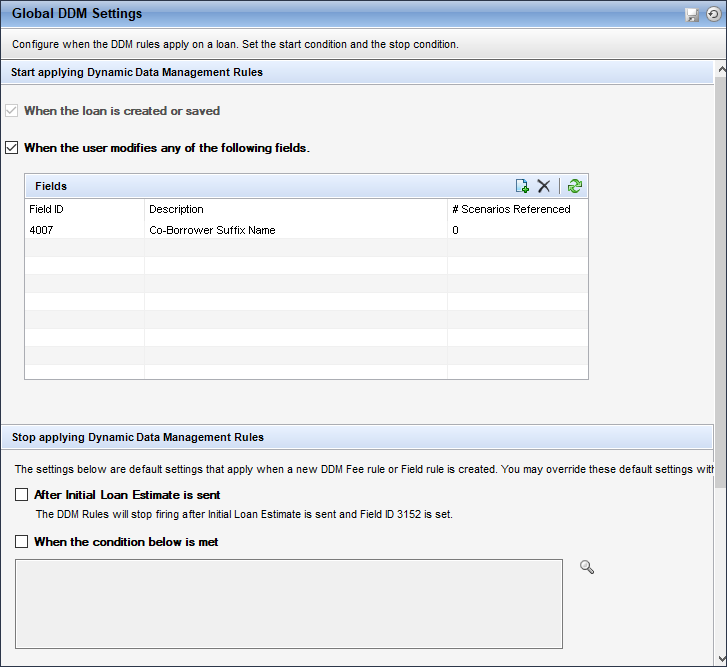
The key components of DDM, the fee and field rules, data tables, and global DDM settings are discussed below. View the Dynamic Data Management User Guide for more detailed information about setting up fee rules, field rules, data tables, and the global DDM settings in Encompass. You can also review the Top Use Cases for Dynamic Data Management guide to learn about typical use cases where utilizing the Dynamic Data Management options provides a more efficient way to automate fee data rather than templates (especially when the number of templates increase) and a simpler way to set field values instead of field triggers business rules.

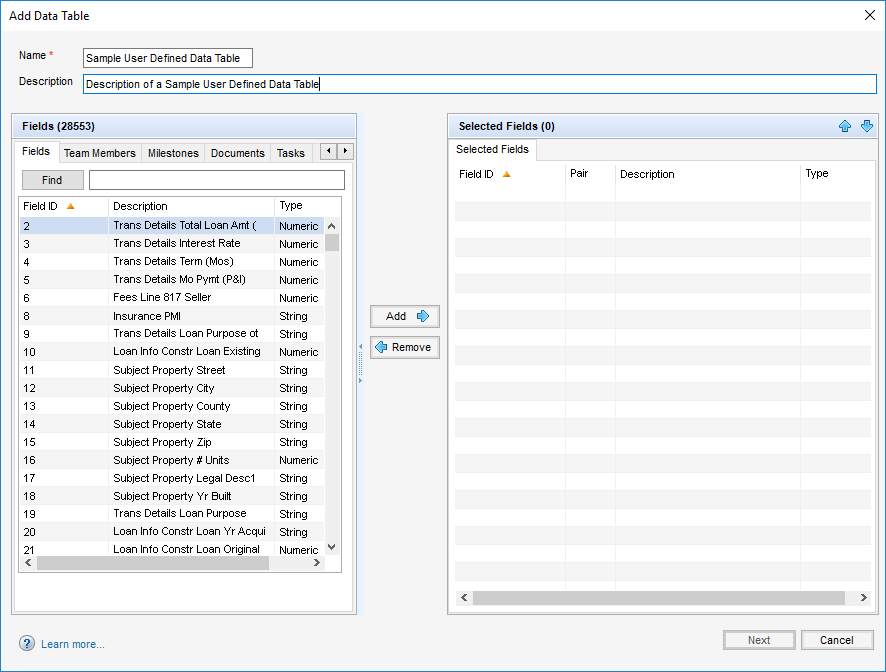
Again, you can refer to the Dynamic Data Management User Guide for more detailed information about setting up fee rules, field rules, data tables, and the global DDM settings in Encompass. You can also review the Top Use Cases for Dynamic Data Management guide to learn about typical use cases where utilizing the Dynamic Data Management options provides a more efficient way to automate fee data rather than templates (especially when the number of templates increase) and a simpler way to set field values instead of field triggers business rules.
Lender Key Contacts
Why we made these updates: To support the generation of a Lender Key Contacts widget for Encompass TPO Connect.
A new TPO Global Lender Contacts setting has been added under External Company Setup to maintain a global list of contacts. These contacts will be included in the Lender Key Contacts widget for Encompass TPO Connect.
These contacts will be combined with a Third Party Originator’s Sales Rep/AE contacts to build the list displayed in the Lender Key Contacts widget.

Title/Department
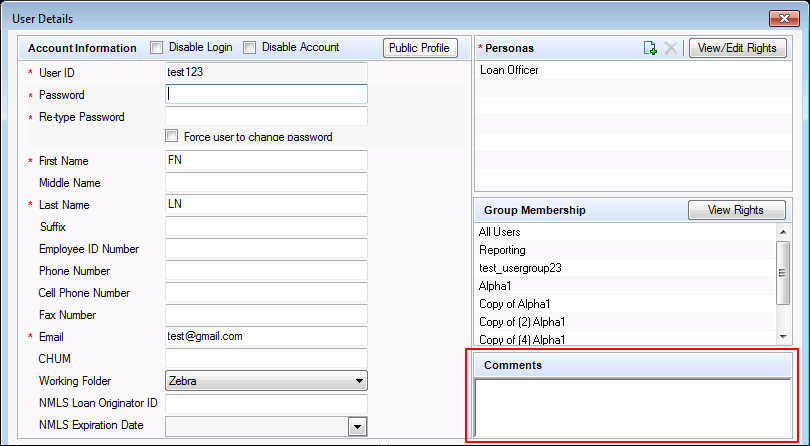
Currently, the User Details setting does not have a field where a user’s job title or department can be entered. Since the Title/Department field is required for every global lender contact and Sales Rep/AE contact to be included in the Lender Key Contacts widget for Encompass TPO Connect, you must enter the user’s job title or department in the Comments field on the User Details setting. The first 30 characters from the Comments field will be extracted as the user’s job title or department.
- On the menu bar, click Encompass, and then click Settings.
- On the left panel, click External Company Setup, and then click TPO Global Lender Contacts.
- Click on the Add icon
 .
.
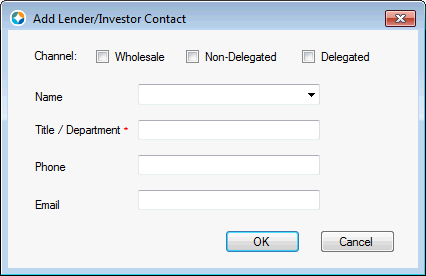
- Select a channel/channels if you want the contact to be displayed under that channel/channels contact grouping in the Lender Key Contacts widget for Encompass TPO Connect. For example, if you select Wholesale, the contact will be grouped and displayed in a “Wholesale” section.
If you do not select a Channel, the contact will be displayed in an “All Channels” section.
- In the Name field, click on the arrow to select a user from the dropdown list or manually enter a name, up to 30 characters.
- If you select a Name, the Phone and Email fields are automatically populated and cannot be edited. In addition, if the selected user’s Comments field in their User Details setting is not blank, the first 30 characters will populate the Title/Department field.
- If you clear the Name, the Phone, Email, and Title/Department fields are cleared.
- In this required field, enter or change a Title/Department for the user, up to 30 characters.
- In the Phone field, enter the user’s phone number, up to 30 characters, if you manually entered a Name.
- If you selected a Name, this field cannot be edited.
- If you clear the Name, this field is cleared and you can edit it.
- You must enter a Phone, Email, or both.
- In the Email field, enter the user’s email address, up to 40 characters, if you manually entered a Name.
- If you selected a Name, this field cannot be edited.
- If you clear the Name, this field is cleared and you can edit it.
- You must enter a Phone, Email, or both.
- Click OK.
- If the Title/Department field is blank, the OK button is grayed out until all validation requirements are satisfied.
- If both the Phone and Email fields are blank, the OK button is grayed out until all validation requirements are satisfied.
- If the Email address format is not valid, the OK button is grayed out until all validation requirements are satisfied.
- A new contact entry is added to the bottom of the Lender/Investor Contacts grid.
- On the menu bar, click Encompass, and then click Settings.
- On the left panel, click External Company Setup, and then click TPO Global Lender Contacts.
- Select the entry you want to edit, and then click on the Edit icon
 .
. - Make your changes.
- If you select a Name, the Phone and Email fields are automatically populated and cannot be edited.
- If you clear the Name, the Phone, Email, and Title/Department fields are cleared.
- You must have a Title/Department.
- You must have a Phone, Email, or both.
- When you edit an existing contact, the Title / Department, Phone and Email can be manually edited and saved.
This manual update is saved into the Global Contacts table. However, it is not updated in the existing Encompass User profile.
- Click OK.
- If the Title/Department field is blank, the OK button is grayed out until all validation requirements are satisfied.
- If both the Phone and Email fields are blank, the OK button is grayed out until all validation requirements are satisfied.
- If the Email address format is not valid, the OK button is grayed out until all validation requirements are satisfied.
To Delete a Contact:
- On the menu bar, click Encompass, and then click Settings.
- On the left panel, click External Company Setup, and then click TPO Global Lender Contacts.
- Select the entry you want to delete, and then click on the Delete icon
 .
. - A warning message is displayed: “Deleting this contact will permanently remove the entry from the settings. Do you wish to continue?”
- Click Yes.
How sequencing affects the order of the Lender Key Contacts widget in Encompass TPO Connect
The sequence of the TPO Global Lender Contacts list directly affects the sequence of the TPO Company level Lender Contacts list and the subsequent rendering of the Lender Key Contacts widget in Encompass TPO Connect. The TPO Company level Lender Contacts list is ordered by "Primary" Sales Reps followed by other Sales Reps (alphabetical by name), and then the TPO Global Contacts in the order in which they have been sequenced.
The Lender Key Contacts widget in Encompass TPO Connect follows the same order as above, except that the entries are grouped by channel as follows: All Channels (where no channel has been selected), Wholesale, Non-Delegated, and then Delegated. If a specific contact has more than one Channel selected, it is displayed in each selected section.
To Sequence Contacts in the Grid:
- On the menu bar, click Encompass, and then click Settings.
- On the left panel, click External Company Setup, and then click TPO Global Lender Contacts.
- Select the entry you want to move, and then click the Up
 and Down
  arrows.
A new Lender Contacts tab has been added to the Company Details setting to display the contacts that will be listed in the Lender Key Contacts widget for Encompass TPO Connect. This tab cannot be edited except for the Hide column.
These contacts will be combined with a Third Party Originator’s Sales Rep/AE contacts to build the list displayed in the Lender Key Contacts widget.

- The contacts displayed on this tab are populated from the new TPO Global Lender Contacts setting and the Sales Reps/AE tab.
- A Primary checkbox is displayed (and selected) if the contact was populated from the Sales Reps/AE tab and that contact was Set As Primary on that tab.
For information on how to set a primary contact, refer to the Sales Reps/AE tab section of the Company Details setting in the Encompass online help.
- To hide a contact from the Lender Key Contacts widget for Encompass TPO Connect, select the Hide checkbox on that contact’s row.
This is the only data column that can be edited on this tab.
Proceed to Feature Enhancements
![]()