Getting Started with Encompass Data Connect Replication
With Encompass Data Connect Replication, you can quickly access large amounts of near-real time loan data that's stored in the cloud, thus enabling you to leverage your existing technology to build your own intelligence on top.
Visit the Encompass Data Connect website to request access to your Encompass Data Connect instance, or view your account status.
In order to access Encompass Data Connect, you must have permission to log in to Encompass with the admin user ID, or be assigned the Super Administrator or Administrator persona.
Log in
Two to four days after a provisioning request is initiated, ICE Mortgage Technology will send a welcome email to the address you provided during initiation. Check this welcome email for your instance ID and a link to the Encompass Data Connect website.
Click the link in your welcome email to log in to Encompass Data Connect. From the log in screen, enter the following:
-
Instance ID - The ID of your Encompass instance, provided in your welcome email.
-
User ID - Your Encompass user name.
-
Password - Your Encompass password.
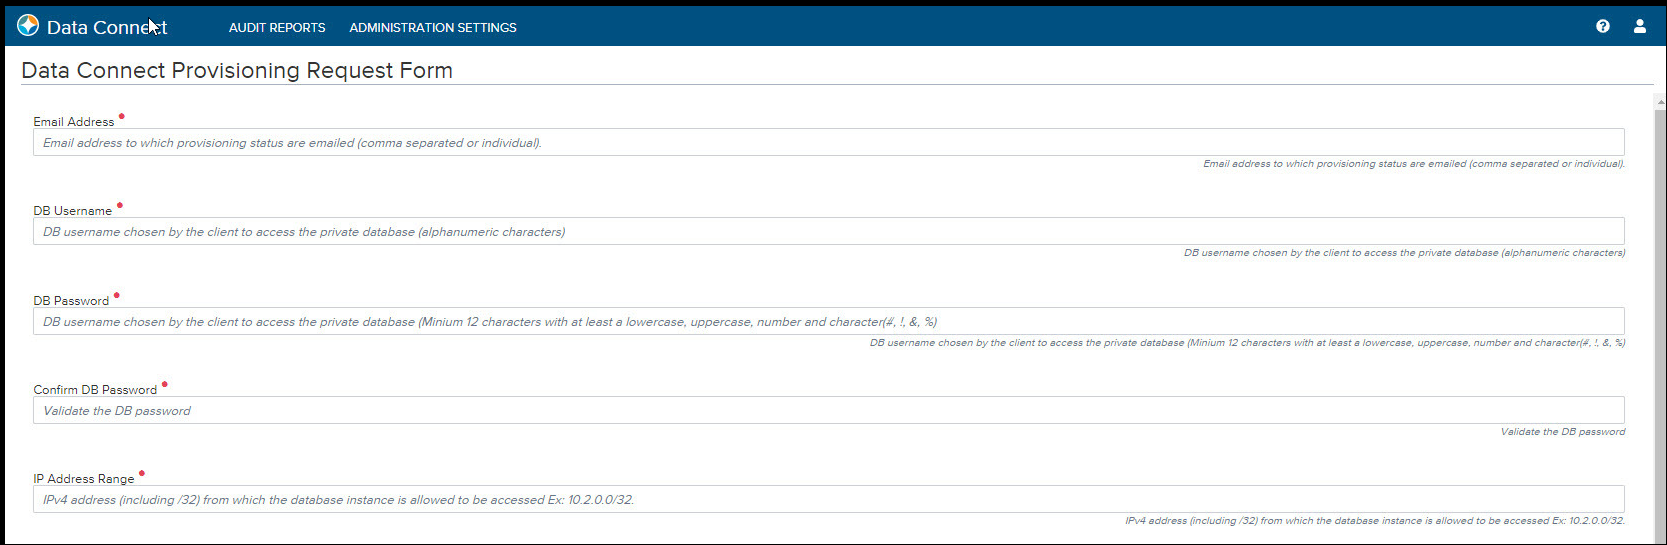
Provisioning Request Form
If you haven’t yet been provisioned, you will be required to submit the Provisioning Request Form.
In the Provisioning Request Form, enter the following:
-
Email – Use commas to separate multiple email addresses.
-
Database User Name - Your desired Encompass Data Connect user name.
-
Database Password - Your desired Encompass Data Connect password.
-
IP Address Range - The IP address range allowed to access the Encompass Data Connect instance. Use commas to separate multiple IP addresses. Use the subnet mask of "/32" for an individual IP address.
-
Public Key – For how to manage keys, view Encompass Data Connect Replication - Best Practices.
This feature is available in Encompass Data Connect Standard only.
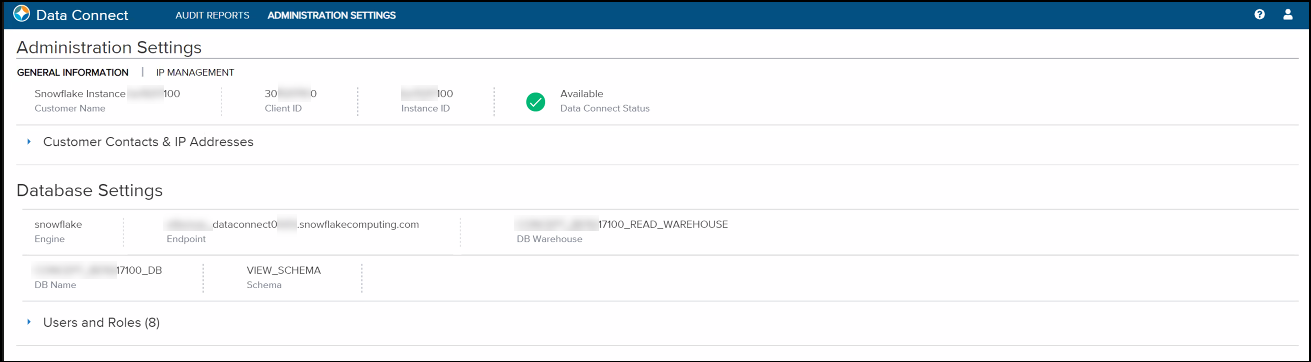
Administration Settings - General Information
After submitting the Provisioning Request Form, the General Information screen displays under the Administration Settings tab. The General Information window contains database provisioning status along with the following information to view:
- Data Connect Status – This displays the provisioning status of your Encompass Data Connect instance.
- Instance ID - The ID of your Encompass instance.
- The Instance ID is your Encompass SmartClient ID, which is provided by your Encompass administrator. (It is not the Client ID found under Help > About Encompass in Encompass). Example SmartClient ID: BE111XXXXX.
- Client ID – Your Encompass Client ID.
- Customer Name – Your organization name.
- IP Address Range - The IP address range allowed to access your Encompass Data Connect instance.
- Customer Contacts – The email addresses that will be notified once the provisioning of your Encompass Data Connect Hosted instance is completed.
- DB Engine – Snowflake is the database where data will be hosted.
- Endpoint – Your database endpoint
- DB Warehouse – Name of your database warehouse
- Users and Roles – Users added to your Data Connect Hosted instance and their respective roles.
- DB Name – Name of your database
- Schema – Name of schema provisioned
Account Status Report
The account status report contains the following database information to view:
-
Email Address - The email associated with Encompass Data Connect.
-
Instance ID - The ID of your Encompass Data Connect instance. This is provided in the welcome email ICE Mortgage Technology sent two to four days after a provisioning request was initiated.
-
Client ID - The ID of your Encompass instance.
-
Data Connect Status – The status of your Encompass Data Connect instance:
Data Connect Status Provisioning Stage Description Not Available Infrastructure Setup The infrastructure, including the database, is being provisioned. Not Available Database Setup The database is being set up for Encompass Data Connect to start writing data, including schema creation, creation of roles etc. Not Available Historical Data Load Three years of history data is being loaded into the database. Not Available Finalizing Setup Data is being reconciled. Available Provision Complete The "DB Connection String" will be available and users can start connecting to the database. -
IP Address Range - The IP address range allowed to access your Encompass Data Connect instance.
-
Public Key – Click to view your public key. For how to manage keys, view Encompass Data Connect Replication - Best Practices.
-
DB User ID - Your Encompass Data Connect user name.
-
DB Connection String - The connection string for your Encompass Data Connect instance.
-
DB Port - The port number for your Encompass Data Connect instance.
-
DB Engine – One of the two supported database engines:
-
Postgres
-
MS SQL Server
-
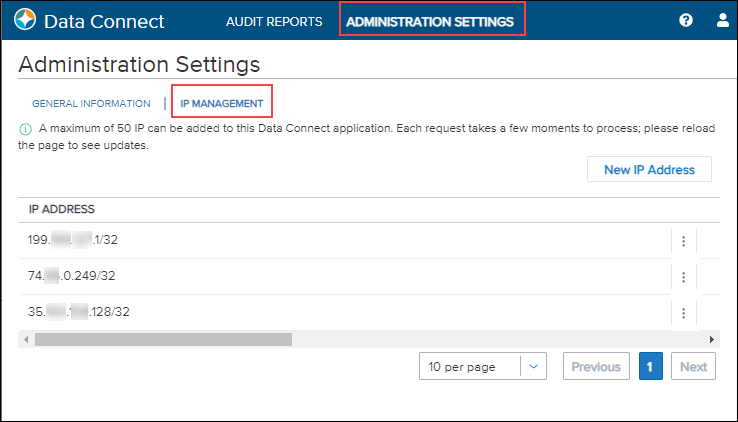
Administration Settings – IP Management
The IP Management screen is provided on the Administration Settings tab in the Encompass Data Connect portal. Here you can enter a list of IP addresses to whitelist for your Encompass Data Connect instance. A maximum of 50 IP addresses can be added here. It lists the IP addresses of the computers allowed to access Encompass Data Connect Hosted instances.
This option enables you to manage (add or delete) the IP addresses for your company, rather than having to submit an ICE Mortgage Technology Technical Support Case to request that they perform these IP management actions on your behalf.
To Access the IP Management Tool:
- Visit the Encompass Data Connect log in page, and then enter the following credentials:
- Instance ID - The ID of your Encompass instance
- User ID - Your Encompass user name
- Password – Your Encompass password
- On the Encompass Data Connect tool, click the Administration Settings tab.
You must be an Encompass administrator to have access to the Administration Settings tab. This includes the user assigned with the admin user ID, as well as users assigned with the Super Administrator or Administrator personas in Encompass.
- Click the IP Management tab.
To Add IP Addresses:
- On the IP Management screen, click the New IP Address button.
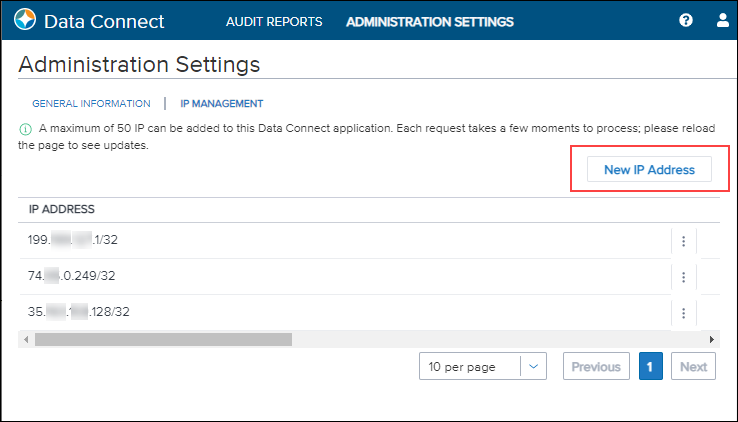
- Enter the IP address range (including /32) that will get access to the Encompass Data Connect Hosted database instances.
- The IP Address must be a public IP address.
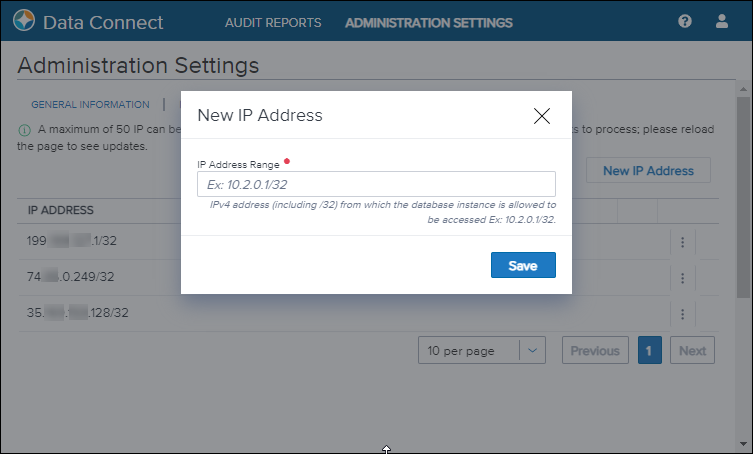
- When finished, click Save. When you reload the page, the new IP address is added to the bottom of the list. All IP addresses within the range are now whitelisted.
To Delete IP Addresses:
- On the IP Management screen, hover your mouse pointer over the hamburger menu next to the IP address you want to delete.
- Click the Delete icon (trash can). Once clicked, the IP address is removed from the list. When you reload the page, the updated IP address list displays.
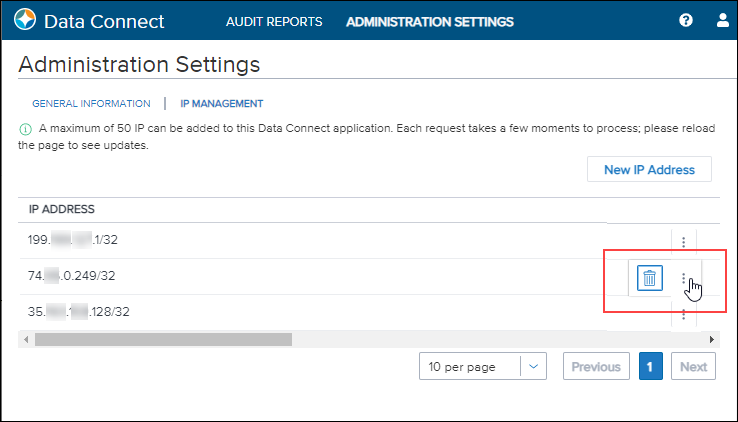
At least one IP address must be listed here. If you attempt to delete the last remaining IP address range, you will receive an error message and the IP address range will not be deleted.
At least one IP address must be listed here. If you attempt to delete the last remaining IP address range, you will receive an error message and the IP address range will not be deleted.
Contact ICE Mortgage Technology Technical Support
Click Help to be taken to the Resource Center, where you can access Technical Support.
In order to access Technical Support features, you must be a named Support contact.
To Contact Technical Support:
-
On the Resource Center Home Page, under Popular Topics, expand Technical Support.
-
Click Contact Tech Support to be taken to the Technical Support page.
-
Under Support Cases, click Submit a Case.
-
In the Submit a Case form, enter your first name, last name, email address, and phone number.
-
It is recommended to select General Technical for the topic area.
-
It is recommended to include "Encompass Data Connect" in the subject.
-
Enter a description, include any attachments, and set a severity.