New Features & Forms in Version 24.2
This section discusses the new features being introduced in this Encompass Product & Pricing Service release.
Rebranding of the Encompass Product & Pricing Service
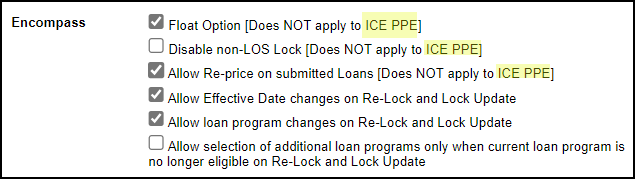
We are excited to announce the rebranding of the Encompass Product & Pricing Service to ICE PPE. As part of this initiative, the Encompass section of the Options page (Admin>Settings>Options) has been updated in this release to use the new name.
For additional information about ICE PPE, visit the ICE PPE page on ice.com.
ICE PPE Integration
(Updated on 10/11/2024)
As part of the 24.2 release, we are introducing the ICE PPE integration. This new integration will provide the Loan Officer experience only (no Secondary features). The ICE PPE integration leverages the Encompass Partner Connect (EPC) integration which is the next-generation iteration of the ICE Mortgage Technology Partner Network integrations platform. Your users will be able to migrate to this new integration once it has been configured and enabled by your Client admin. Until that time, your users will continue to select the Encompass Product & Pricing Service when running pricing. Use of the new integration is currently optional.
To use this new integration, please follow the steps below.
-
Set Up ICE PPE in Web Version of Encompass
-
Review User Roles in EPPS
-
Configure Bidirectional Custom Fields in Web Version of Encompass
-
Import Custom Fields into EPPS
-
Verify Office Access for Assign LO & Price as LO
Set Up ICE PPE in Web Version of Encompass
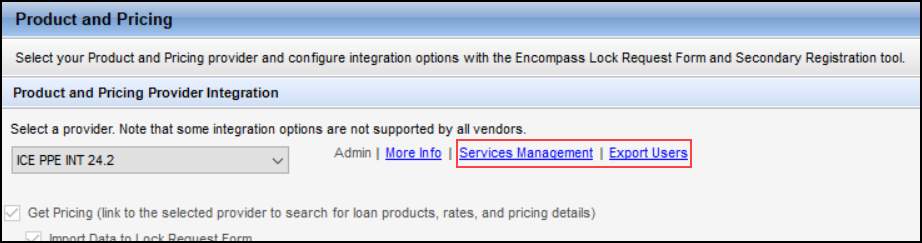
The ICE PPE integration will not prompt you to log in unlike the current integration. The steps below are necessary to facilitate this straight-through login to ICE PPE. To support this new integration, the Product and Pricing Provider Integration section of the Encompass Product and Pricing setting will display the following two links when an ICE PPE provider is selected.
-
The Services Management link opens the Services Management page in the web version of Encompass Admin (if enabled).
-
The Export Users link provides a one-time export when users exist in Services Password Management and a user is attempting to save the ICE PPE integration. The export will transmit the existing users to the web version of Encompass Services Management and validate if that service setup already exists.
The Export Users link will continue to be displayed if there is an error during the export.
Configuring the ICE PPE Integration
Before an ICE PPE integration can be used, the integration must be configured in the web version of Encompass Services Management setting.
Only one manual service setup can be activated for each service provider. If you try to activate a second manual service setup for the same provider, an error message displays. All Users for that service provider must be included in one manual service setup.
Refer to the Configure Bidirectional Custom Fields in Web Version of Encompass section for instructions on how to map fields in the Services Management setting in the web version of Encompass.
ICE PPE integrations do not support the following features available for Encompass Partner Connect on the Services Management setting.
-
Easy Order
-
Automated Order
-
Condition Mapping
-
Document Mapping
To Configure an ICE PPE Service:
-
Log into the desktop version of Encompass as an Administrator.
-
On the menu bar, click Encompass, and then click Settings.
-
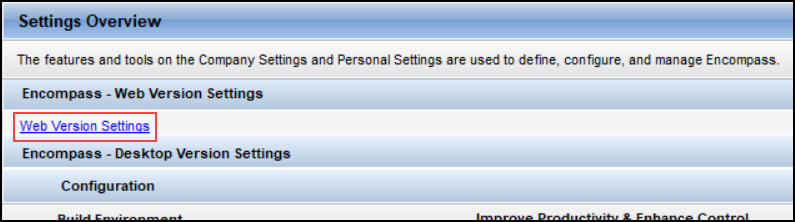
Make sure you are on Settings Overview.
-
Click on the Web Version Settings.
-
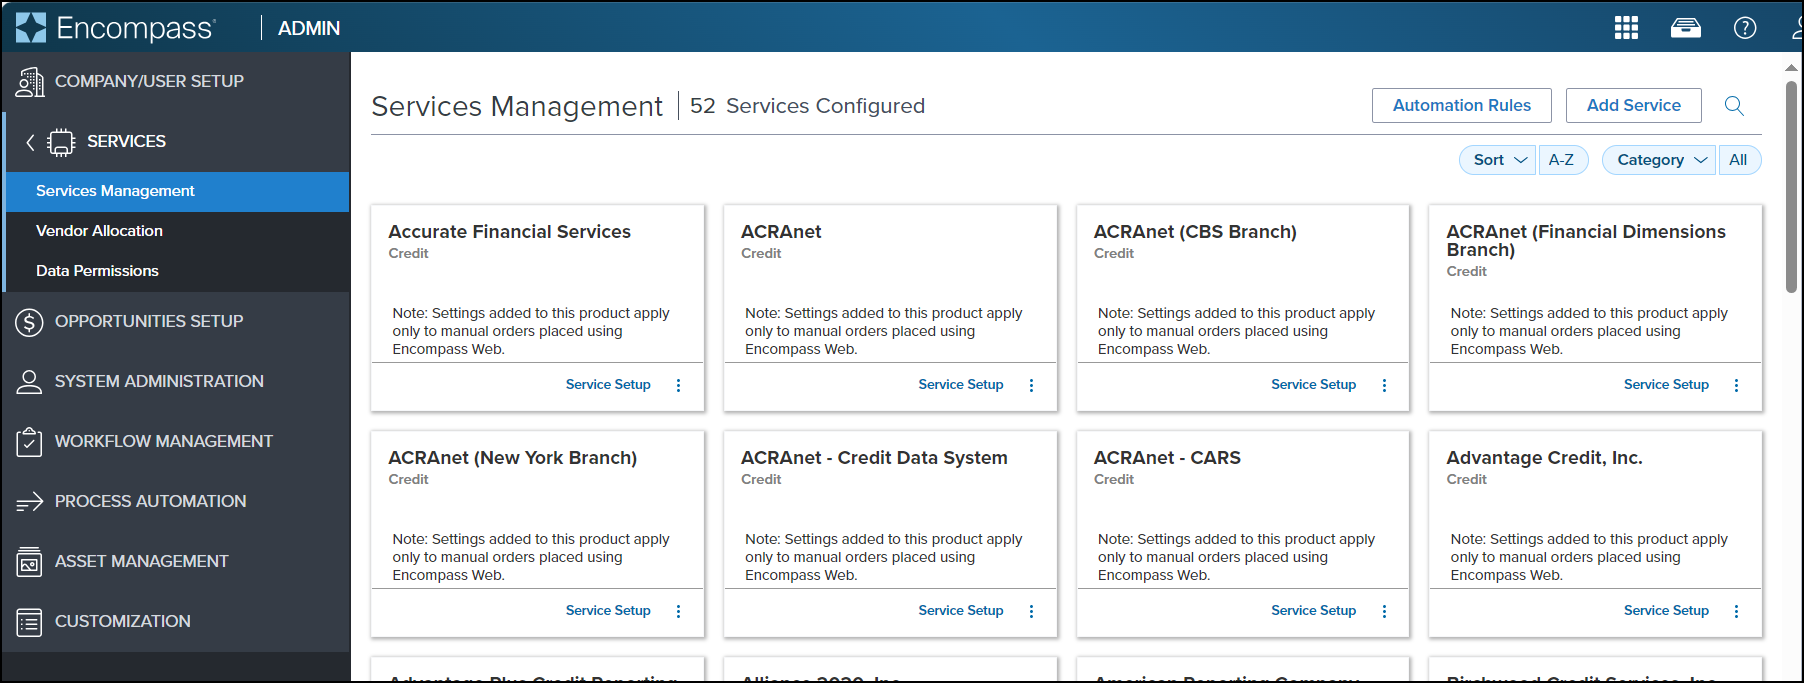
Expand Services in the left menu, and then click on Services Management.
-
Click Add Service.
-
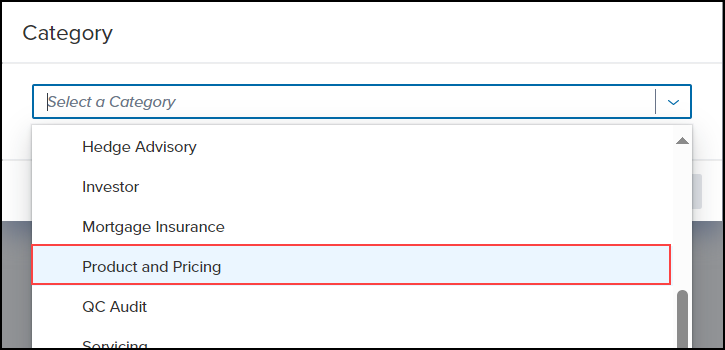
From the Category dropdown list, select Product and Pricing and then click Retrieve Products.
-
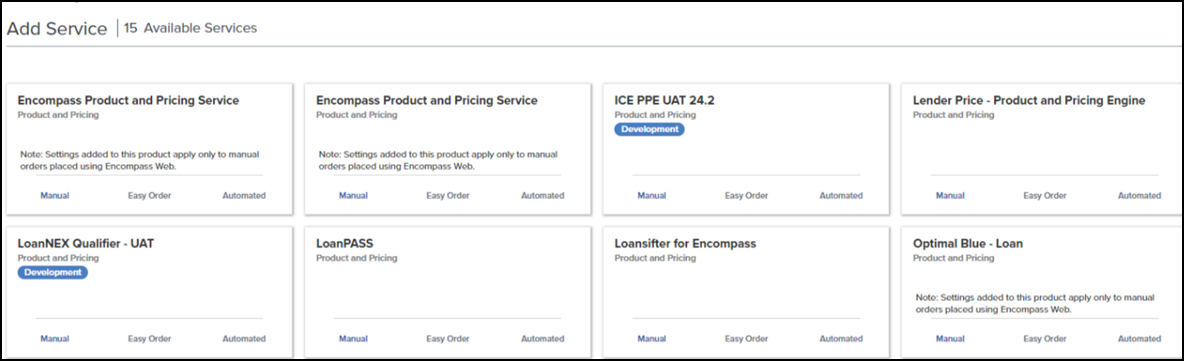
Locate the card for the provider you want to setup, and then click the Manual link.
-
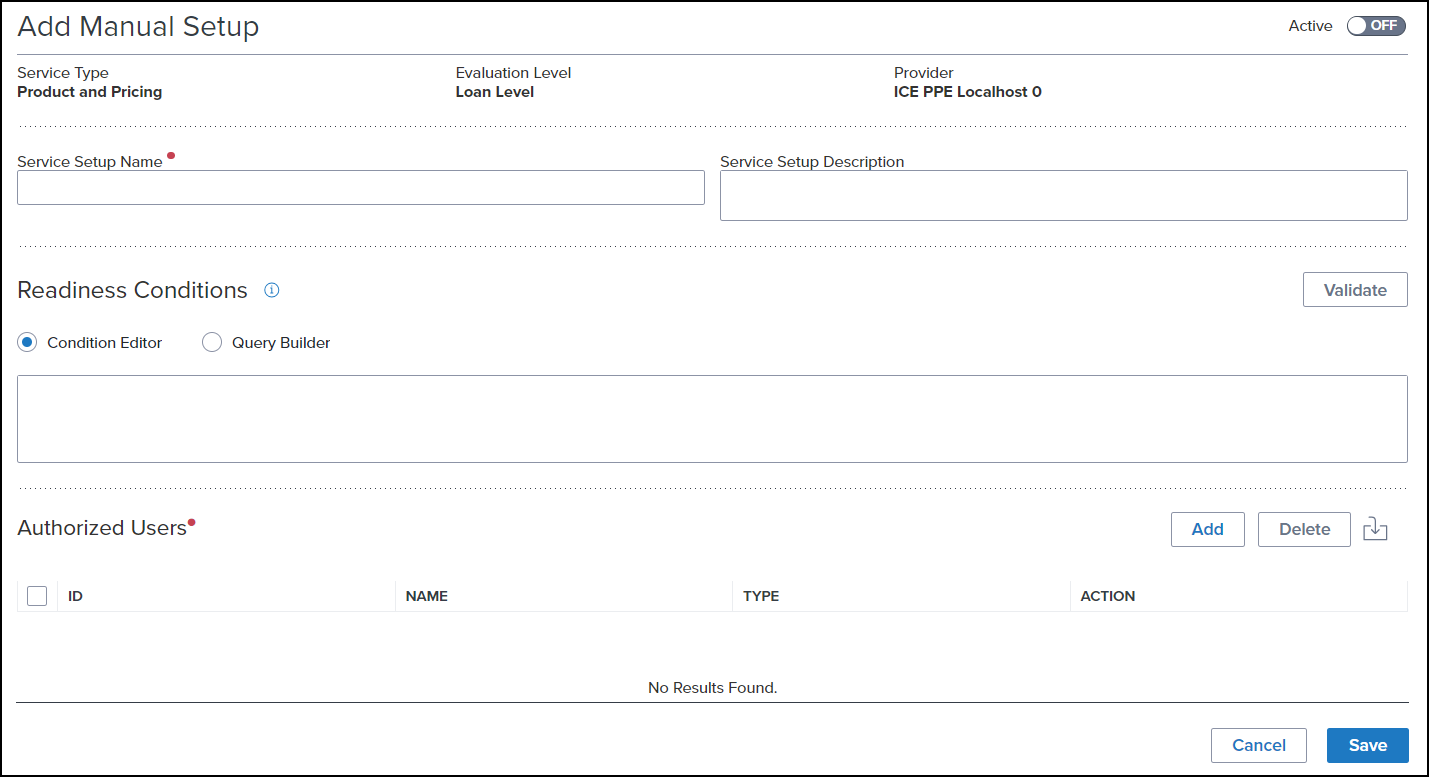
Complete the following fields.
-
Enter a unique name in the Service Setup Name field
-
Enter a brief description in the Service Setup Description field.
-
The ICE PPE service does not currently use Readiness Conditions.
-
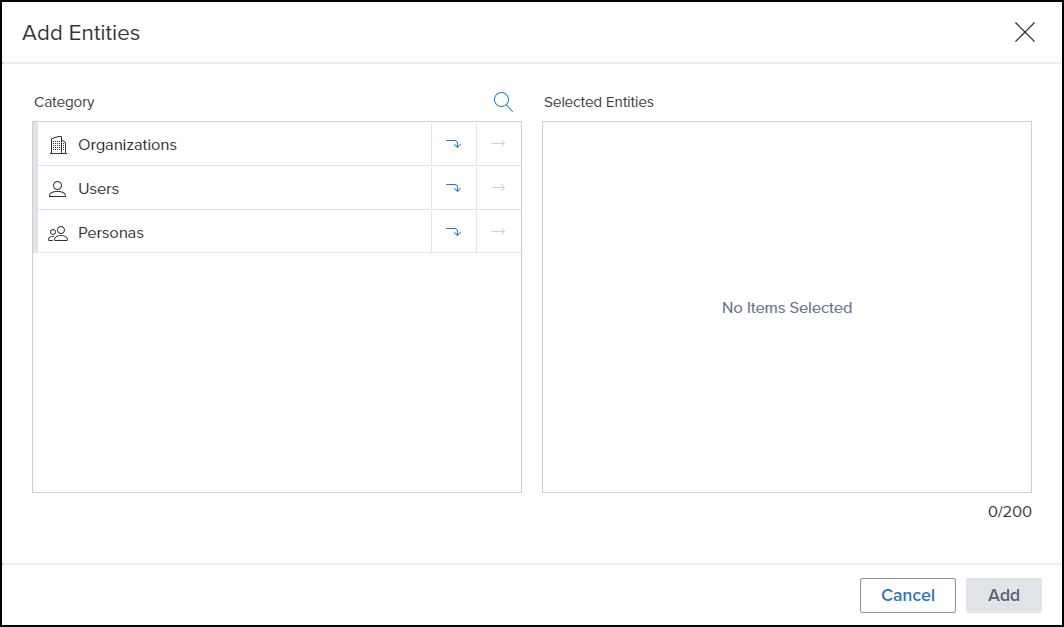
On the Add Entities window, navigate through the Category options to select the Users who will use this setup. To move to a category, select the Down Arrow
 icon. To move an individual user to the Selected Users column, select the Move Arrow
 icon. To search for a specific user, select the Search
  icon.
icon.
-
To remove Users from the Users section, select the checkbox in front of the User and then click Delete. Alternatively, you can select the Delete icon in the Action column for the User.
-
Once your Users or Organizations are listed in the Selected Users column, click Add.
-
Once you have selected the Users who will use this service setup, click Save.
-
Set the Active toggle to "ON".
-
Click Save.
To Configure Credentials for an ICE PPE Integration:
-
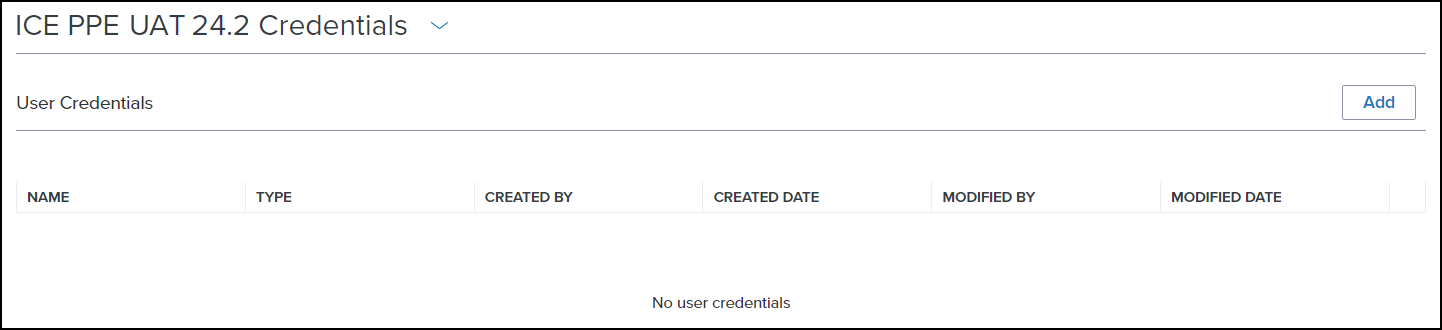
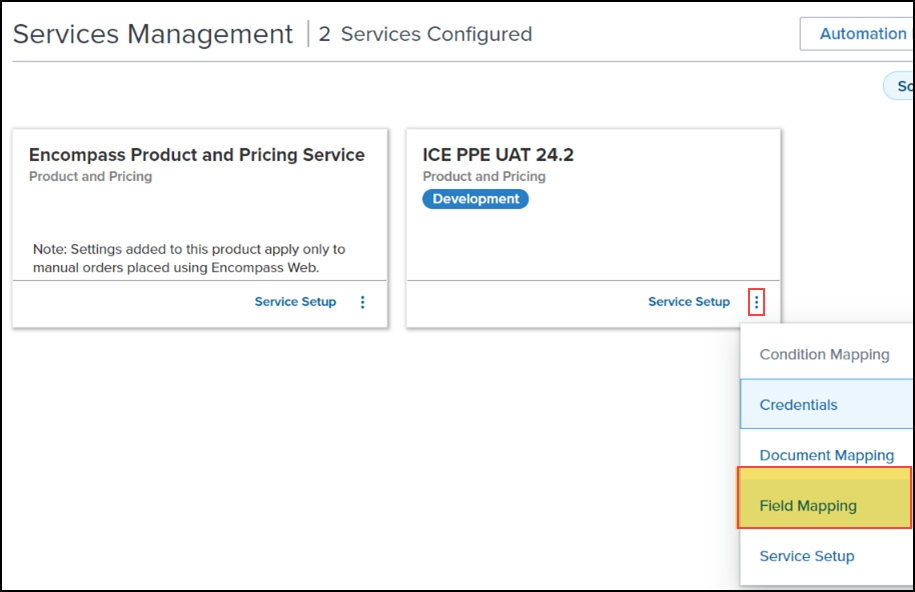
On the Services Management setting, locate the ICE PPE card you want to configure, click on the Kebob icon next to Service Setup, and then click Credentials.
-
To add user credentials, click Add.
-
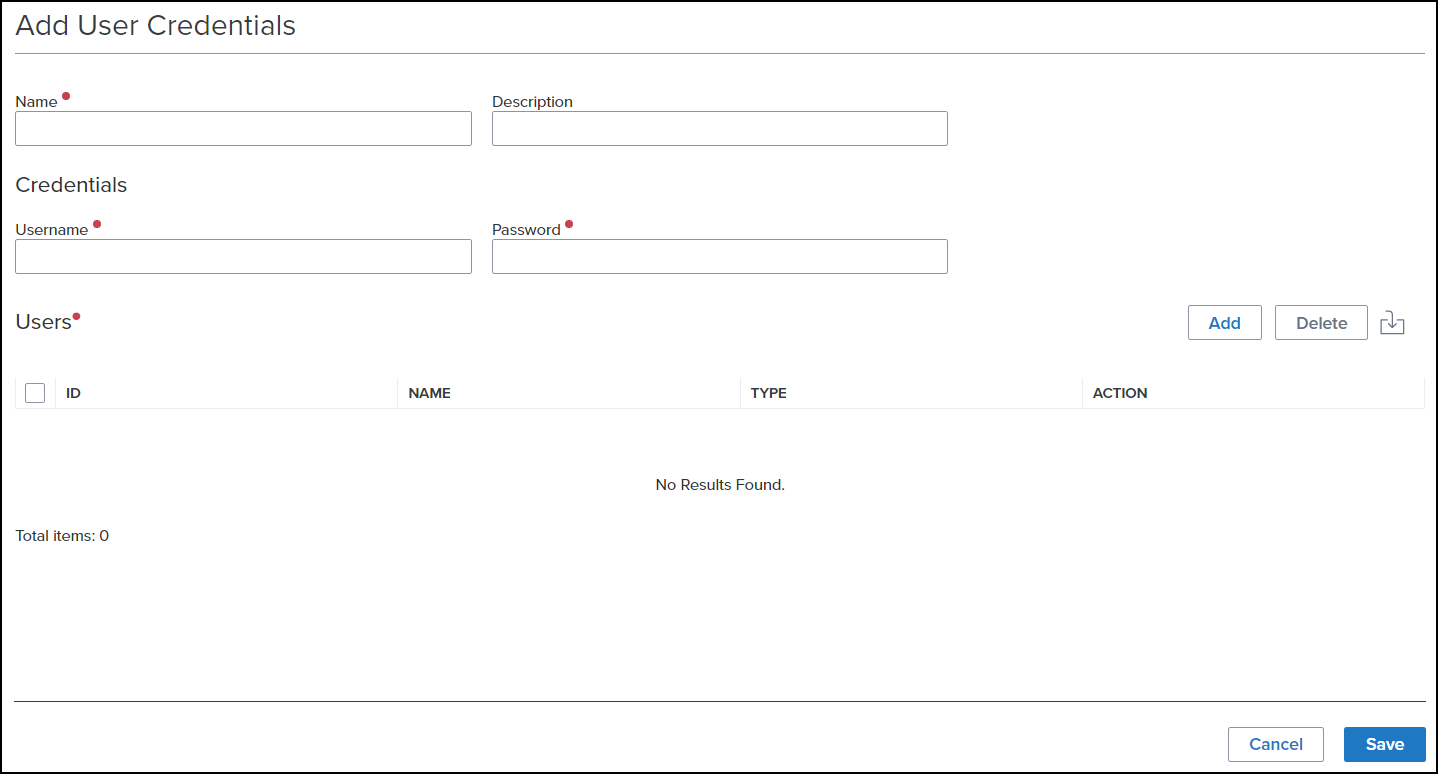
Complete the following fields.
-
Enter a unique name for the credentials setup in the Name field, and then enter a description in the Description field.
-
Enter the user name and password in the Username and Password fields.
-
To designate which users will use these credentials, select Add in the Users section.
-
On the Add Entities window, navigate through the Category options to select the Users who will use this setup. To move to a category, select the Down Arrow
icon. To move an individual user to the Selected Users column, select the Move Arrow icon. To search for a specific user, select the Search icon. -
To remove Users from the Users section, select the checkbox in front of the User and then click Delete. Alternatively, you can select the Delete icon in the Action column for the User.
-
Click Save.
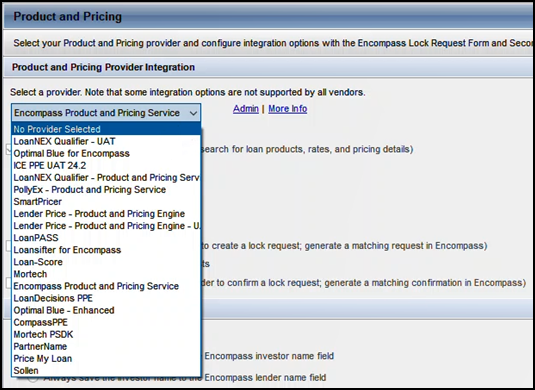
When testing the ICE PPE integration, the saved Provider should be "Encompass Product & Pricing Service" and the Allow Product and Pricing Provider selection from Lock Request Form and Secondary Lock Tool checkbox should be selected (as shown in the screenshot below). This will enable the Lock Desk to launch Buy Side and Sell Side pricing through the EPPS integration.
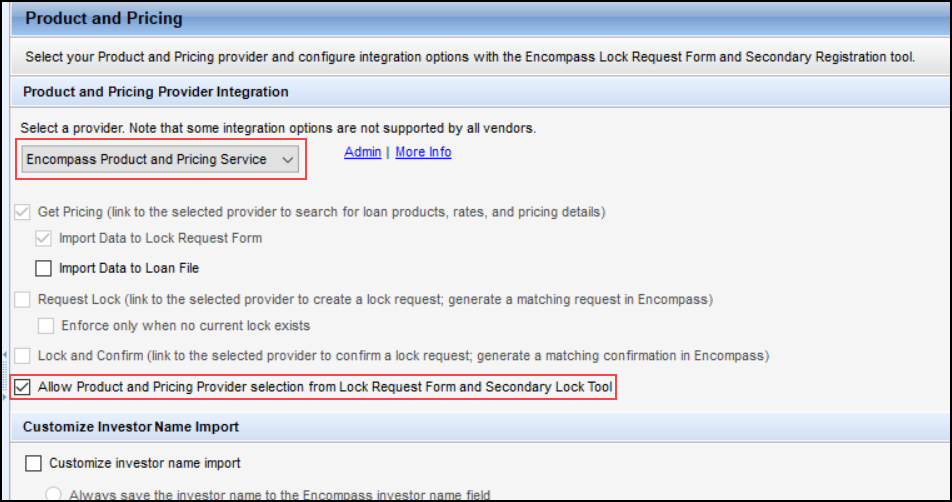
The functionality of the new integration mimics the existing web application with the following noteworthy differences.
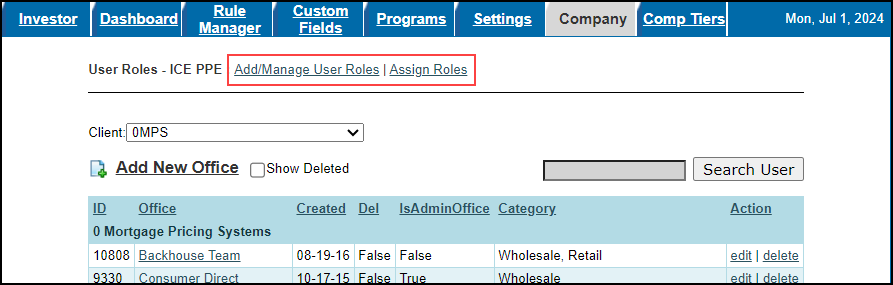
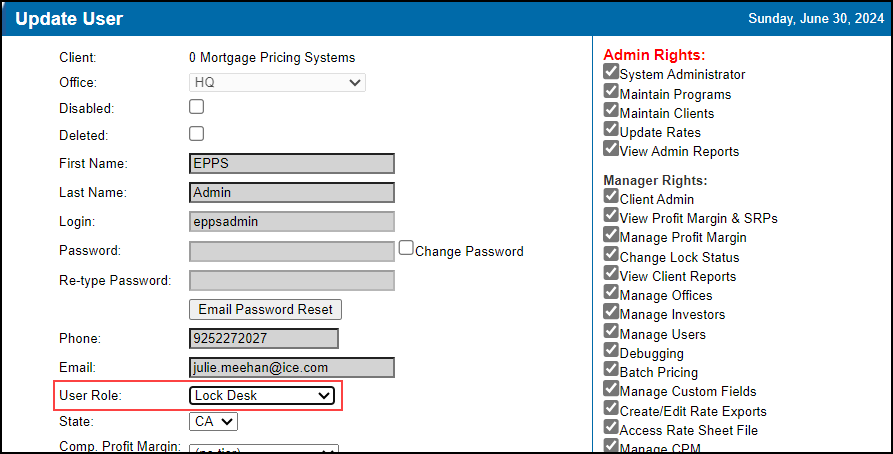
Review User Roles in EPPS
The new integration uses User Roles that have User Rights assigned to them, which provides a way to group access rights to users more efficiently, similar to how personas are used in Encompass. These Roles are then assigned to Users. User Roles are created, assigned, and managed from the EPPS Company tab.
To Manage User Roles:
-
Log into EPPS as a Client admin.
-
Click on the Admin tab, and then the Company tab.
-
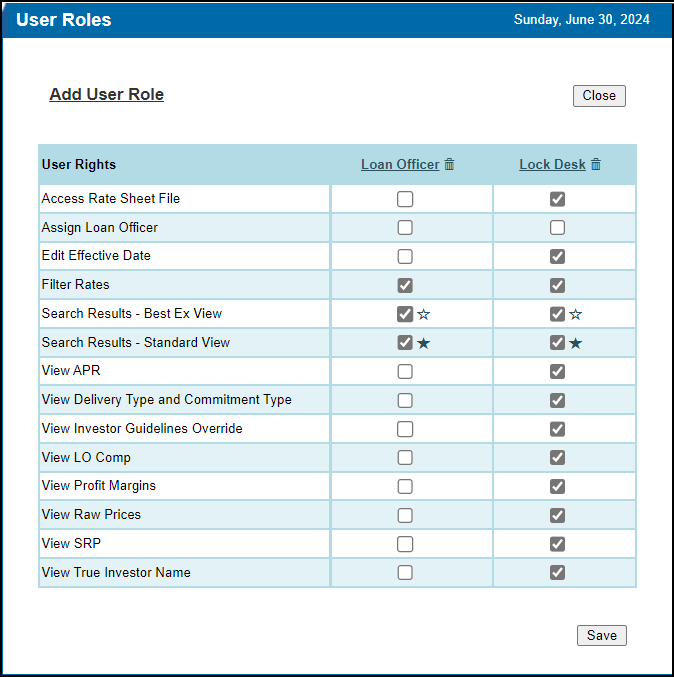
Click the Add/Manage User Roles link to assign individual User Rights to User Roles.
-
In the screenshot above, the Roles displayed and the starred Rights assigned to these Roles are the defaults that will be provided to all Clients as part of the release. You can add/modify these User Roles as needed.
-
If both Search Results - Best Ex View and Search Results - Standard View are selected, you must designate one as the default. The "darkened" star indicates the default view.
-
Click Save.
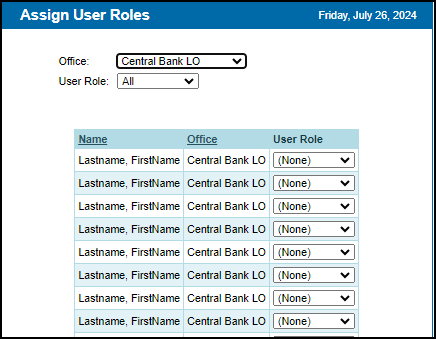
To Assign User Roles:
-
Click the Assign Roles link on the Company tab.
-
All Users in the selected Office are displayed. You can filter them based on their current User Role.
-
Select a User Role for each User from the User Role dropdown list.
-
Click Save.
-
The User Role can also be assigned on a User's Profile.
Configure Bidirectional Custom Fields in Web Version of Encompass
This feature enables Users to edit Custom Fields and return these edits to Encompass.
The settings in red in the screenshot below only work with the ICE PPE integration.
Before the Lock Request Additional Fields can be displayed on the Custom Field Definitions page, you must map those fields in the Services Management setting in the web version of Encompass, and then import the fields using the Import Custom Field Definitions button on the Custom Fields tab under the Admin section of EPPS.
If you are planning to test the ICE PPE integration in the UAT environment, you must repeat these steps in that environment, along with the steps to set up an ICE PPE service provided in the UAT Environment section located later in this release note.
To Map a Field from Encompass to an ICE PPE Integration:
-
Log into the desktop version of Encompass as an Administrator.
-
On the menu bar, click Encompass, and then click Settings.
-
Make sure you are on Settings Overview.
-
Click on the Web Version Settings.
-
Expand Services in the left menu, and then click on Services Management.
-
From the Category dropdown list, select Product and Pricing and then locate the ICE PPE card you want to configure.
-
Click on the Kebob icon next to Service Setup, and then click Field Mapping.
-
To add the first field mapping entry, click Add. If fields have already been mapped, click + Add Another.

-
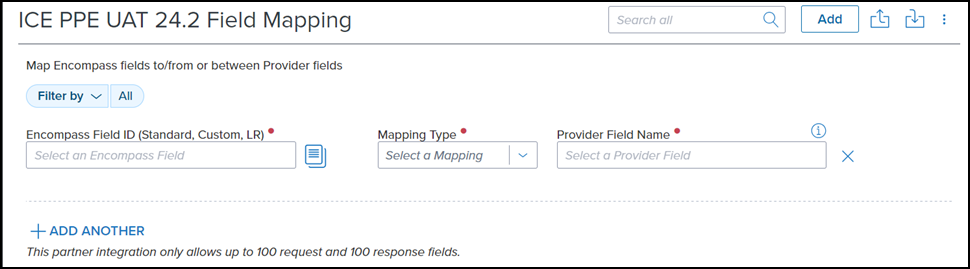
Complete the following fields.
-
Enter the Encompass field ID that you want to use for mapping in the Encompass Field ID (Standard, Custom, LR) field.
-
Indicate how the data should be transmitted in the Mapping Type field.
-
Maps To indicates that the data from this field is sent to the provider field in the Provider Field Name field.
-
Maps From indicates that data from the Provider Field Name field is sent to the specified Encompass field ID.
-
Maps Between indicates that data can be sent back and forth between the two indicated fields (bidirectional).
-
Enter the Encompass field name in the Provider Field Name field.
-
To add another field mapping, click + Add Another and then repeat step 8.
-
Click Save.
Import Custom Fields into EPPS
To Import a Custom Field Definition into EPPS:
-
Log into EPPS as a Client admin.
-
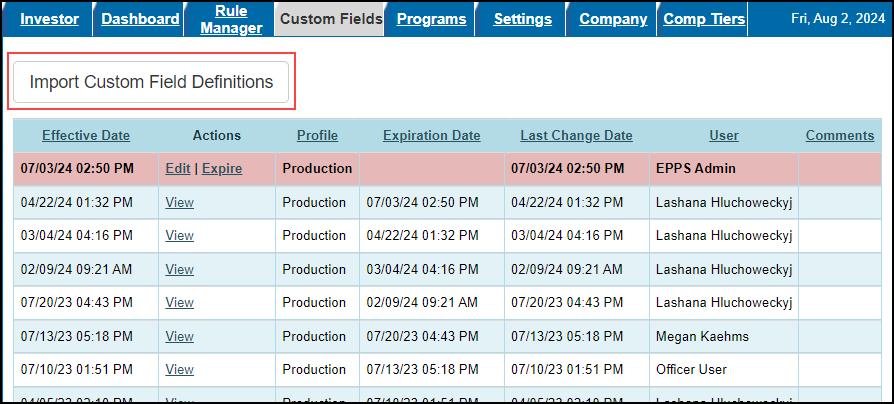
Click on the Admin tab, and then click on the Custom Fields tab.
-
Click on the Import Custom Field Definition button.
-
Log into the desktop version of Encompass as an Administrator.
-
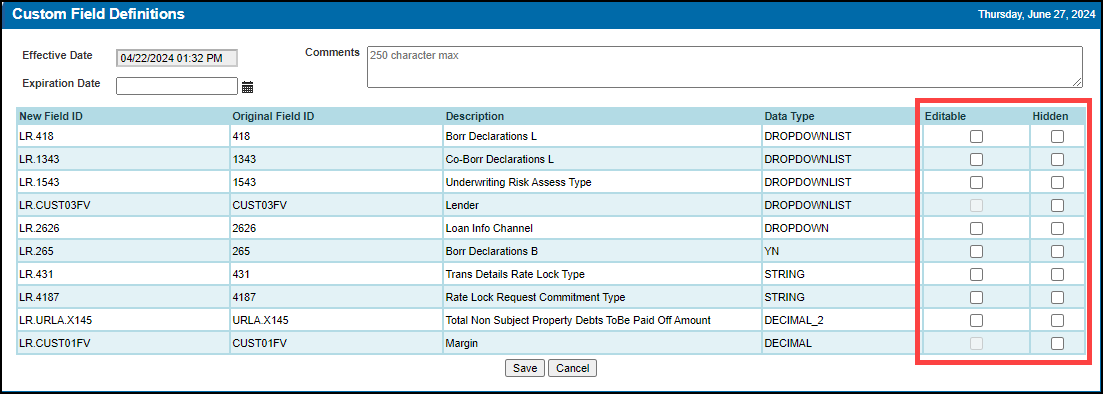
The fields that you mapped via the web version of Encompass Services Management setting will be displayed on the Custom Field Definitions page.
-
Enter the date and time when the custom field definition will become active in EPPS in the required Effective Date field.
-
The Effective Date cannot be blank.
-
The Effective Date cannot be identical to the Effective Date of any existing Production or Test version.
-
Enter the date and time when the custom field definition will expire in EPPS in the optional Expiration Date field.
-
The Expiration Date cannot be equal or prior to the Effective Date.
-
The Expiration Date cannot be identical to the Expiration Date of any existing Production or Test version.
-
Select one of the following checkboxes. If both checkboxes are selected, a validation error message "Editable and Hidden cannot be selected together." is displayed.
-
Editable - The field can be edited by the User.
-
Hidden - The field is hidden (not displayed) from the User.
-
Click Save.
Verify Office Access for Assign LO & Price as LO
This feature enables a User to price a loan as if they were another User. This eliminates the need for Users to share credentials such as when a Processor supports multiple Loan Officers. The User can select this assignment on the Search for Products page.
This feature only works with an ICE PPE integration.
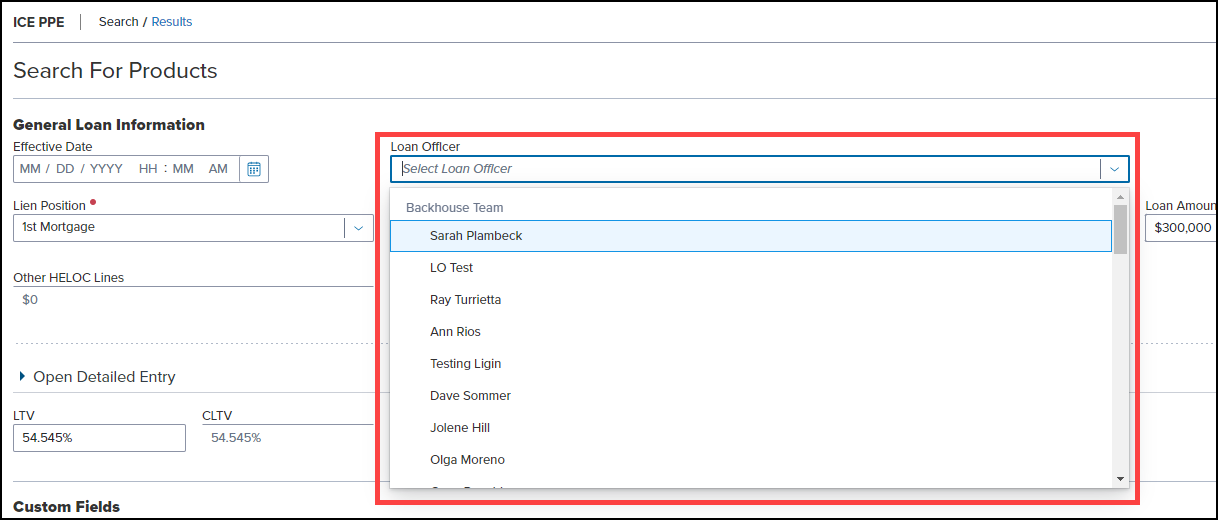
Users must have access to the offices in which the Loan Officers reside to use this feature. The Offices displayed for a User is managed in the User's Profile.

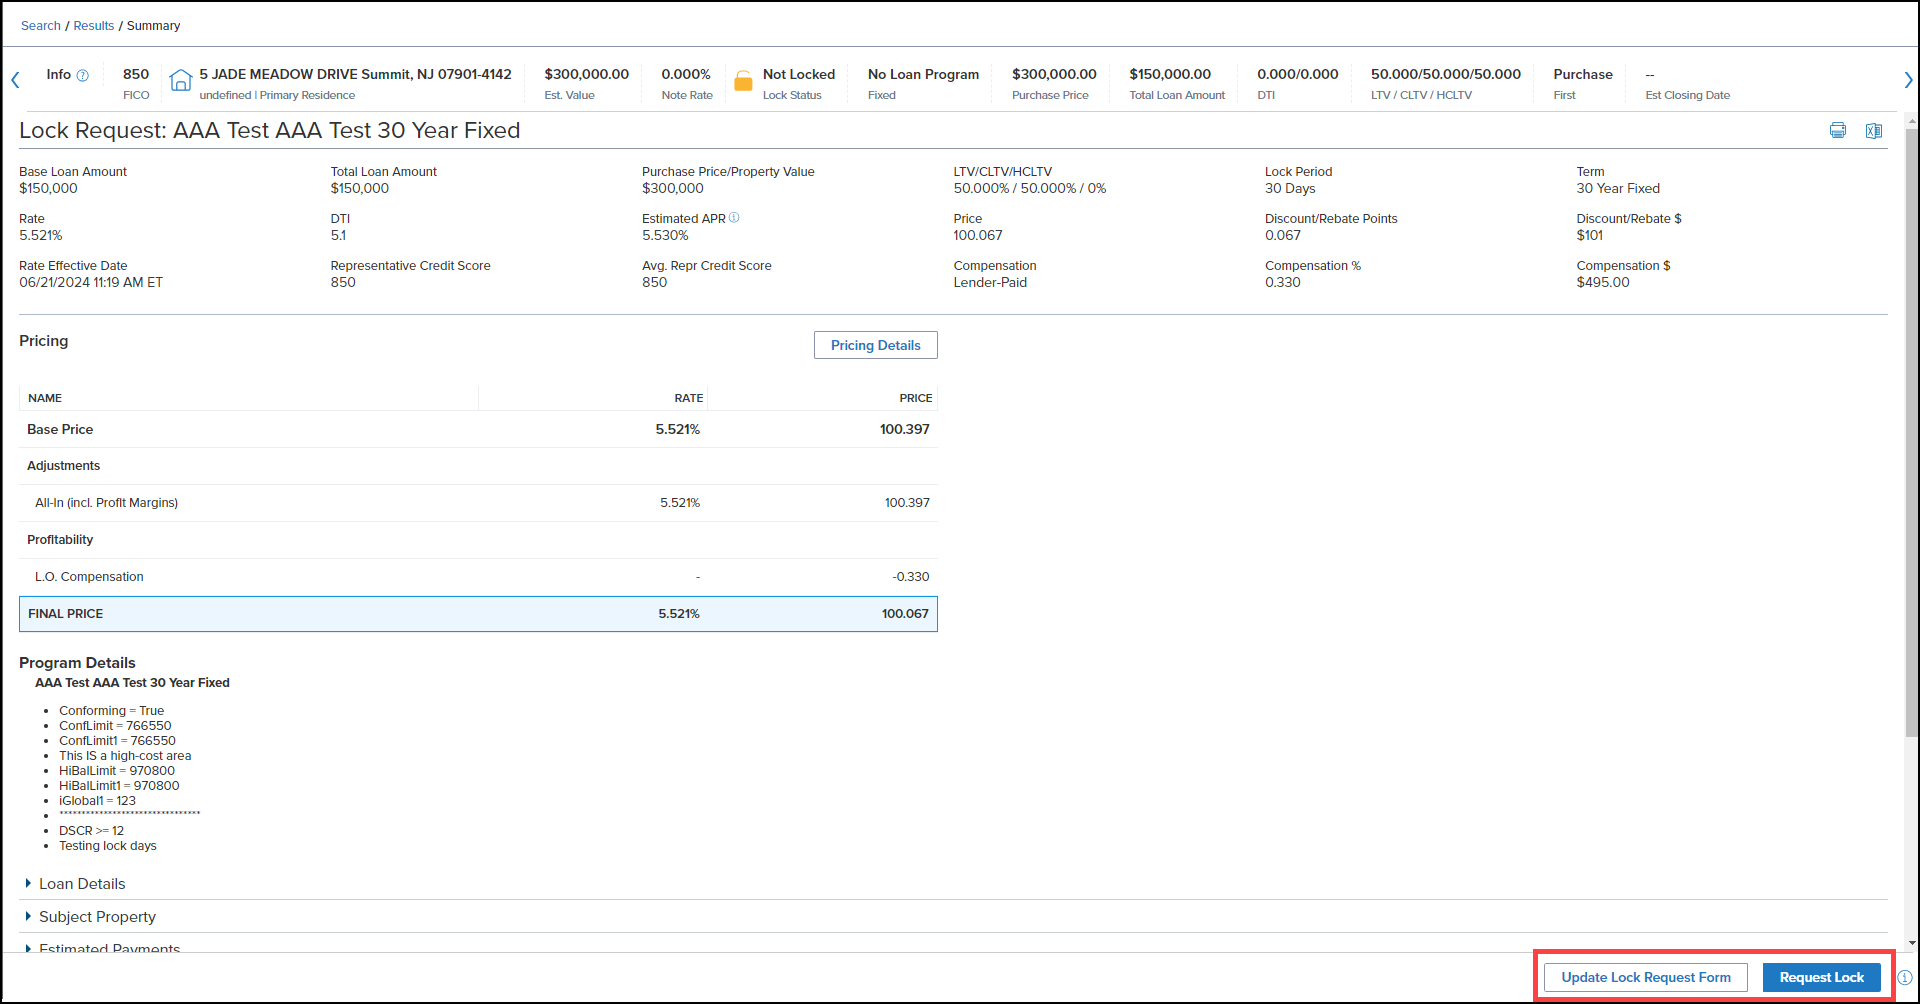
Submitting a Lock Request
In EPPS, when a User clicks the Update Encompass button, the lock data is returned to the Encompass Lock Request Form. The User then clicks the Submit Request on the Lock Request Form to submit the lock to Secondary.

In ICE PPE, the User has two choices, Update Lock Request Form and Request Lock. Update Lock Request Form returns the lock data to the Lock Request Form (current functionality). Request Lock bypasses the Lock Request Form and submits to Secondary, essentially performing the Submit Request action for the User.
Any Loan Action Completion business rules for a lock request will be honored when submitting the request from ICE PPE.
UAT Environment
(Updated on 10/11/2024)
We are introducing a new UAT environment that is available to Encompass TEBE environments. This enables ICE PPE users to test modifications to their ICE PPE Client before introducing them into Production. The ICE PPE UAT provider will be "ICE PPE UAT 24.2" and the EPPS UAT provider will be "Encompass Product and Pricing Service (UAT)". The Loan Officer experience can be tested in the ICE PPE UAT from both the desktop and web versions of Encompass, but Secondary features can only be tested in the EPPS UAT from the desktop version of Encompass.
The EPPS UAT environment can be accessed directly from epps.uat.ice.com. The user login credentials for both the URL and the integrations are the same credentials used to access Production.
For the UAT environment, we recommend that you set up users manually for an ICE PPE integration. For instructions on how to manually set up users, please refer to the steps for Authorized Users located in the ICE PPE Integration section above.
| Next Section: Feature Enhancements | ||
| Previous Section: Introduction |